
Category: Japan
Sony Watchman FD-10A and Watchman FD-30A
Today we return to the extravagant world of 1980s handheld TVs.
This is my Sony Watchman FD-10A and Sony Watchman FD-30A, two of Sony’s attempts to create “Watchman” CRT handheld TVs in the 1980s.

The FD-10A, dating from 1987 is on the left and the FD-30A, dating from 1984 is on the right. They both still work, though the FD-30A seems to have a loose connection somewhere and sometimes will not turn on after you pull the antenna out. As you can see, they are both black and white sets.
My father found the FD-10A at a thrift store some years ago and I believe I found the FD-30A at Village Thrift sometime in the past two years or so.
The most distinctive thing about these TVs is what they’ve done with the CRT. On a typical CRT the electron gun is located behind the viewing surface you’re looking at. The gun is firing at a surface of phosphors that are glowing on the other side of the glass tube you’re looking into. There’s basically a straight line between your eyes, the surface of the picture tube, the glowing phosphors, and the electron gun.

Take a look at these Panasonic Travelvision handheld TVs and you can see the ergonomic issue this creates. The shape you get from putting a tiny conventional CRT into a handheld TV ends up with the screen on the short end of a long case. Holding that up to your face is very unnatural. If you’re sitting down you end up putting the TV in your lap and craning your head down to look at it. If you really wanted to hold it up to your face you would have to hold it like a telescope.
The ingenious CRT that these Watchman units use solves this problem. Their CRTs have a window built into the top of the wide end of the tube and the electron gun fires at a curved surface of phosphors located under the window.

See that? You’re actually looking down into the CRT there.
So, the electron gun ends up firing perpendicular to the viewers eyes onto the curved white area with the phosphors. While this does not do great things for the geometry of the resulting image it does mean that you can hold the Watchman in a much ore natural way as you would a portable radio or a Game Boy with your hands down near the Watchman logo and the screen facing your eyes.
This must have been difficult to design. Clearly this is from the era people remember when Sony was doing amazing things miniaturizing electronics.

The FD-10A is a fairly basic model that only has VHF/UHF and no other fancy do-dads like AM/FM or a video-in jack. As a result though it’s more lightweight and somewhat smaller than the FD-30A.

Other than an earphone jack, just about the only feature that the FD-10A has is a switch that allows you to save the batteries by only listening to TV sound.
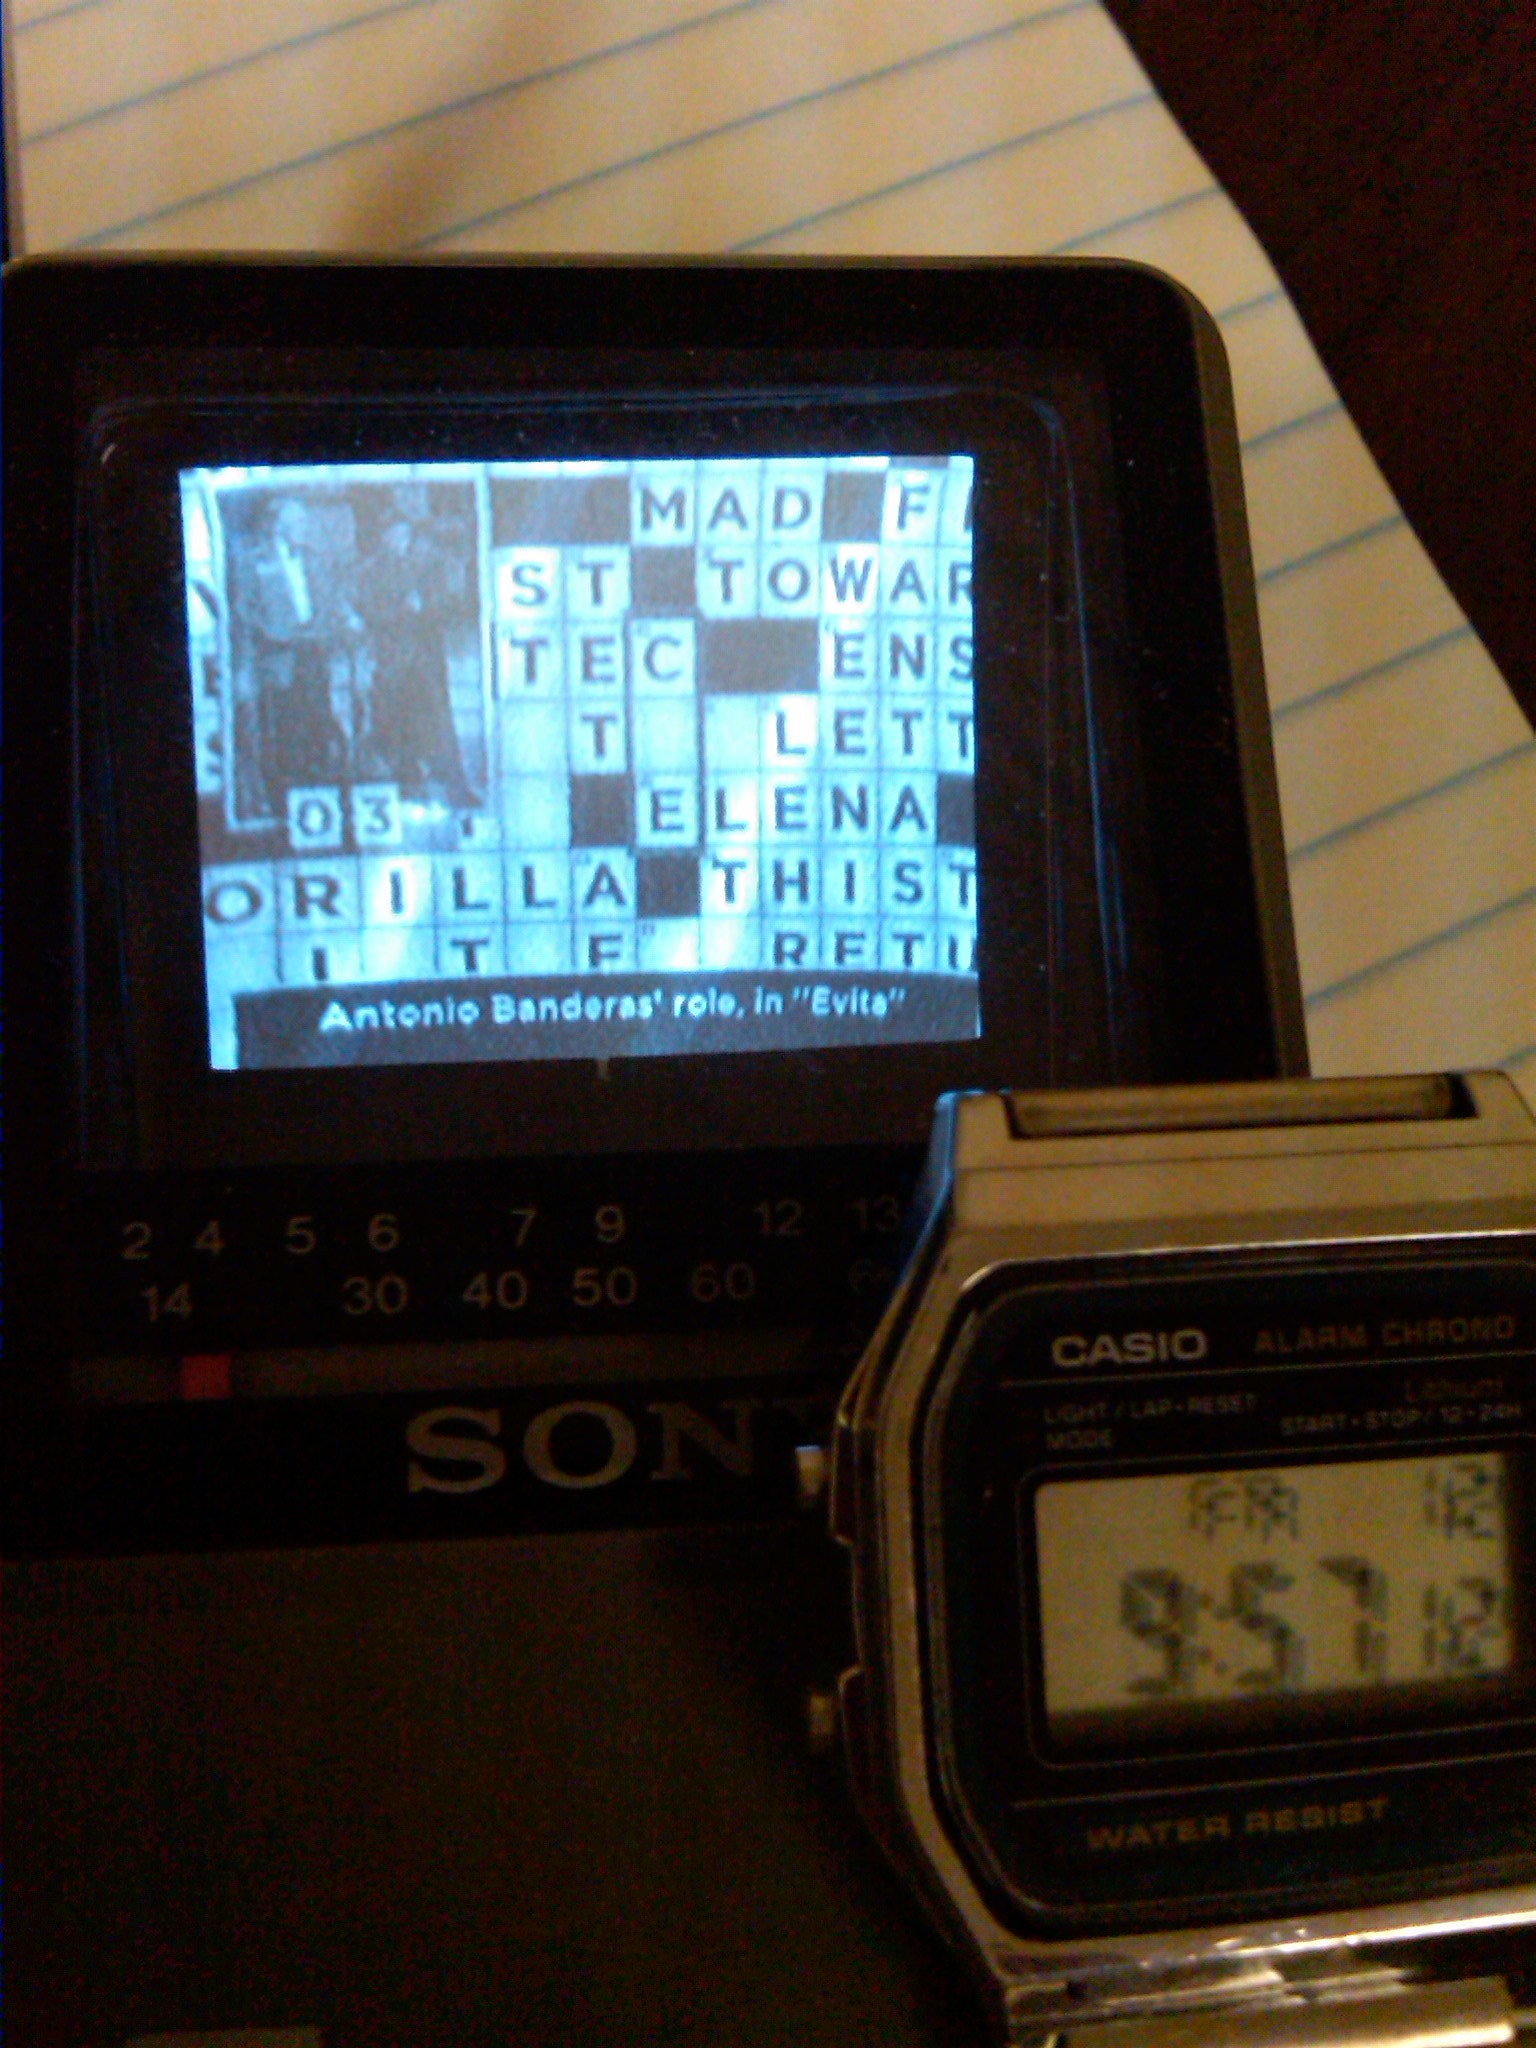
I used the FD-10A to watch the end of analog TV on June 12, 2009. Here is an image of Cleveland’s Channel 19, WOIO-TV taken before the 10AM cutoff and moments after.
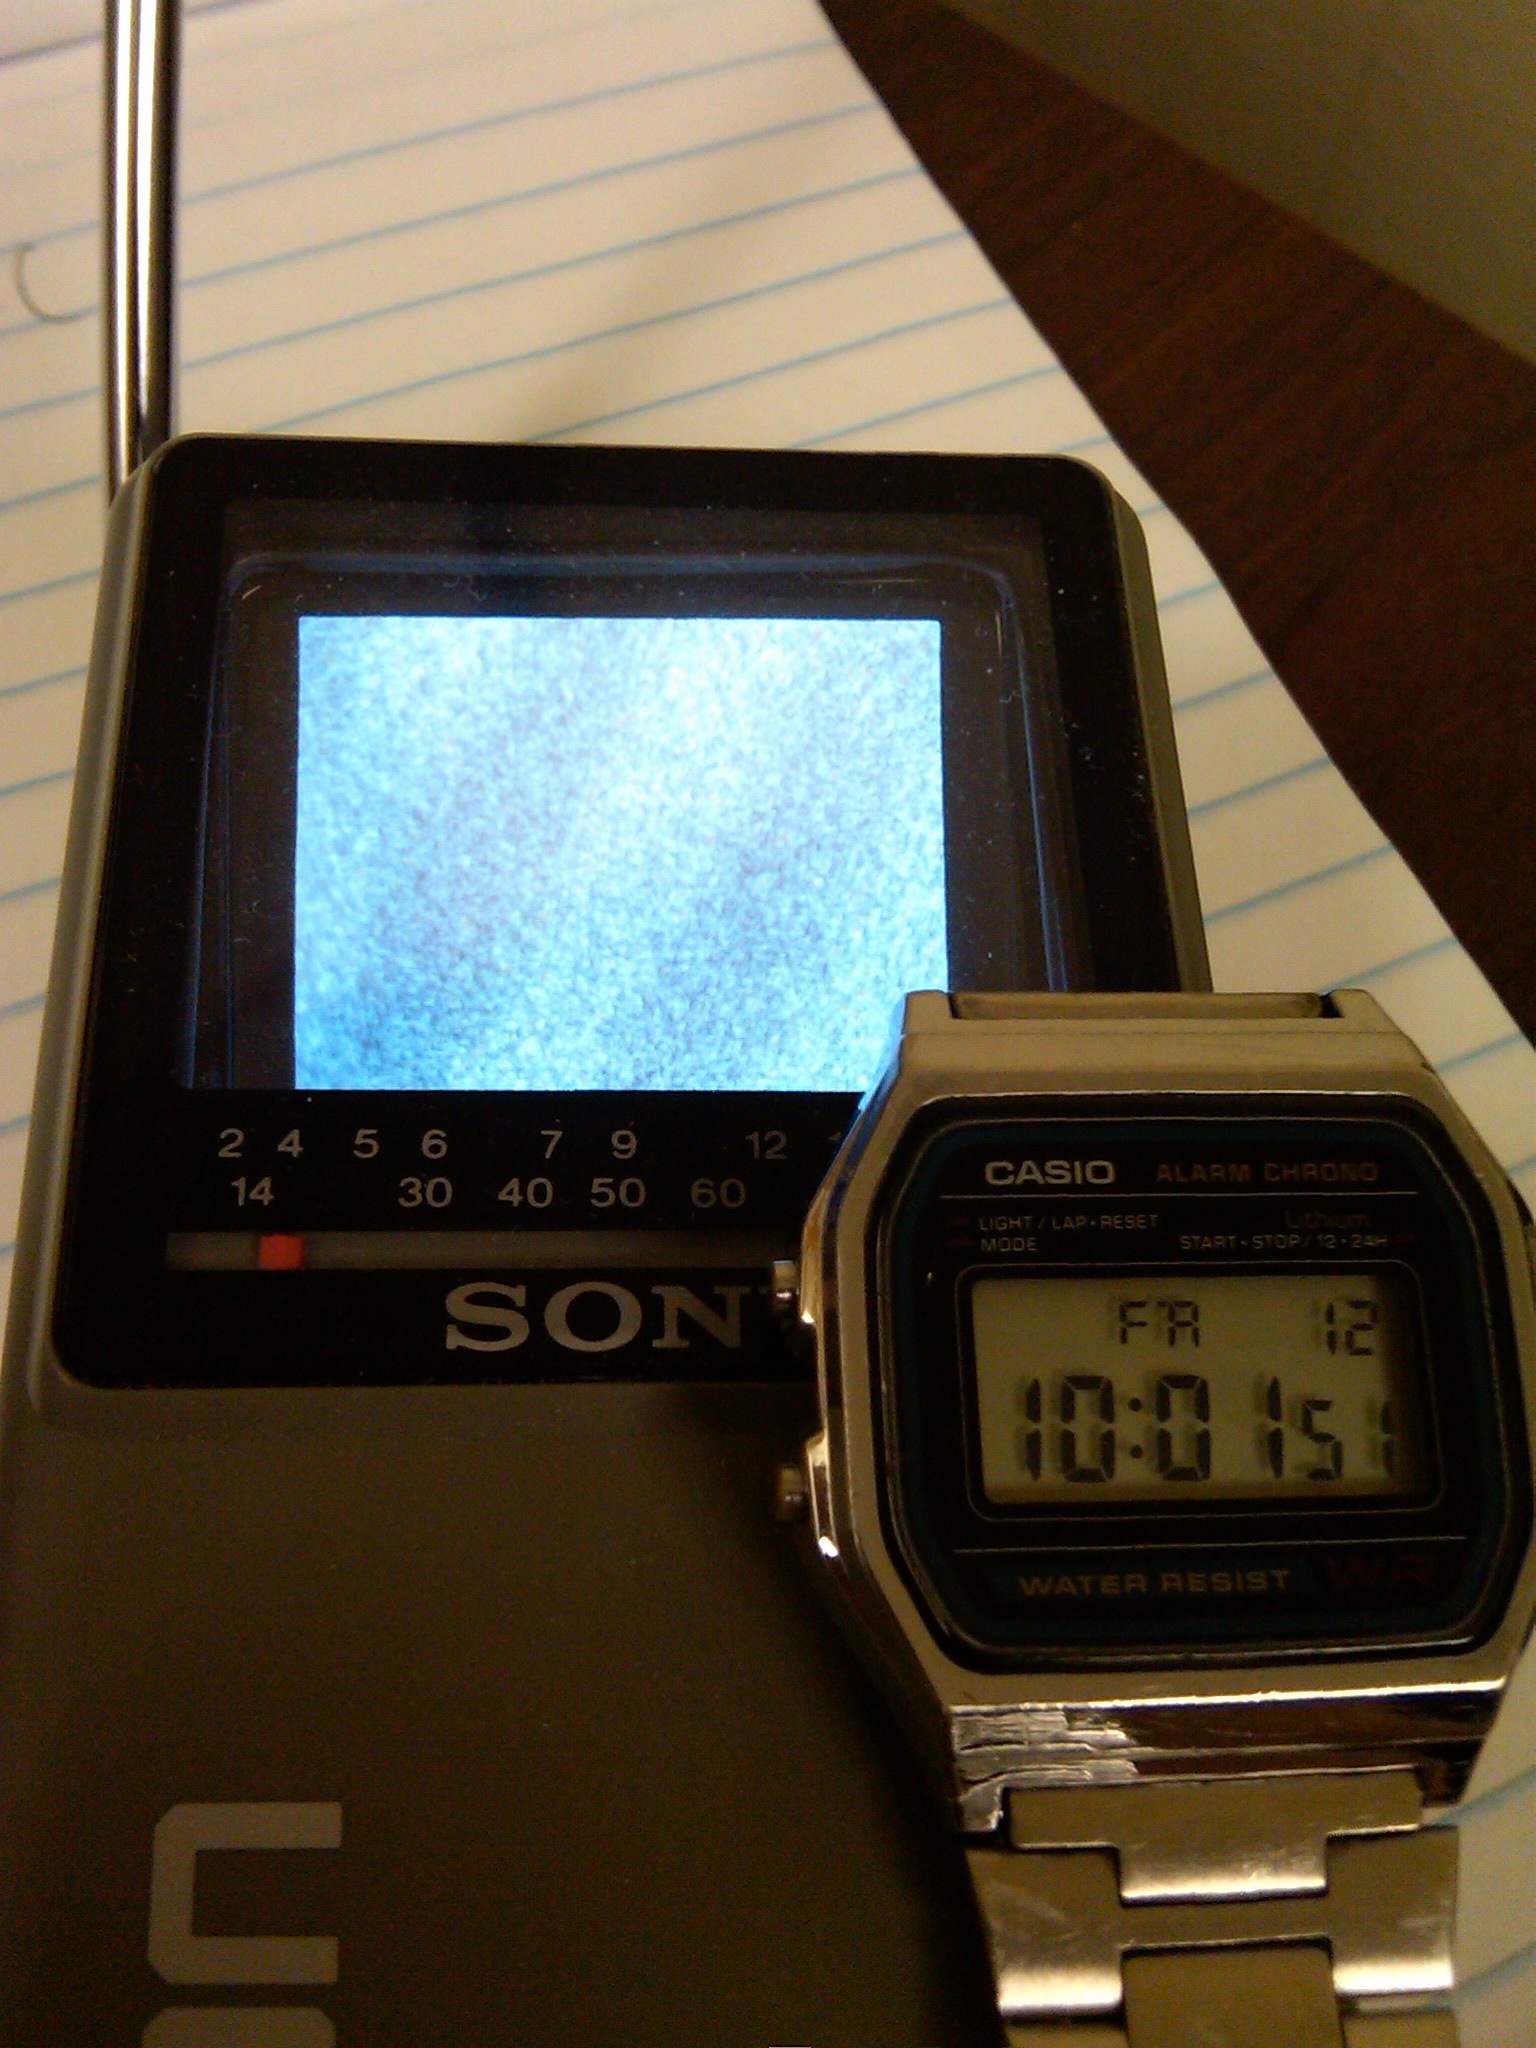
At the moment of the cutoff I took a blurry and unusable movie with my Blackberry. While some channels made a big deal about the switchover to digital on WOIO there was no fanfare other than a text explanation that scrolled very fast up the screen, followed the by the static you see in the second picture.

The FD-30A is a more full-featured set but it’s heavier and larger than the FD-10A. It has a video-in jack (using a normal stereo Y-cable), AM/FM radio (with FM stereo), a DC power input, and a kickstand.

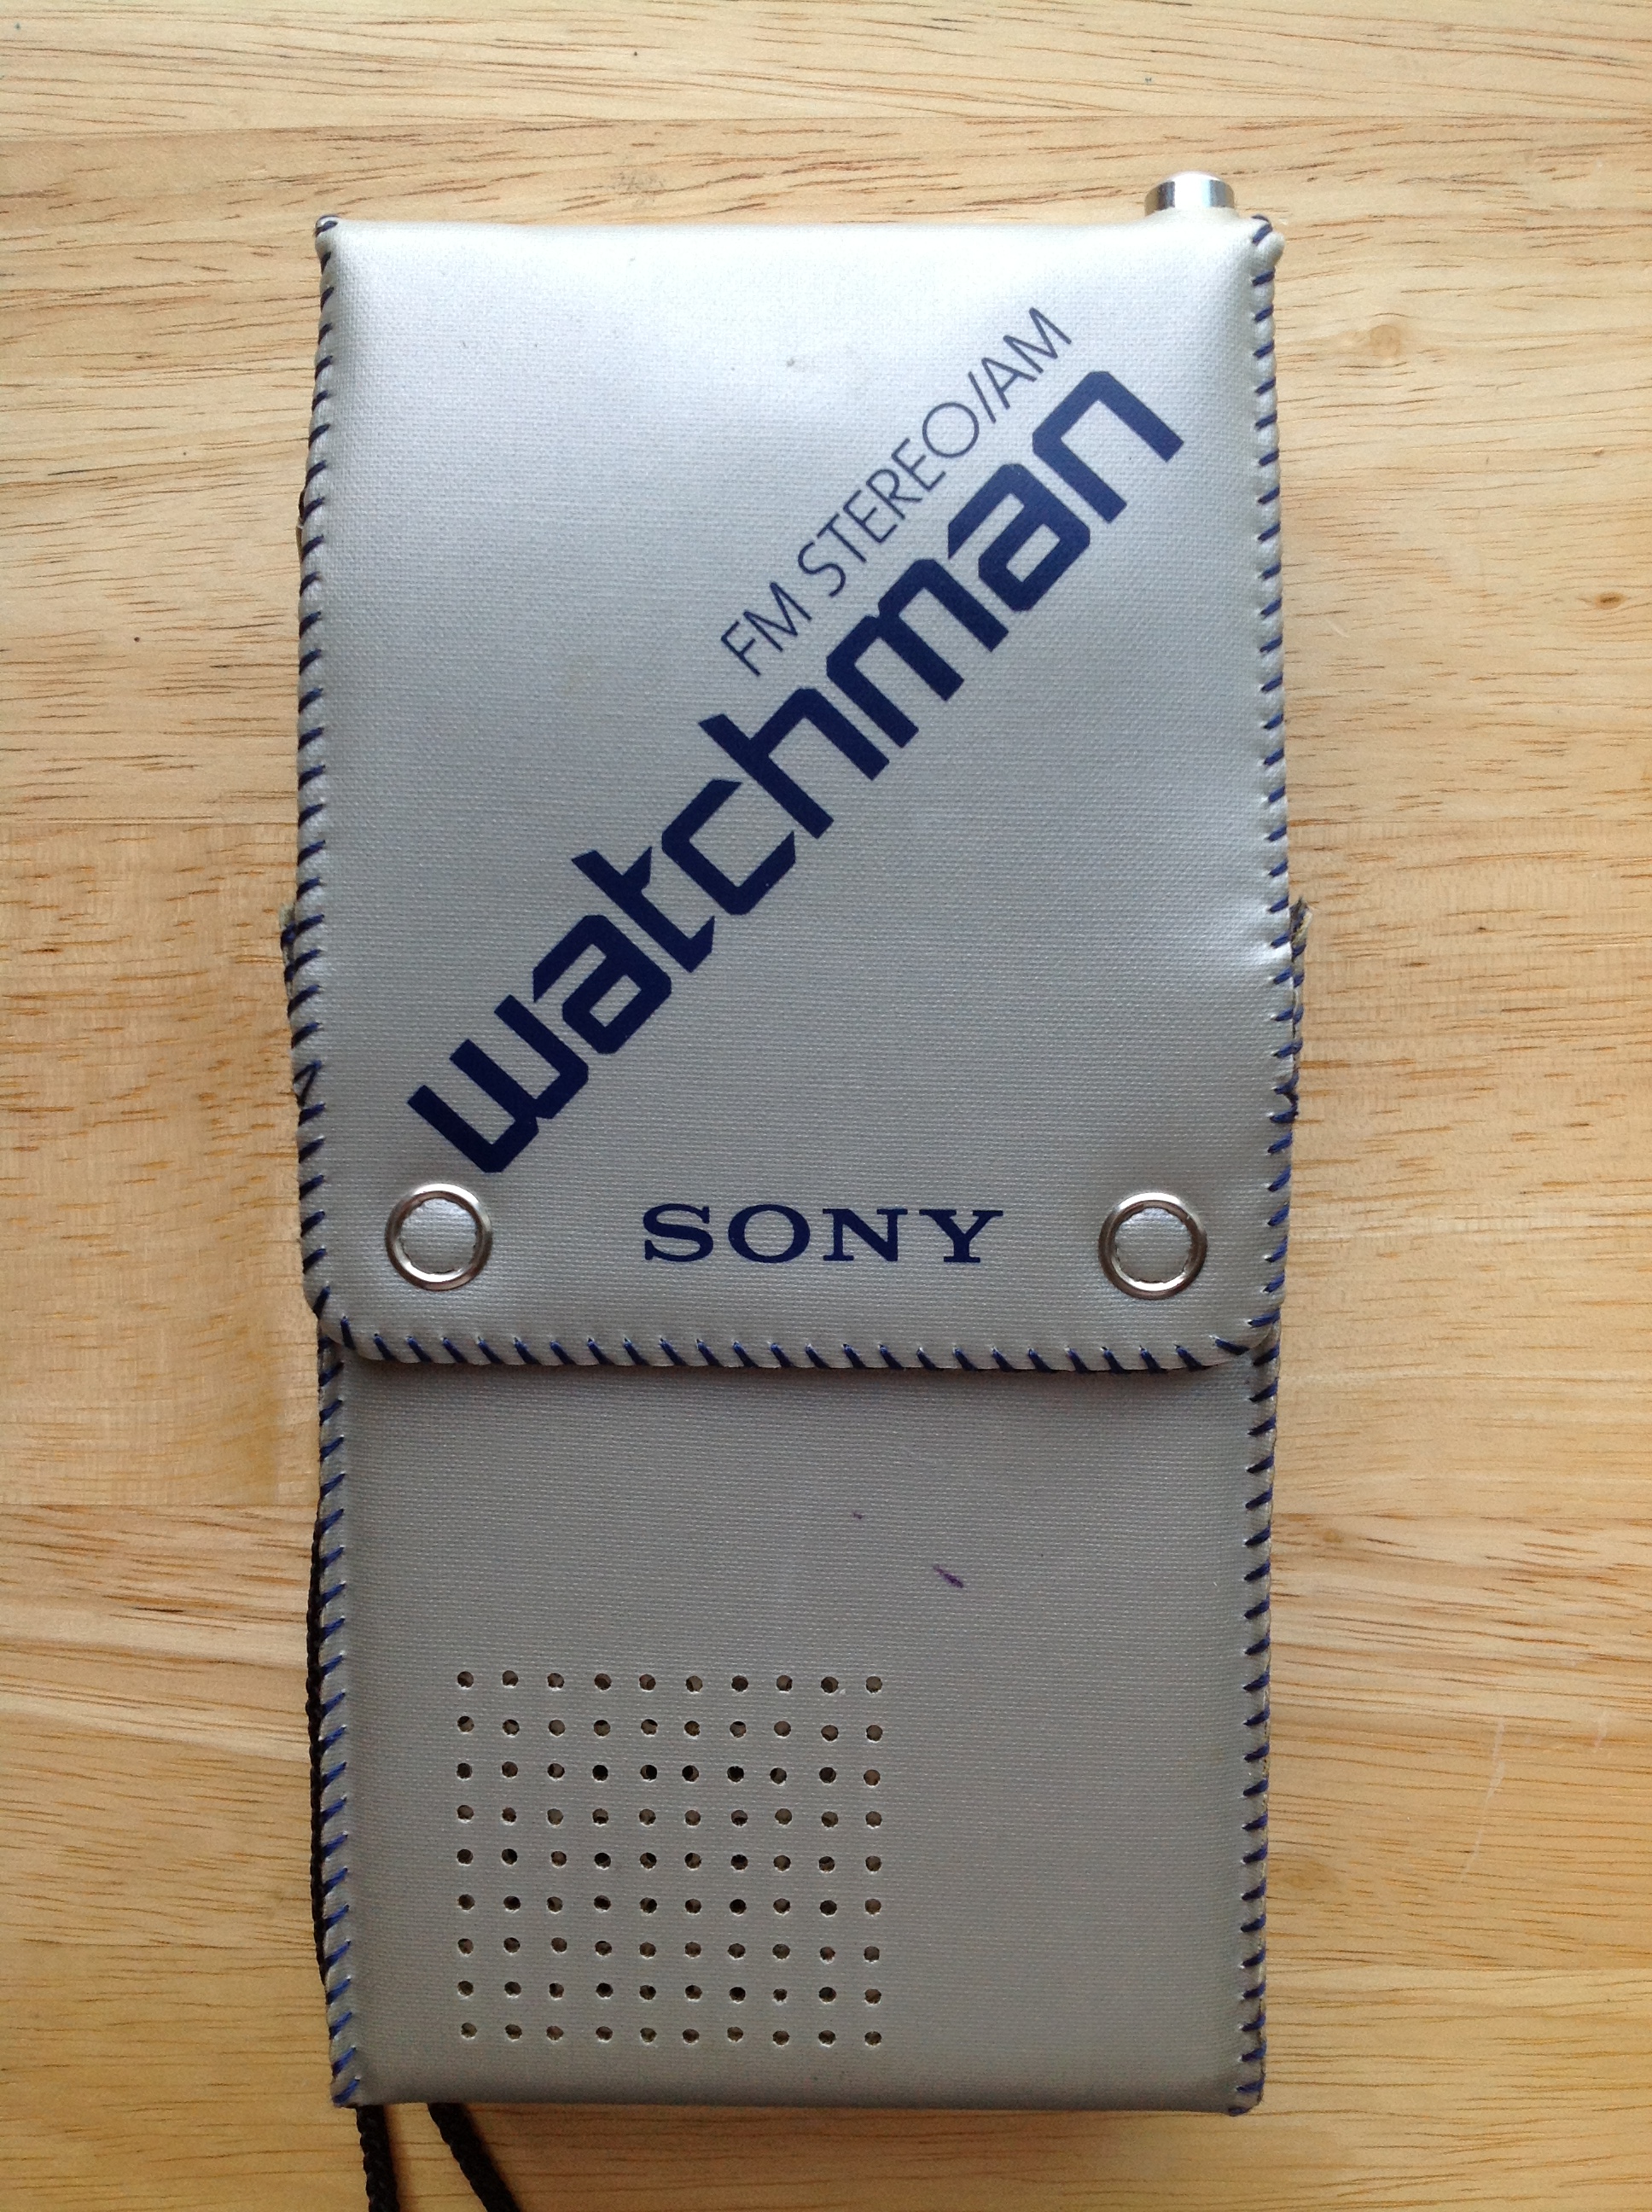
This FD-30A also came with a cloth case. All of the controls are accessible through the sides of the case so when the case is closed you can easily use the FD-30A as a rather weighty AM/FM radio.

The real party piece of the case though is that the cover can become a hood by unfolding flaps that attach to Velcro on either side of the Sony logo.
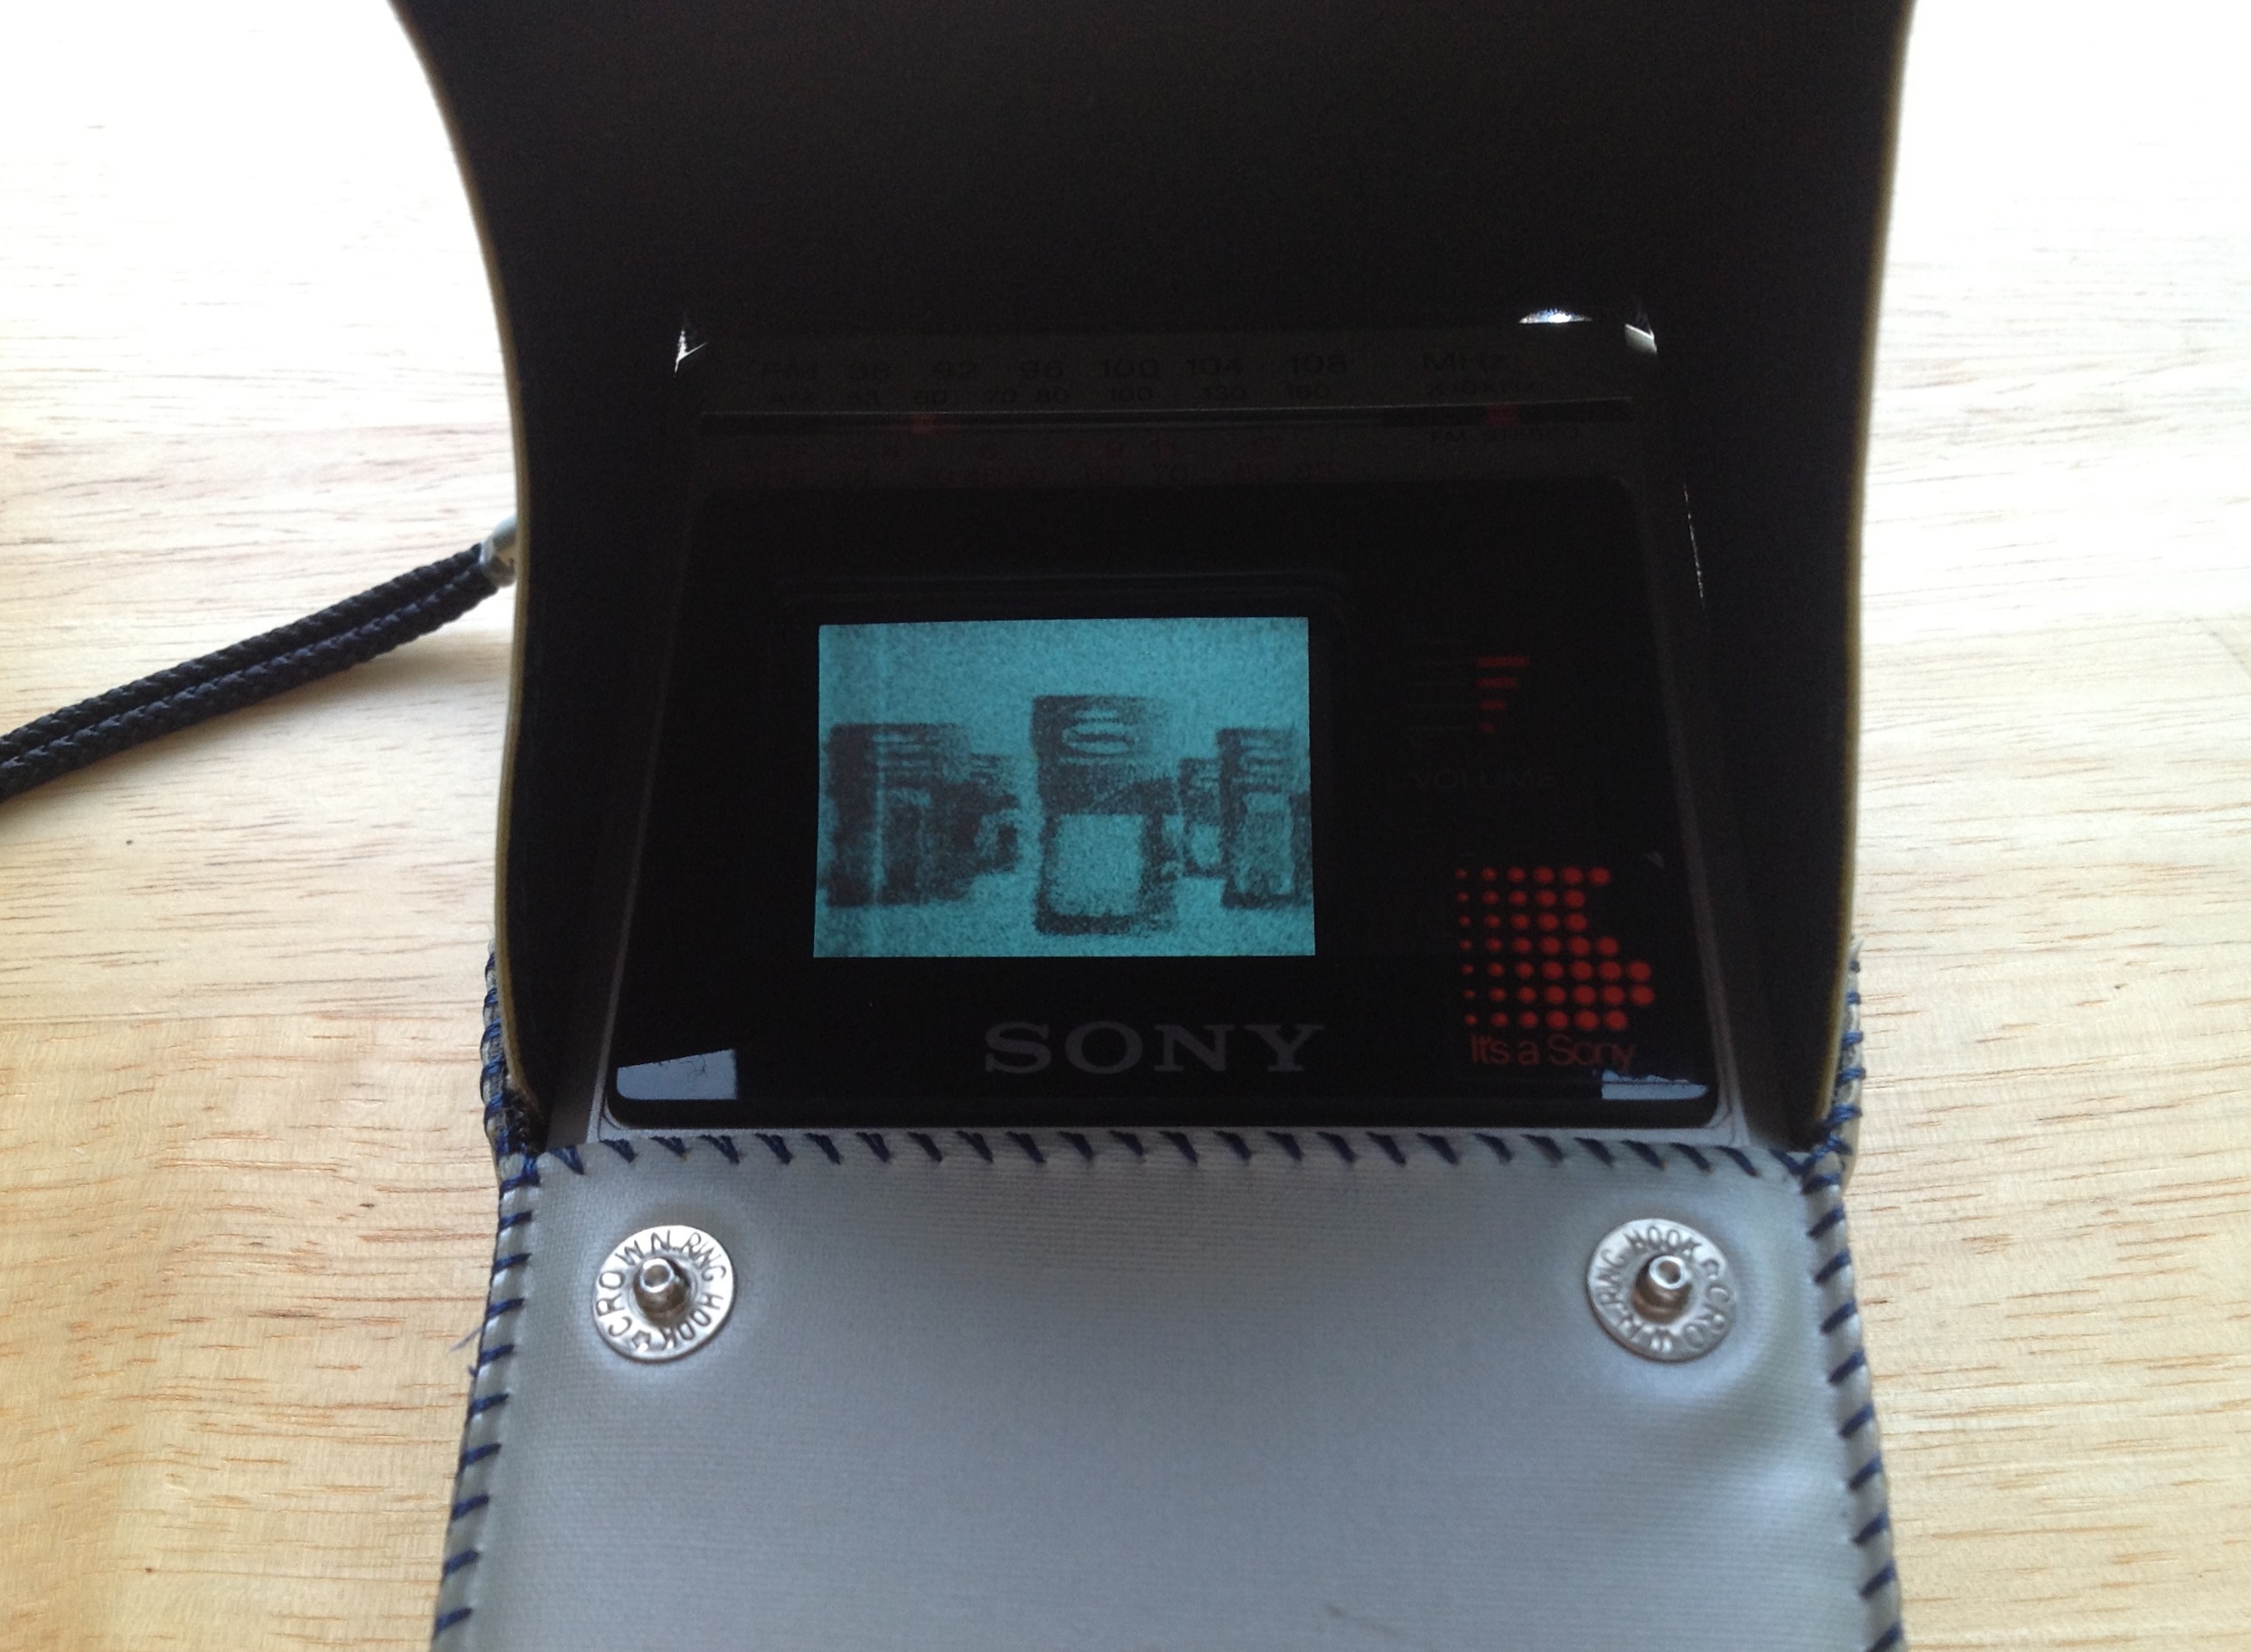
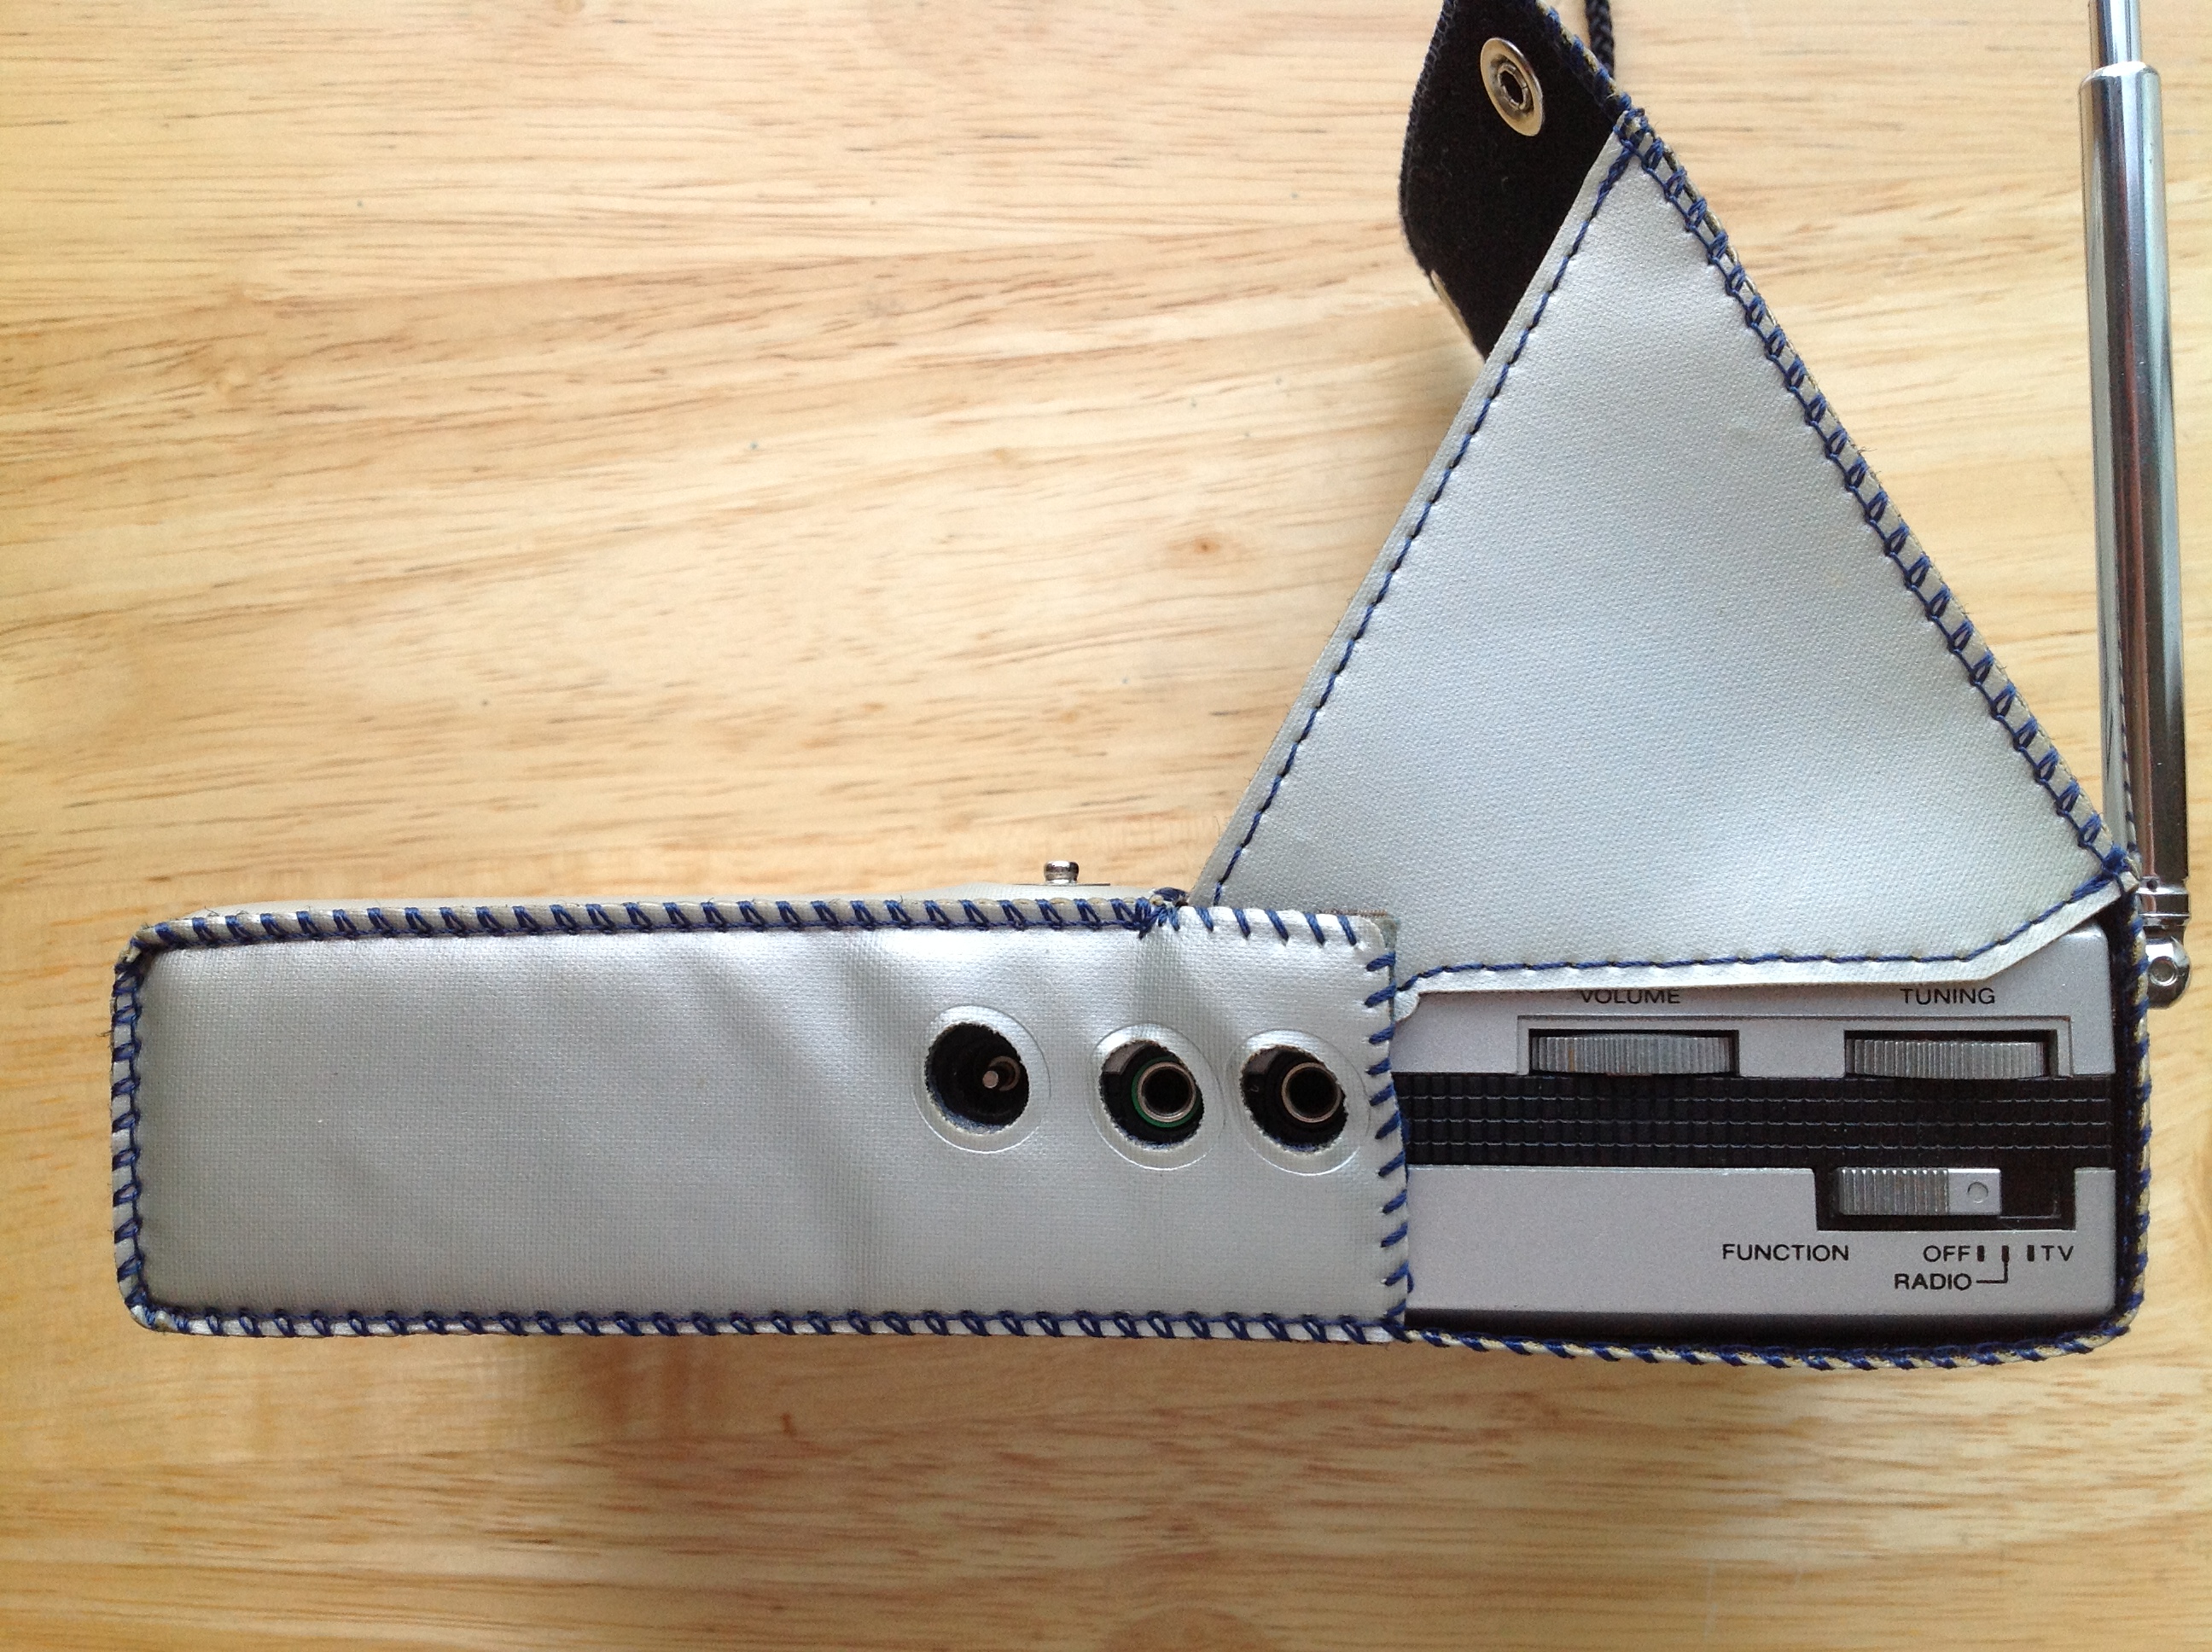
I supposed this might help in bright Sun conditions, but I couldn’t see using this thing in the rain at all.
One thing I like to think about when I collect items like this is what would people at the time thought about them? That is to say, if you walked into an electronics store in the 1980s and wished to purchase a handheld TV with your hard-earned money, which one should you have bought?

As a collector, I love the styling on the Casios such as the TV-400 and the TV-1000 here. These Sony Watchman units do not have the same 80s flair that the Casio do. I’m sure salespeople hawking the Casios would have been buzzing about the stunning newness of LCD technology and the significant advance of on-screen electronic tuning.
In reality, those Casios are awful. Even if you look past the inherent awfulness of first generation passive-matrix LCDs screens the electronic tuning is disturbingly bad. Anyone who has ever tuned in analog TV knows that you always have to fiddle with the tuning. There’s no way to do that with the Casios. If they don’t find your desired channel, they just tune right on by.
So, what you really want is a TV with analog tuning. I think you also want a CRT. I still need to see what a quality 80s active-matrix LCD looks like but even so I don’t think the LCD technology of the time could hold a candle to the contrast and crispness of a CRT. Even if those CRT handheld TVs ate batteries like vampires, I think the picture quality would still be worth it.
Personally, I would have bought a FD-10A. It’s simple to operate and it’s more convenient than the larger and heavier FD-30A.
But then again, if this was the 80s and you were blowing a wad of cash on something as decadent as a handheld TV, you probably want the FD-30A with all of it’s bells and whistles.

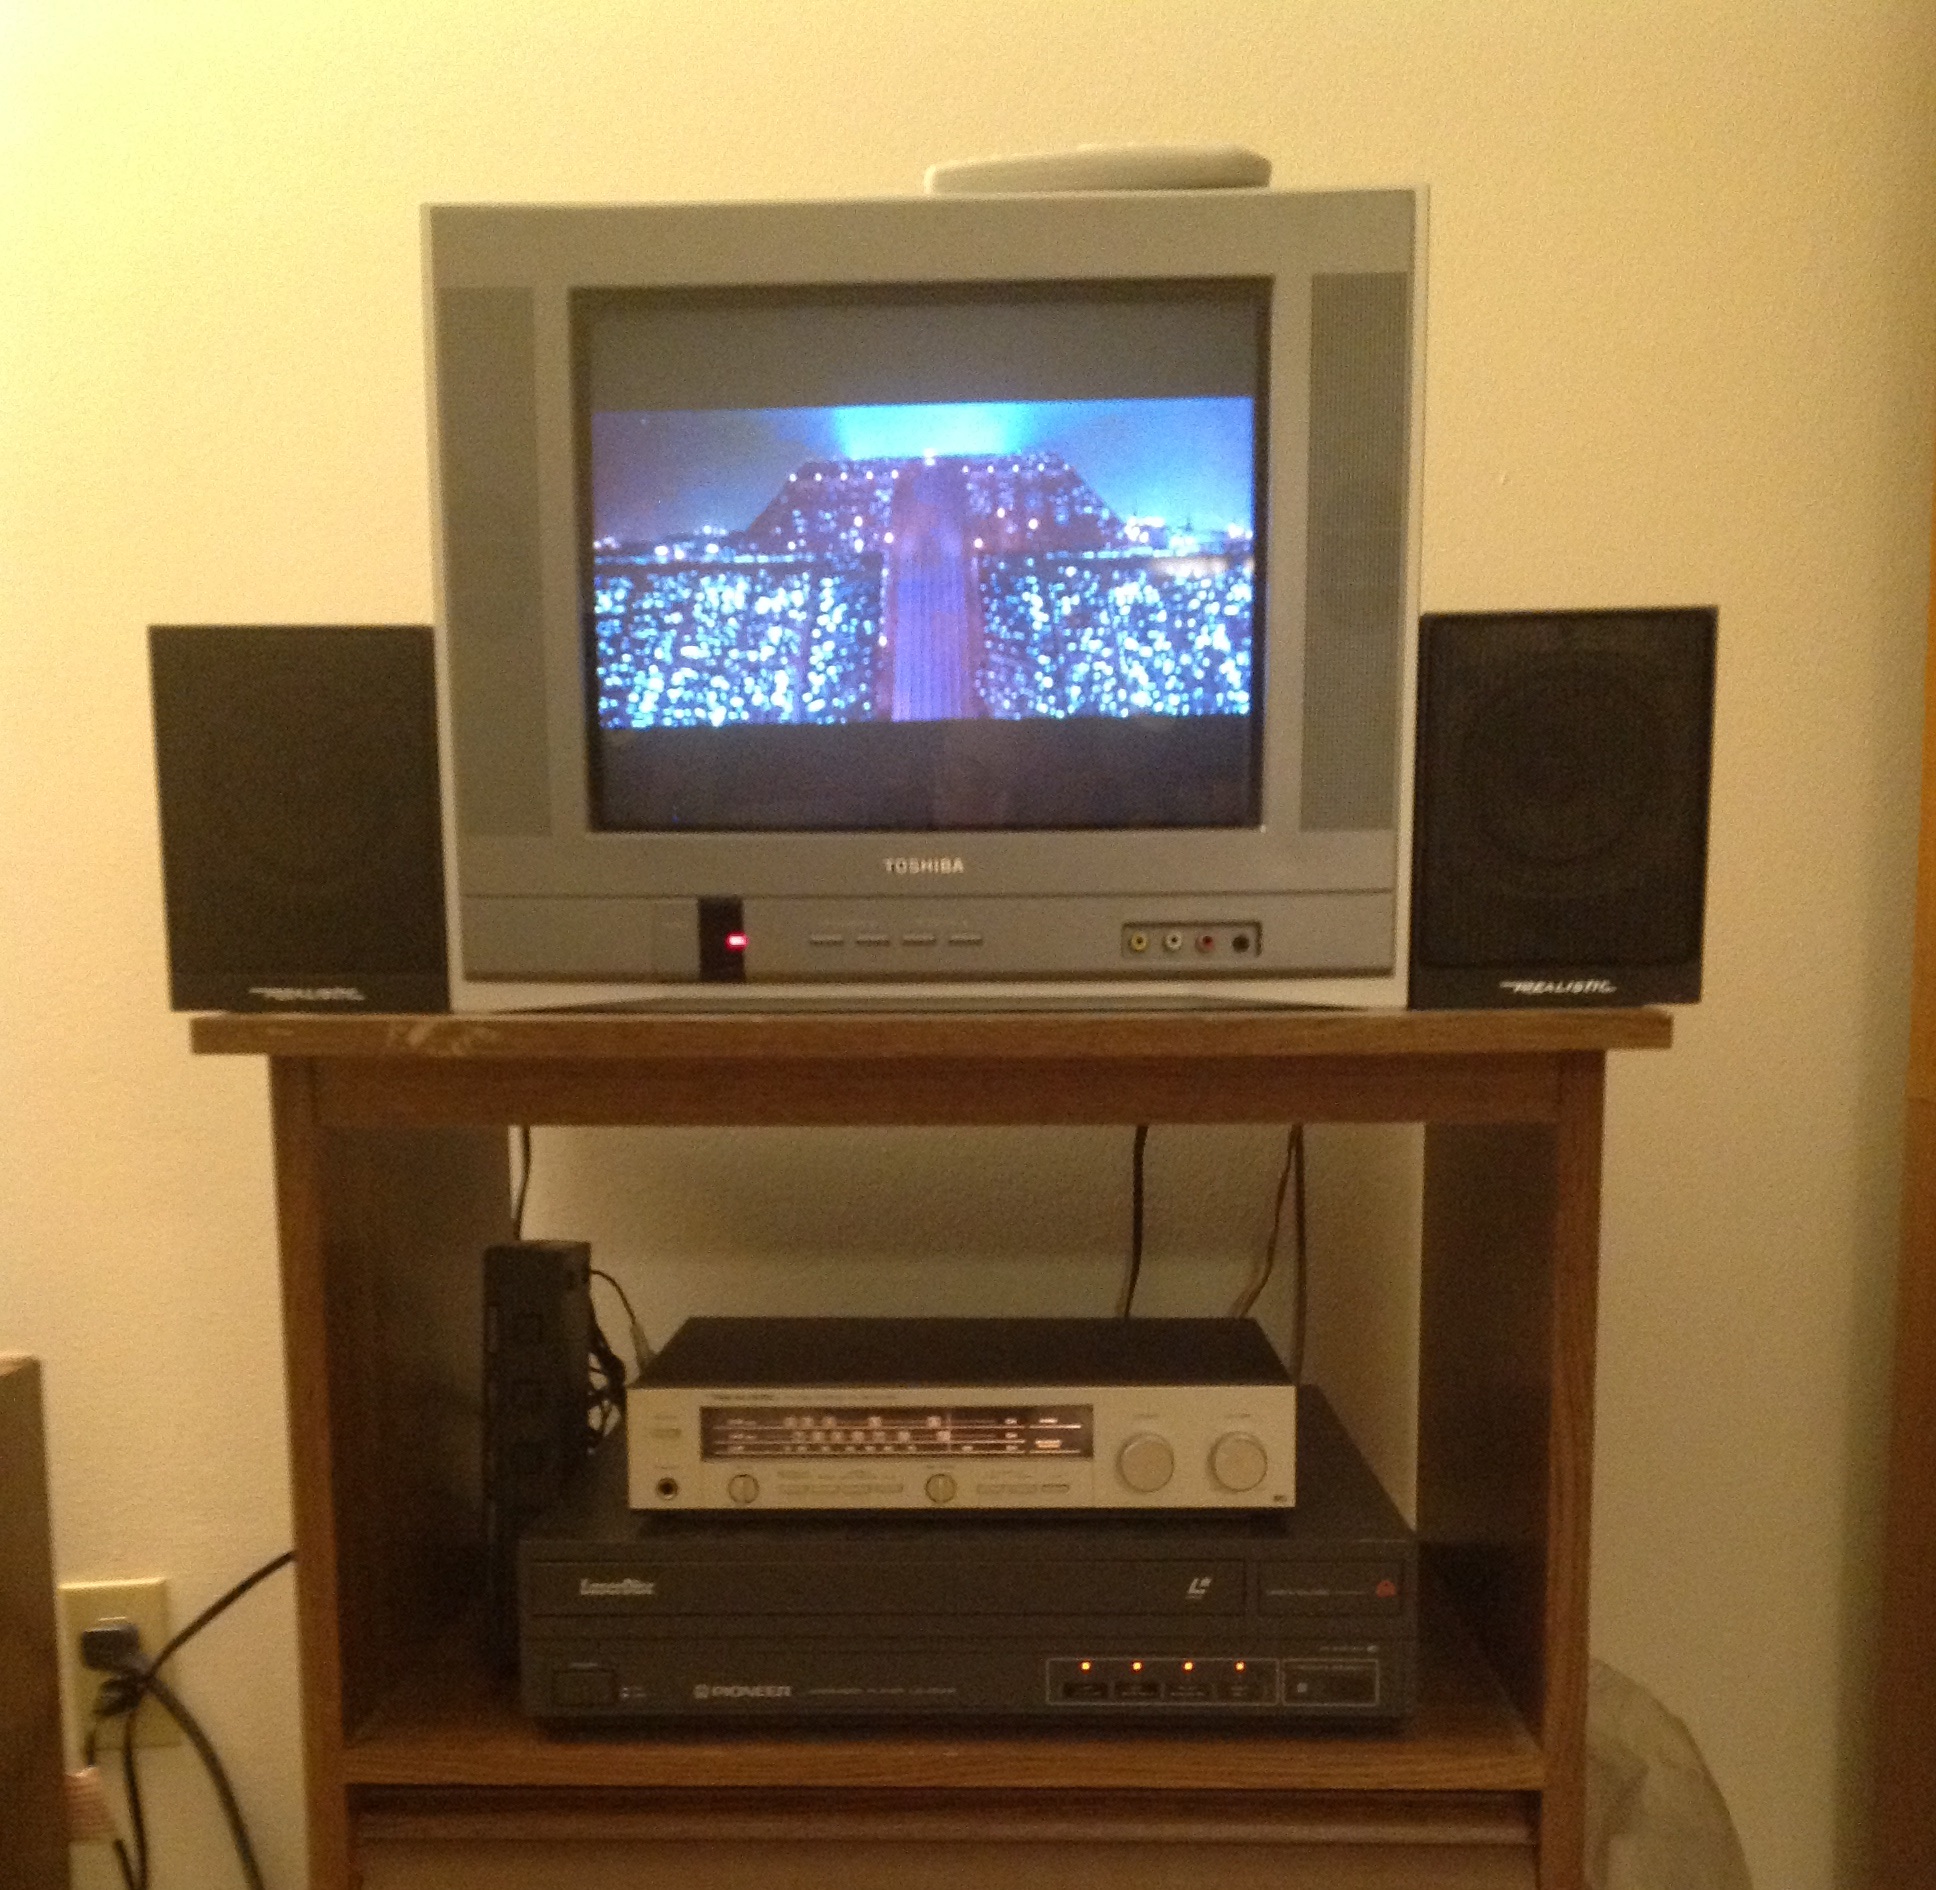
Pioneer LaserVision LD-V2000
This is my Pioneer LaserVision LD-V2000 LaserDisc player that I believe I found at the old State Road Goodwill some years ago.

A few weeks ago on Record Store Day I visited Time Traveler in Cuyahoga Falls and was pleased to find a nice little LaserDisc section among all of the other myriad things in that store. I think I spent about $20 on used LaserDiscs. That reminded me that I should write something about my LaserDisc player and my fascination with the LaserDisc format.

LaserDisc, if you’re not familiar with it, was a home video format active from about 1978 to 2000 that played high quality analog video from 30cm discs that resembled large CDs the size of a vinyl LP record.

LaserDisc is sometimes described as the forerunner to DVD, but that’s not a totally valid comparison. Unlike DVDs, LaserDiscs contain analog video. The way this page puts it, the video and audio signals are combined into a frequency modulated waveform and the length of the pits and lands represents the wave on the discs. So, while the discs are physically like CDs and DVDs in that pits and lands are read by a laser, the video itself is stored as composite analog video.
LaserDisc spent much of it’s life as a luxury format for film and home theater enthusiasts. It’s important to note that LaserDisc was not a failed format (like CED). Rather, it became a niche format that lasted for about 20 years while never achieving mainstream success. From 1978 to 1997 it was the home video format with the best video resolution, and after the introduction of digital audio in the late 1980s, the best audio as well.
At the time the main practical criticism of the format was that it was not recordable. If you bought a VCR you could both record from TV and watch prerecorded movies where if you owned a LaserDisc player you probably also wanted to own a VCR for recording TV. The other prominent downside to LaserDisc was that most films required at least one disc flip.
Early discs like this 1981 copy of Animal House were constant linear velocity (CLV) which meant that each side of the disc could hold 60 minutes of video and a two hour film could fit on two sides of a single disc and the film would require one disc flip. These discs are labeled Extended Play.

As the format became more of a high end item for film enthusiasts more films were sold as constant angular velocity (CAV) discs, which could only fit 30 minutes per side and generally required at least two discs for the whole film, meaning many more disc flips. However, they would have had better video quality. These discs were labeled Standard Play, like this Disc 1 of Blade Runner the Directors Cut.

The original Criterion release of the theatrical cut of Blade Runner was on two sides a single CLV Extended Play disc but the later Directors Cut was four sides of two CAV Standard Play discs.
There was also a 20cm LaserDisc size as well.

Today we associate features like random access and chapters with DVD but LaserDisc had already had them for years. One notable thing for me is that fast forwarding on LaserDisc is much more slick than on any other video format, DVD included. On VHS the image would waver and distort while fast forwarding. On DVD the fast forwarding is very jumpy as it quickly shows you still frames. On LaserDisc fast forwarding feels very stable, smooth, and responsive.
The most fascinating thing about LaserDisc was how the audio standards evolved over time. Originally LaserDiscs contained only analog audio. Some discs used the CX noise reduction system, like audio cassette tapes used Dolby-B noise reduction.
After the advent of the CD player started supporting PCM audio as well. Discs started coming with two PCM digital audio tracks in addition to the two analog tracks (to keep support for older players that only supported analog audio). These discs carried this digital SOUND logo.

About this time Philips tried to unite the LaserDisc and CD standards with what they called CD Video or CD-V. This meant they they wanted CD-V badged players to be able to play 30cm LaserDiscs, 20cm LaserDiscs, normal 12cm CDs, 8cm Mini CDs, and finally a new CD-Video format 12cm disc with 20 minutes of CD audio in an inner ring and 5 minutes of LaserDisc video on an outer ring, presumably for music videos.
Some LaserDiscs, like this 1993 AD Police anime disc, carry the CD Video logo.
![]()
In the mid-1990s some discs began to re-purpose one of the analog audio channels to carry RF modulated AC3 Dolby Digital 5.1 audio. These discs then carried three audio formats simultaneously: Mono analog audio, stereo PCM audio, and 5.1 Dolby Digital audio. It must have been a real thrill for home theater geeks to finally have a true discrete 6 channel surround sound format.
As LaserDisc players go my LD-V2000 is a very basic model and practically has none of the features you’d want to see in an ideal player. It does not automatically play both sides of the disc. It does not have a digital memory to show still frames. It does not have S-Video output. It does not play digital audio or have an AC3 Dolby Digital RF output. It does not have a fancy jog control. Basically, this player was manufactured in 1990 and the LaserDisc players that enthusiasts are really interested in were manufactured after this one in the early-to-mid 1990s.
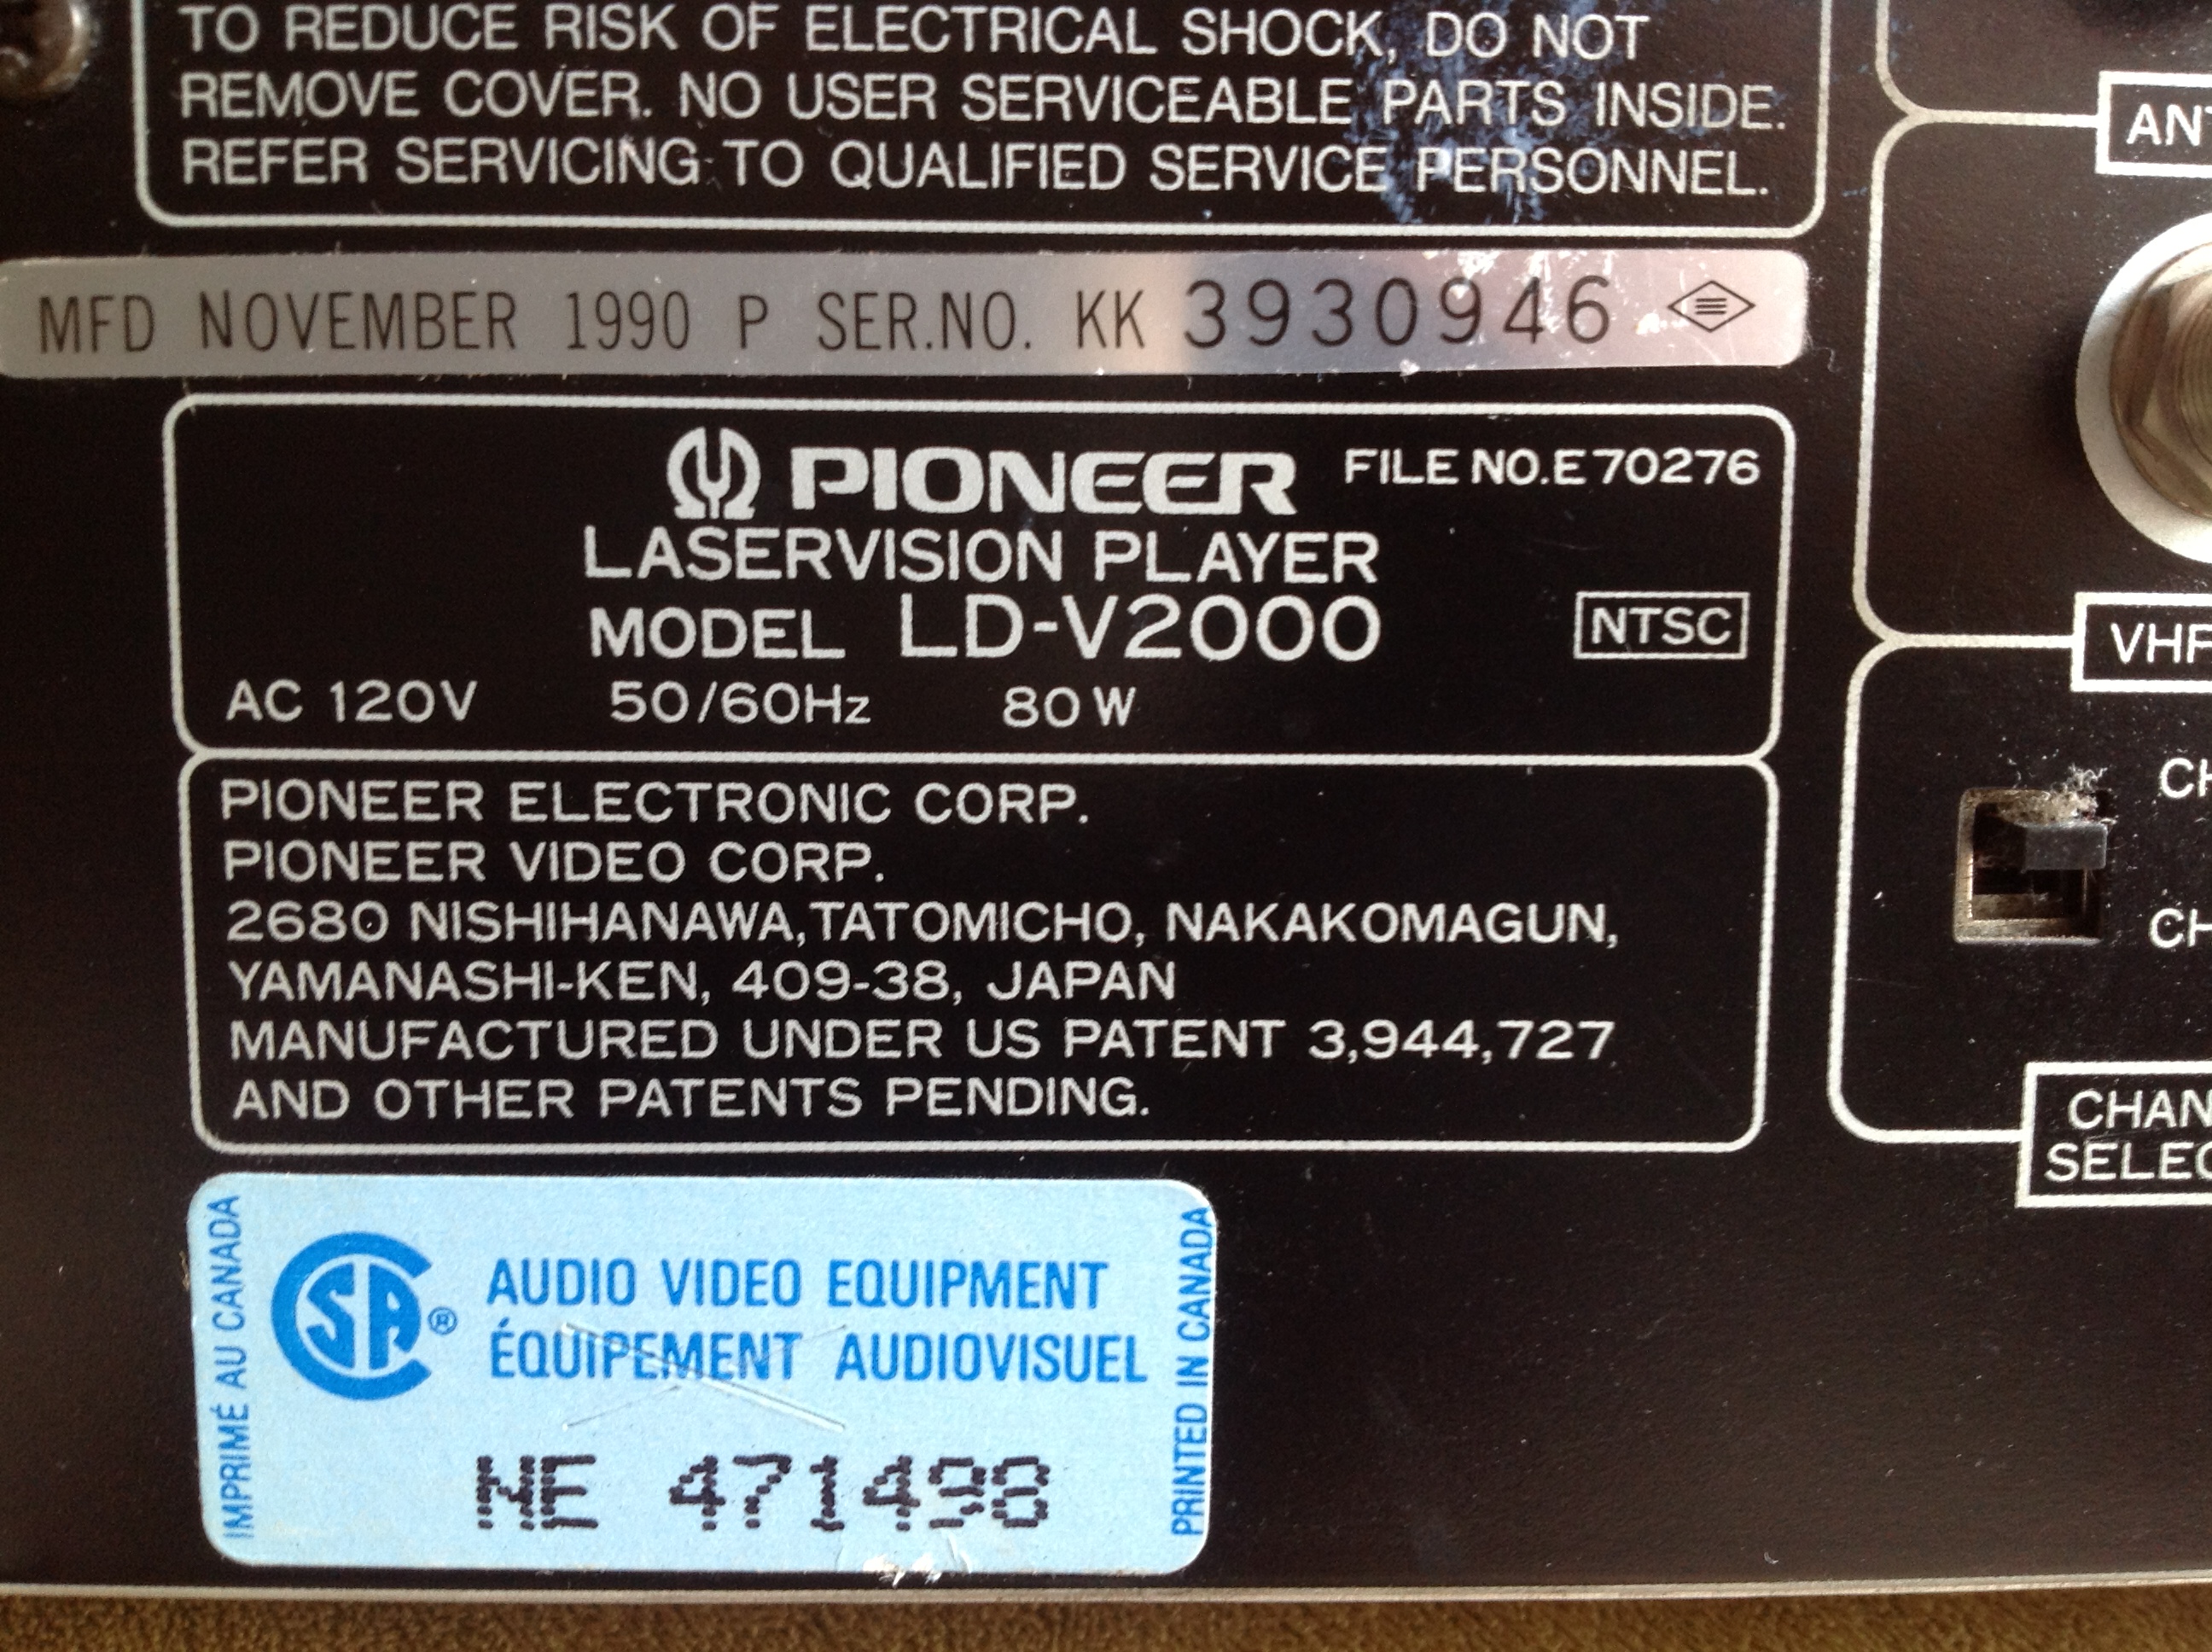
I’ve seen references that call the LD-V2000 an industrial LaserDisc player model meaning that it was probably intended for the educational or business markets. LaserDisc is an ideal format for a business situation where you would want a TV playing a video on a loop all day.
I remember the ophthalmologist’s office I went to as a child had a LaserDisc player that would play Disney cartoons on a loop in the exam rooms. The idea was that kids would focus on the cartoons in the distance with one eye while he examined the other eye. I remember walking past the player in the hall outside of the exam rooms and being very impressed.

A VCR would have had to rewind the tape to play a loop where a LaserDisc player can seek to the beginning of the disc in a moment and loop the same video all day. That’s probably also why this player lacks the most basic controls on the front panel and totally depends on a remote control.

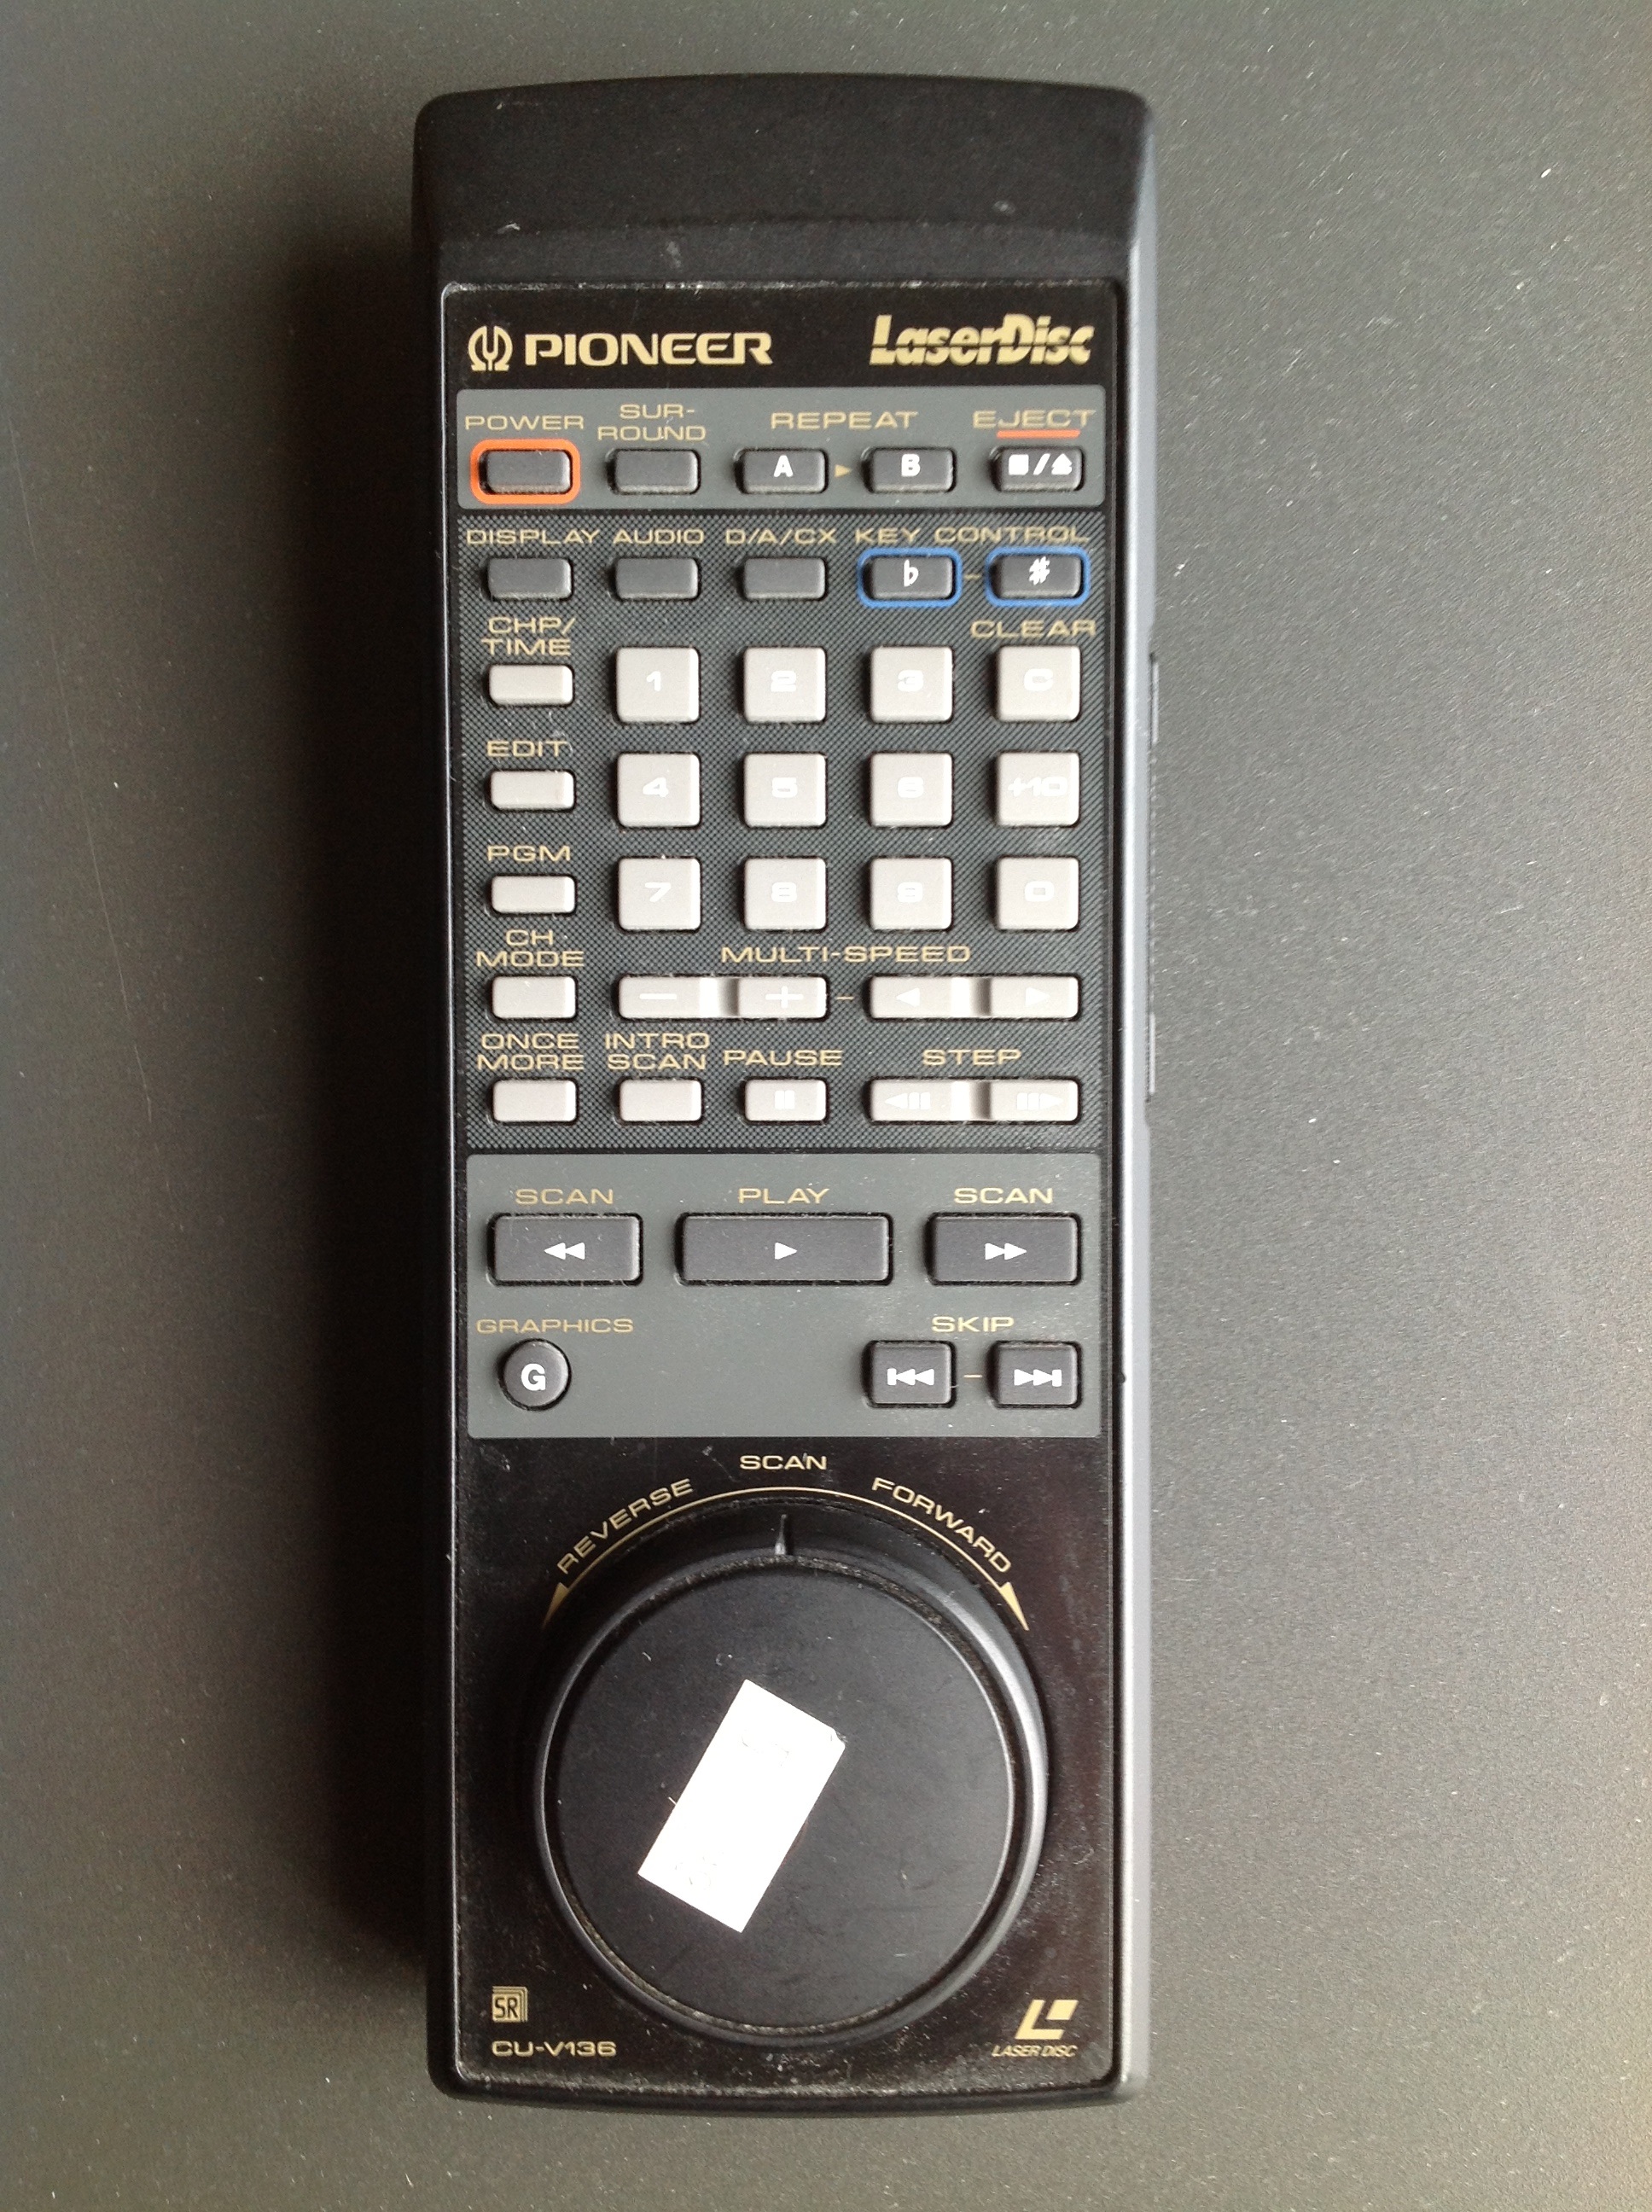
This particular LD-V2000 had a medical training disc in it when we bought it. It also did not come with a remote. However, I remembered seeing a Pioneer branded LaserDisc remote at the now-defunct Abbey Ann’s #2 in a basket of miscellaneous remotes. It still has the $5.99 price tag on it. I was correct in assuming that it would also work with other Pioneer models, though some of the controls don’t apply to the LD-V2000.
One interesting feature this player does have is an “I/O Port”, which I believe is a serial port.

I have never seen the manual for the LD-V2000, so I have to speculate a but about what this port is for. I’m fairly certain that it’s not some sort of port that reads data off of discs. I believe it’s a serial port that allows a computer or another accessory to control the player. Since all LaserDisc were time-coded it was very easy to tell a player to call up a particular frame from anywhere on the disc. For example, there were educational discs that used a bar code reader accessory to let a person scan a bar code in a book and call up a still image or a video from the LaserDisc. You can also easily imagine a museum display where pressing a specific button would call up a video on a monitor from a LaserDisc player.
So, what this player does have going for it it that it works and it’s built like a tank. I’ve been on the lookout for a player with more of the fun features people look for in LaserDisc players for some time now, but the problem is that usually someone wants $40 for it, and my sweet spot for something like this is $15. In the meantime, this simple player has been an excellent gateway into the world of beautiful analog video that is LaserDisc.

Realistic CD-1000
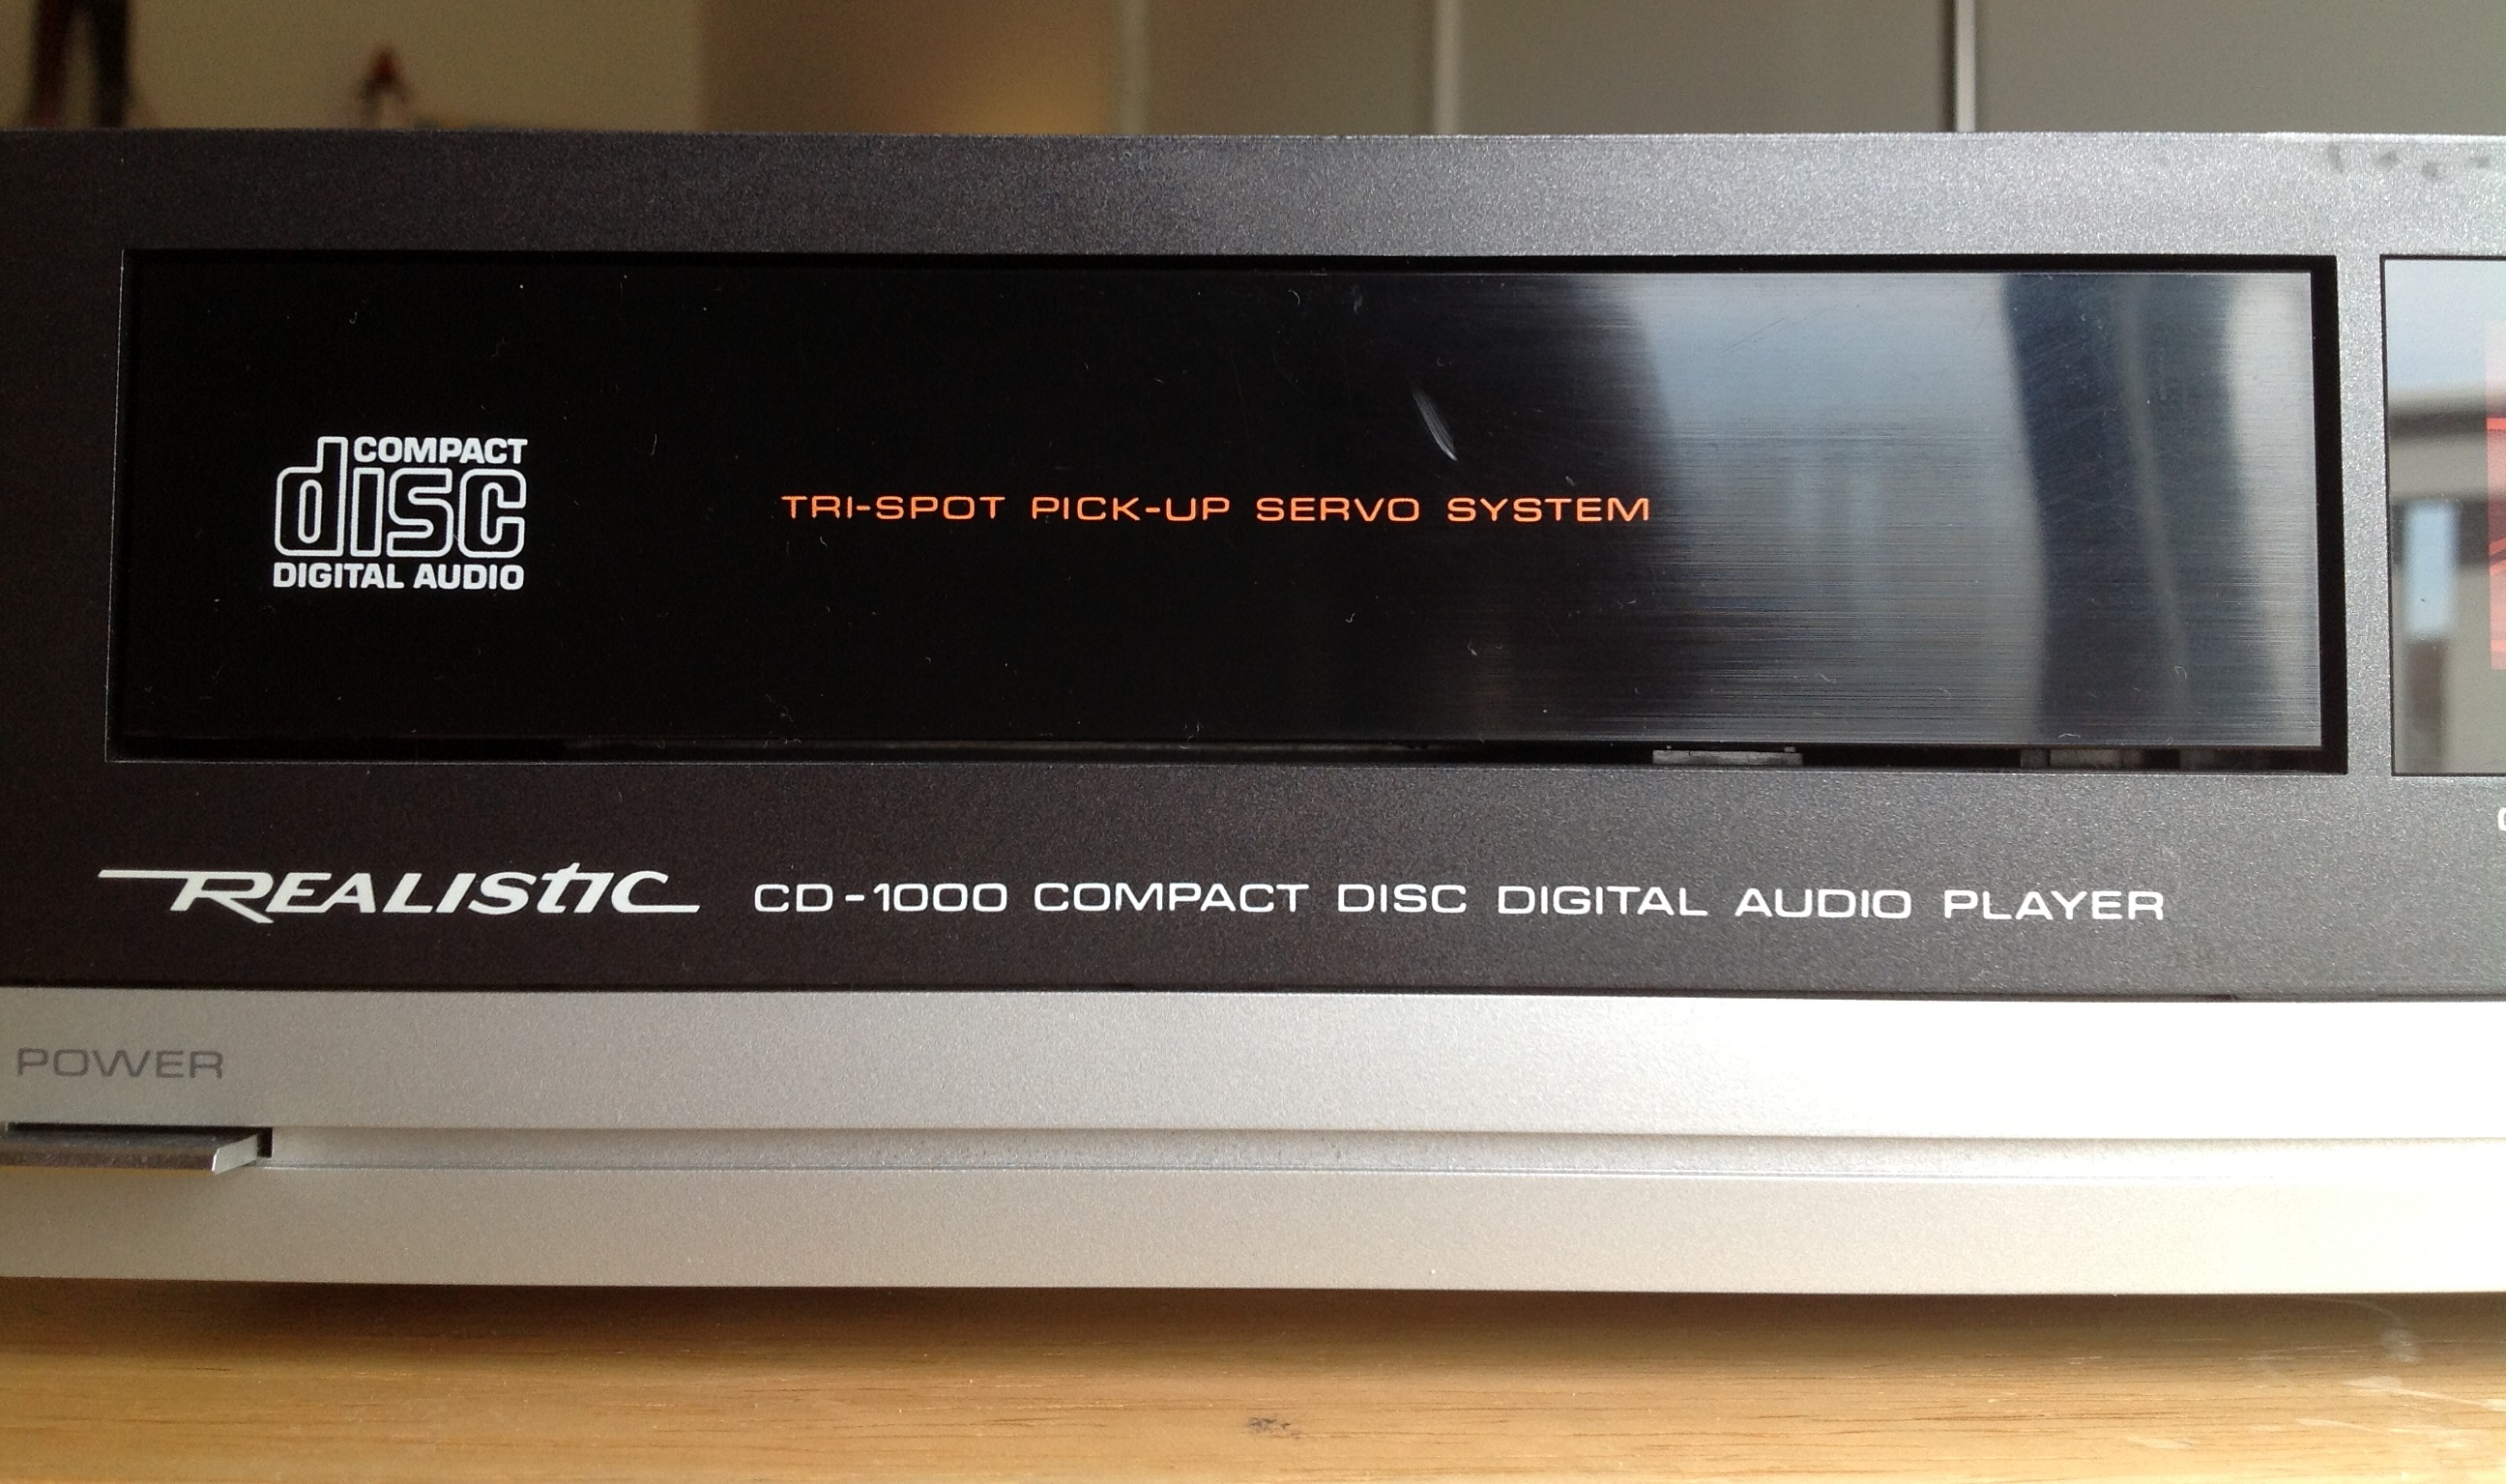
This is the Realistic CD-1000 CD player that I found just this past Tuesday at Village Thrift.
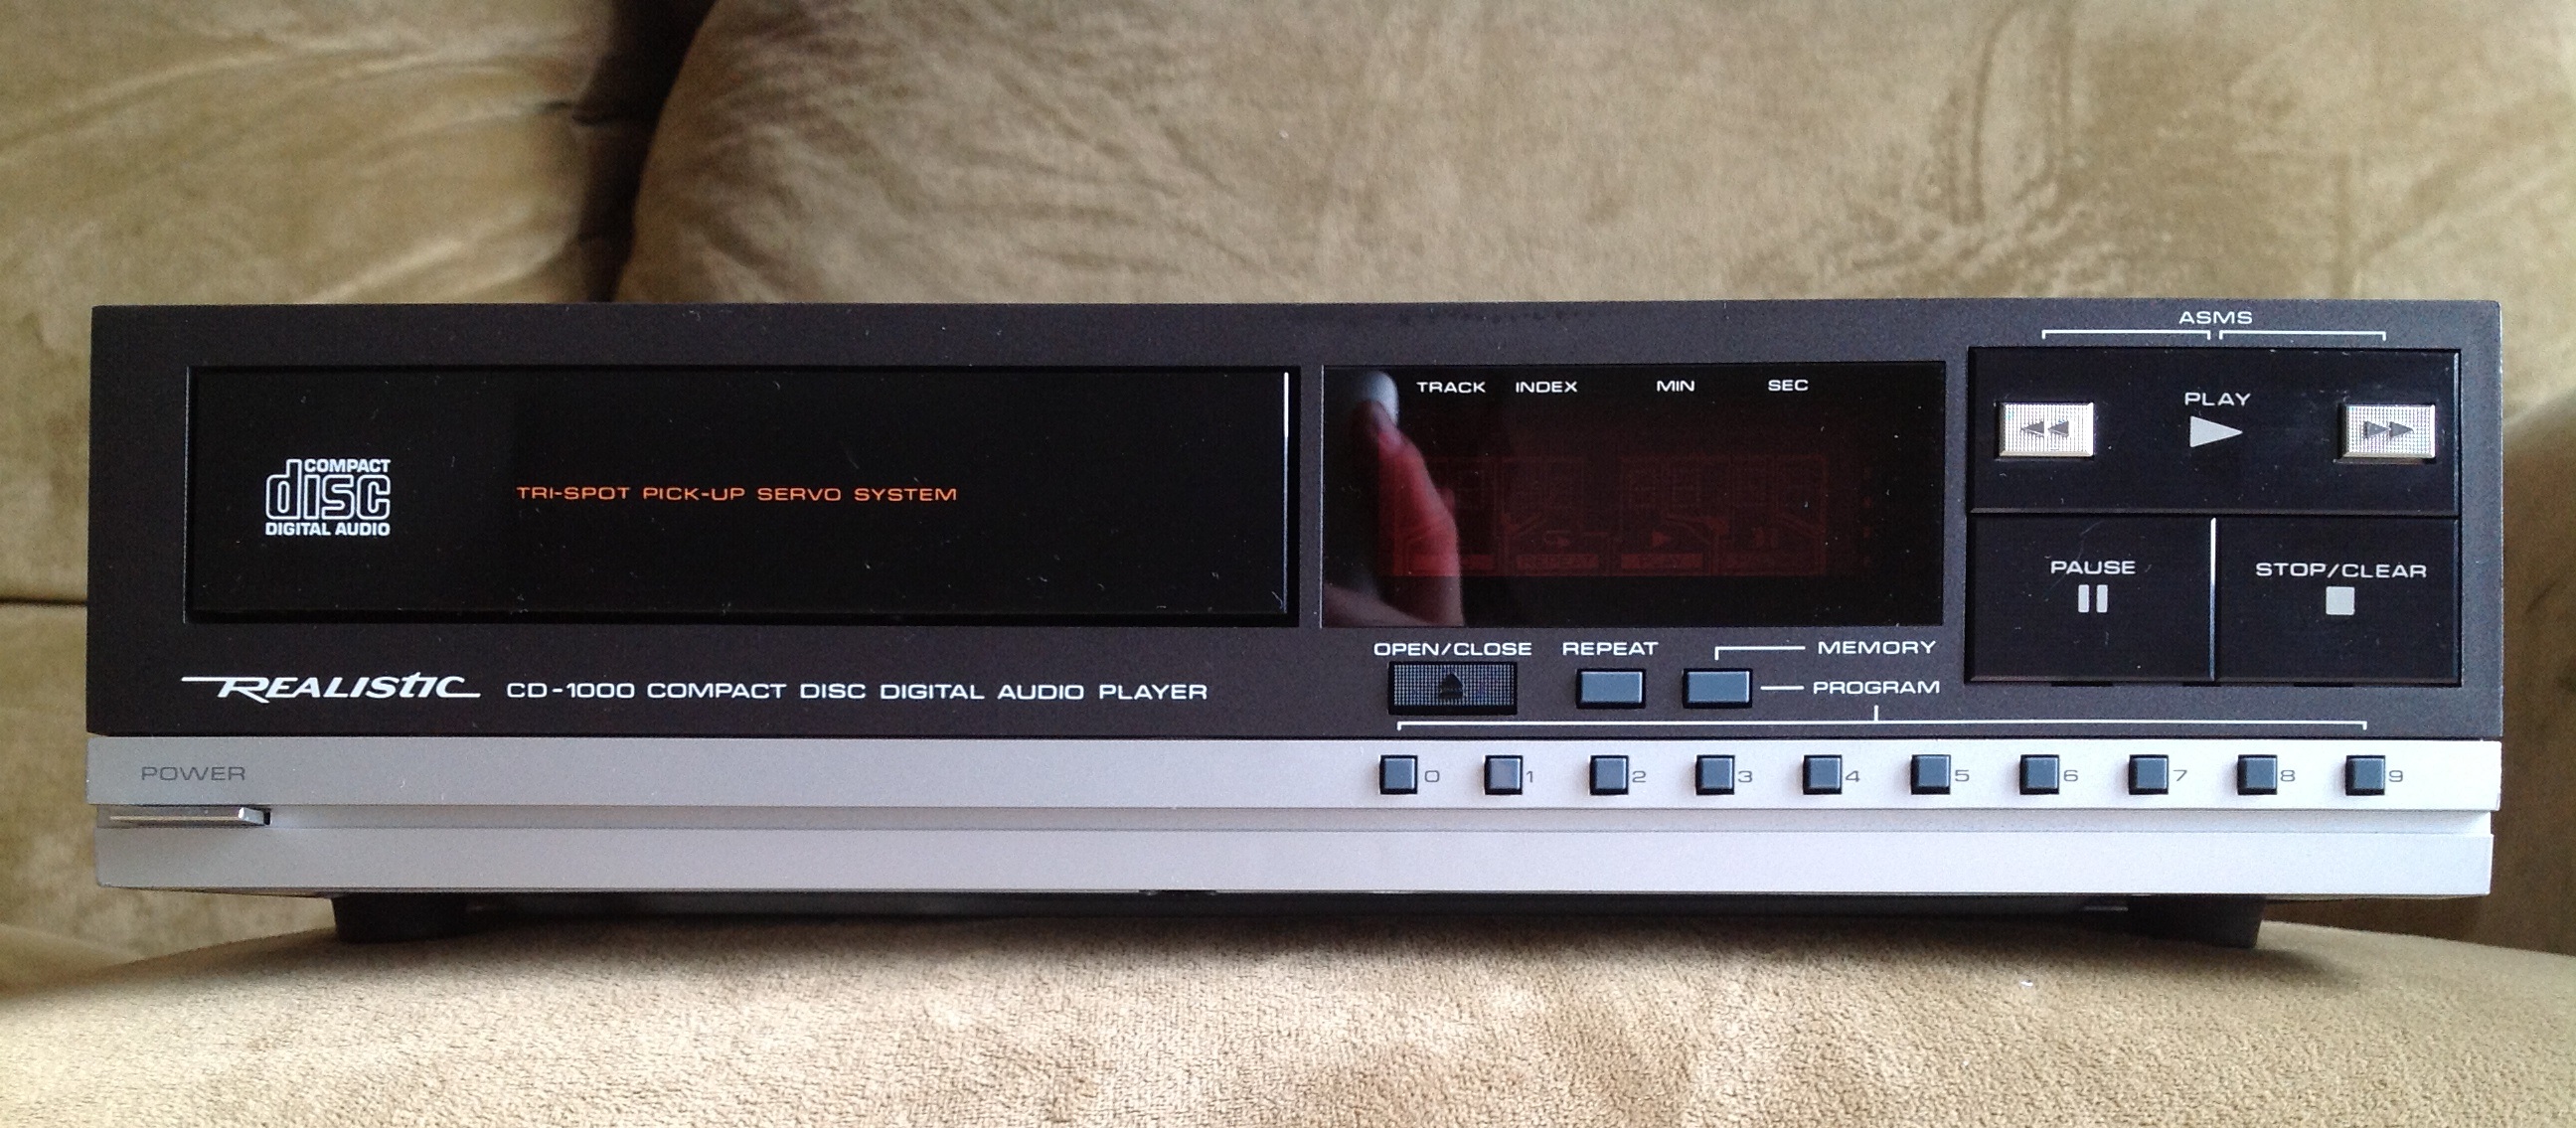
This is the first time I’ve found an item and posted it to the blog in the same week. When I saw this in the electronics section at Village Thrift I could tell it was pretty old from the styling, but when I saw the August 1984 manufacture date I knew I had something really special on my hands.

Checking the 1985 Radio Shack catalog confirmed what I suspected: The CD-1000 is the very first CD player that Radio Shack sold. Given my already discussed fondness for Radio Shack and Realistic I had to have it.
The problem was that the price was marked “3.00 As Is”. If Village says something is as-is, most likely it plain doesn’t work. But, for $3, I’m willing to take a chance.
When I got it home it became apparent what the problem was: While the player would turn on, the CD drawer refused to open.
I opened up the case to see if I could spot anything obviously amiss inside. The first thing I noticed was that there was a CD-R disc that must have been stuck inside the machine when it was donated that had slipped out of the drawer and was sitting among the electronics. After removing the CD-R I tried watching the CD drawer try to open with the case open. All I heard was a motor try to turn but nothing moved.
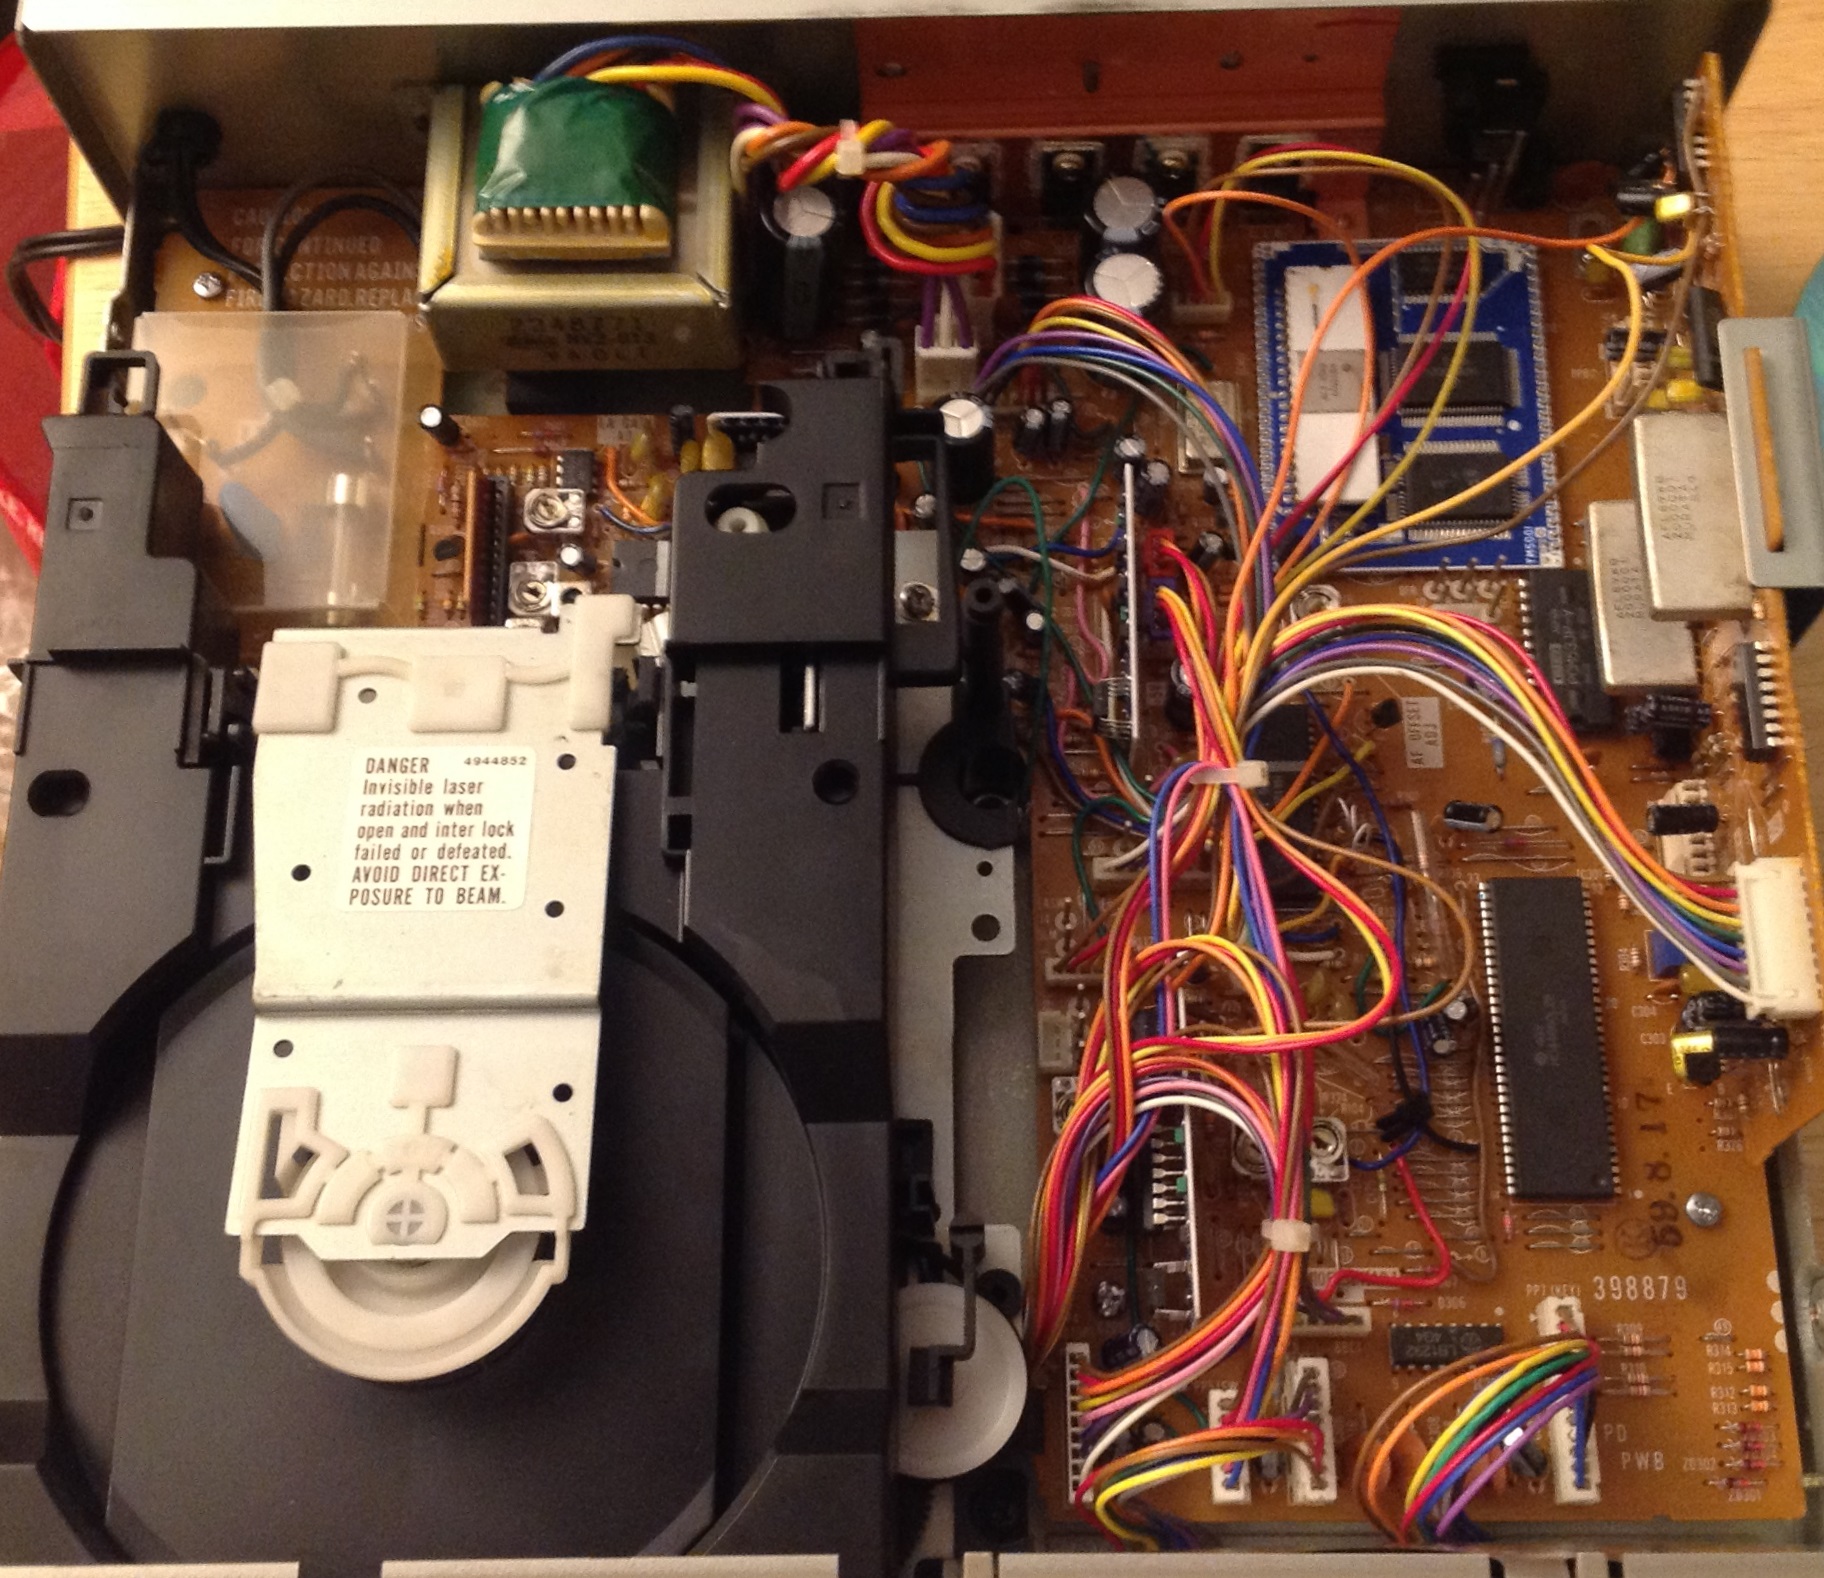
Next, I took it to my father. He quickly discovered that the belt that goes between a motor and that white, round piece in the bottom center of the picture above was broken.
We then proceeded to remove the drawer assembly from the unit to get a better look. That involved unplugging all of the connections between the drawer and the main board.

Eventually we got the drawer assembly out of the unit. My father manually turned the round white piece and we discovered how the drawer works. As you would expect, first the drawer pulls in. What was really curious was seeing the little platform on the center of the drawer move.
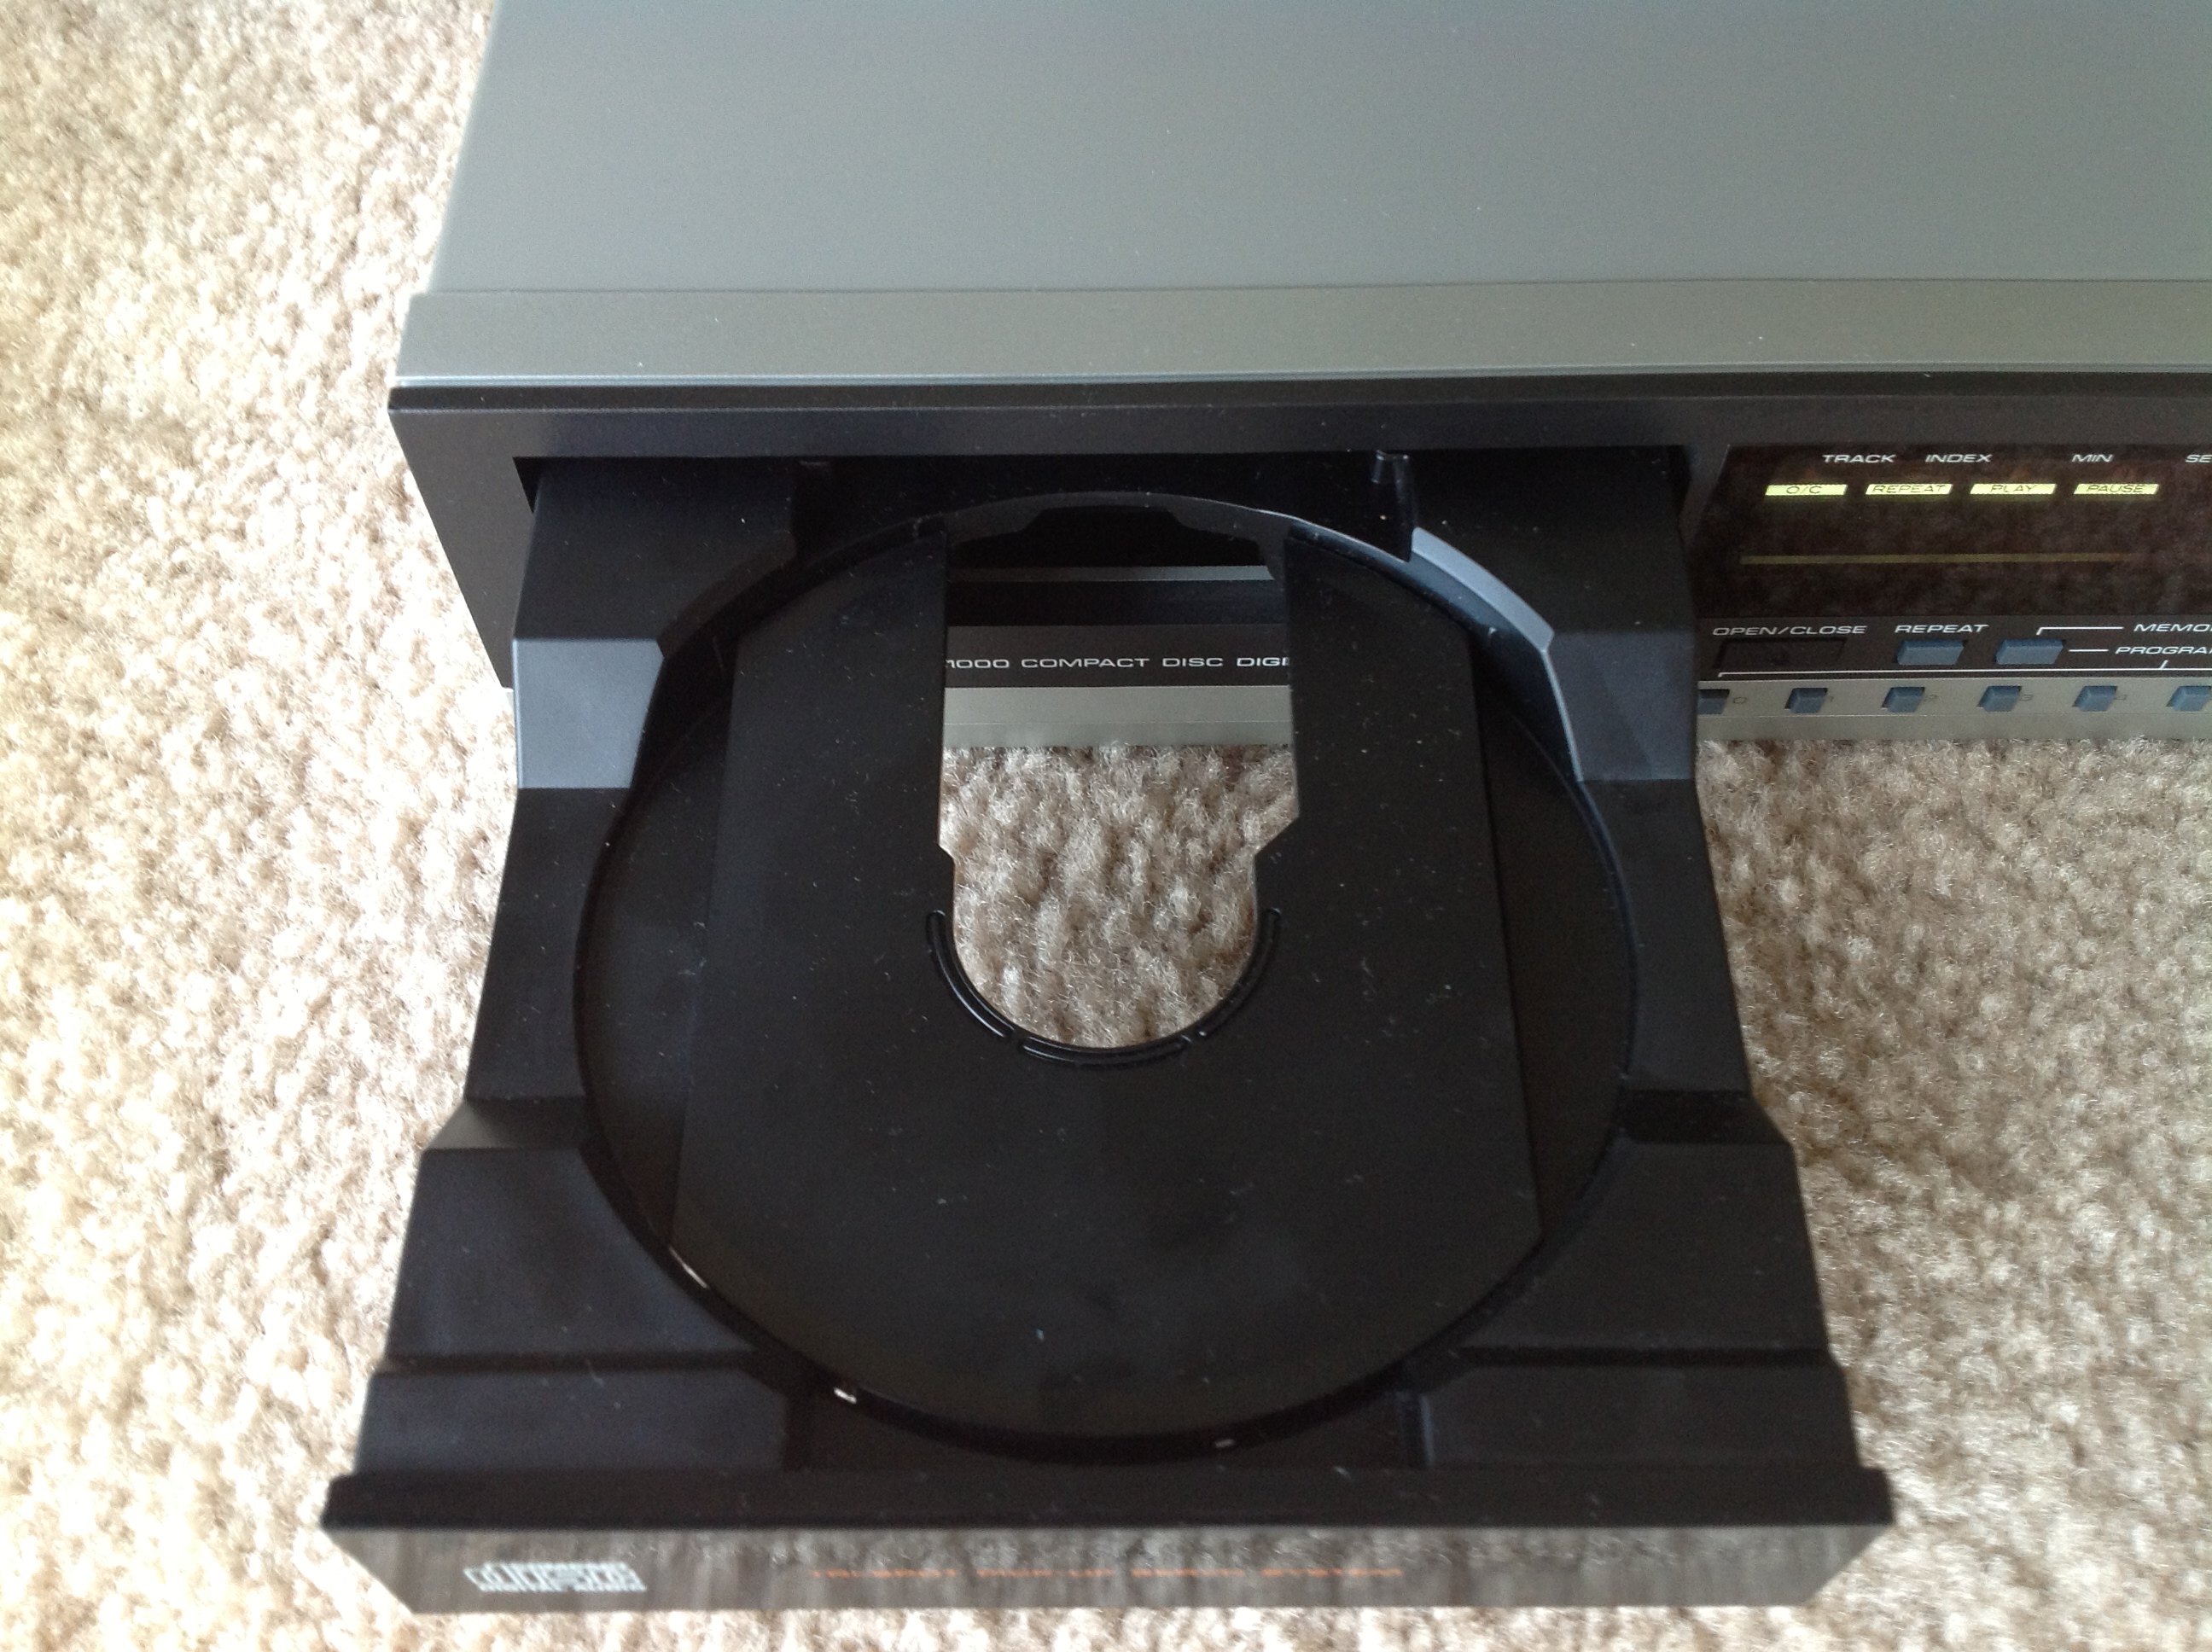
See that raised platform where you place the disc? It works like an elevator that places the disc onto the drive spindle. Then the white plastic piece with the “Danger!…” sticker on it moves downward and clamps the disc in place. All of this was driven by that single white round piece with the broken belt.
The next day, my father took the drive assembly to Philcap Electronics where they took some measurements and sold him a replacement belt for $3.
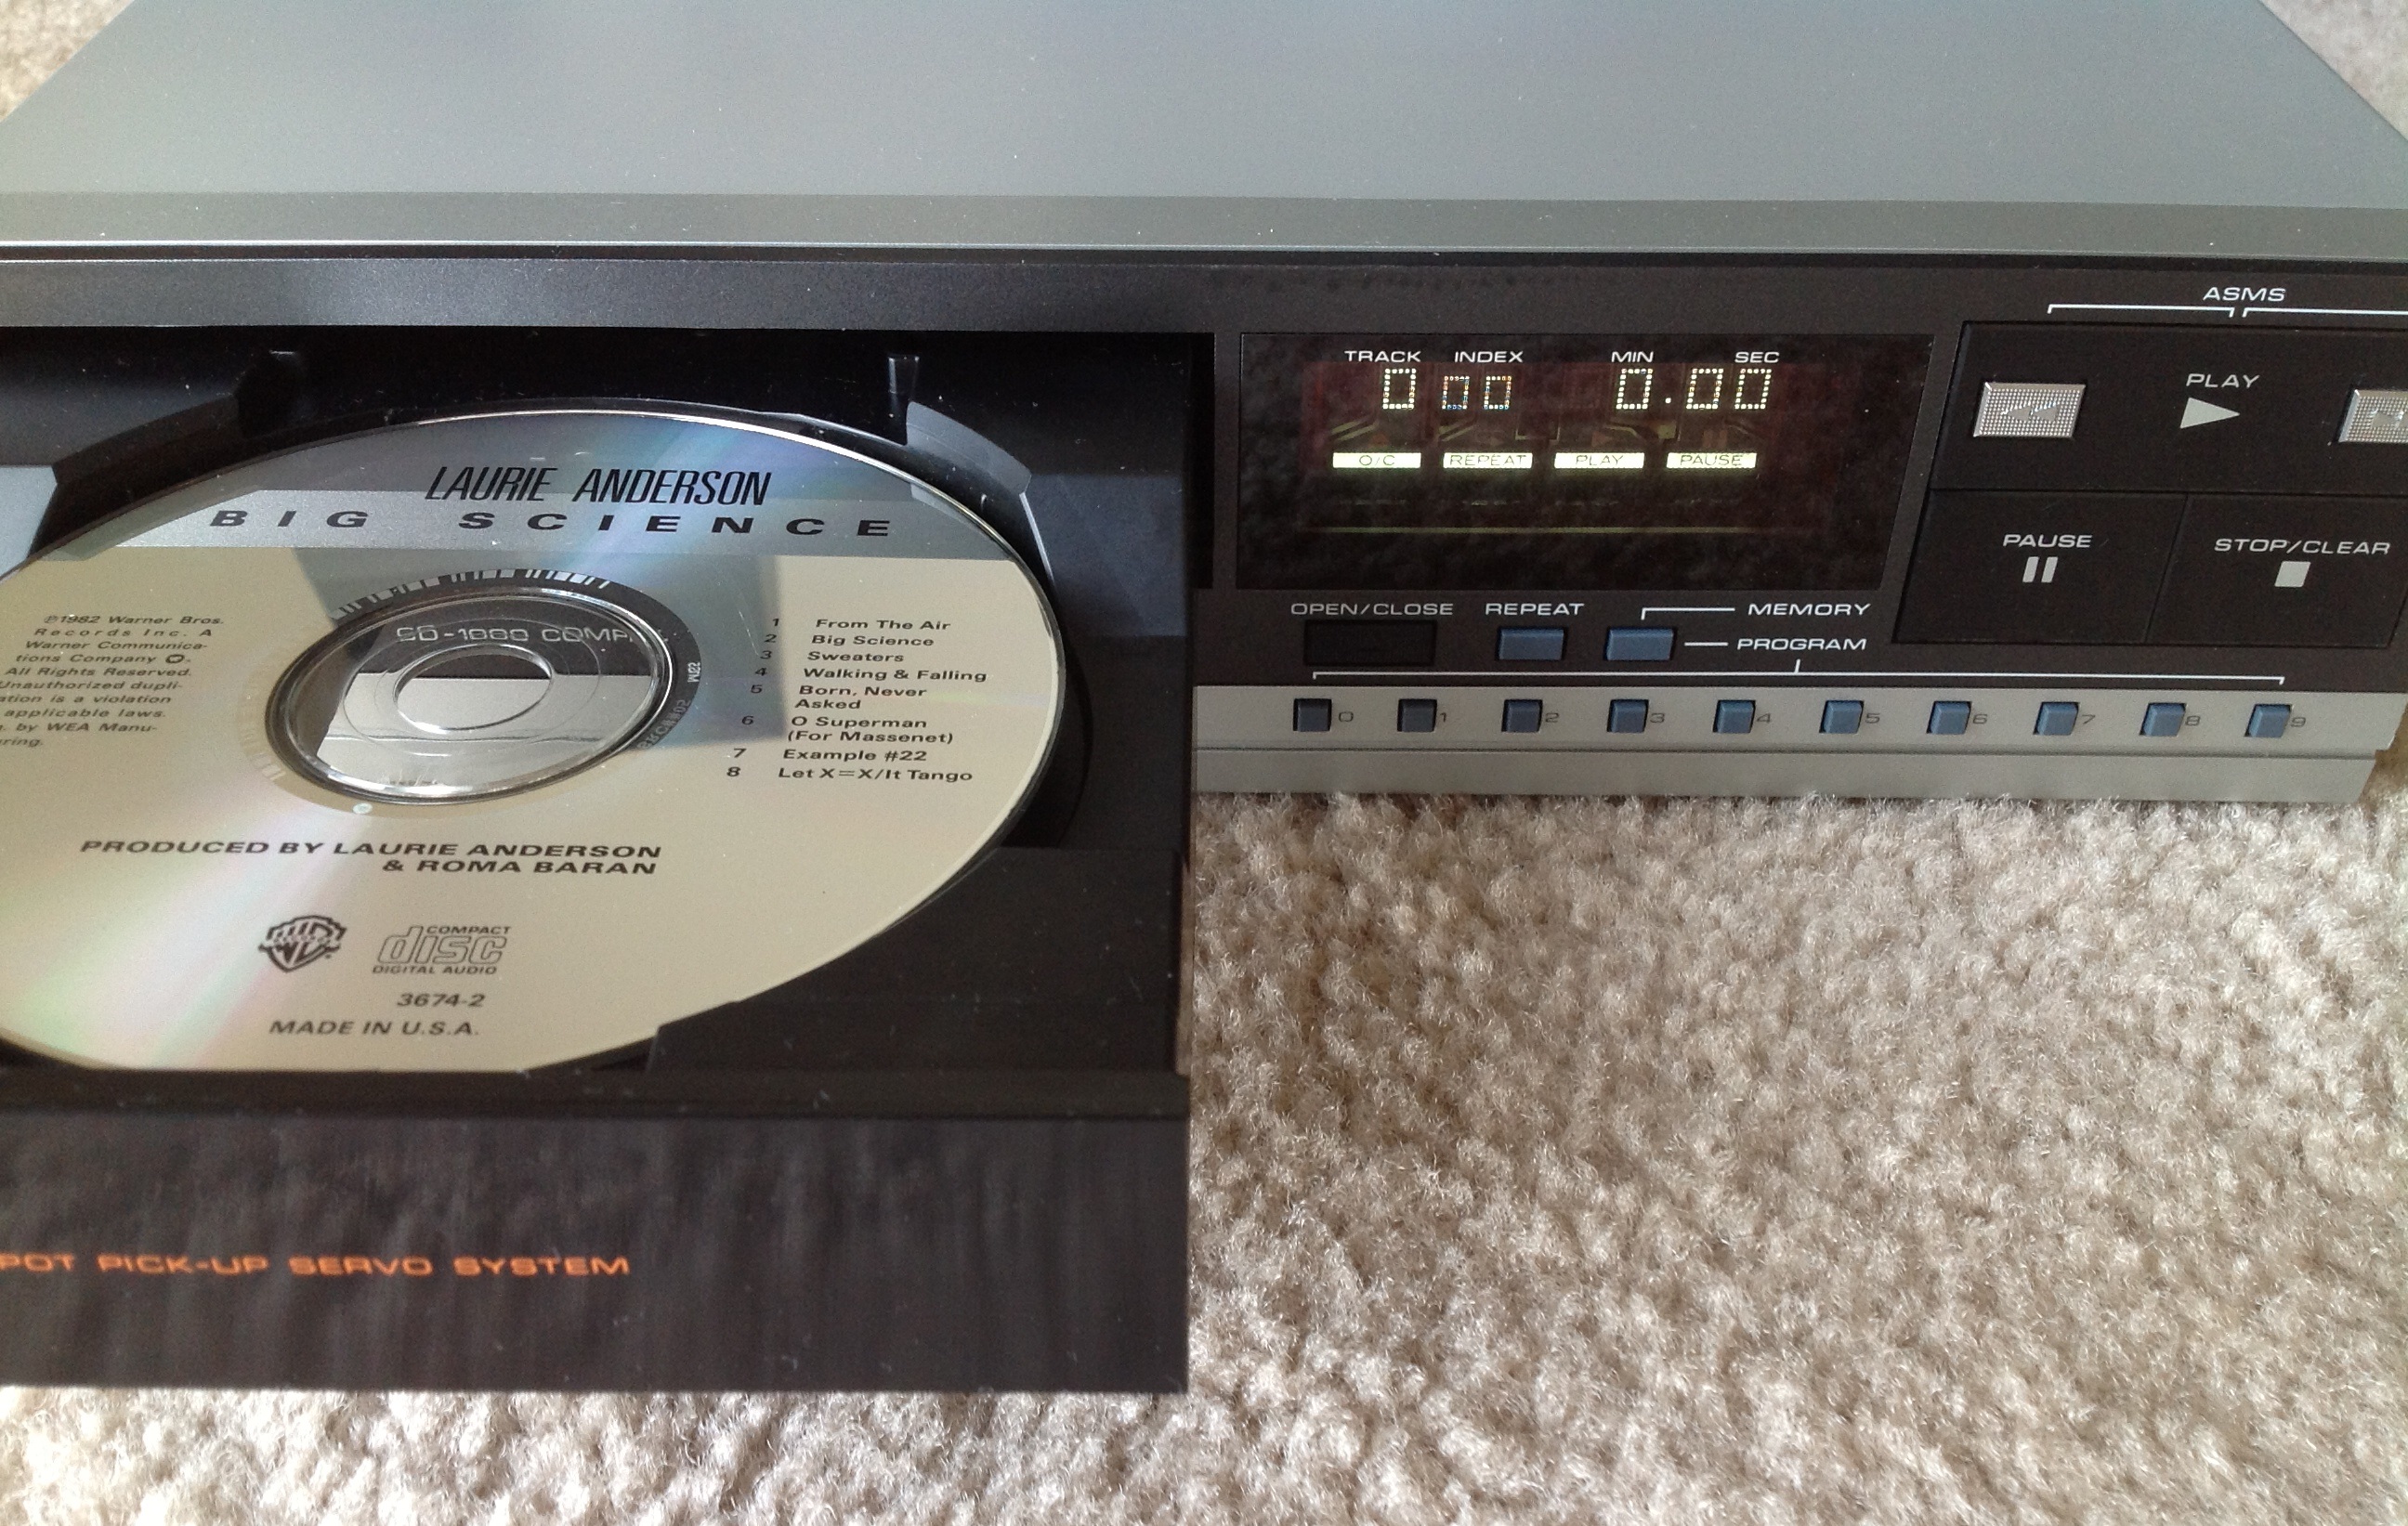
After he installed the new belt and reconnected all of the wires the CD player worked! I’m personally somewhat shocked that nothing else was broken on this thing but that belt. In researching this unit you find people talking about problems with distorted sound and the laser failing, but my player seems to work perfectly after the belt repair.
The thing about CD players that is a blessing and a curse is that to a close approximation they basically all sound the same. I had heard though, that the very earliest CD players had some nasty filtering in their early DACs that might be audible. Personally, it sounded to great to my ears. That got me curious about what all of those chips were inside the CD-1000.
The first thing I found was that this player was probably designed for Tandy by Hitachi. Most of the chips inside are Hitachi chips. I stumbled upon this French website about another, much more flashy early CD player, the Hitachi DA-1000 that shows the chips it had inside of it.
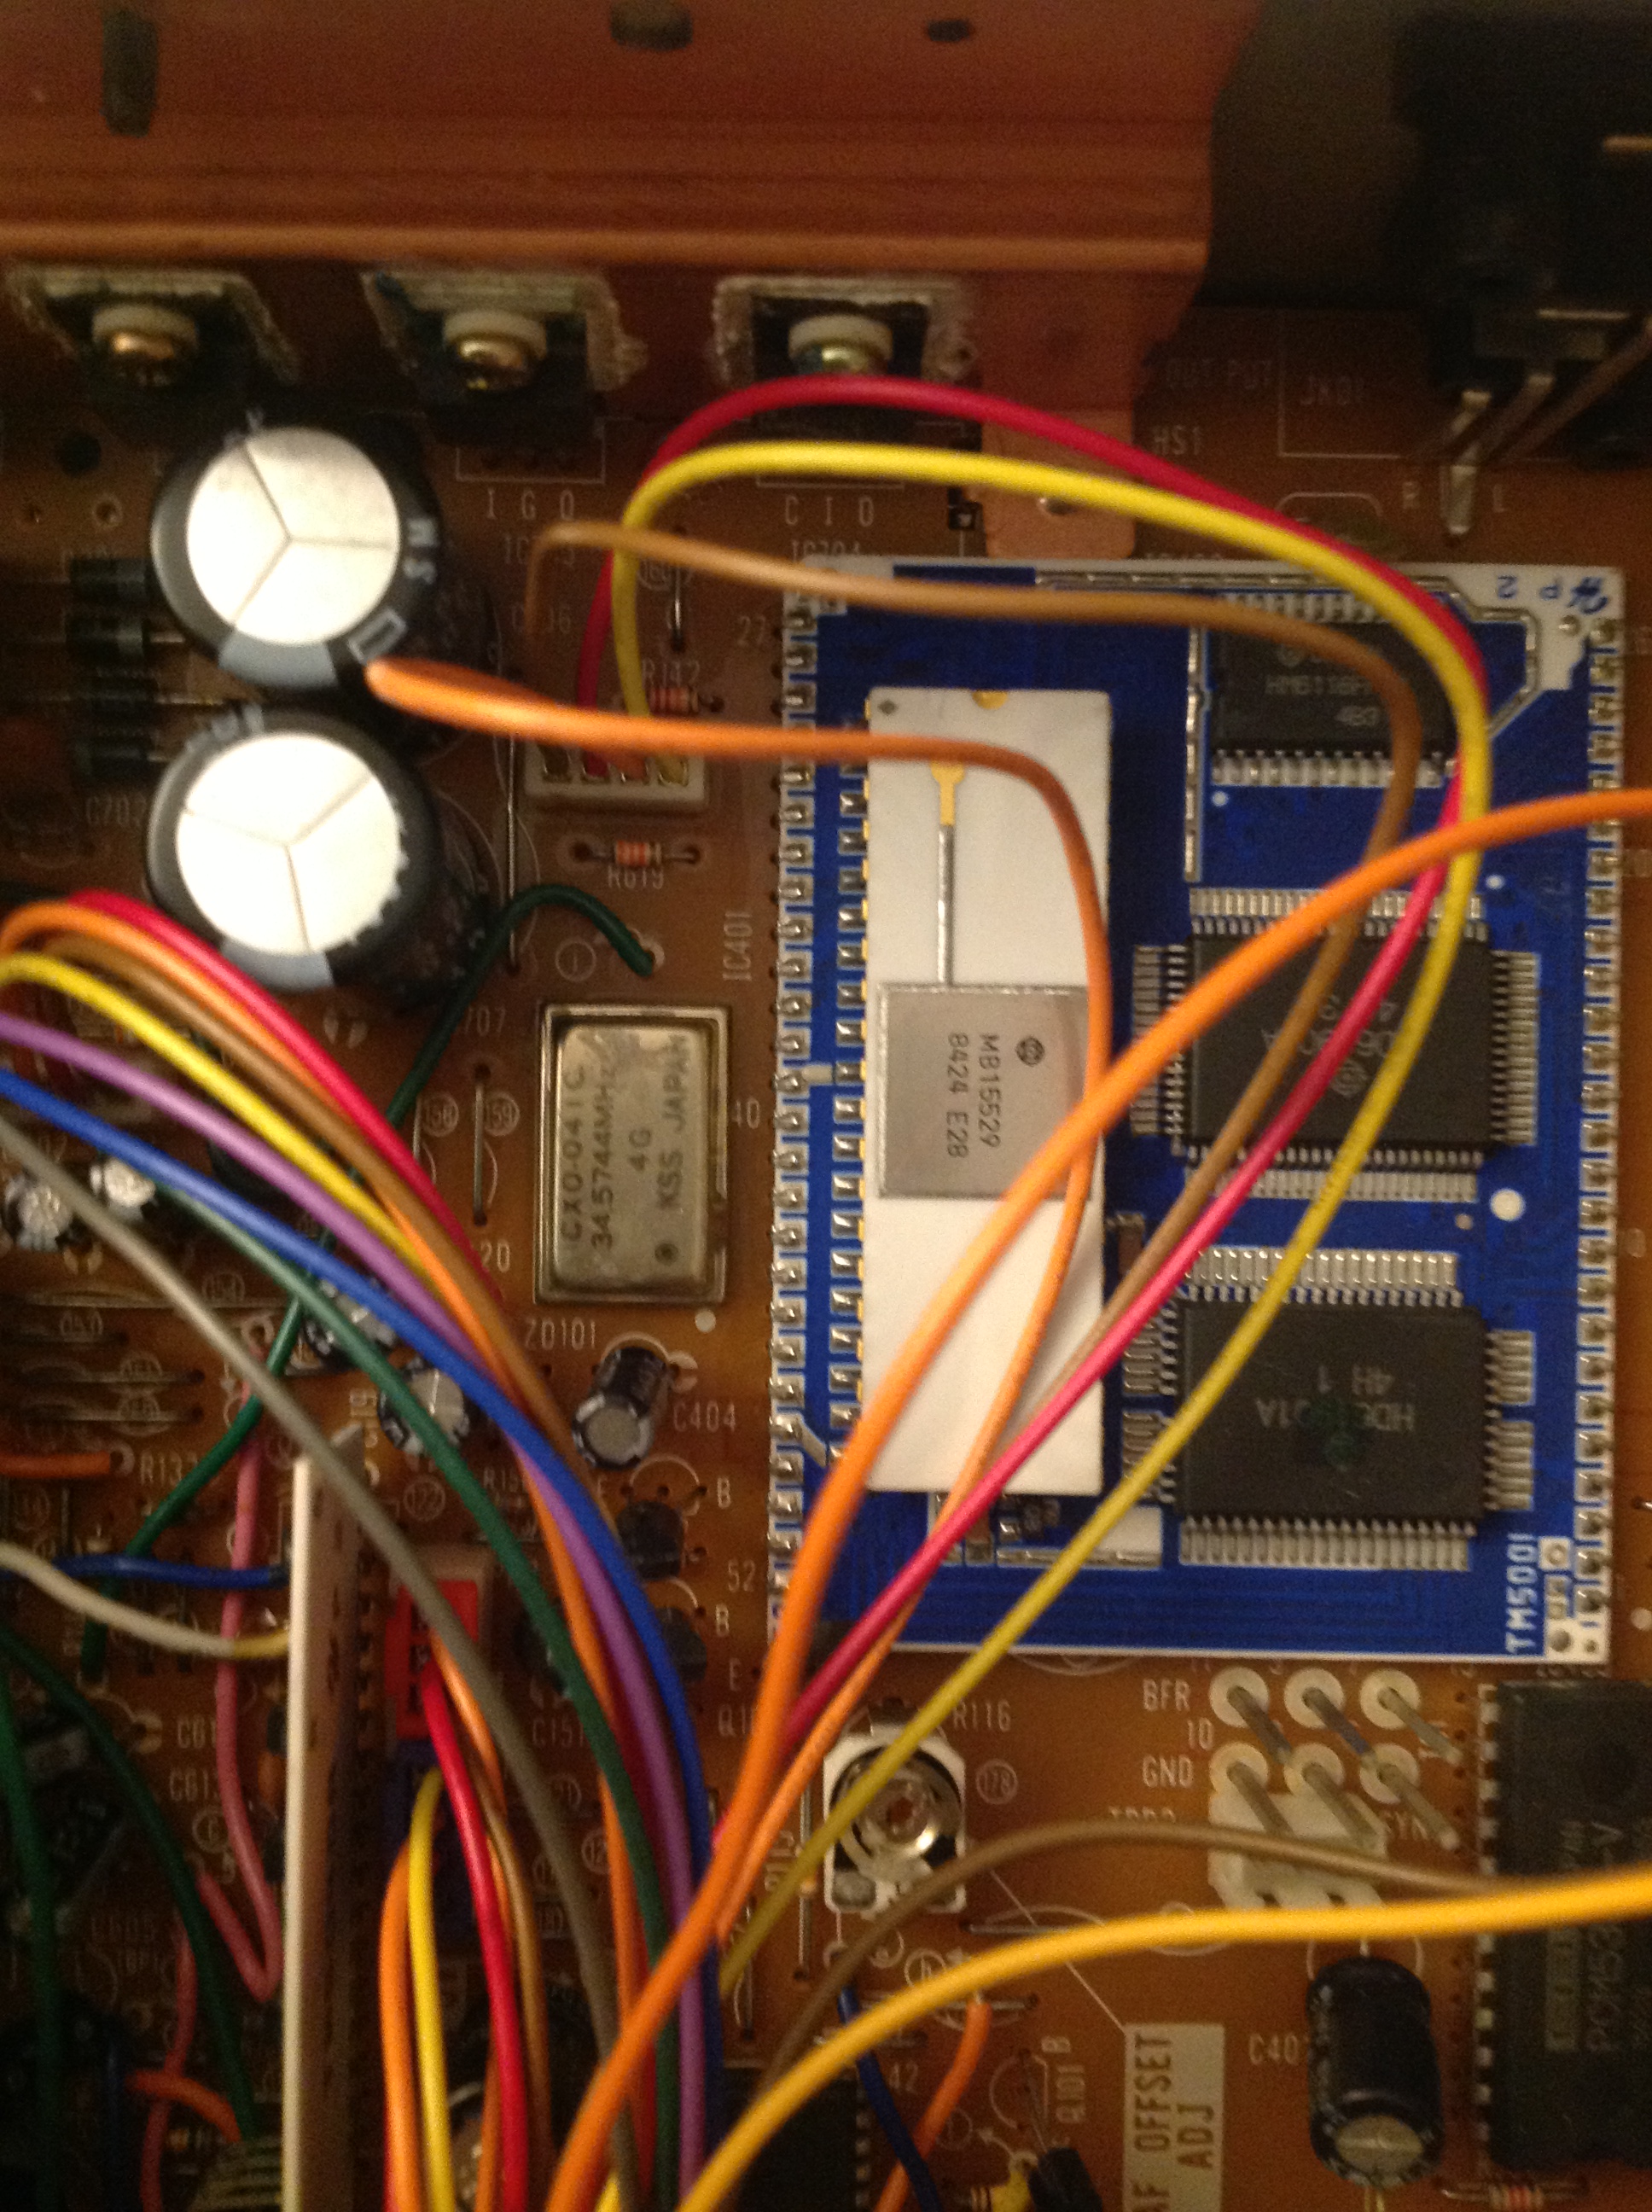
Notice that both players used the MB15529 chip. Those two other chips next to it also look similar. The description of those chips is in French, but Google Translate tells me that the MB15529 decodes the bitstream into frames and the HD60901H does error conversion. Basically, these chips are the digital portion after the drive reads the bits and before the DAC turns them into analog sound.
The DAC used in the Realistic player is a 16-bit Burr Brown PCM53JP-V DAC.
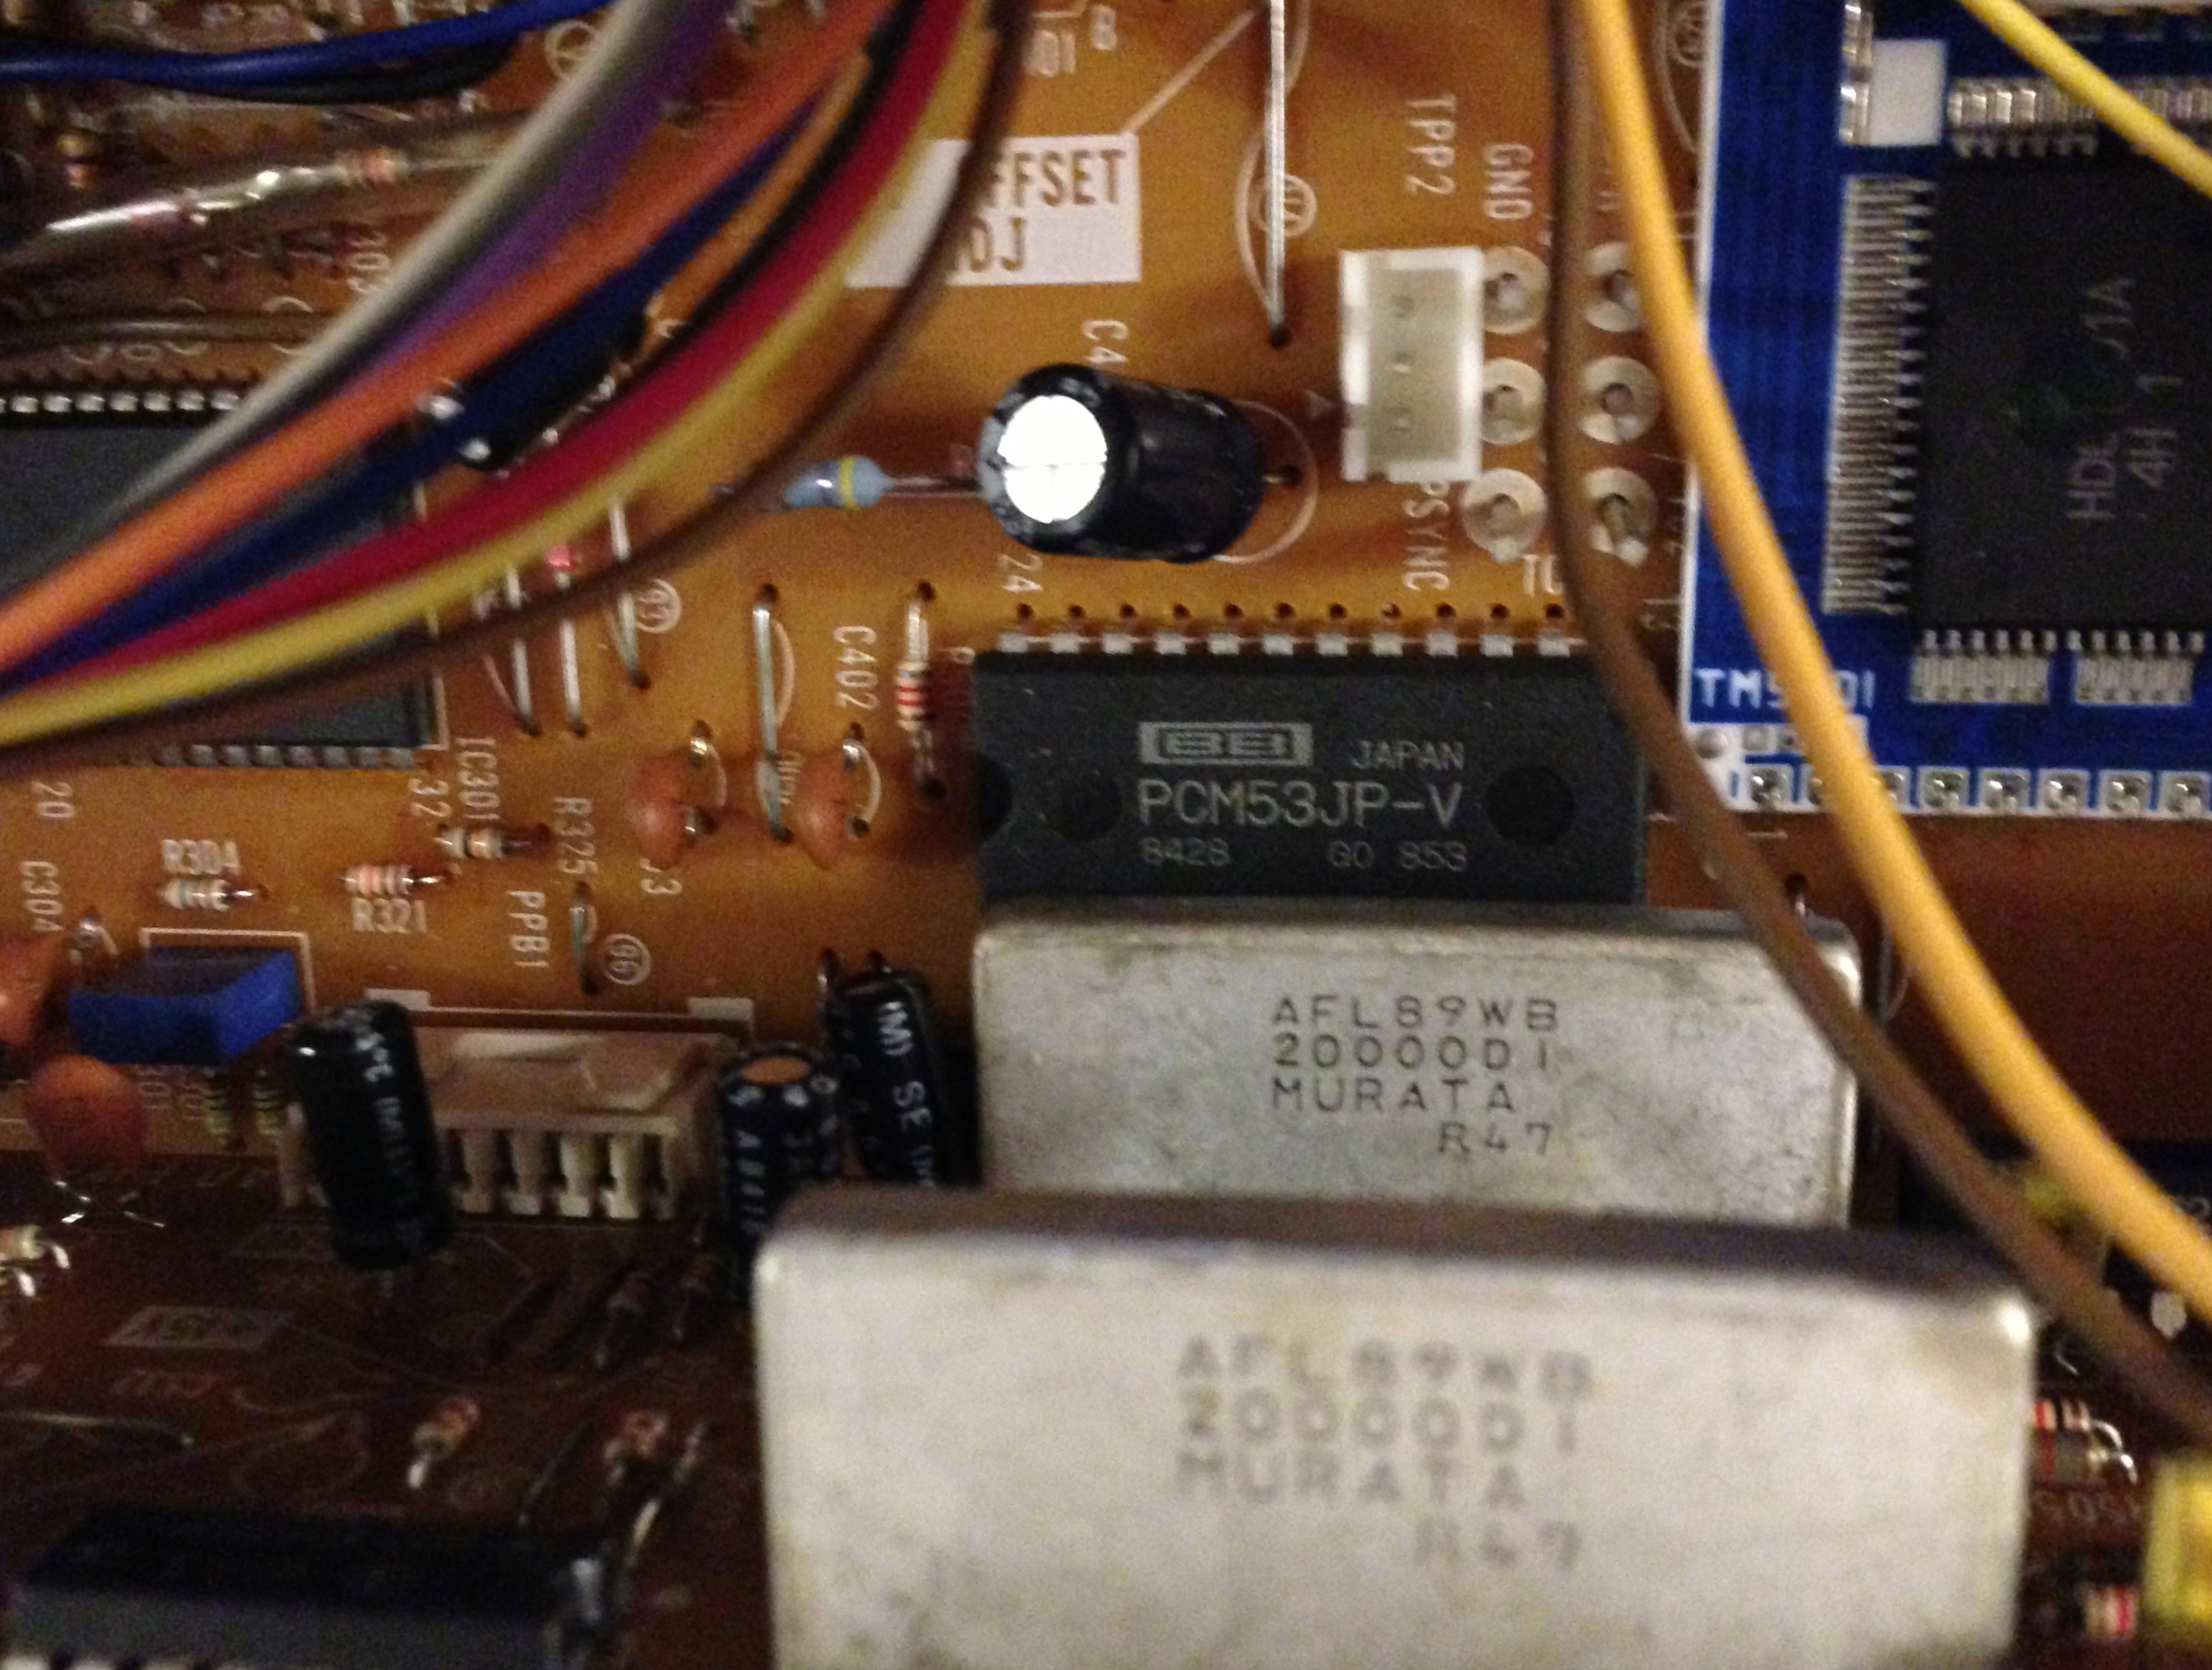
It sounds like this was a common chip in pro audio equipment in the 1980s. It also looks like they’re even still in demand today to repair old gear. The Burr Brown DAC is probably why this unit sounds so good today.
From what I can gather the first generation of CD players like the famous Sony CDP-101 was from 1982-1983. By 1984-1985 when my CD-1000 debuted the hardware was settling down a bit.
This raises an interesting point about the CD-1000. Even at the time, this was an austere player. The design was pretty low-key compared to something like that over-the-top Hitachi DA-1000 I linked to above. The CD-1000 had no headphone input, no remote control, and a basic (but beautiful) display. On the other hand, the CD-1000 debuted at $400 which was probably more affordable than most players at the time. And yet, Radio Shack and Hitachi did not skimp on components, since the guts look comparable to the DA-1000.

It’s interesting to see how the designers of the CD-1000 dealt with things that are commonplace today. For example, there is no next track button. What you do instead is hold play and press the fast forward or rewind button to skip a track. If you just hit the fast forward or rewind buttons it seeks rather than skipping. If you want to skip to track 12 you have to hit the 1 button, then the 2 button, and then press Play.
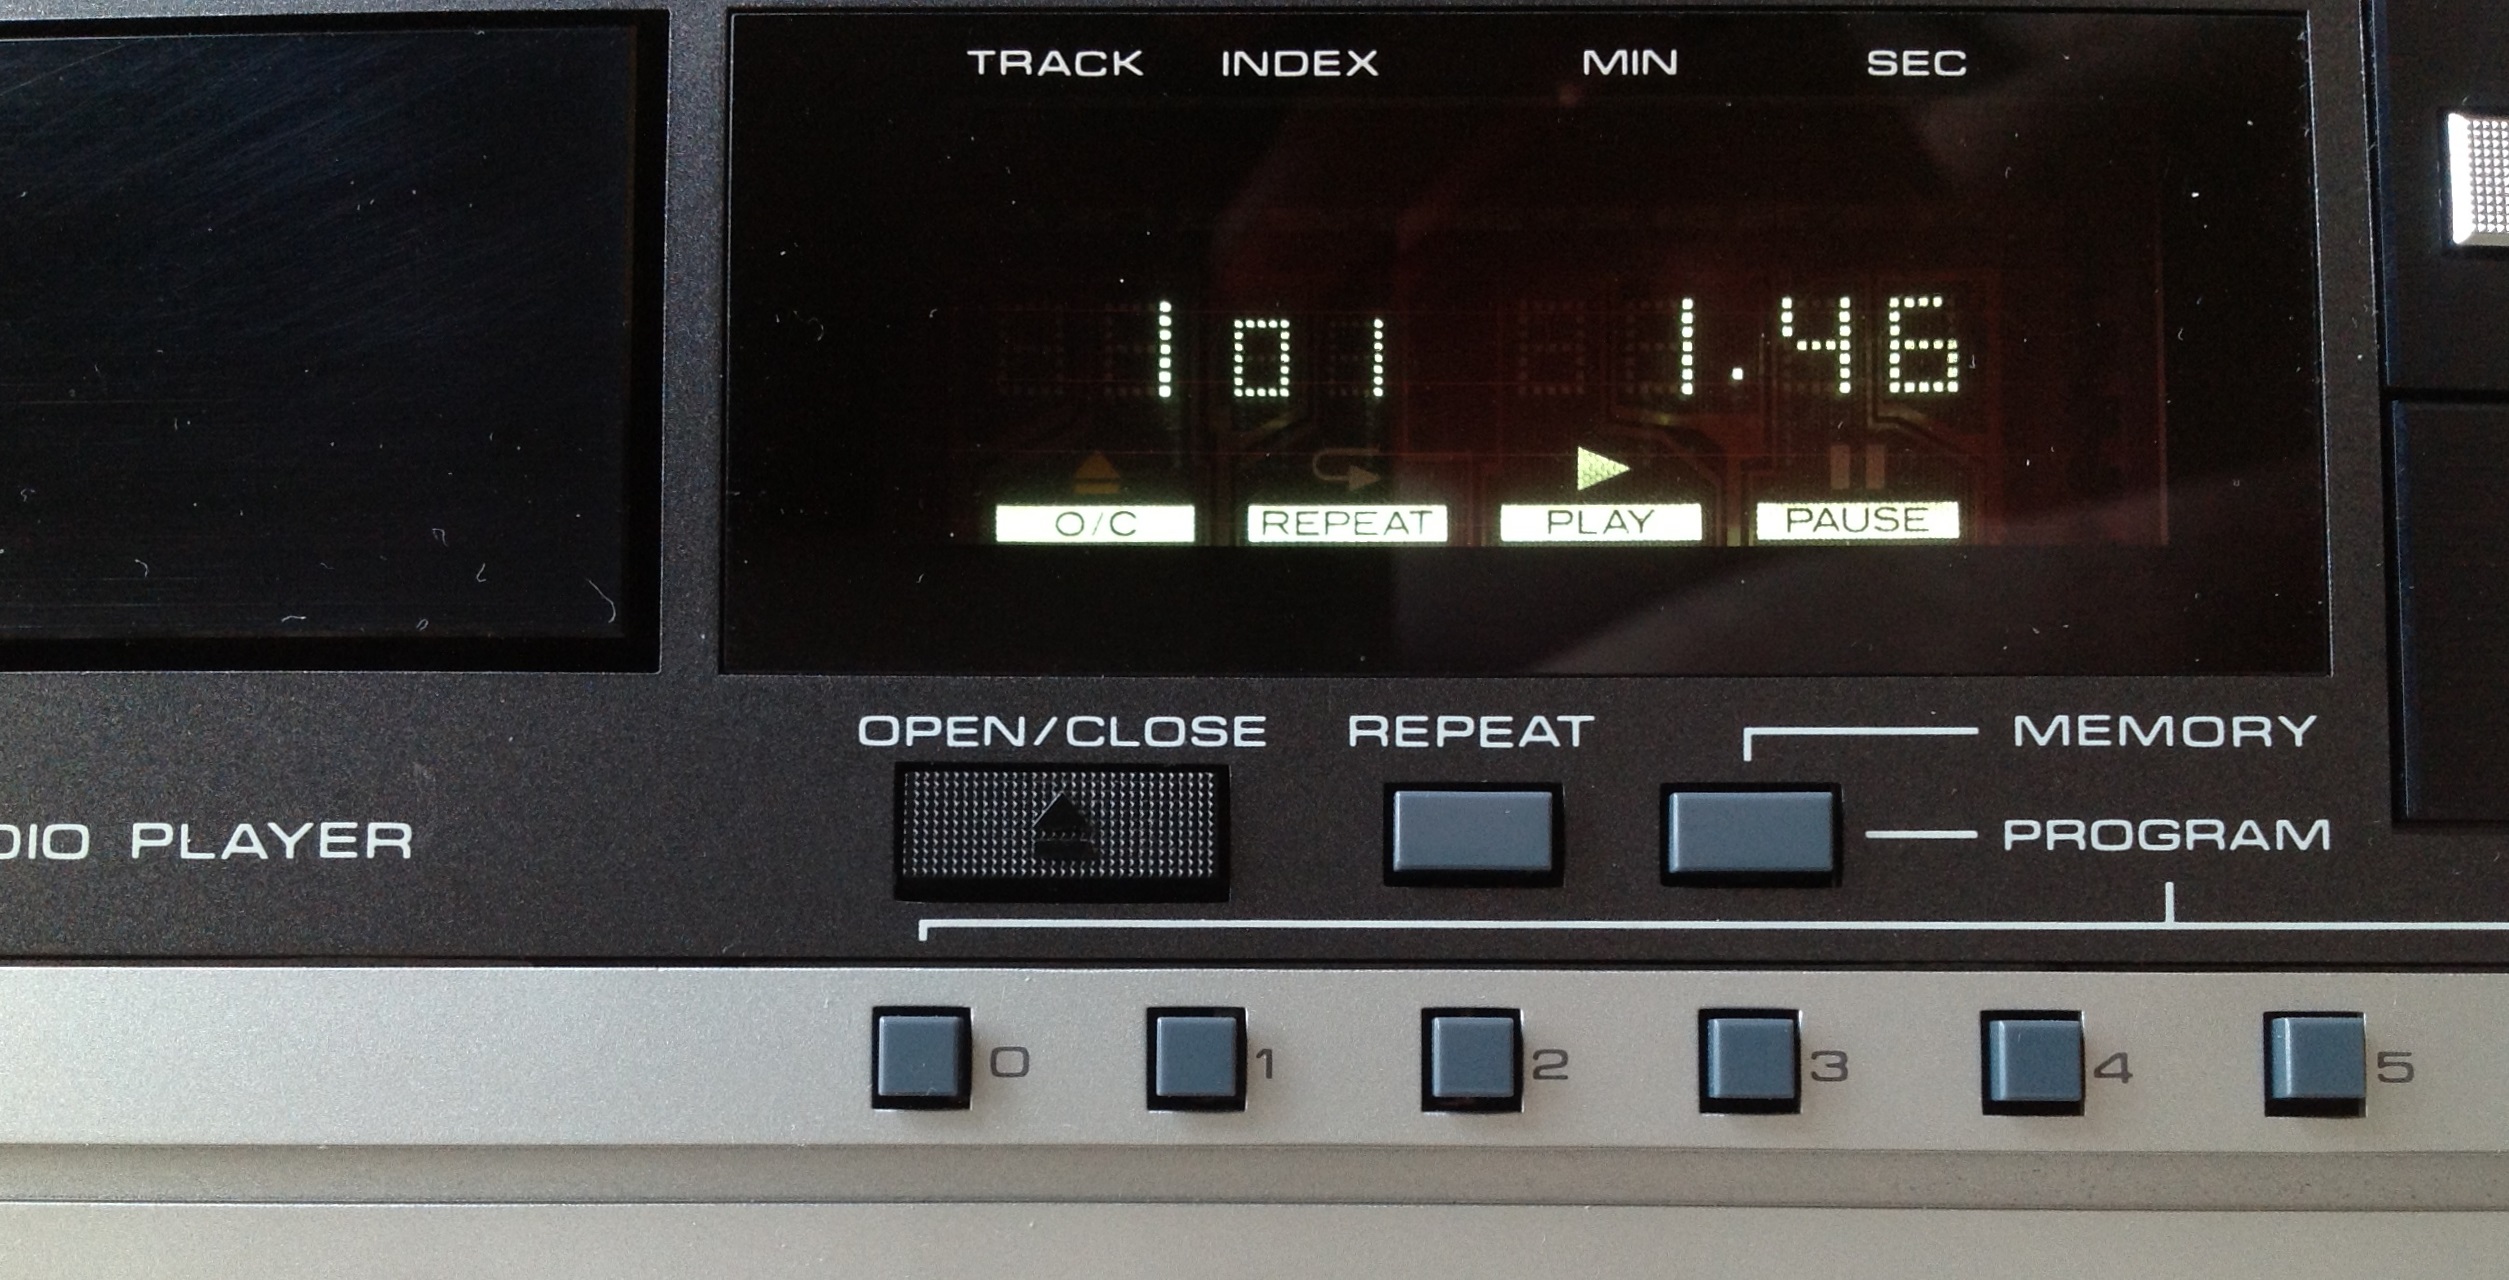
The display is a simple affair with lovely, bright florescent digits.
Listening to a CD player for the first time in 1984 must have been amazing. The 1980s were a time of electronic novelties. There were portable TVs, personal computers, various type of home video like Beta, VHS and LaserDisc, huge early cellular phones, etc. But, none of them could hold a candle to the shockingly great sound of a Compact Disc. No pops, no scratches, no tape hiss. Just clean sound with amazing dynamic range. Some of the pro-CD propaganda from that era was nonsense, such as how the discs were indestructible, but the promise of clean sound was true. The Compact Disc was the ultimate 1980s novelty.
Today, as people re-embrace vinyl we forget the lesson the CD player taught us: Analog is tyranny. That is to say that in analog audio there’s always some noise, always some distortion and all you can do is spend more money to minimize it. That’s awful, when you think about it. You can whine all you want about the loveliness of analog audio but what it meant was that a select few who could afford expensive hi-fi systems got to listen to great sound and everyone else got less than that. Yes, you can have a great record player that minimizes surface noise and produces spine-tingling sound, but if you can’t make it affordable and give it to the masses, what’s the point of that?
So, if you walked into a Radio Shack in late 1984 and were blown away listening to a CD-1000 for the first time you were hearing not a $5000 turntable but a $400 component you were much more likely to be able to afford.
I can appreciate that album artwork looks much, much better on an LP dust jacket. Fundamentally I think that’s why vinyl is coming back into fashion now. It’s the beautiful artwork. There’s also a readily understandable beauty to watching a vinyl disc spin with music coming out.
But we too often forget the beauty of digital audio. It wasn’t until I watched this fantastic video from Xiph.org (YouTube link if your browser doesn’t support WebM) about the common misconceptions about how digital audio works that I realized how fortunate we are to have had the CD and 16-bit/44.1KHz PCM digital audio. The most surprising thing about the video is how Monty explains that human ears don’t really need anything better than 16/44 because 16/44 can reproduce any frequency we can hear. I had always assumed that more bits and more samples would mean better audio, but that’s not the case. Given two sampled points at a 44.1KHz sample rate there is only a single waveform that fits those points that is within the range of human hearing. The 16-bit sample depth already produces a dynamic range that exceeds the range of our ear’s sensitivity and a noise floor that is inaudible. We will never need anything greater than 16/44 with the speaker technology we possess today and the ears we will always possess.
The compact disc was unwittingly the last physical consumer electronics audio format. The depth of the 16/44 format meant that there will never be another format that sounds better to most people. For playback, there’s no need to go further.
More importantly though, by pressing hundreds of millions of discs full of unencrypted 16/44 PCM, the industry laid the groundwork for the future. Bits are inherently portable. Get those bits off of the CD and they can go anywhere and be physically stored in a drive of any size.
What’s killing the CD now is the tyranny of space. Storing discs takes up space. Players take up space. With digital the beauty is that the music is in the bits, and not the physical medium (which is how digital defeated analog in the first place). You can make digital storage basically as small as you want. But the polycarbonate disc never matter in the first place. What mattered are the bits. And they are likely to live forever.
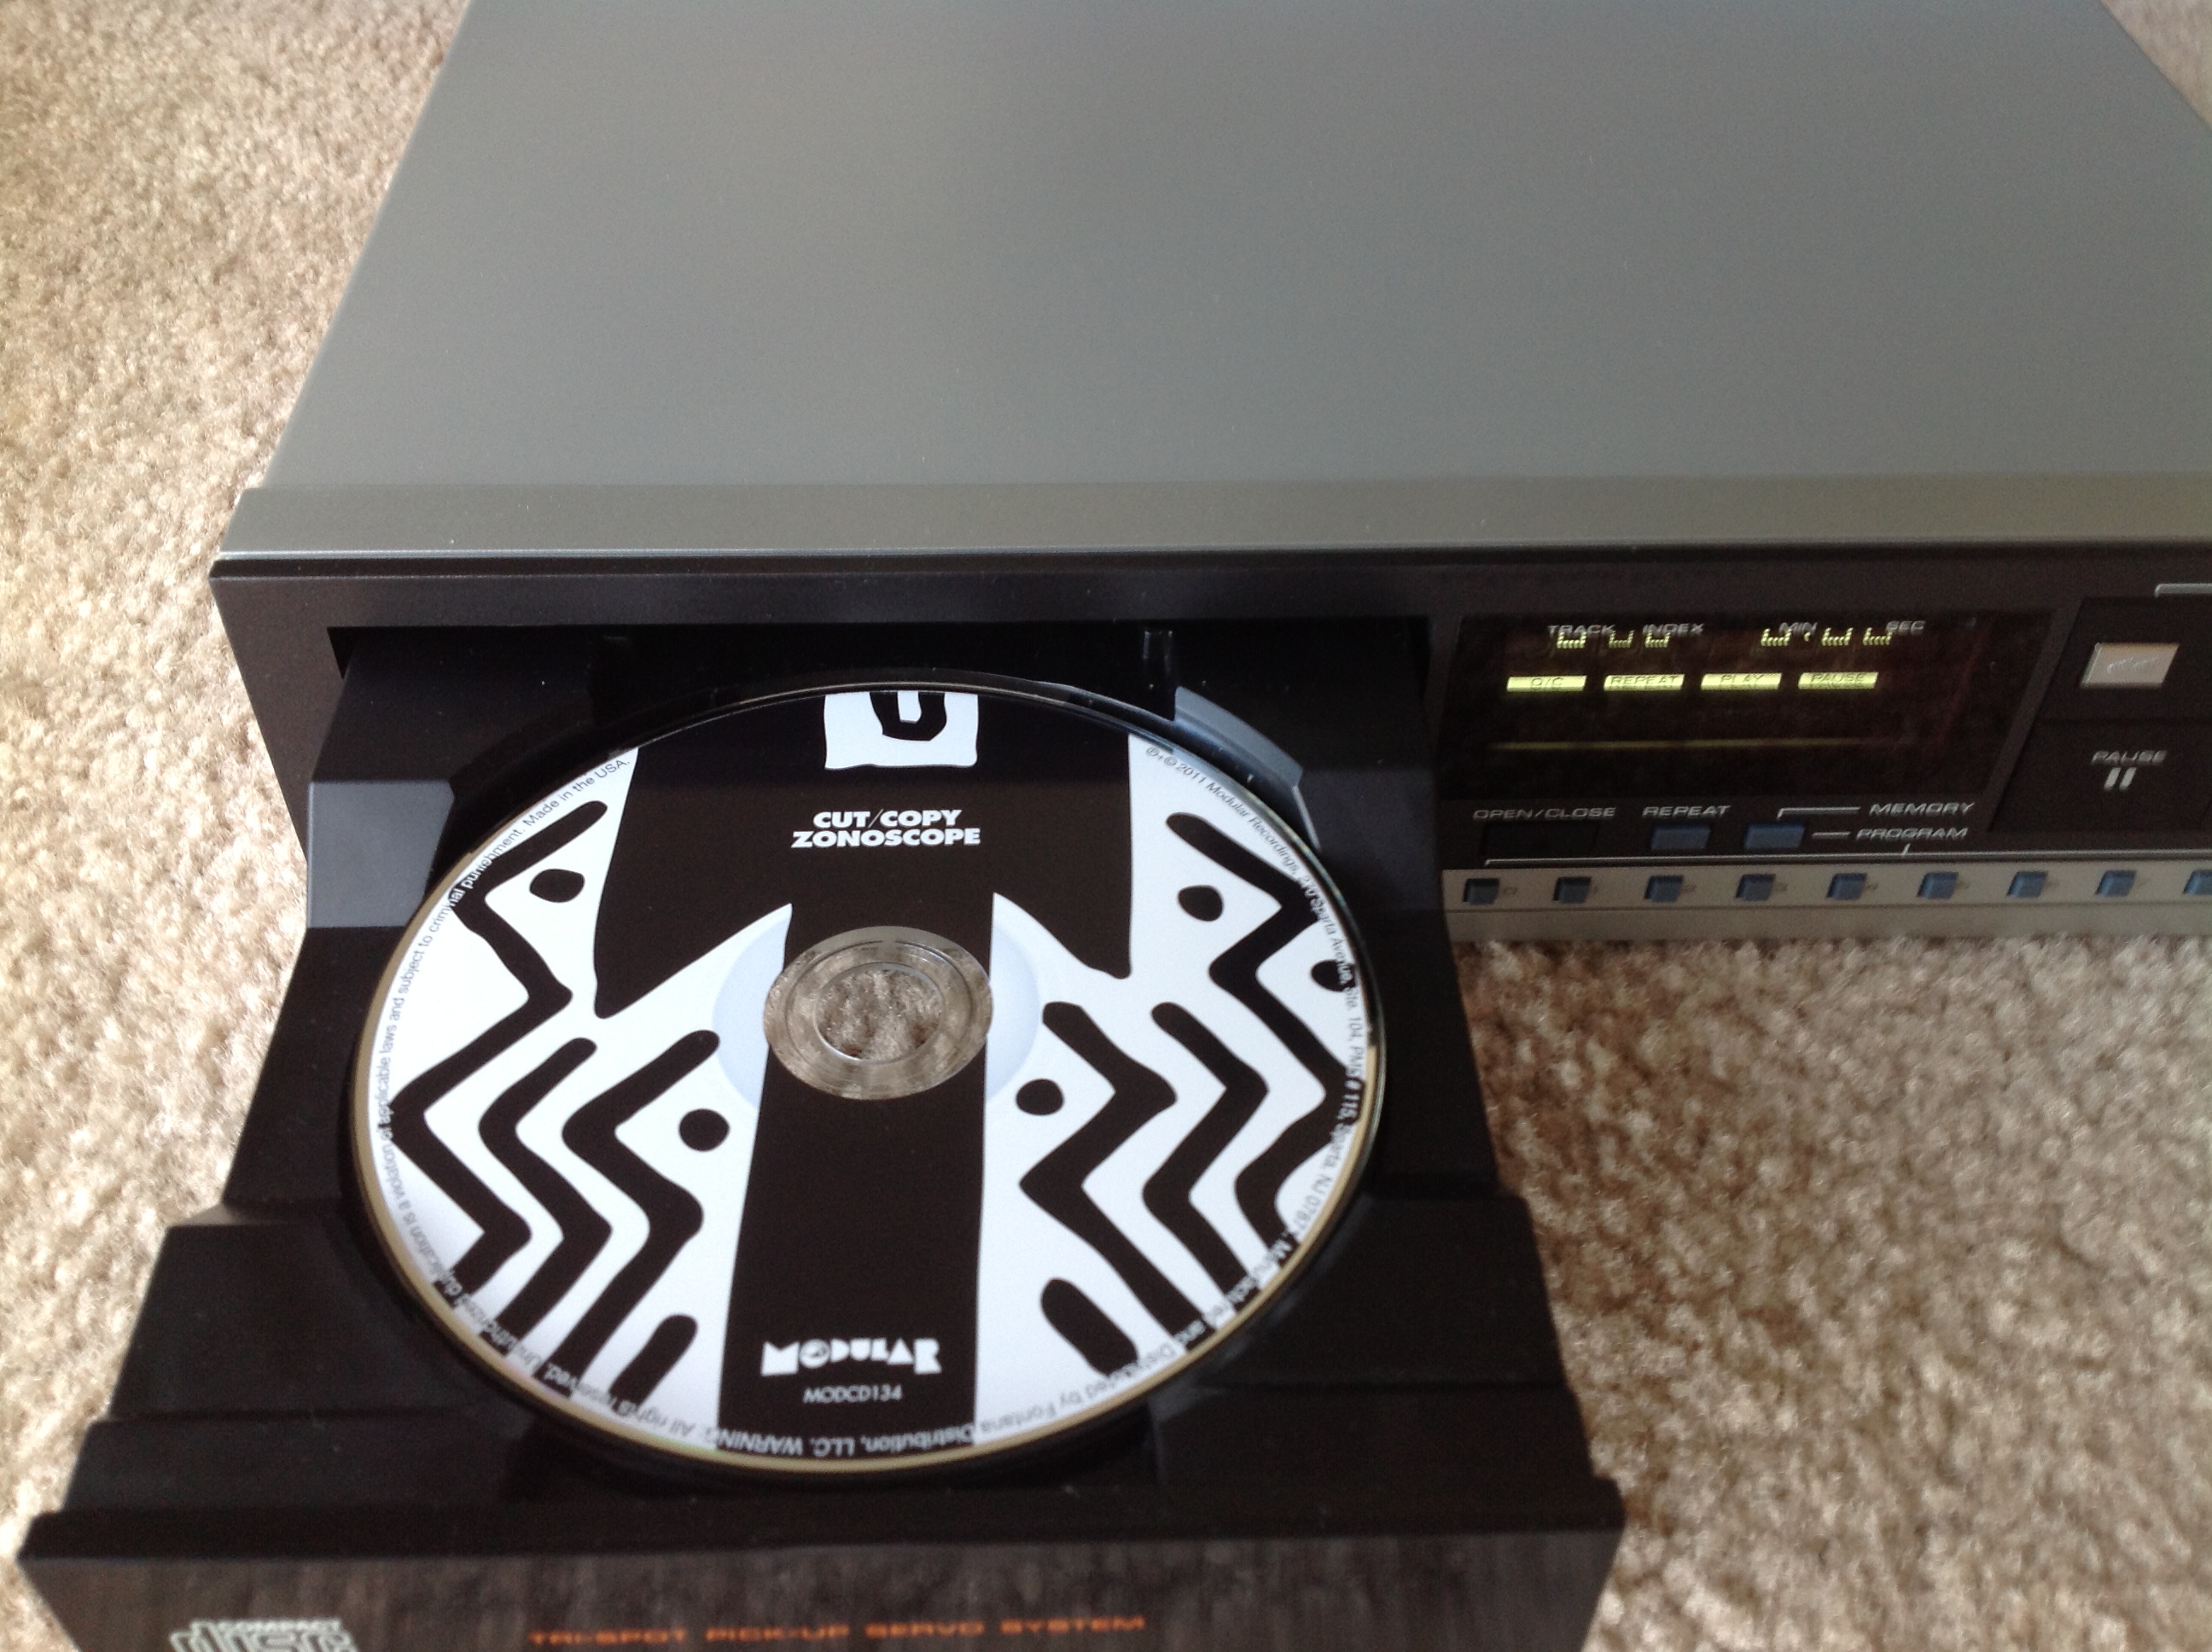
A CD player from the 1980s with an album that badly wishes it was from the 1980s.
Sega Genesis Nomad
This is my Sega Nomad, the portable version of the venerable Sega Genesis videogame console, introduced in 1995. I don’t remember which thrift store I found it at, but it’s likely to have been the old State Road Goodwill, sometime in the early 2000s.

The Genesis is better known as “the Sega” (as in, “remember when were were kids and played Sega at your house?”) than by it’s real name. It was Sega’s one and only true hardware success.

By the end of the 1980s through a combination of quality first party games and tight control of third party publishers Nintendo had come to dominate the home videogame console market. The Genesis broke Nintendo’s near monopoly and setup the first great “console war” of the 1990s. Powered by the venerable Motorola 68000 CPU (which also powered the Apple Macintosh and is one of the great CPUs of all time) the Genesis was home to Sonic the Hedgehog, edgy fighting games, and popular sports games.

While they were riding high on the success of the Genesis in the early to mid 1990s Sega made some bizarre decisions about videogame hardware that damaged their relationship with consumers in the years to follow.
There are a lot of companies that you come to find out 20 years later had design concepts or prototypes for ideas that seemed really cool but in retrospect were probably best left on the drawing board. These drawings for Atari computers that never were and these Apple prototype designs come to mind. There are probably sound reasons why these things were never produced for sale. In Sega’s case, they actually produced some of their bizarre ideas and basically every one of them was either an embarrassing failure or was received with apathy by the public.
When you consider the numbers of consoles and hardware add-ons for consoles that Sega either produced or licensed to other companies it’s staggering to think how much hardware they produced in such short a time between 1991 and 1995:
- There were two versions of the Sega CD that added better graphics and a CD-ROM to the Genesis.
- The Sega CDX that combined the Genesis and the Sega CD into one semi-portable console.
- The Sega 32X add-on for the Genesis that added somewhat pathetic 32-bit CPUs to extend the Genesis’s lifespan.
- An attachment for the Pioneer LaserActive that combined Genesis and Sega CD hardware with a LaserDisc player.
- The JVC X’Eye that was a combination Genesis and Sega CD console licensed to JVC.
- The Sega TeraDrive that somewhat unbelievably combined an 286-based PC and a Genesis.
The Nomad is another one of these bizarre hardware ideas. The technology of 1995 could not provide the Nomad with a crisp screen, a manageable size, or anything that could be considered better than horrendous battery life.
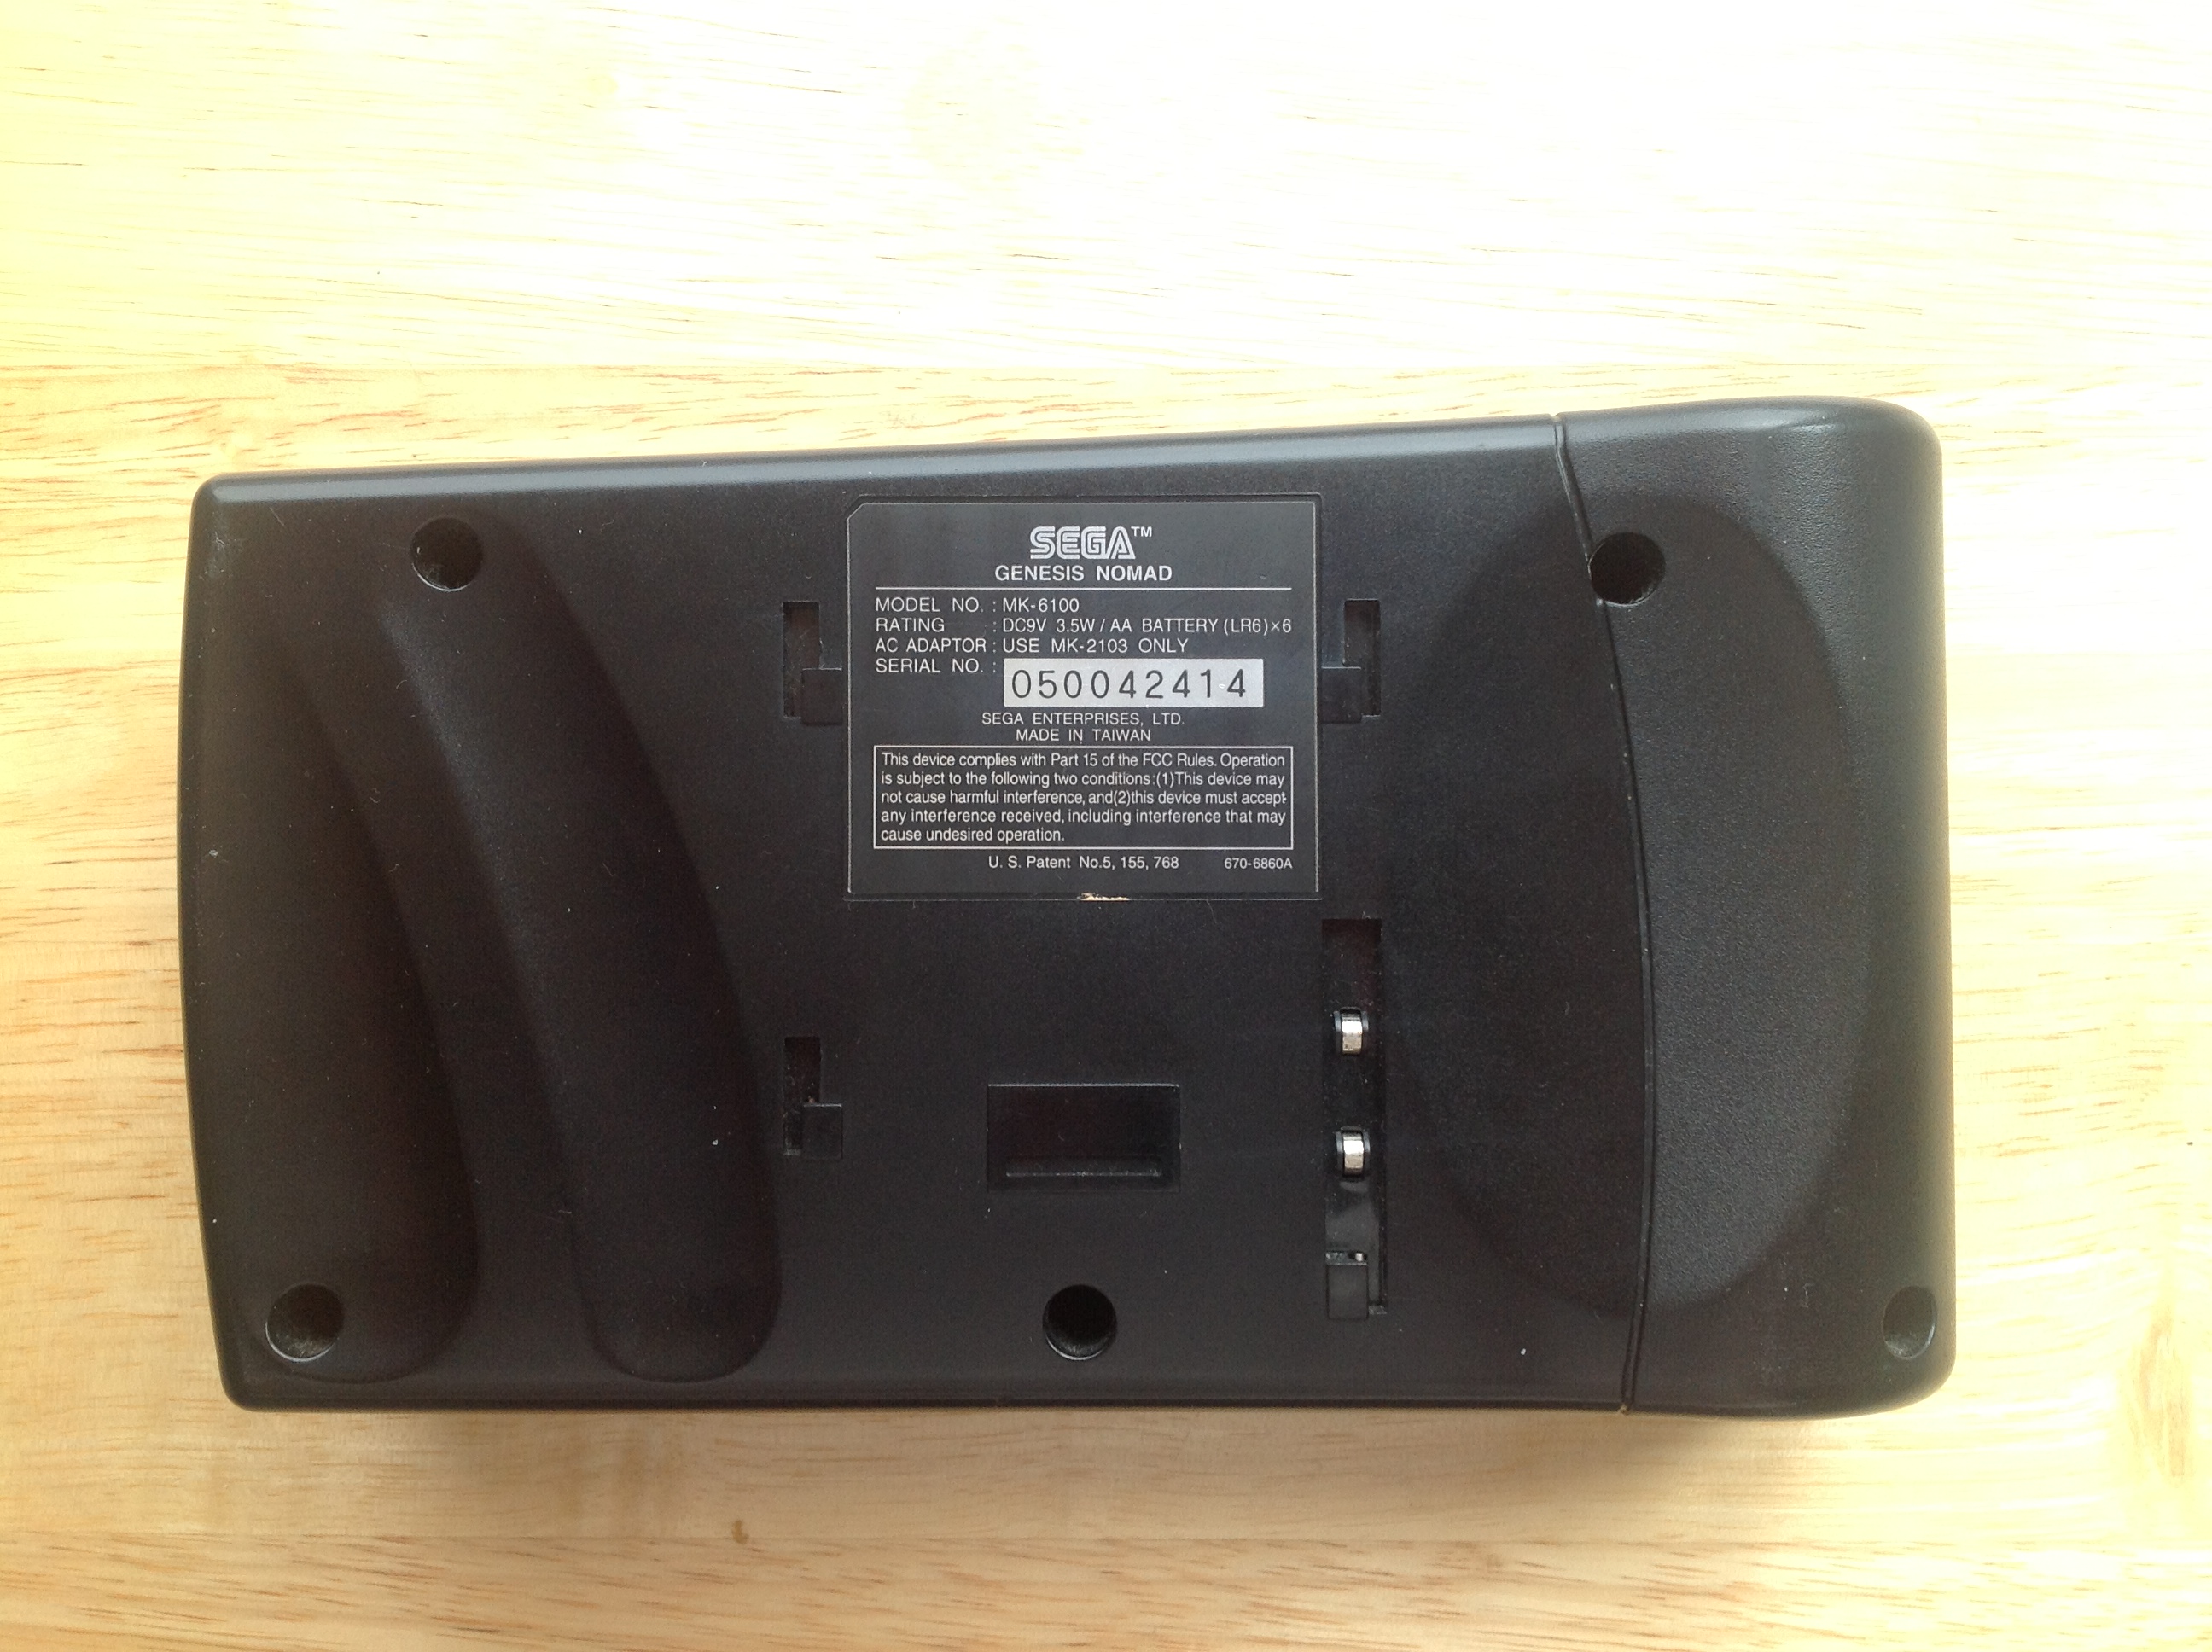
Here’s the back of the Nomad. Notice there is no battery compartment but there are contacts for a battery accessory. You were expected to attach an external battery pack to the back of the Nomad to actually use it as a portable game system. Without the pack, the Nomad is already over 1.5 inches thick on it’s “thin” edge. I don’t have a battery pack so I can’t speak directly to what the weight and battery life are like with the pack installed, but you read phrases like “the low battery light told you when the Nomad was on” and “horrendous” to describe the battery life.
The Nomad’s screen, while much better at producing color at the Casio TV-1000 I blogged about in February, has some serious issues with ghosting. As you can imagine, this is an issue with games like Sonic the Hedgehog that have fast movement.


Oddly, the blurring actually does a good job at hiding the awful color dithering in Virtua Racing.

Apparently part of the cause of the Nomad’s notoriously poor battery life is the high voltage florescent backlight which also lights the screen in an uneven way.
If you had paid $180 for a Nomad in 1995 expecting a portable Genesis as advertised, you would have cause to be unhappy. In that respect, the Nomad was a failure.
The thing is though, is that if you just consider the Nomad to be a miniature, self-contained Genesis model, it’s pretty fantastic. The saving grace of the Nomad is that it has everything a Genesis has: An AV output, a second controller port, and a six button controller. I have several Genesis controllers and I dislike all of them. The buttons feel clunky and the D-pads feel mushy. The Nomad’s controls seem much sharper. I like the smooth, convex buttons on the Nomad much better than the rough, concave buttons on most Genesis controllers.


Now, you can’t use the Nomad with the 32X (because the AV output that’s necessary to connect to the 32X is covered up by the bulk of the 32X) or the Sega CD (because the Nomad lacks the necessary expansion port) but in all other respects it IS a Genesis. It uses the same AV cables and the same power brick as the Genesis Mark 2 model. If you want to collect Genesis cartridges and play them on a real Genesis but you lack space for a real Genesis in your residence, the Nomad is for you. You would do yourself a favor though, by plugging it into a TV (especially a late-model CRT TV).
One problem the Nomad shares with the Genesis Mark 2 is that the connection between the power input and the PCB board can become weakened causing the Nomad to randomly shut off or not turn on at all. My Nomad had this problem until my father opened up the unit and re-solderer the power input’s connection to the PCB. One of the five screws on the back of the unit is a security screw, so safely cut that screw post, which does not affect the structure of the case at all.
If you really, really want to use the Nomad as a portable Genesis there are mods available to help. One mod replaces the florescent backlight with an LED for significantly improved battery life but otherwise stock appearance. Another mod replaces the mid-90s vintage LCD with a modern LCD for improved screen clarity.
![]()
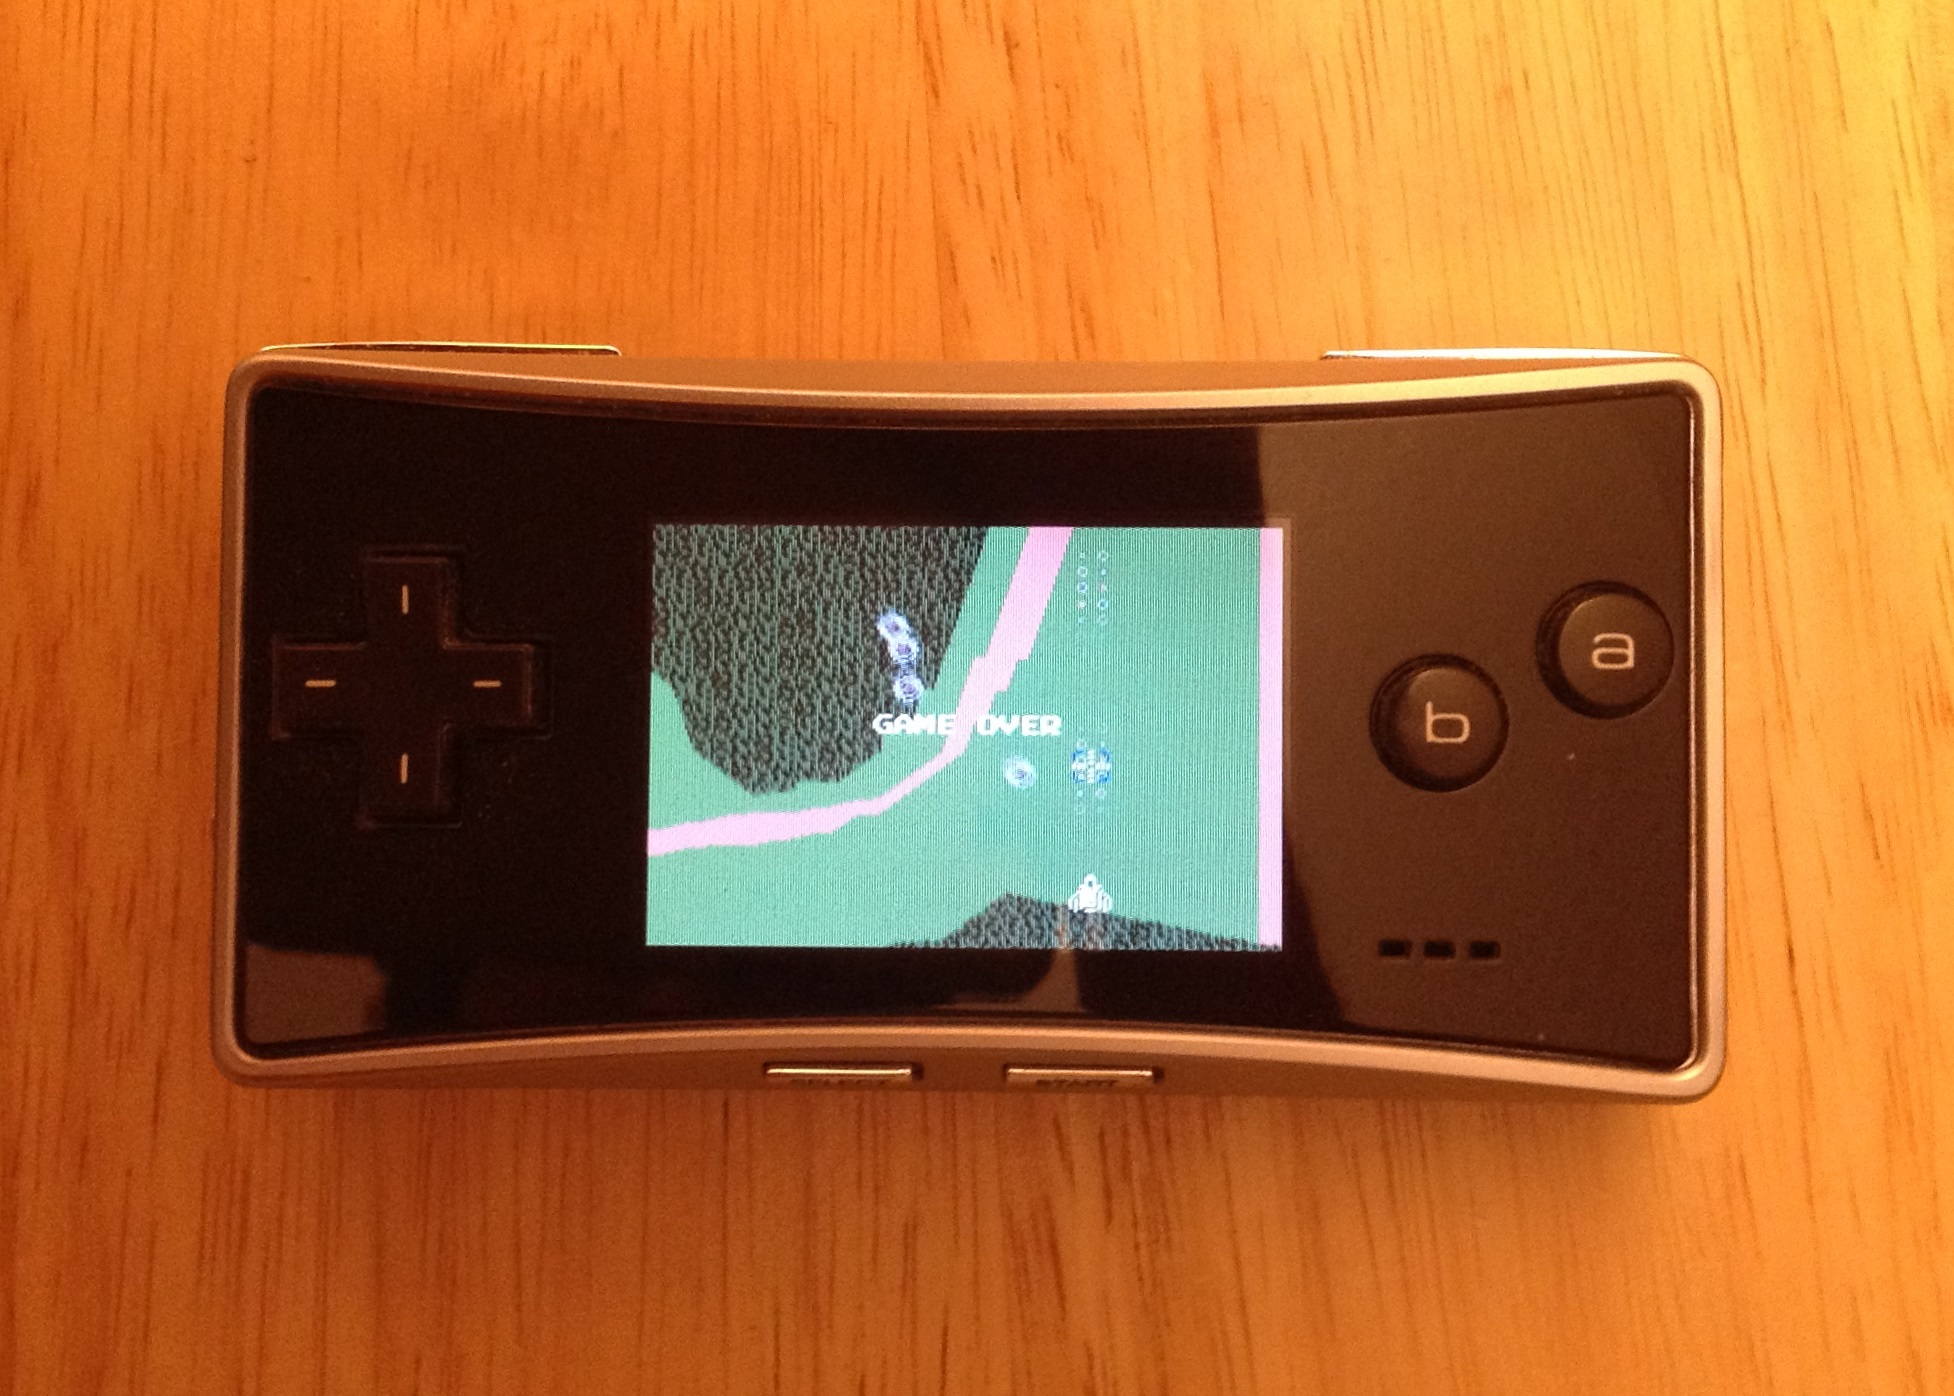
Nintendo Game Boy Micro
I had originally planned to put up a different post this week but some technical issues and the fact that I had a cold means that post will have to wait for some other week.
Today though, I’m going to bend the rules somewhat because this is an item that technically I didn’t buy at a thrift store but I did buy used.
This is my Nintendo Game Boy Micro which I purchased sometime in 2008 at The Exchange in Cuyahoga Falls.

Released in 2005, the Game Boy Micro is a miniaturized Game Boy Advance that loses compatibility with original Game Boy and Game Boy Color games but gained a brilliant (if tiny) screen and a headphone jack that the Game Boy Advance SP oddly lacked..
The Game Boy Micro is, in my opinion, the sexiest piece of videogame hardware ever created. It’s so tiny and jewel-like while at the same time so utterly minimalistic that it just looks better than anything else Nintendo, or perhaps anyone making portable game systems has ever made. It’s not surprising looking at it’s brushed metal construction that the Micro was a contemporary of the iPod Mini and was widely believed to be Nintendo’s bid to capture customers looking for another stylish portable gizmo. It’s so beautiful that you almost feel bad inserting a cartridge because it clashes with the color scheme.
Practially the Micro can be a bit tough to hold for any long period of time. The tiny size (it only measures 50×101×17.2 mm) means that in order to have your index fingers on the shoulder buttons and your thumbs on the D-pad and a+b buttons there’s a good chance you’ll have to hold your hands at an uncomfortable angle. I have pretty small hands and holding the Micro is just about at the edge of discomfort for me. Additionally, while the screen is bright and the colors are well defined the screen is still just 2 inches wide.
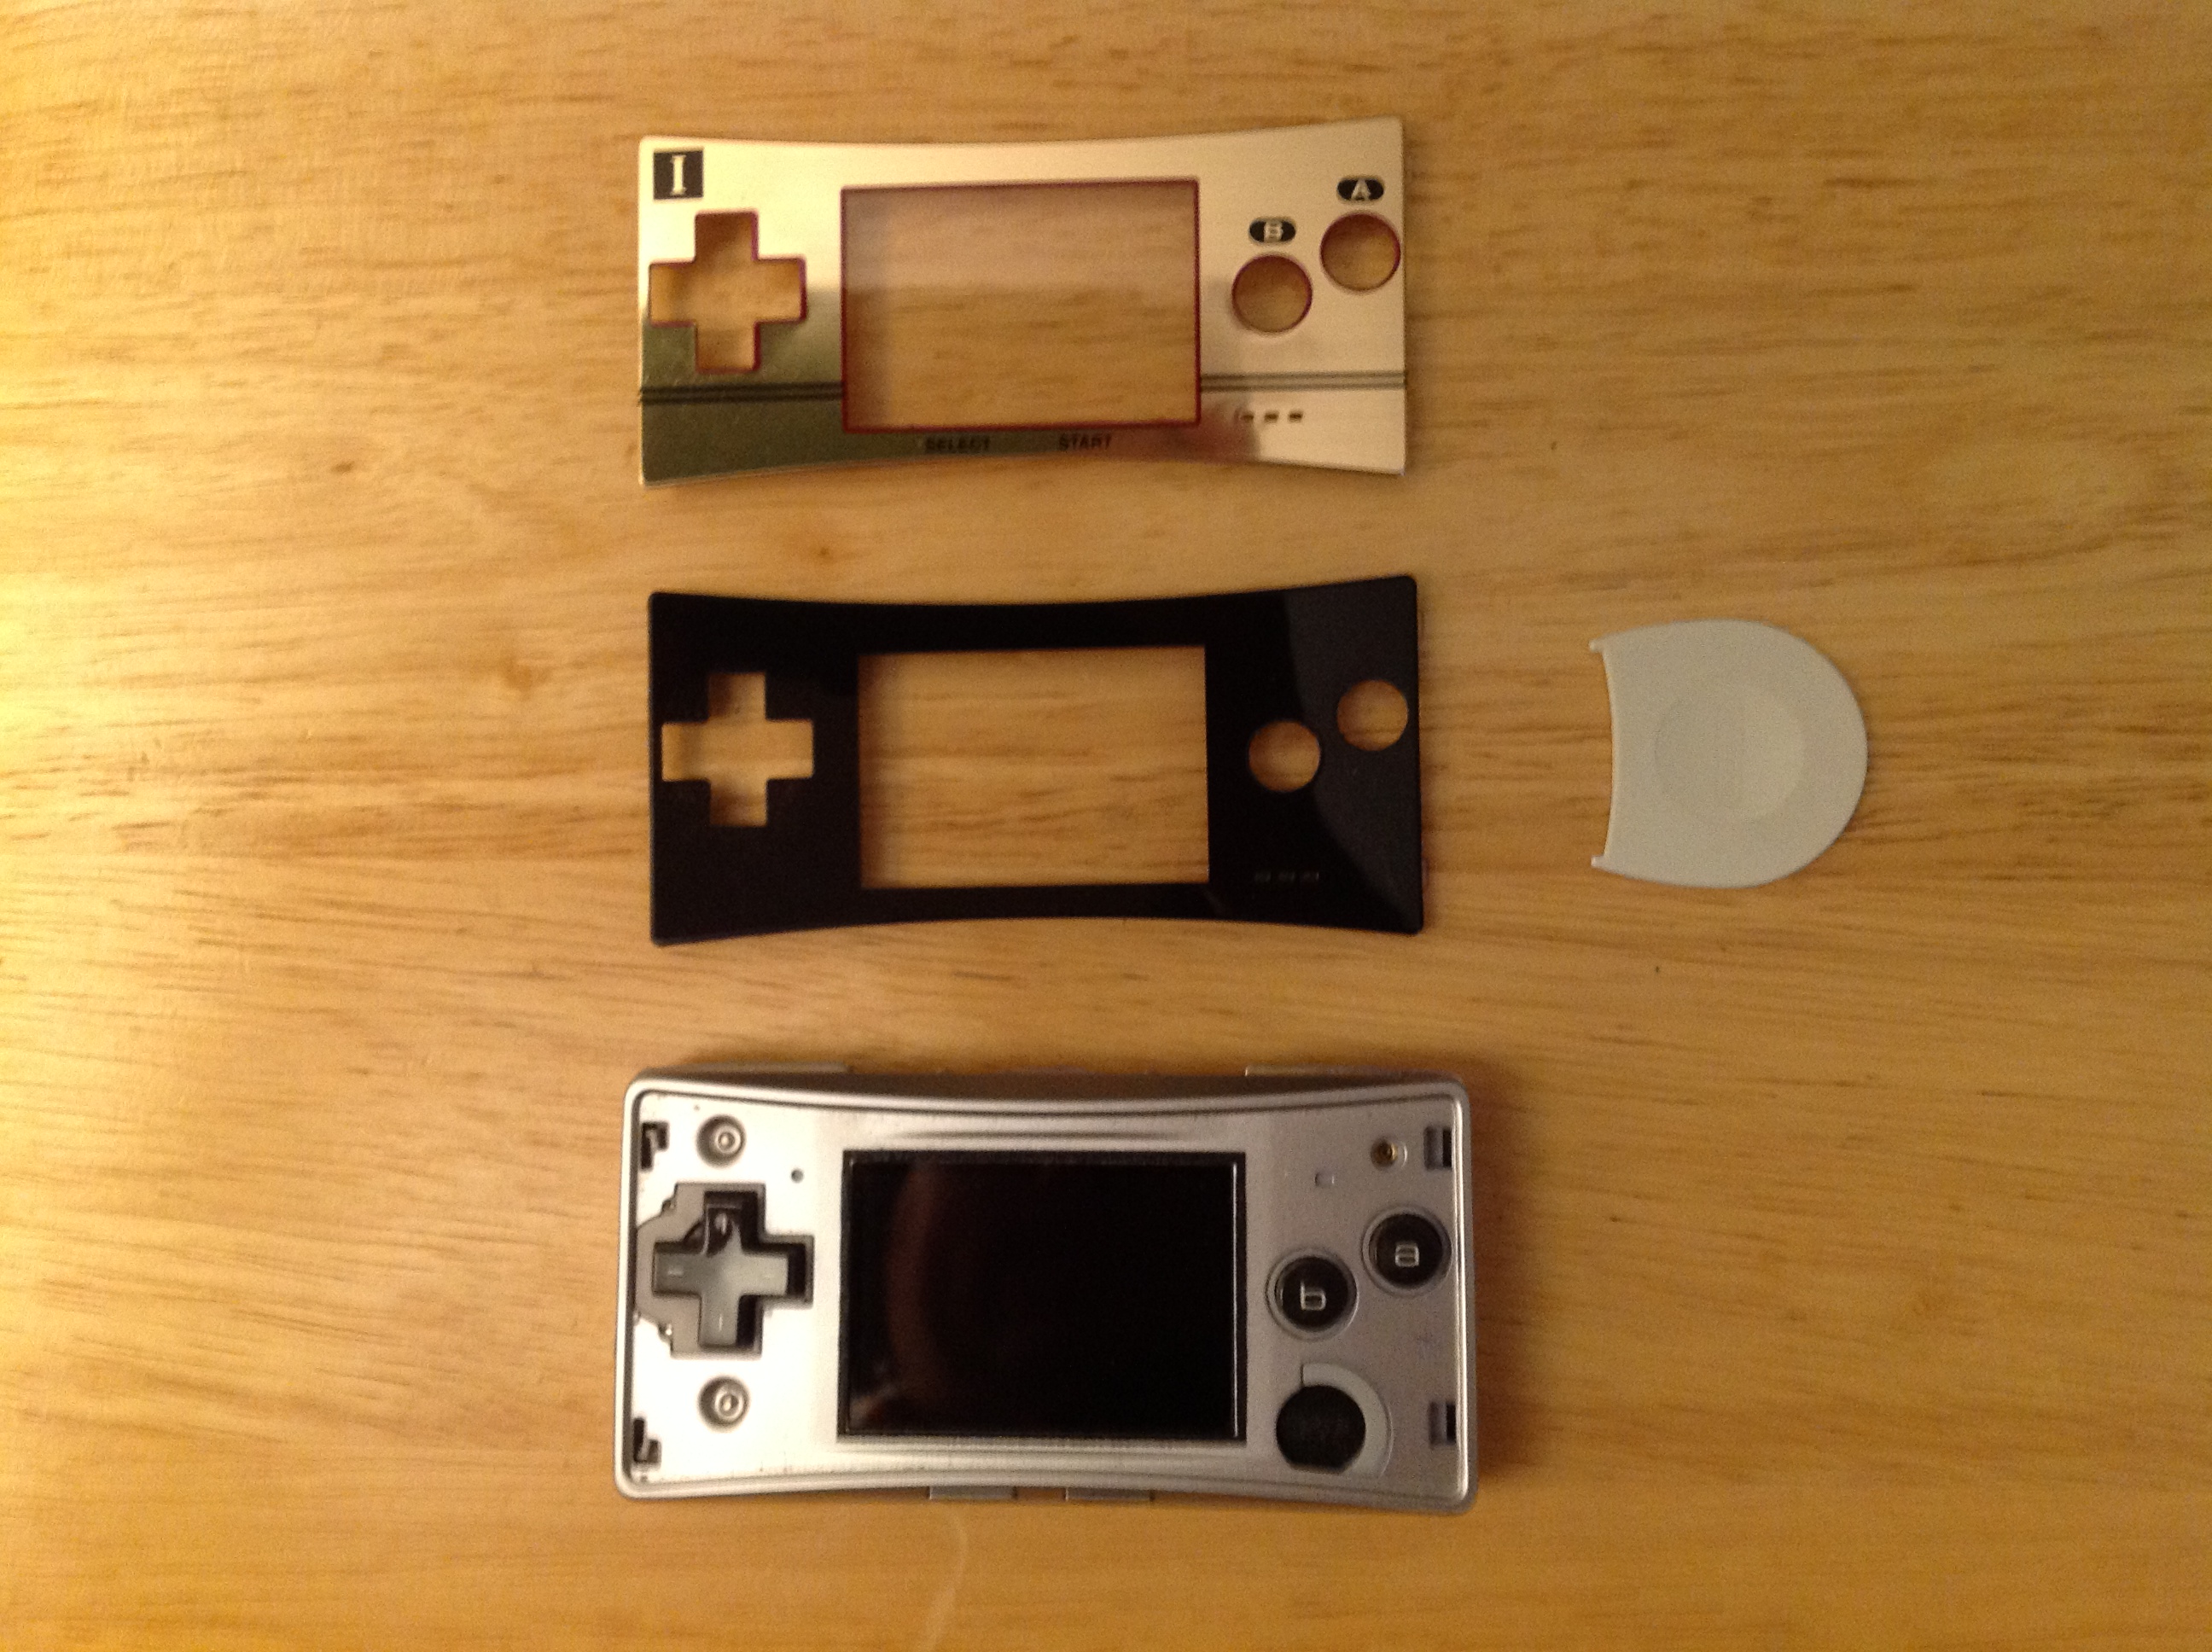
The Micro’s party piece is that it’s faceplates are removable so you can change the appearance of the system by changing faceplates with a plastic tool.
Here are the three faceplates I own, along with the plastic tool:
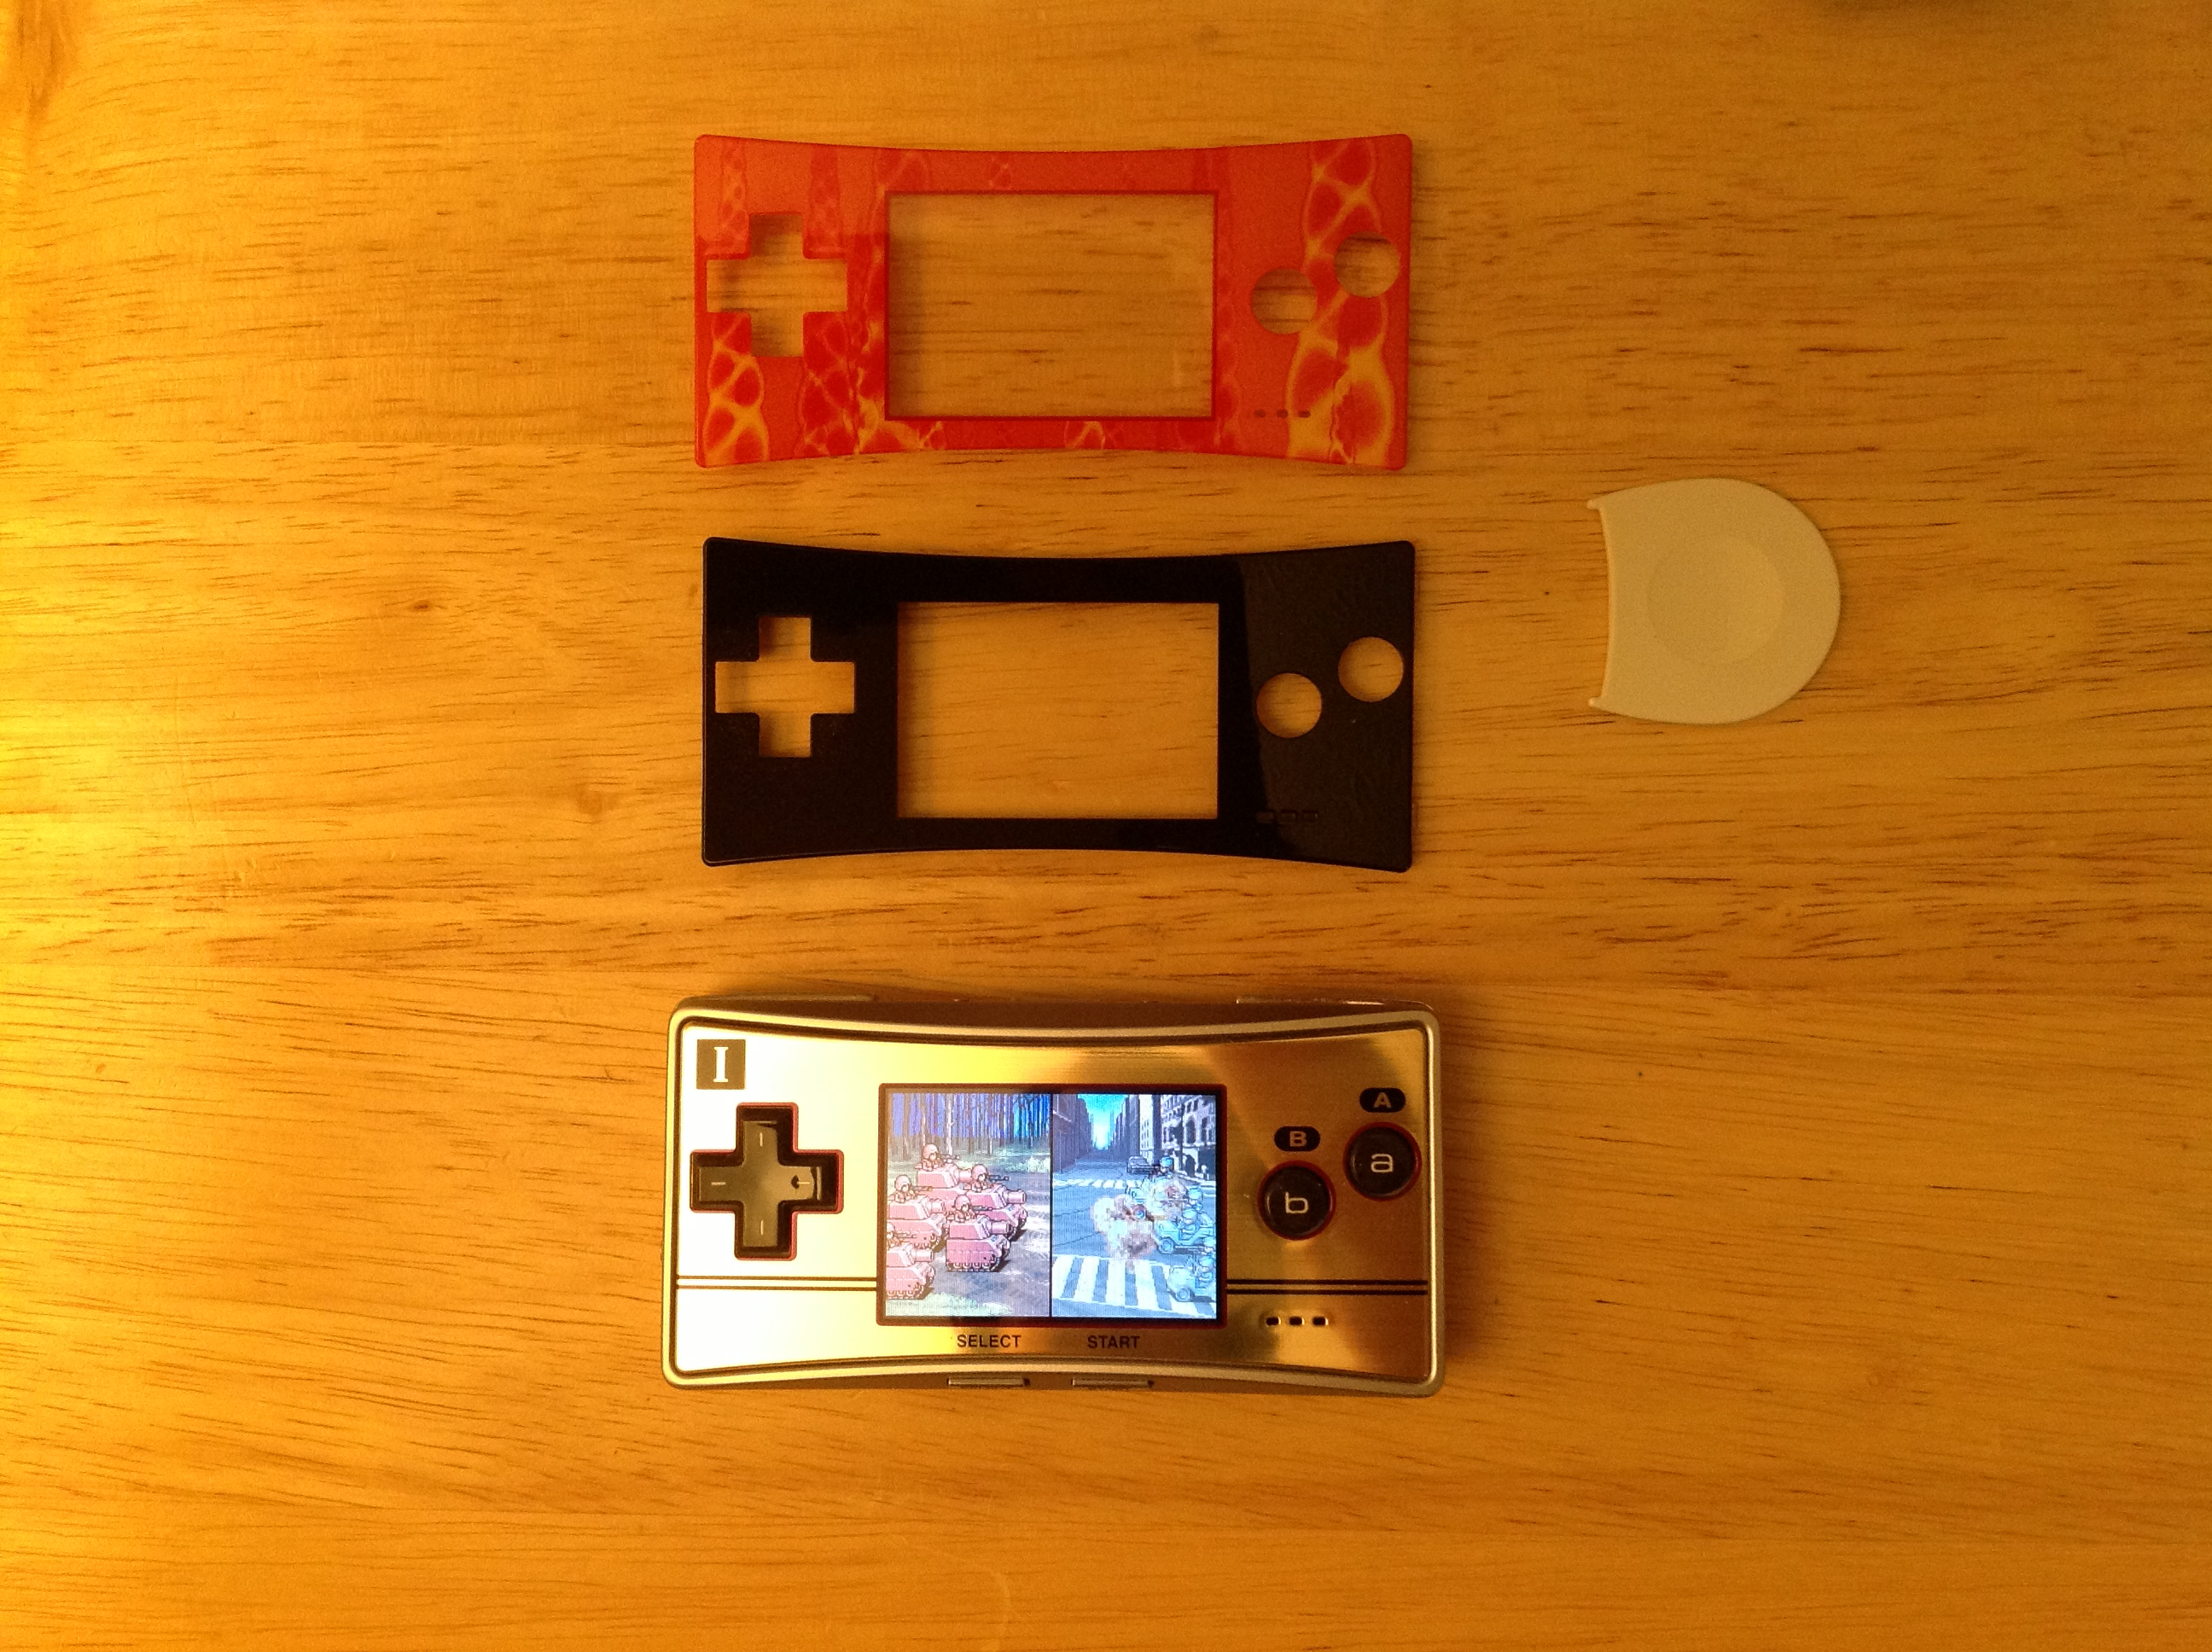
I believe that when I bought the Micro used it was wearing the obnoxious red/orange faceplate. Back in 2008 you could still order new faceplates from Nintendo’s parts site so I bought the stylish black plate and the nostalgic Famicom faceplate. Sadly today they only offer replacement AC-adaptors.
The plastic tool inserts into these two holes on the side of the Micro with the D-pad (on either side of the screw):
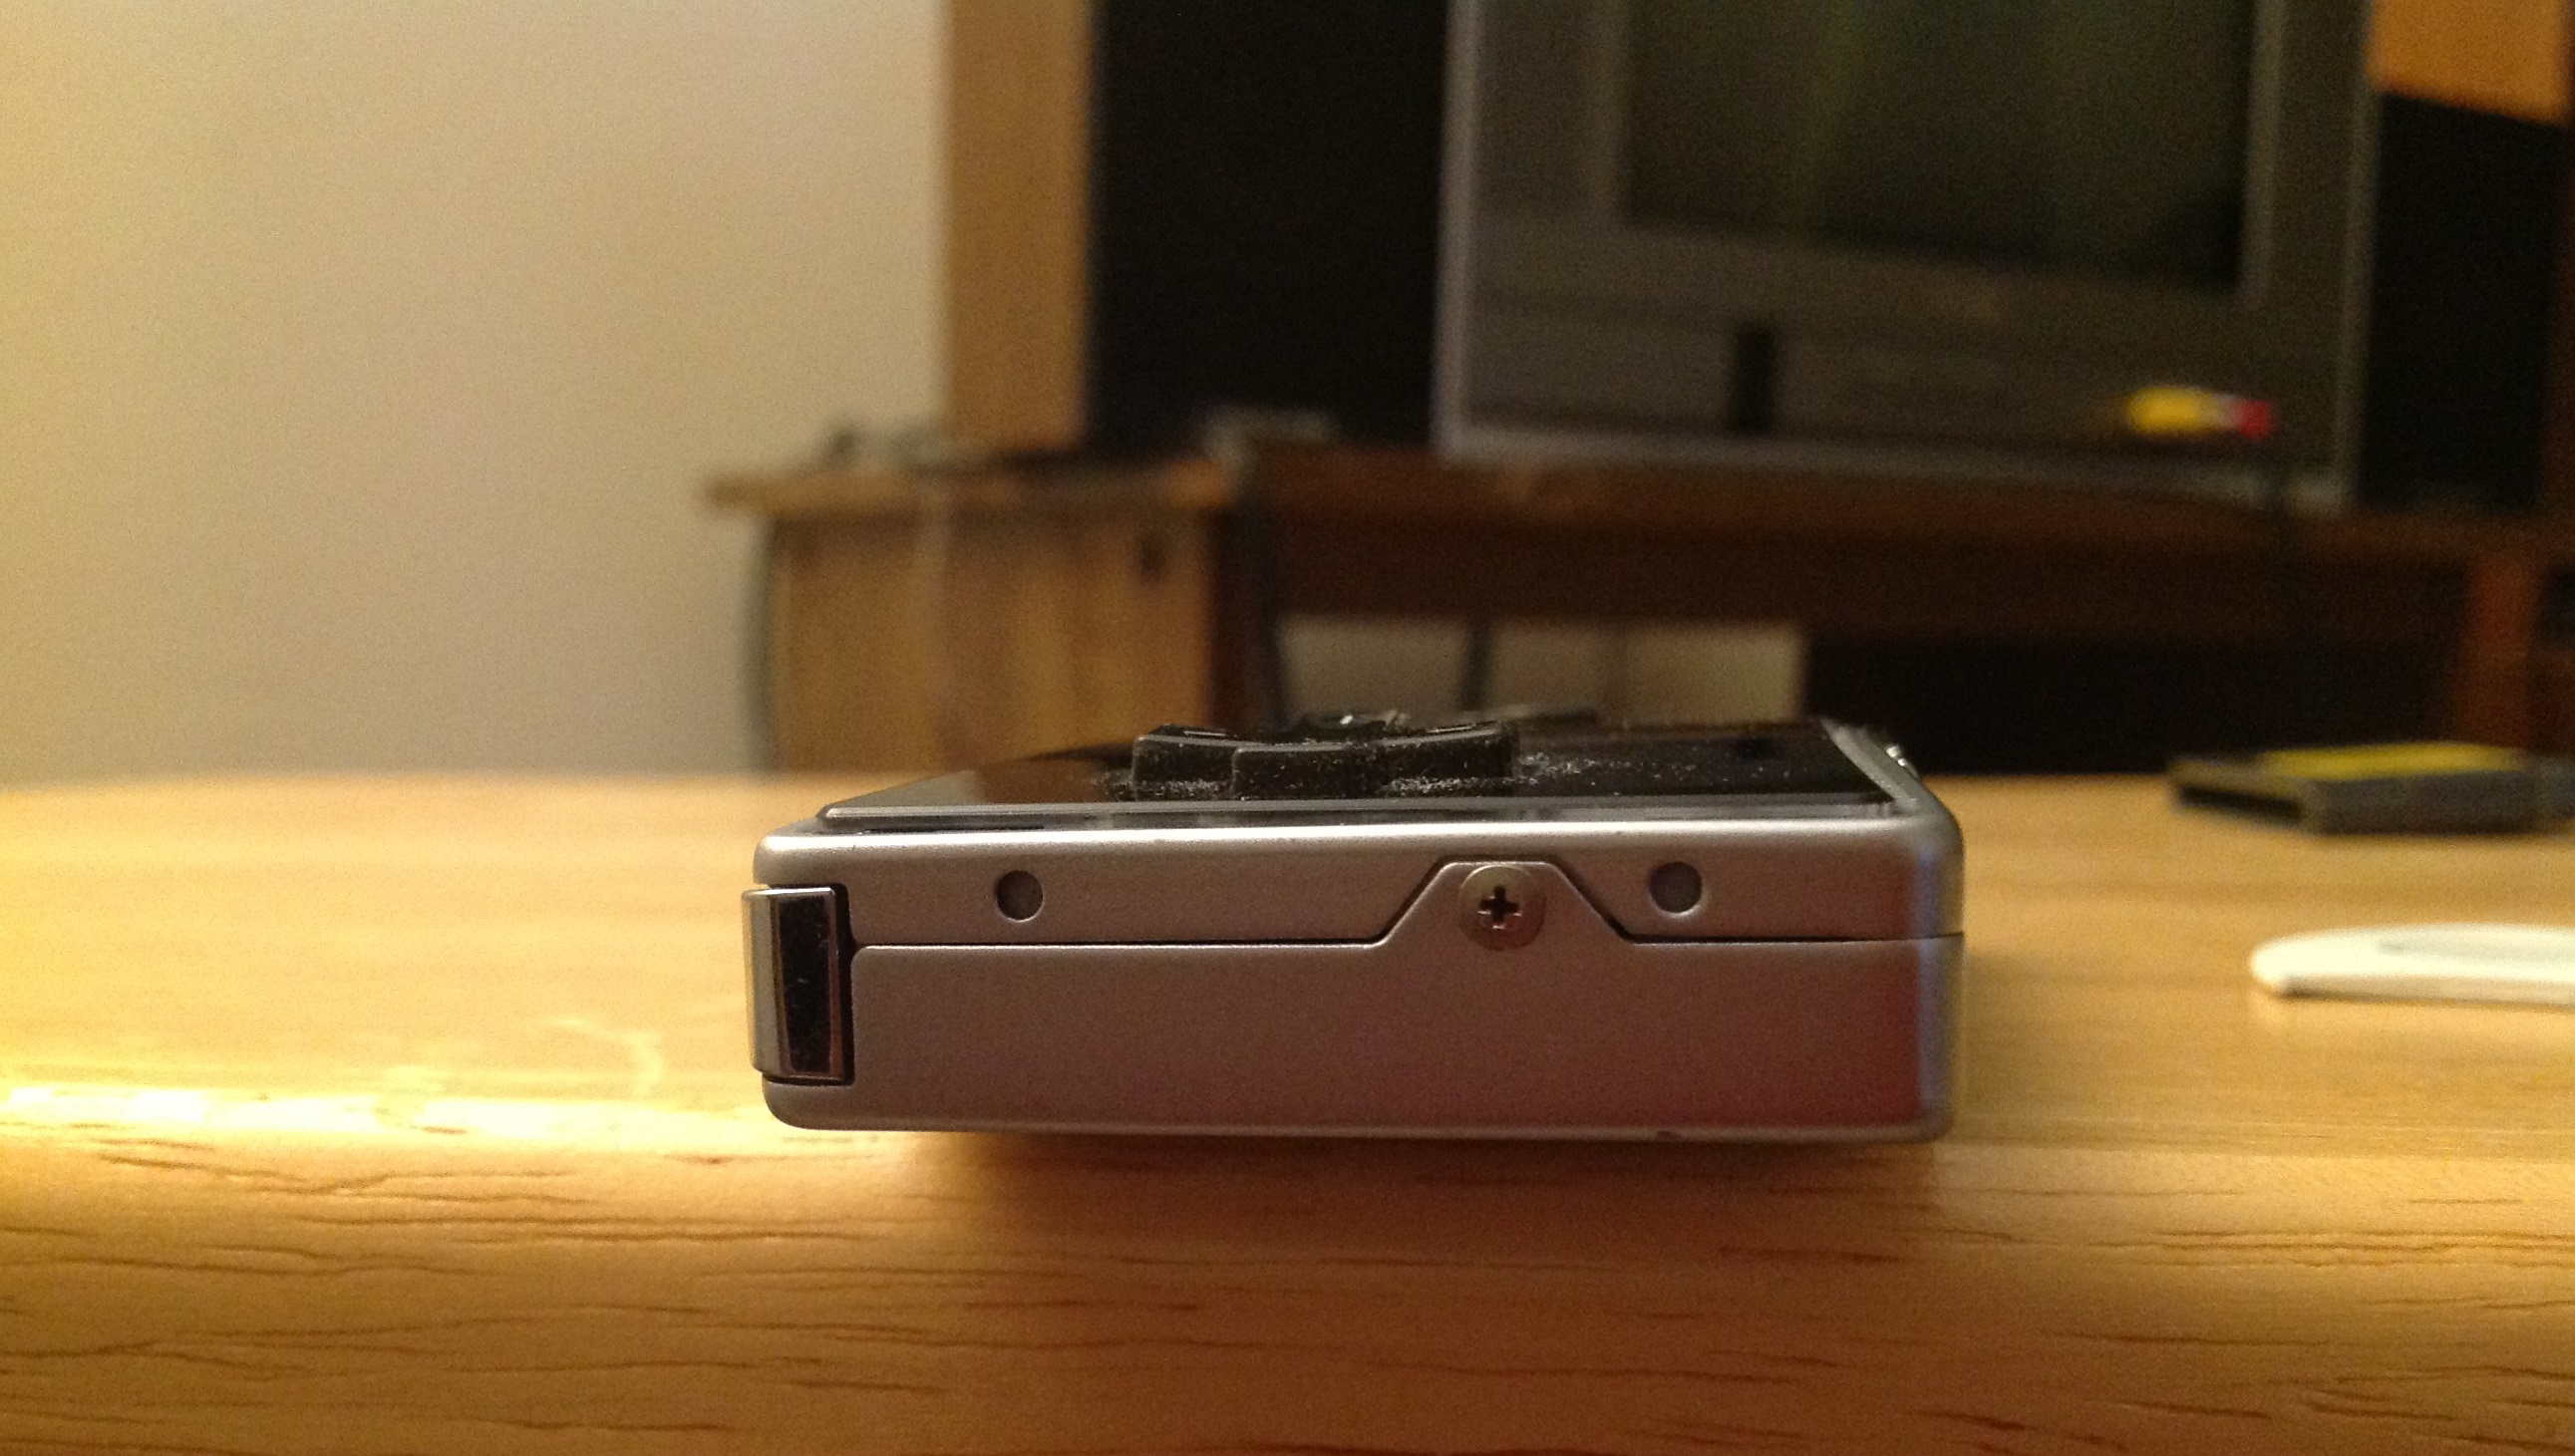
Micro owner Pro-tip: Always insert new faceplates so that you hook in the side with the longer hooks near the a+b buttons first.
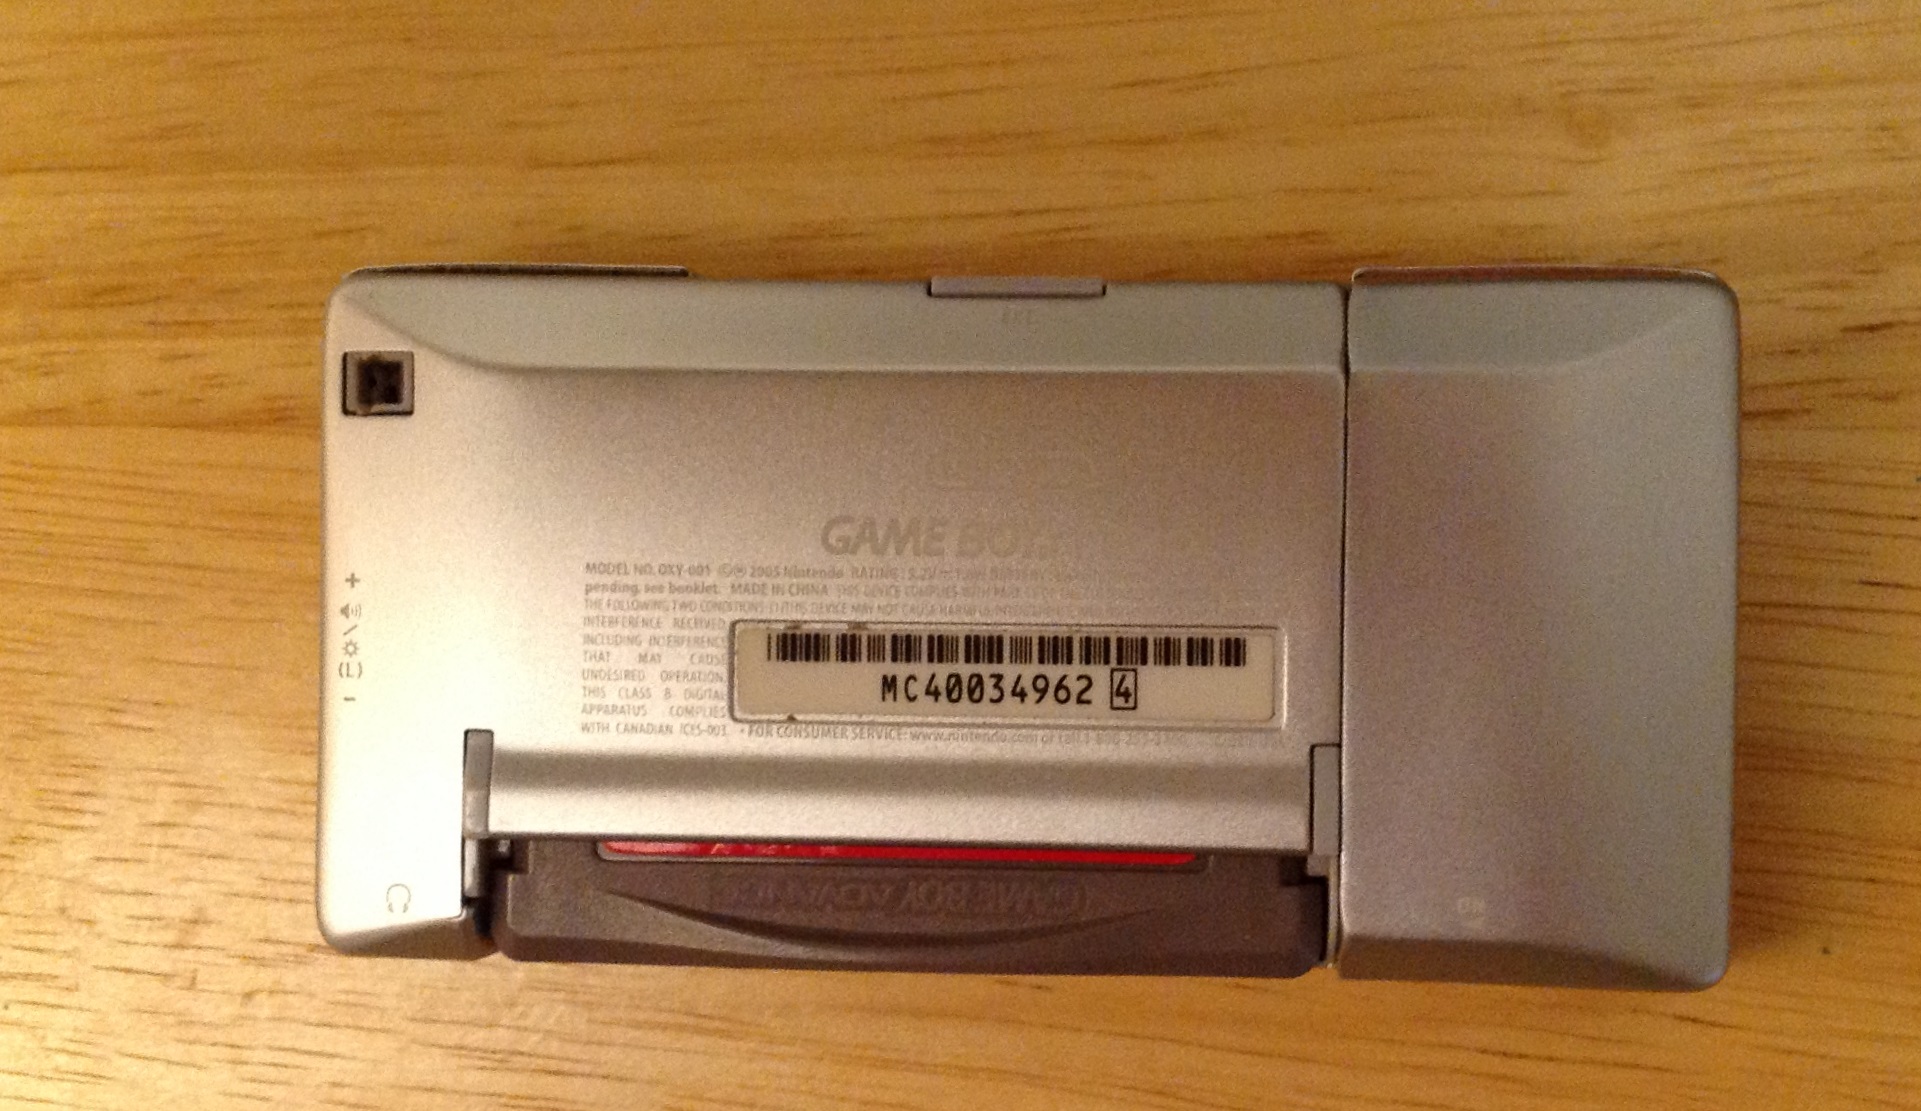
This is what the Micro looks like without any faceplate mounted:
One practical advantage to the faceplates is that they act as hard screen protectors, but really they just look bitch’n cool.
However, the real reason I want to talk about the Game Boy Micro is it’s historical significance to Nintendo. The Game Boy Micro is the last Game Boy as well as the last 2D gaming system from Nintendo.
Now, I would not be shocked if some day Nintendo reuses the Game Boy name but suffice to say Nintendo started selling a line of cartridge-based portable game systems with four face buttons (labeled a, b, start, and select), a D-pad, and one screen in 1989 with the original Game Boy and created a succession of systems with those attributes that ended in 2005 with the Game Boy Micro.
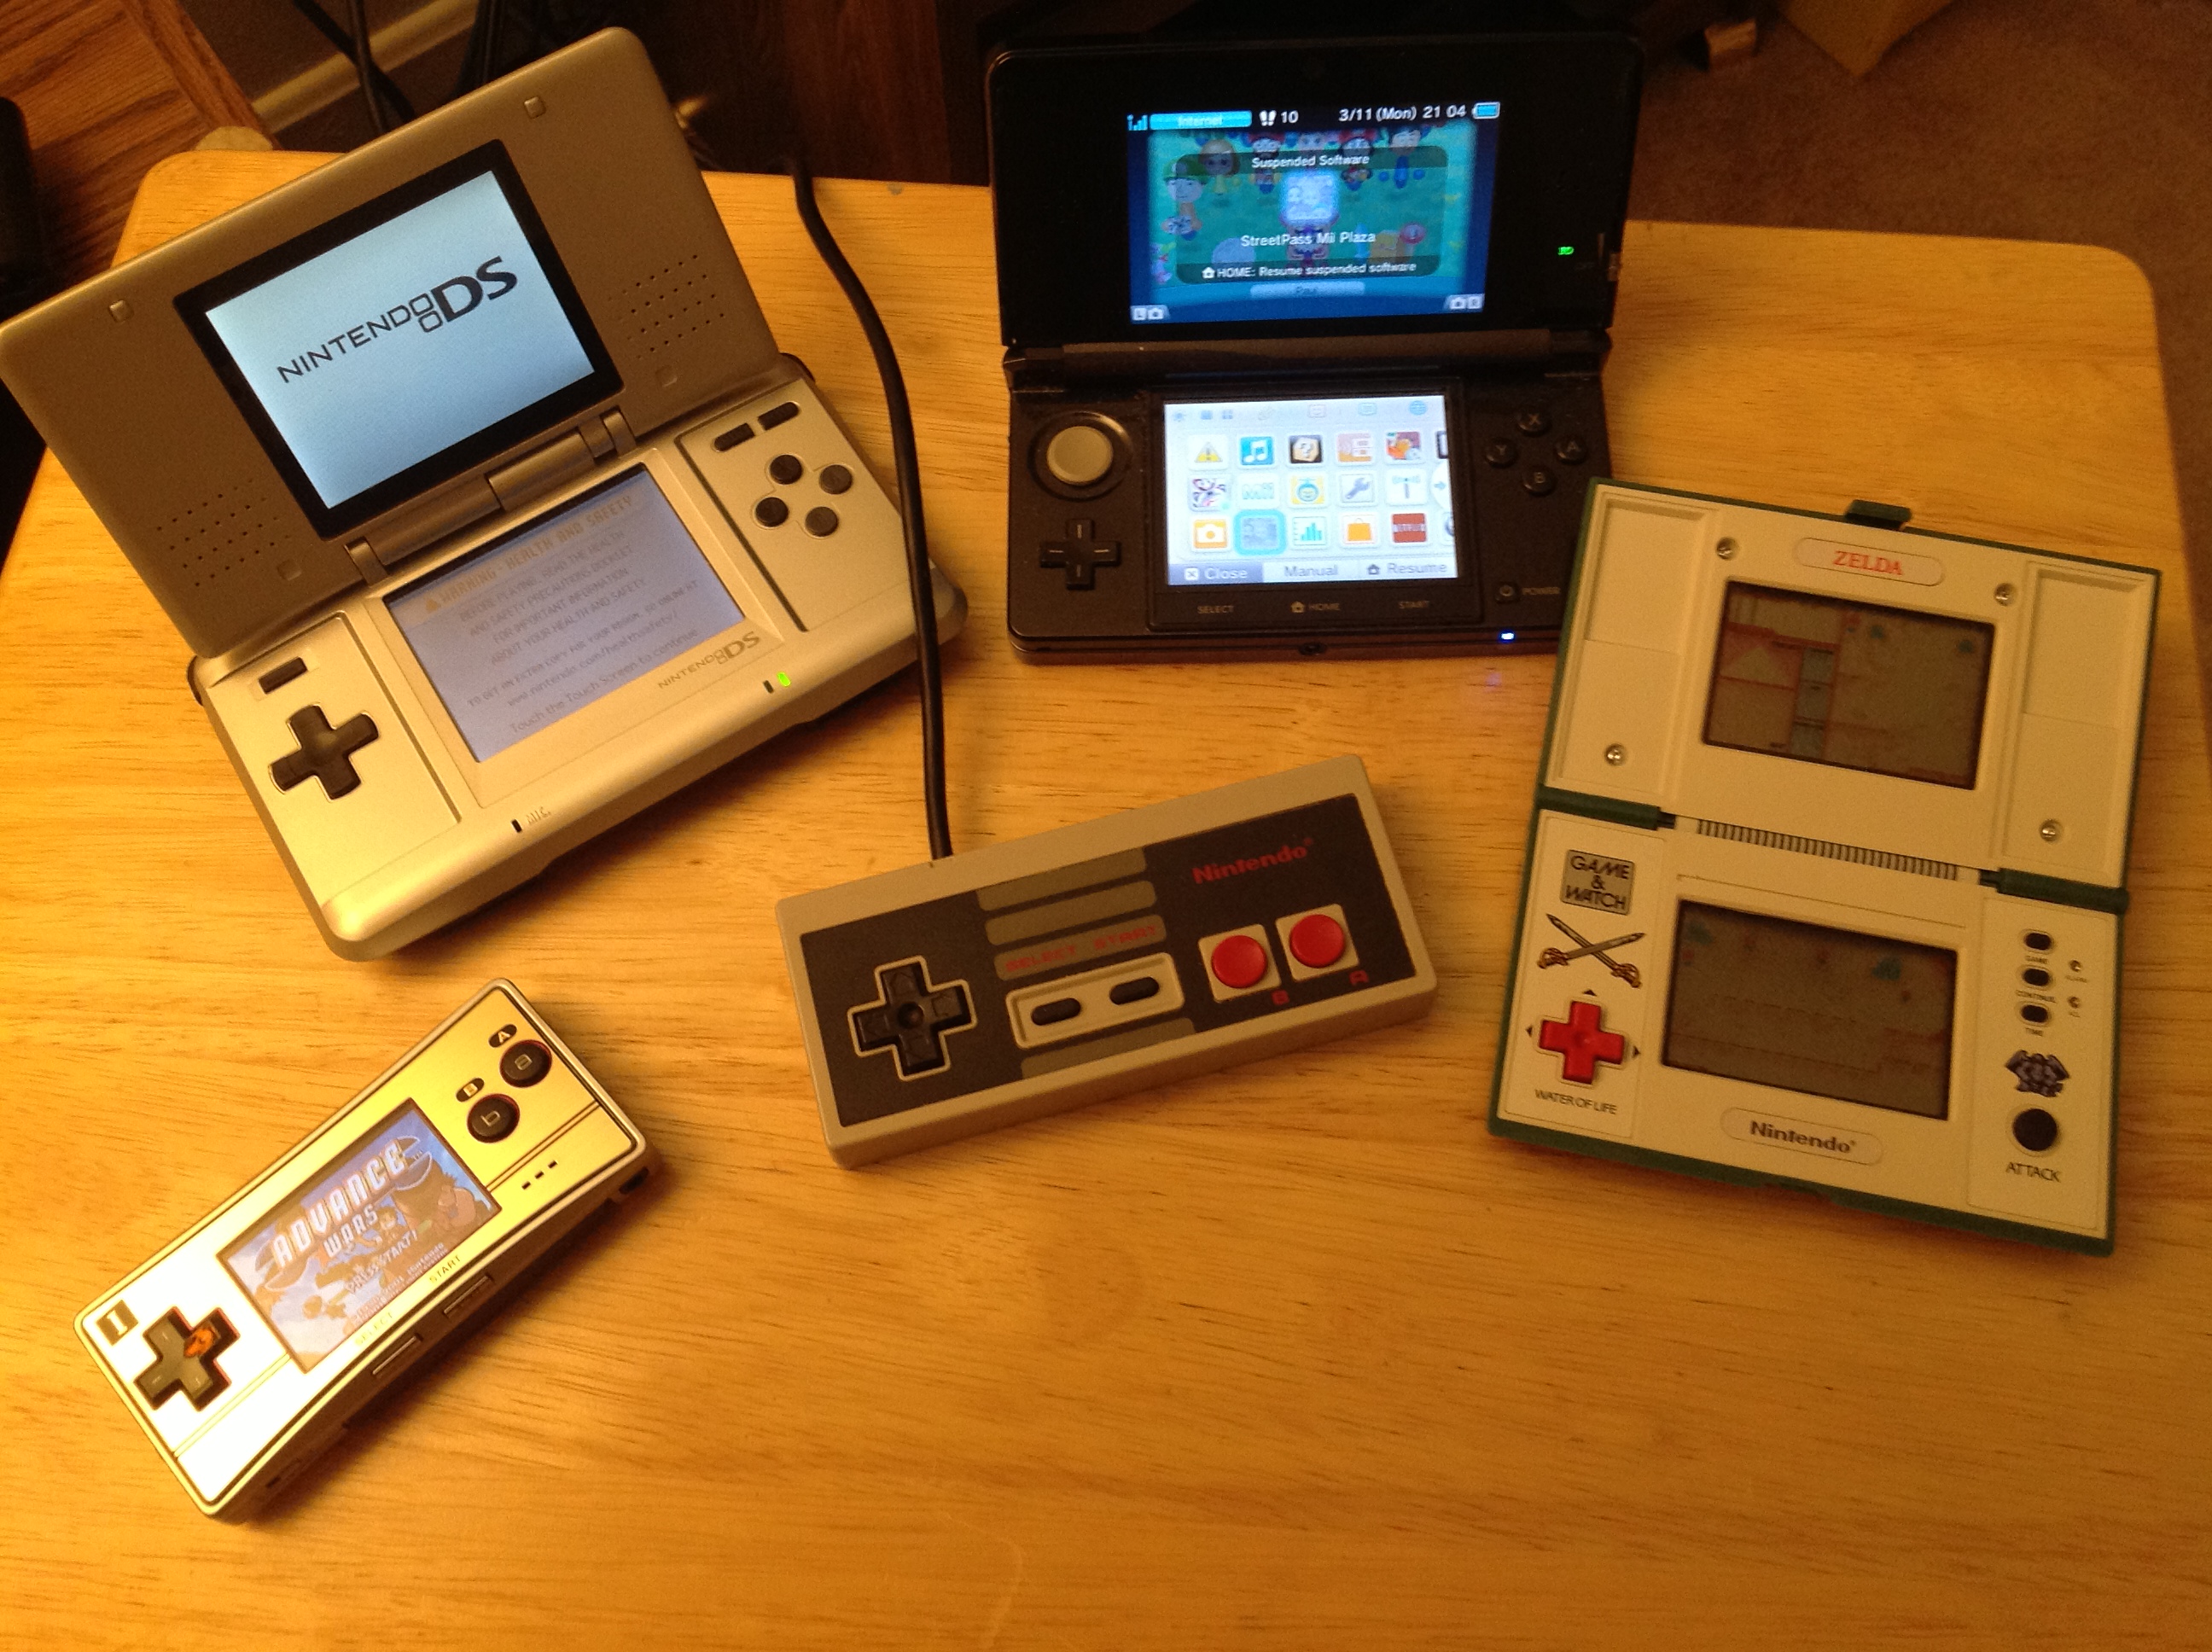
Following the Game Boy Micro Nintendo retired the Game Boy name and has produced the Nintendo DS line of cartridge-based portable game systems with two screens, one of which is a stylus-based resistive touchscreen, six face buttons (labeled a, b, x, y, start, and select), and (at least) a D-pad.
More importantly though, the Game Boy Micro was the last Nintendo system of any kind that was primarily built to play games based on 2D, sprite-based graphics rather than today’s 3D, polygon-based graphics.
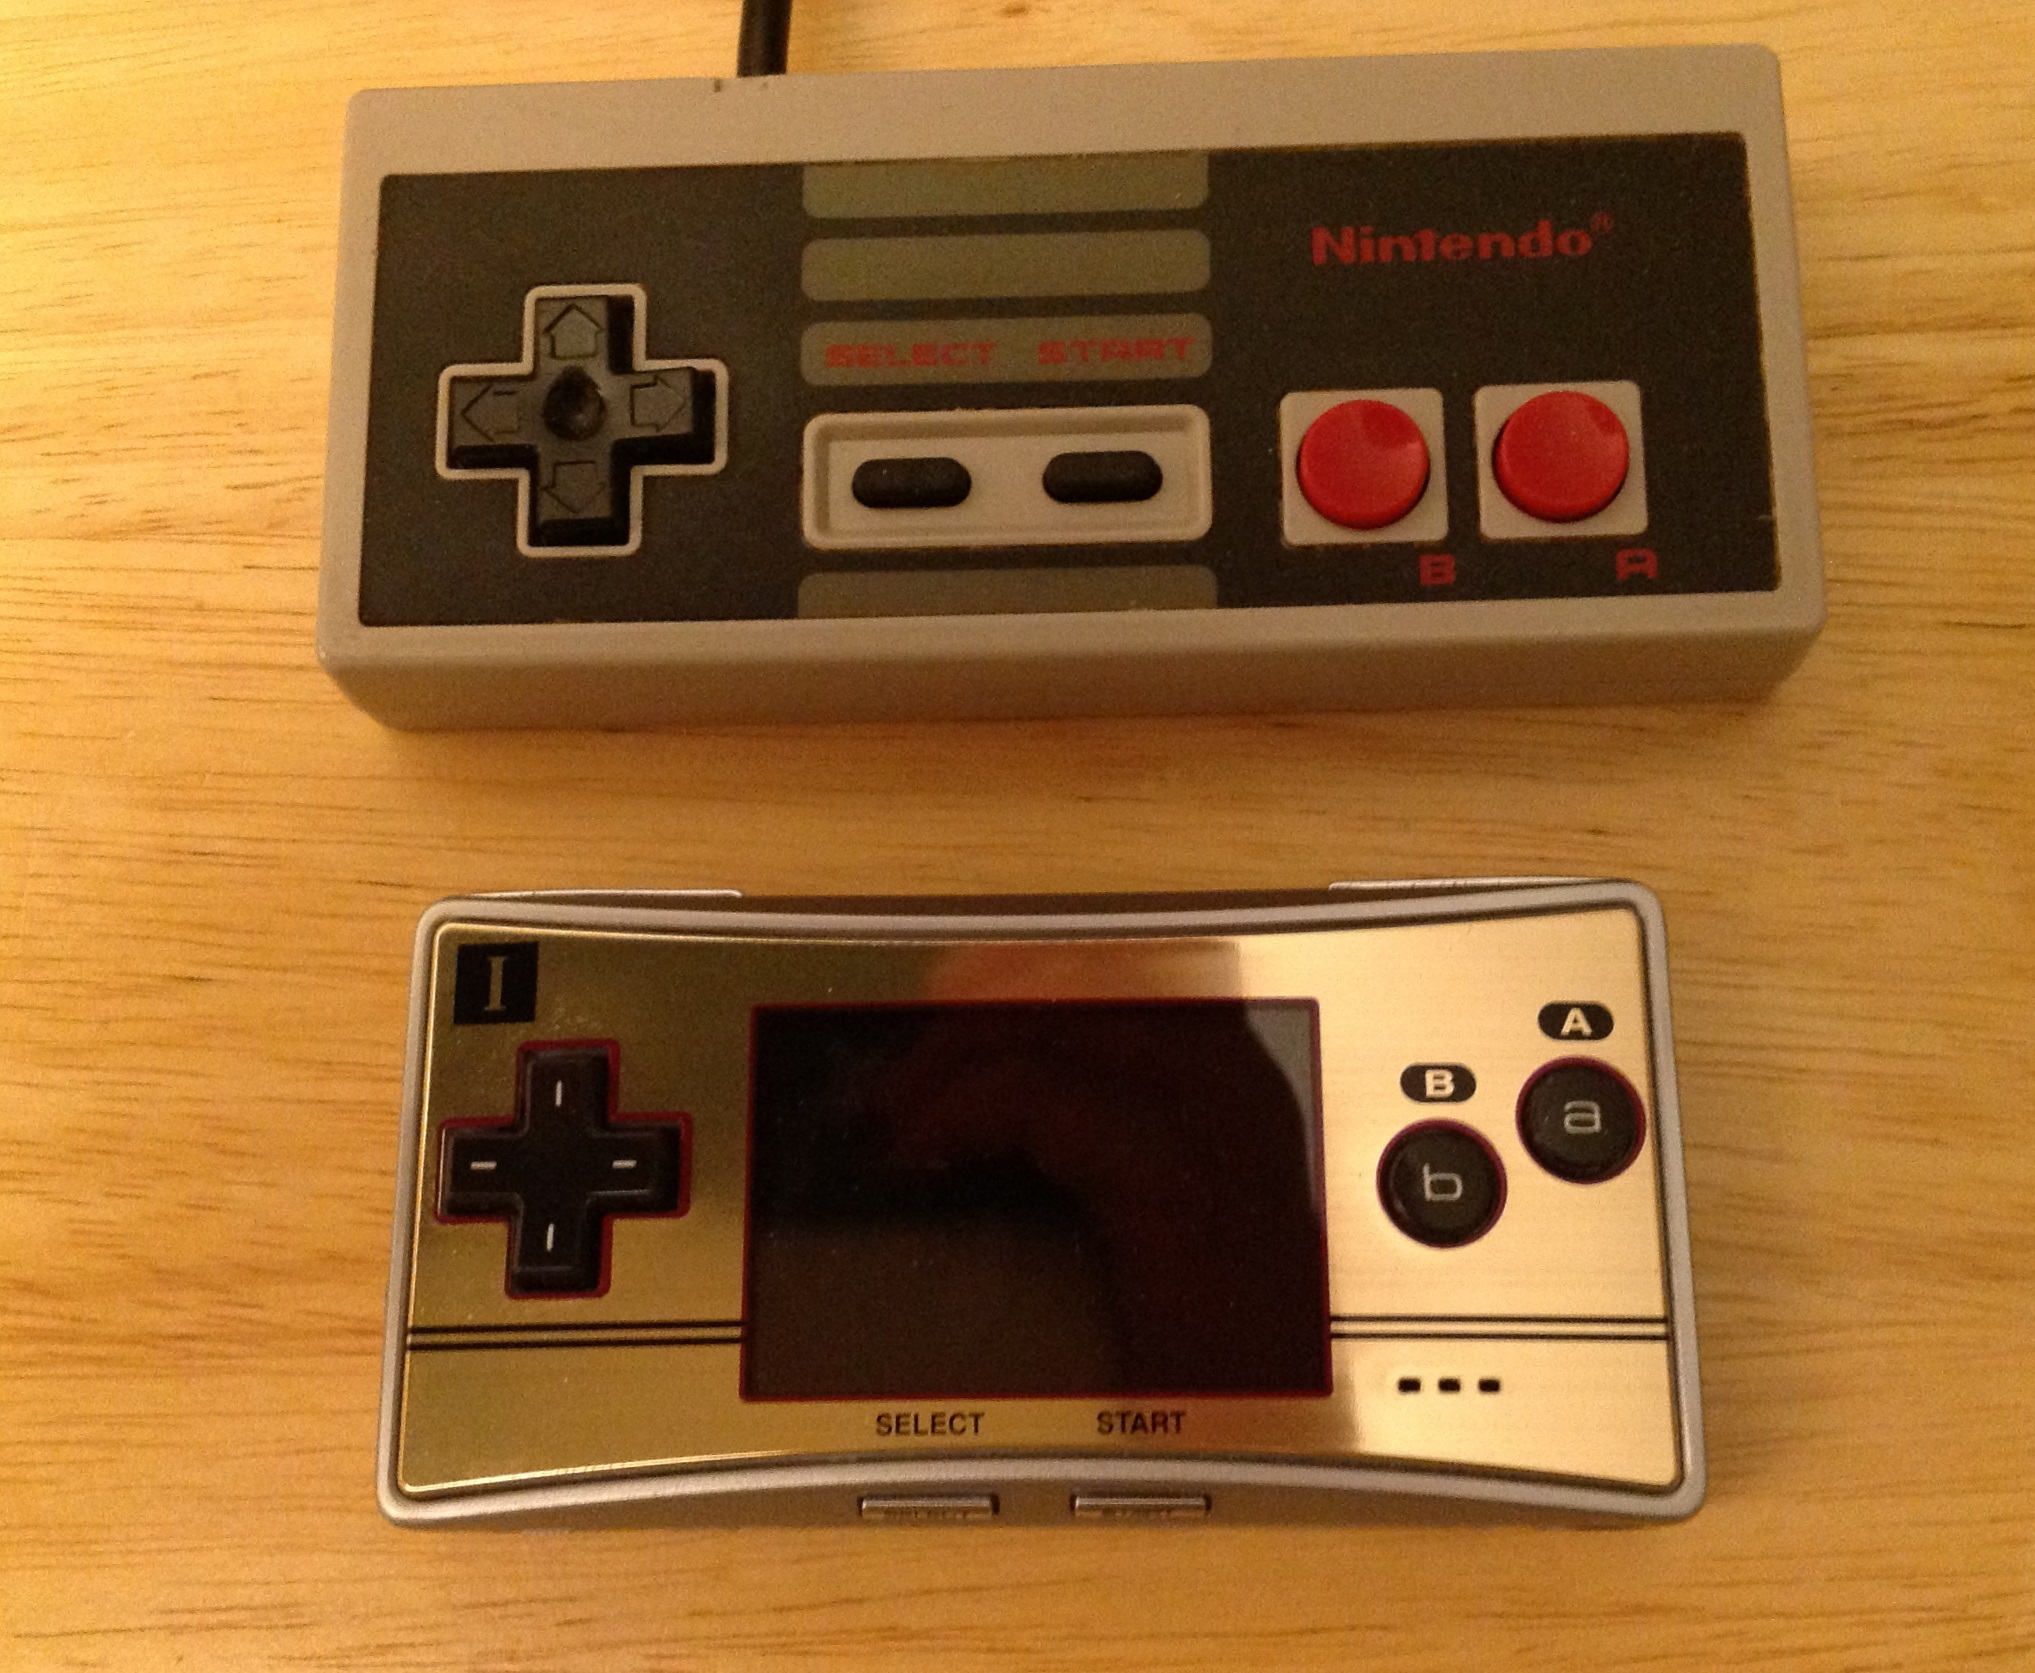
This means that the Game Boy Micro was Nintendo’s final love letter to the era when it dominated the videogame world with the NES/Famicom and SuperNES/Super Famicom. There’s no coincidence to the fact that the Micro itself resembles and NES/Famicom controller.
From the release of the Famicom in 1983 to December 3rd, 1994 (when Sony released the Playstation in Japan) Nintendo was undoubtedly the single most important force in the console videogame world. Surely Sega played some part as well, but while they could on occasion be Nintendo’s equal they were never Nintendo’s superior.
But, as the world marveled at the Playstation and the rise of 3D graphics, Nintendo’s influence crested and then began to wane. Today they are an important part of the industry, but they have never again become undisputed champion.
However, in the portable gaming arena, Nintendo was still the undisputed champion (and still is today, as tough as it is for this PSP and Vita owner to admit). When Nintendo decided to replace the Game Boy Color in 2001 it returned to a 2D-based system and created the Game Boy Advance. An era of 2D nostalgia reigned with the GBA finding itself home to classics of the 16-bit era re-released as GBA games and new 2D classics that heavily drew inspiration from SNES games.
So, when Nintendo said it’s final goodbye in 2005 with the Game Boy Micro it was really closing the door on the era of 2D gaming it had dominated from 1983 to 2005. In that way the Micro is comparable to the last tube-based Zenith Transoceanic or the last piston-engined Grumman fighter aircraft. When a great company wants to say goodbye to one of it’s great products they will often create something fantastic as a last hurrah and that is clearly what Nintendo did with the Game Boy Micro.
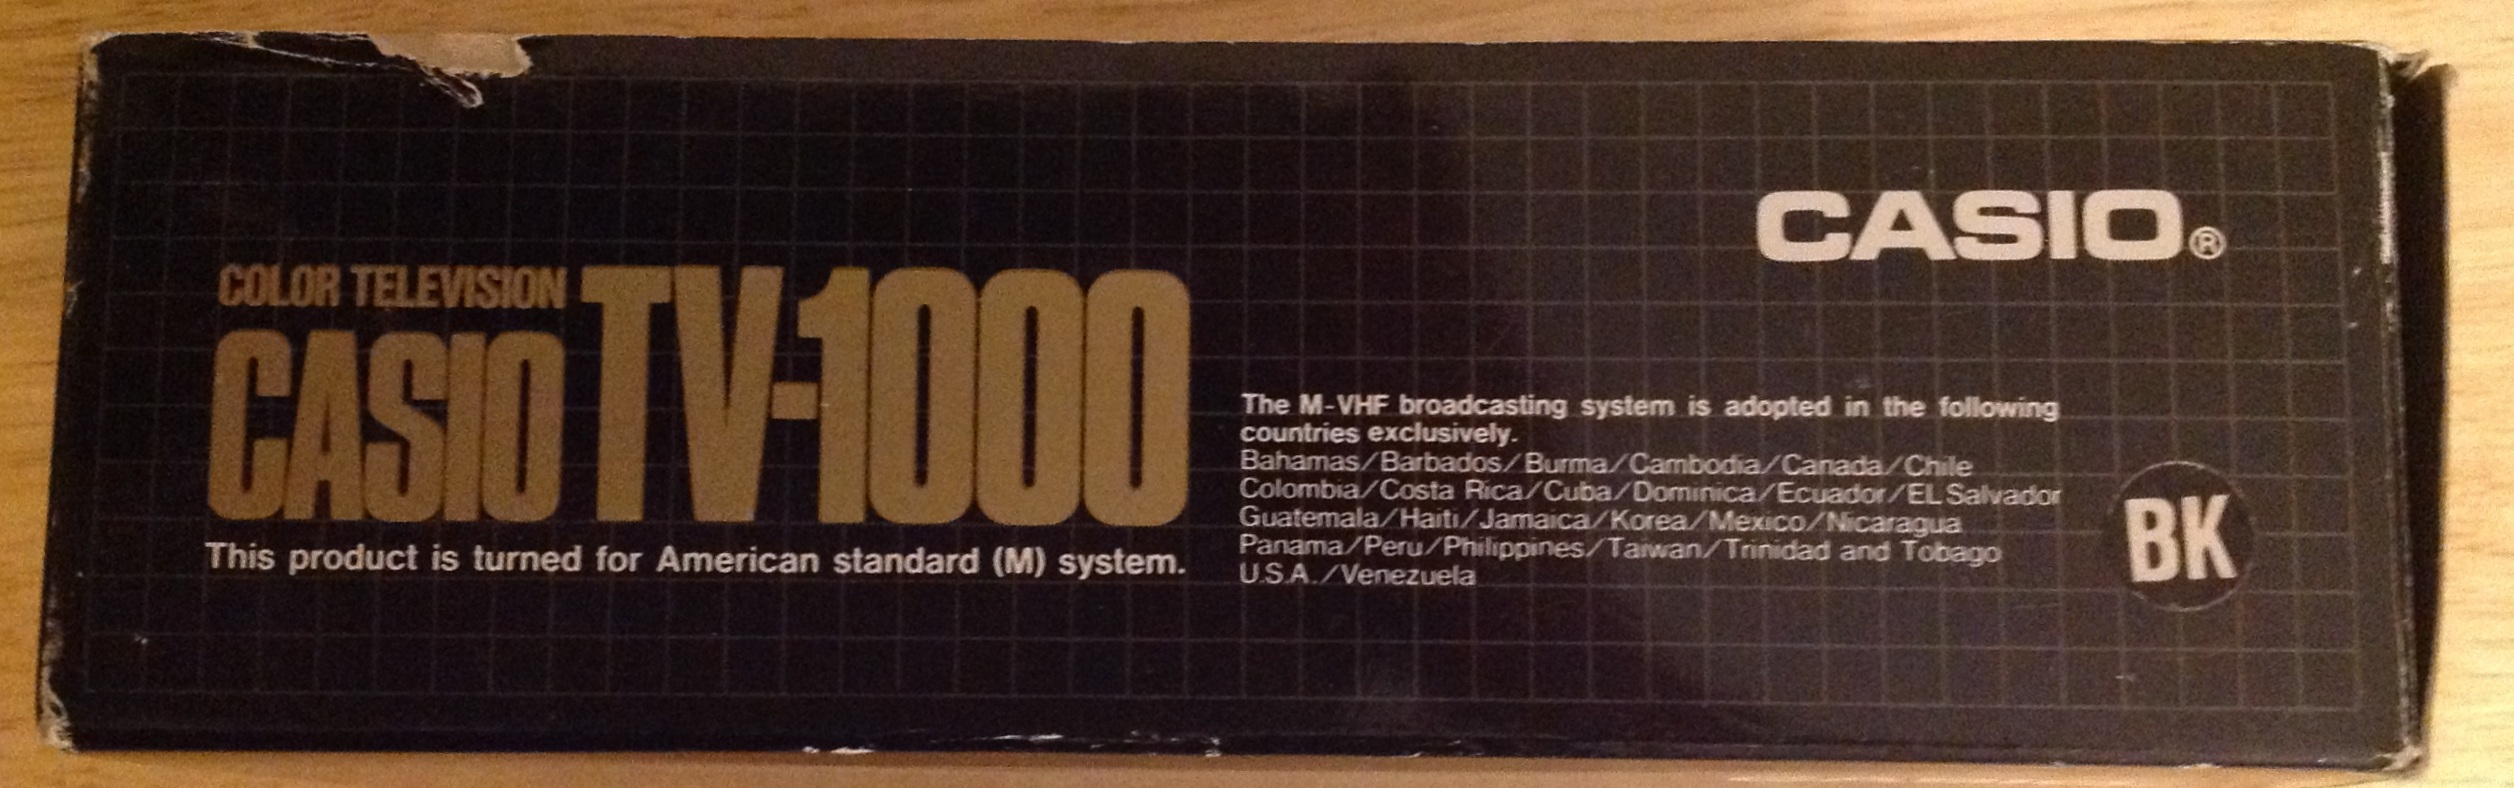
Casio TV-1000

We’ve all become accustomed to “the smartphone stare”. You know, when someone is hunched over their smartphone, oblivious to the world around them, bathed in the glow of their smartphone’s screen. I admit, I can be found in this state several times on the average day.
The magic of the “smartphone stare” is the magic of the personal electronics revolution: It’s the way that an electronic device can be made small enough that you can use it without sitting down. You don’t need a room in your house for it and you don’t need any special furniture. You just pull it out of your pocket and commune with a piece of electronics. When a piece of electronics can come with you anywhere you go and can be used at practically any time it becomes something more intimate.
The “smartphone stare” might seem like a recent phenomenon, but videogame enthusiasts will recall that for them it basically started in 1989 with the Game Boy and Tetris, which for many people was the first really killer portable gaming experience.
But, even before the Game Boy a handful of early adopters could be found basked in the glow of their handheld TVs.
I have a particular affection for the various attempts to make a usable handheld TV in the 1980s. For one, I love the 80s styling. They’re like little jewel boxes of 80s chic. For another, these devices are relatively easy to find and even easier to store. Also, these devices were pushing the boundaries of what was possible technologically, and I respect that. Finally, I’m fascinated by how at the time these were esoteric luxury devices and today they are basically semiconductor trash.
Of the vintage handheld TVs I own the Casio TV-1000 is my favorite. This was one of Casio’s first attempts to make a color LCD handheld TV.
I found it at the Village Discount on State Road in Cuyahoga Falls with its original box, instructions, and warranty card.


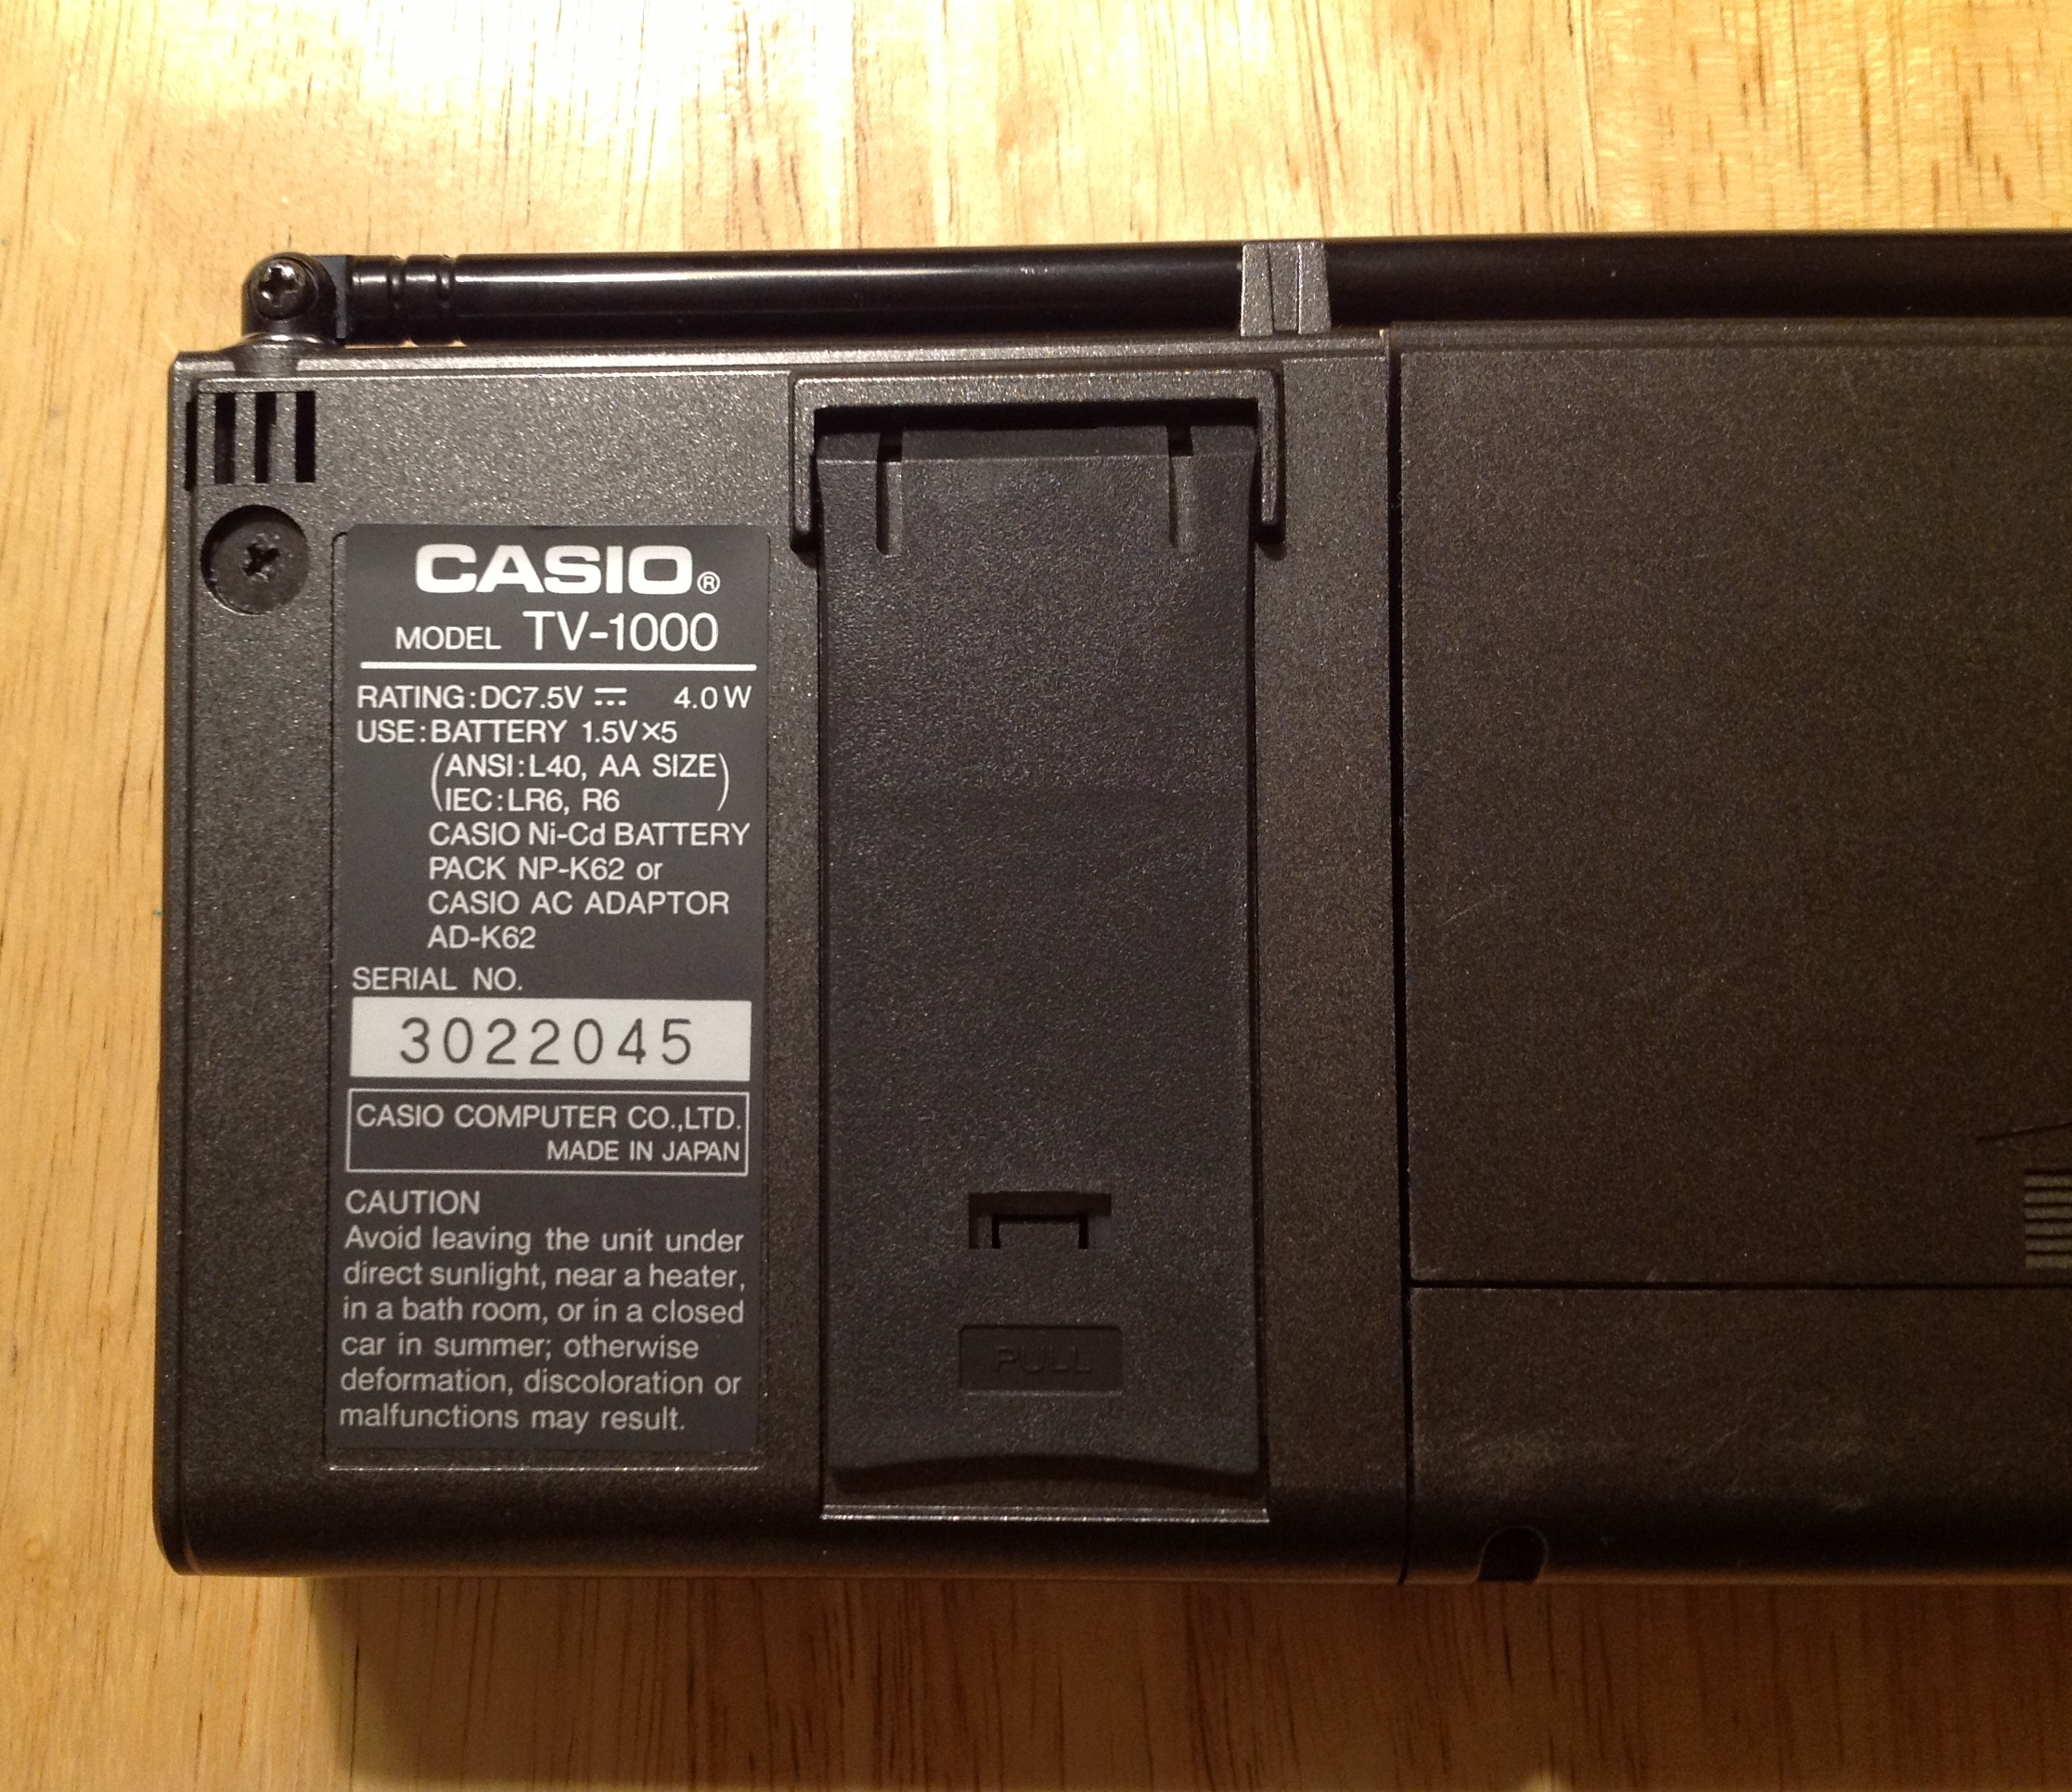
While it does have a backlight it also has an interesting feature where you can open up this door in the back to allow light in, as a way to conserve battery power.

The part that folds down there is actually the battery compartment, which is smart because it gives that section some heft to weight the set while it’s folded down. The interesting thing is that with that part open you can see the innards of the backlight diffuser, which is located at the bottom of that angled transparent section, and how it’s meant to distribute light across the screen evenly.
Image quality, as one would expect from a mid-1980s passive LCD is atrocious. My understanding is that the TV-1000 was an attempt to produce a more affordable color micro TV than it’s contemporaries the Epson ET-10 and the Seiko T-102 and as a result it uses a passive LCD rather than an active LCD. I can’t say I’ve ever seen a passive LCD screen that was ever any good.
Here I am trying to tune in one of the last low-power analog TV stations in the area, WAOH-LP (oddly enough, they were showing a black and white program).
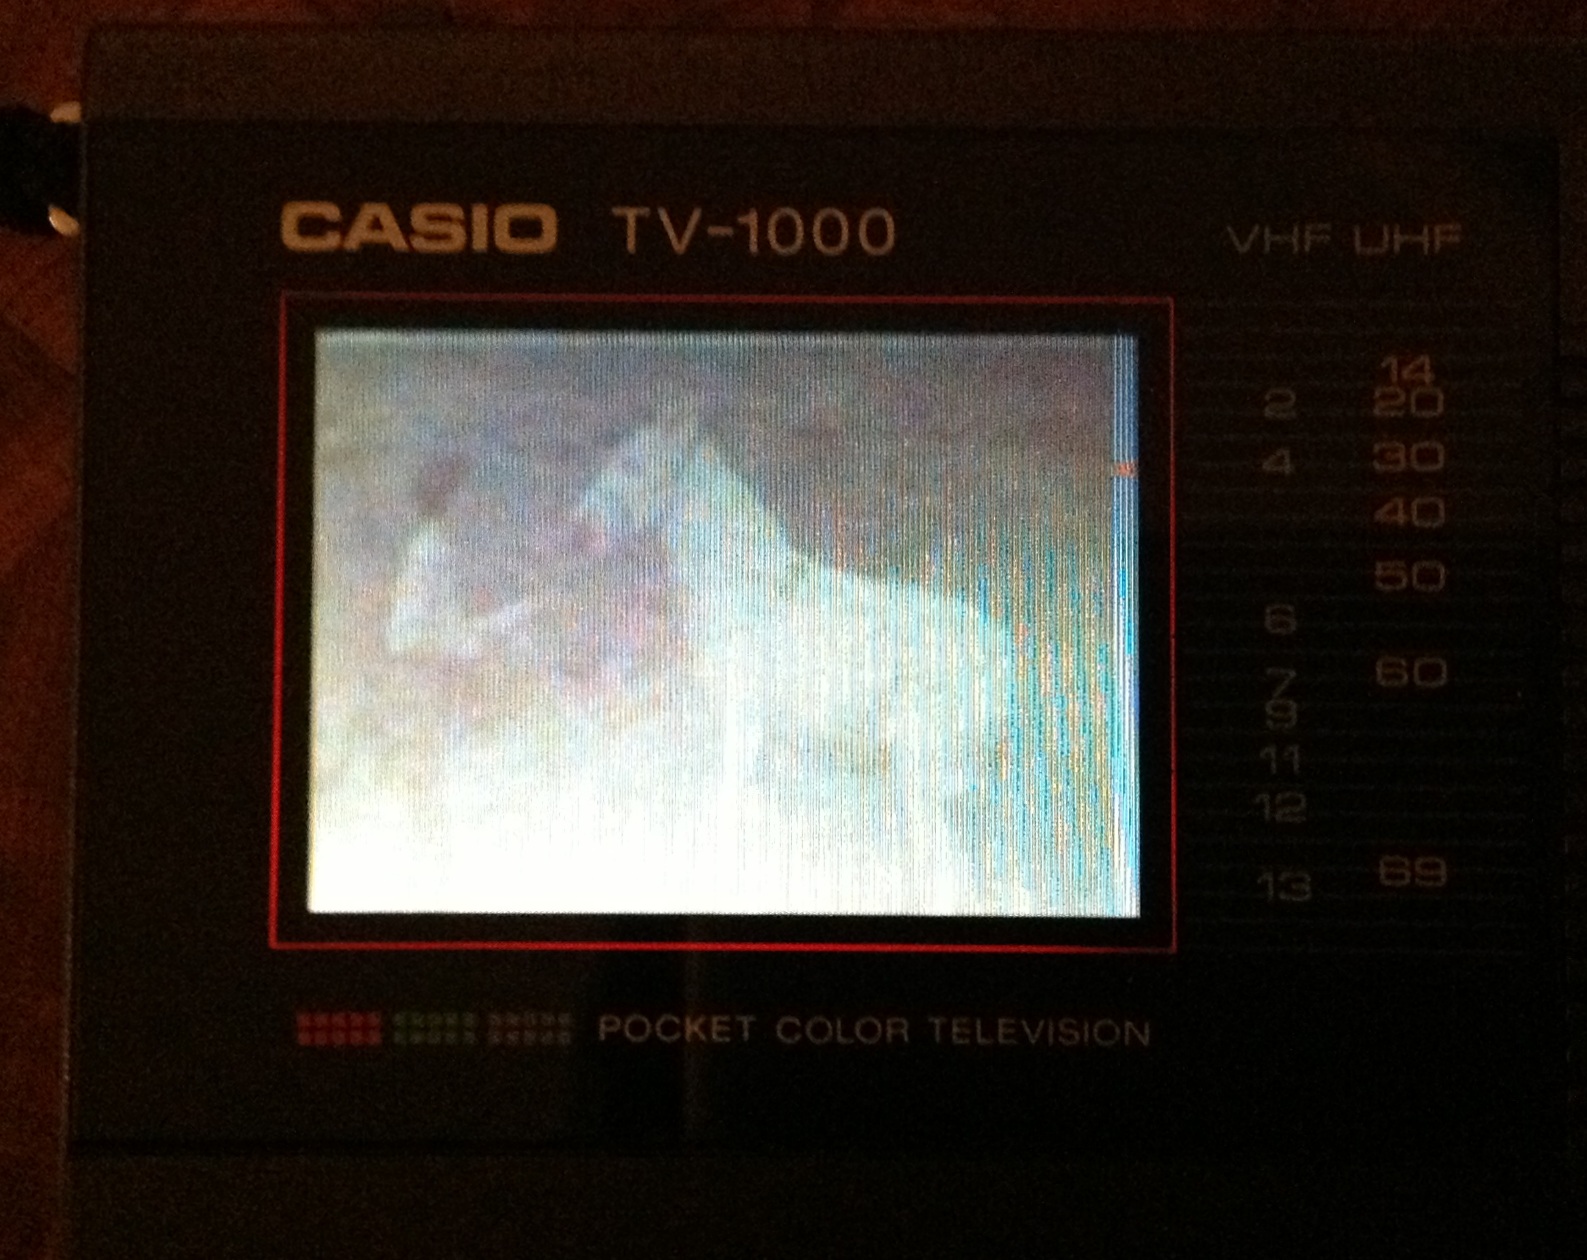

Notice the onscreen blue bar on the side with the red hash mark on the right side of the display. In order to tune the TV-1000 you would select VHF or UHF and then press the up or down channel button once so that it would start scanning for a channel. The red mark shows what channel it’s currently tuned to. The scanning process makes it difficult to tune in a marginal station because often it will scan right past. I would vastly prefer a manual tuning knob like the CRT Sony Watchman sets from the same era. But I suppose at the time this type of tuning seemed more high tech.
The TV-1000 also has a standard RCA 1/8th inch AV input, which is useful in the post analog TV doomsday. Use red/right for video and white/left for audio.


Here is Super Mario World on my Yobo FC Twin (which I shall discuss in the future). As you can see, the TV-1000’s color reproduction is awful, but that’s the reality of mid-80s passive LCDs. The sound however, is loud and crisp.
Right now the TV-1000 is the only 1980s-vintage LCD handheld TV I own, but I’m always on the lookout for others. I do, however, have several micro CRT handheld TVs from the 1980s: A functional Sony Watchman FD-10A, a functional Sony Watchman FD-30A, and a non-functional Panasonic TR-1010P.
