
Category: Goodwill
Stuff I Didn’t Buy #1
As you may have gathered already from reading this blog, I buy a lot of things at thrift stores. But, conversely, I also don’t buy a lot of things at thrift stores. My Dad and I usually do a thrift store run three or four times a week and it’s rare that I buy something interesting enough to write about on the blog. Many times I just come back with a book or two. Stumbling across something interesting enough to write about on the blog is an uncommon and happy occasion.
Other times though, I’ll see something that was interesting but that I decided for various reasons not to buy, Recently I decided to start documenting these things with my iPhone. Keep in mind that taking photos of items in thrift stores is not easy. I don’t want to draw too much attention to myself and often the lighting is very bad. These are not pictures that are up to normal Electric Thrift levels of clarity and composition.
This Bang & Olufsen Beogram 2400 turntable was a real surprise to find nestled within the serpentine labyrinth that is the Abbey Ann’s off of Tallmadge Circle. You can often find stereo equipment at that Abbey Ann’s but this was a cut above their usual offerings.

What this had going for it was that is a striking European early-1970s design. It was in the original box, including the cartridge, the Styrofoam packing material and the instructions. I adore the look of European electronics so this sort of thing is right up my alley.

There were two problems here. First, I think the price was a bit steep, though Abbey Ann’s is known to negotiate quite a bit. The second problem was that all of the glue on this thing had decided to dry up and much of the trim was coming off. It’s a bit hard to see in this photo but the wood-grain on the front was just hanging off. The little metal plate on the top of the end of the tone arm was coming off as well. The dust cover was getting stuck on something and would not close correctly.

I think if this has been one of B&O’s linear tracking Beograms I would have bought it in this condition. However, I’m already backed up on conventional turntables and this B&O looked like it was going to be trouble so I took these photos and moved on.
A few weeks later this 1980s JVC boombox showed up at that same Abbey Ann’s

This tugged at my heartstrings a bit because my Dad had a similar (probably slightly more recent, because it was black) JVC boombox in the late 1980s/early 1990s. I fondly remember making recordings with my brother using the built in microphone and tape recorder. My Dad had originally bought that JVC boombox because it got shortwave, like this one.
Despite all of the 80s electronics I buy, I haven’t yet gotten into boomboxes. I think I’m mainly waiting for one that’s in nice condition and fully functional.
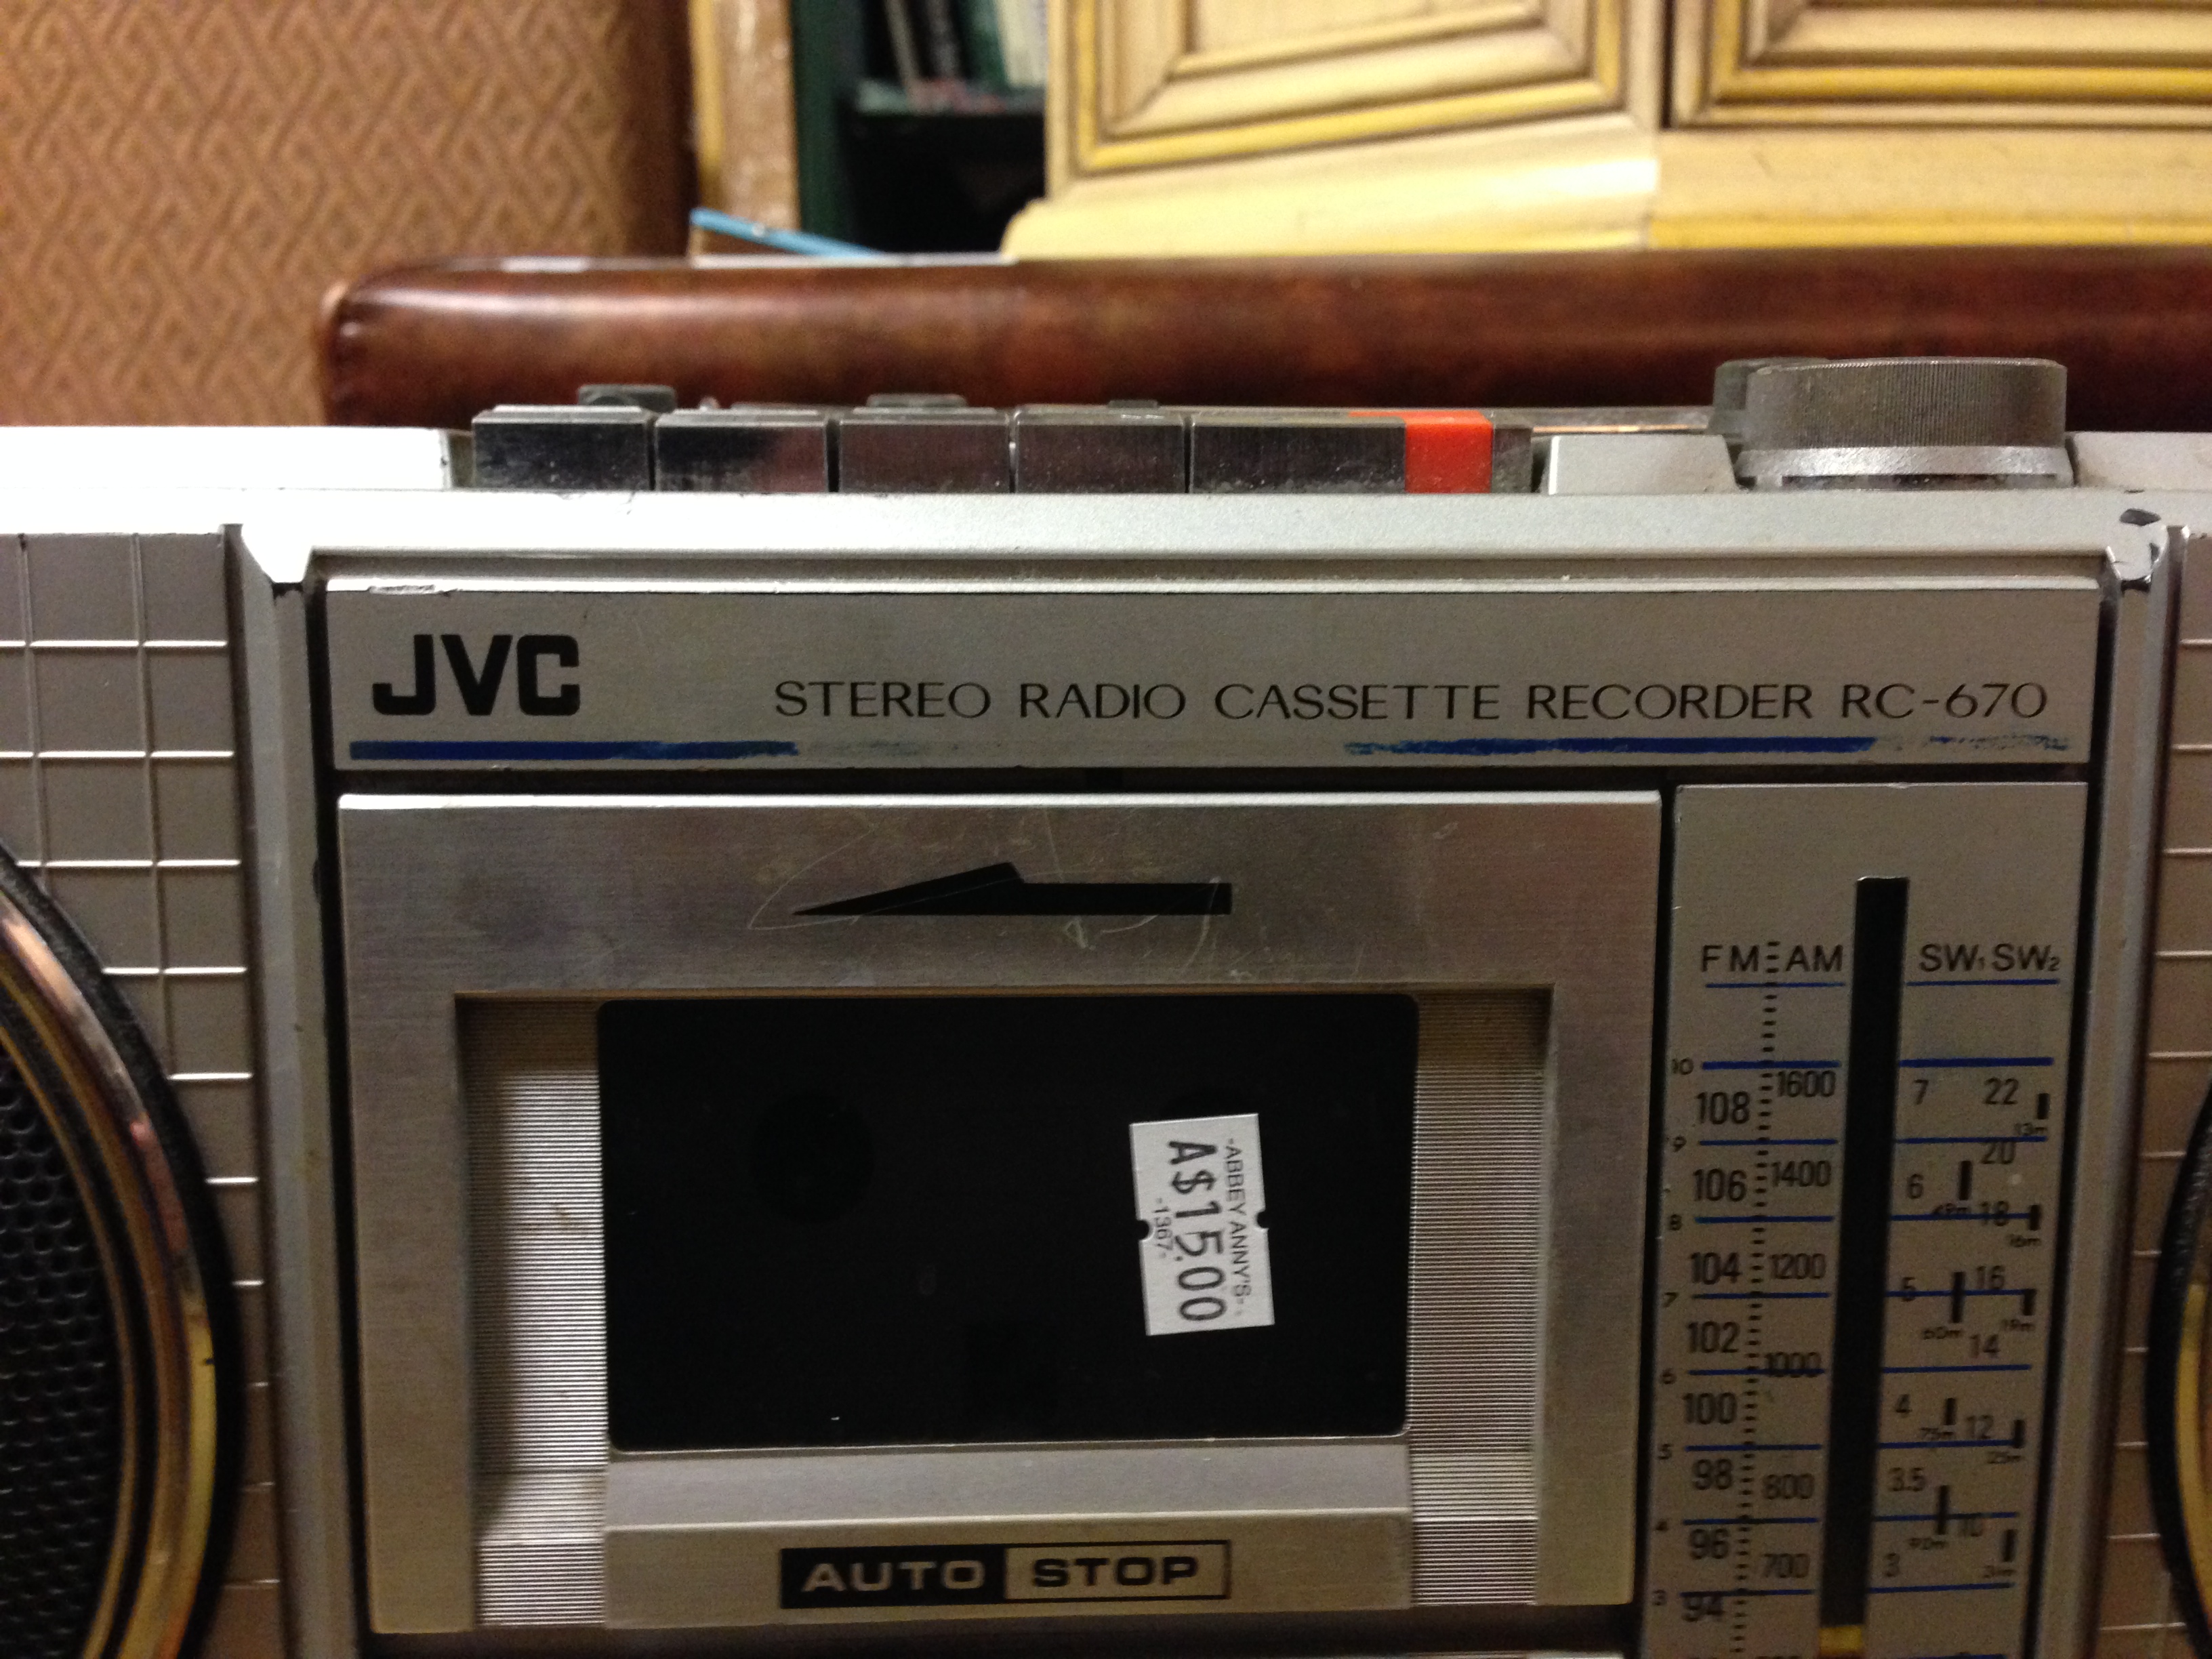

Any time I’m looking at something with a tape player I’m worried about the condition of the mechanism. There are so many mechanical parts, including belts, that can deteriorate. I remembered that eventually the tape mechanism in my Dad’s 80s JVC boombox broke and I wasn’t really in the mood to spend even $10-$15 to find out if this boombox had any of the myriad of problems that tape decks can develop.
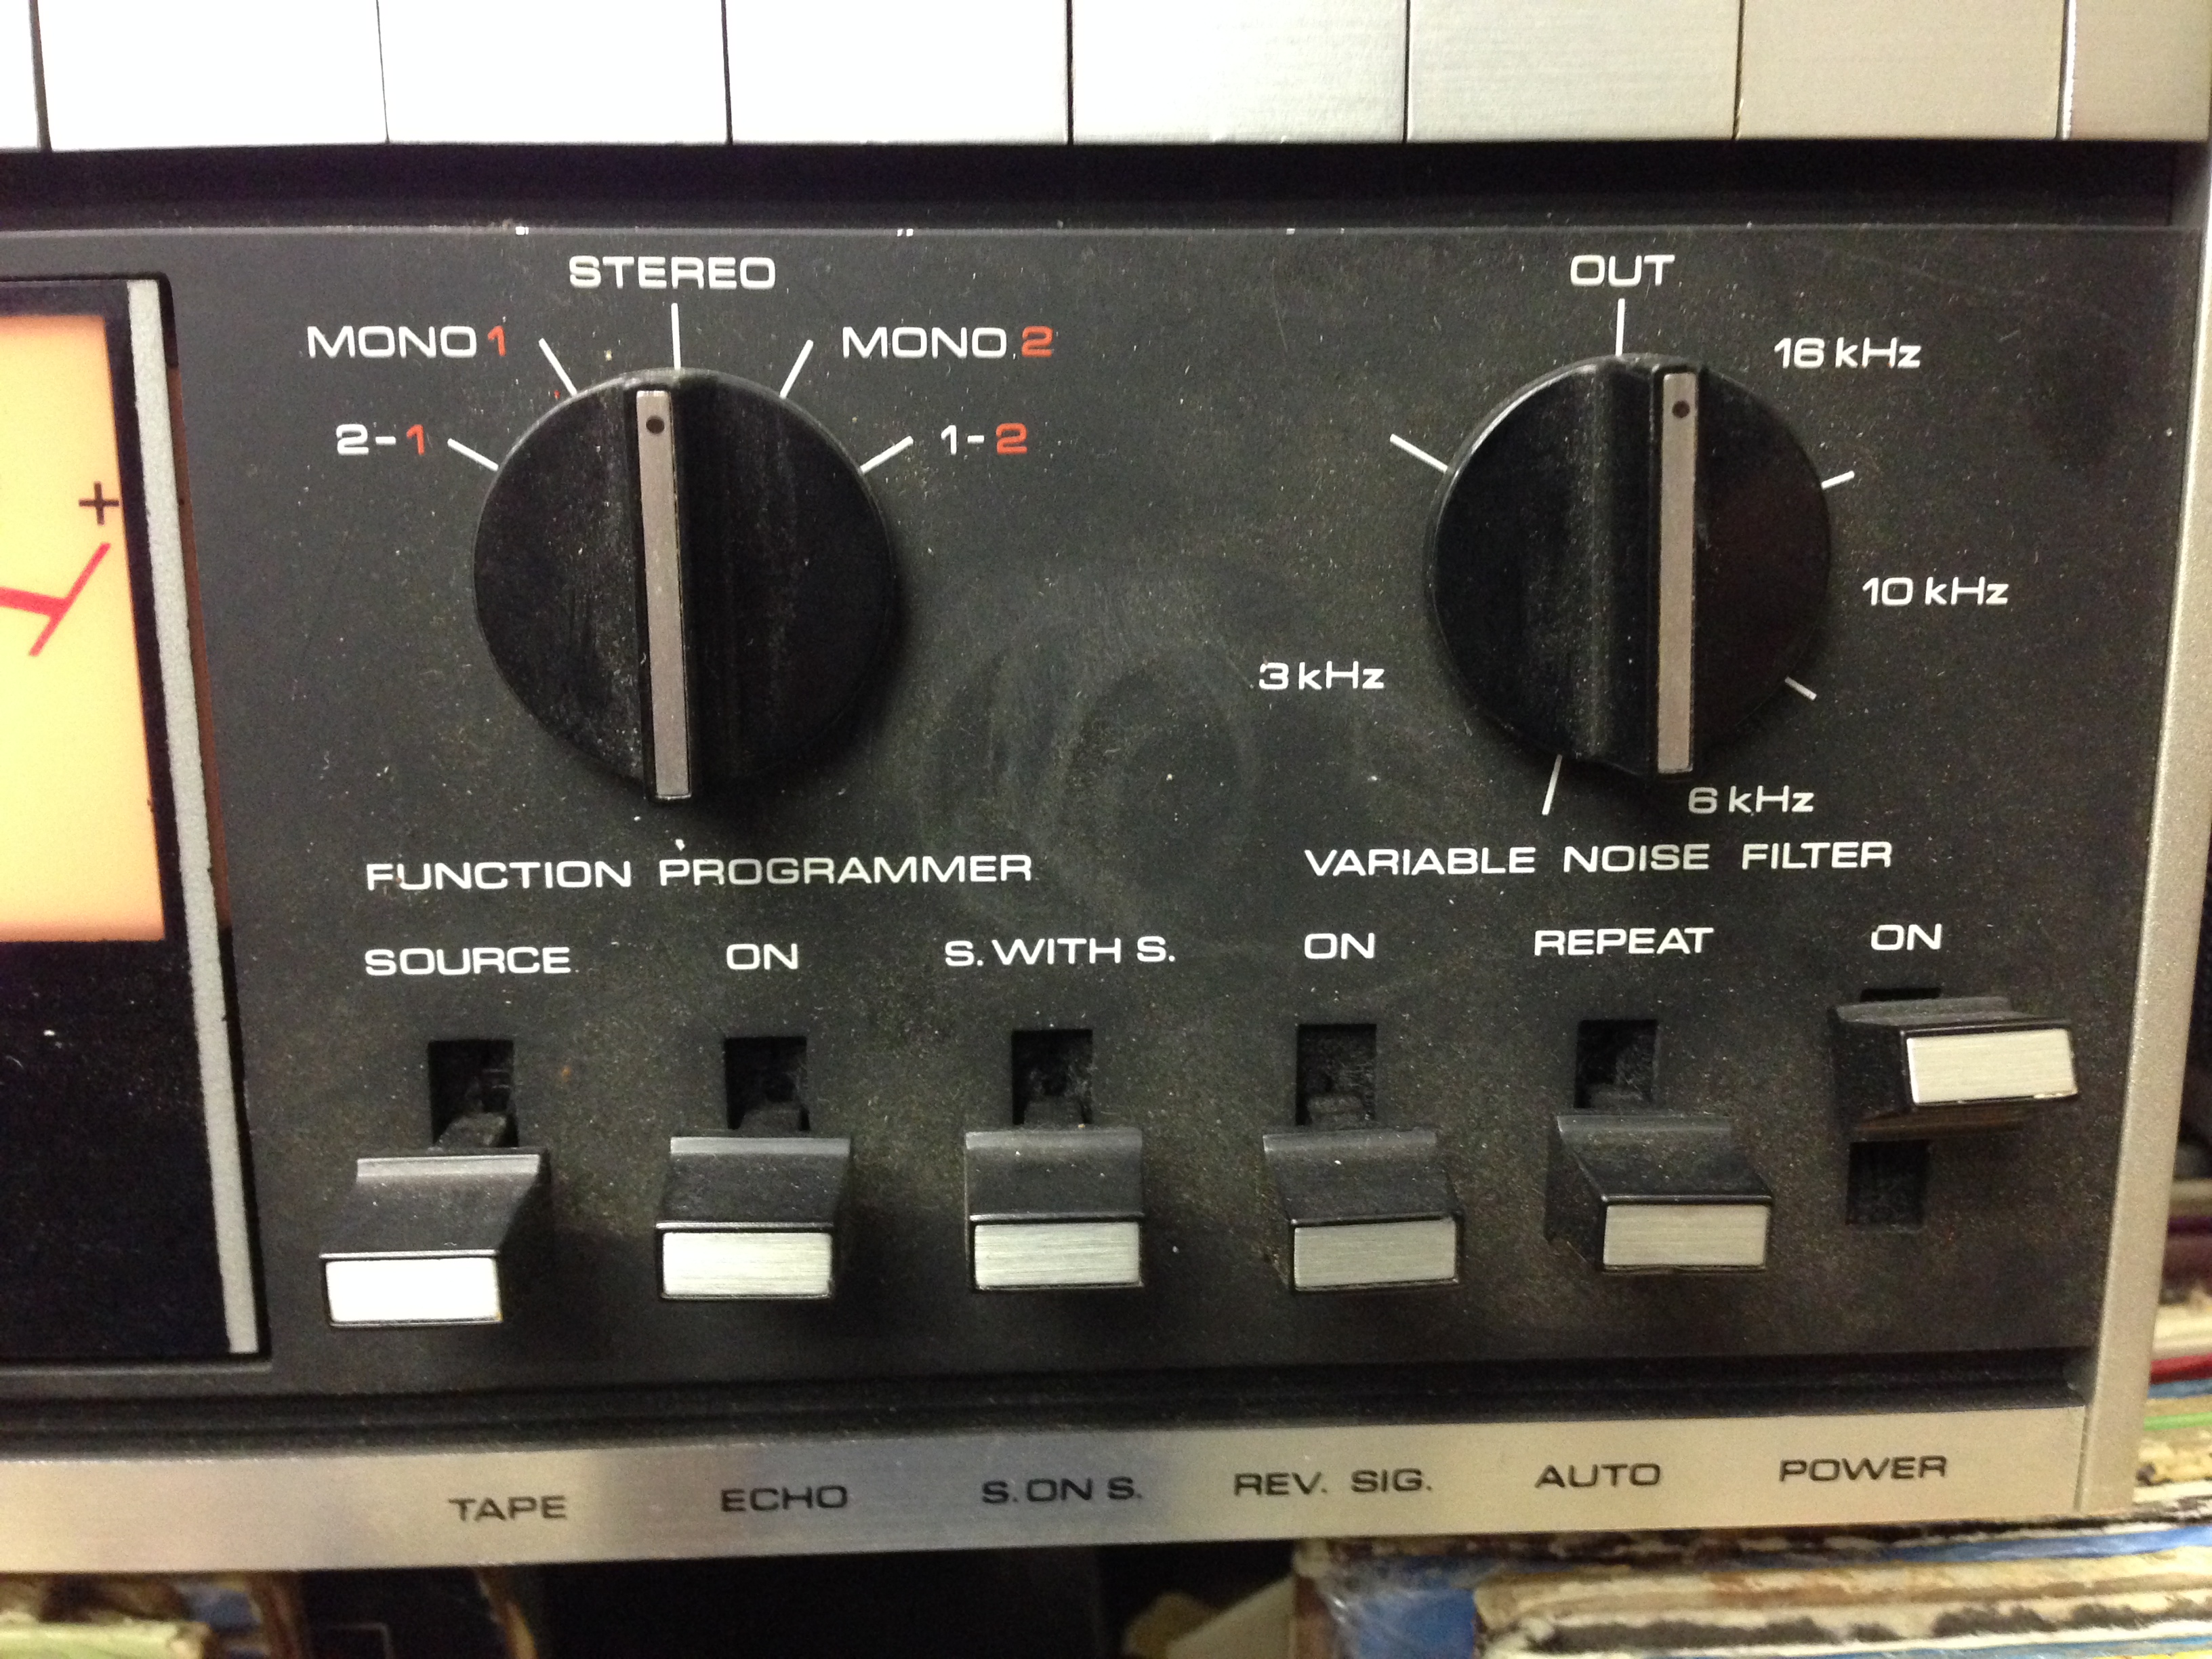
Those tape issues were also the first thing I thought of when I saw this Ampex reel-to-reel tape deck that showed up at the State Road Goodwill in Cuyahoga Falls.

I’ve wanted a reel-to-reel for a while now and this one is gorgeous in a mid-1970s silver and wood-grain way.
There were three problems here. The first is that reel-to-reels are notoriously troublesome. I believe one of the more notable moments of my Dad’s thrift store shopping career was when a reel-to-reel he purchased started smoking when he brought it home and turned it on.
The second problem was that while this is a great looking item it lacks two features I want to see in a reel-to-reel: Four channel output and some sort of exotic noise reduction like Dolby A or DBX. To me, the appeal of a reel-to-reel should be it’s exoticism compared to the common cassette deck and having fancy noise reduction should be part of the fun.

The third problem was that Goodwill wanted $50 for this thing. Sometimes I really question the pricing of some of this stuff I’ve seen at thrift stores lately. Asking $50 for something that’s for all intents not tested and sold “as-is” is not cool.
Coin collectors have a pricing theory that works like this: The price of a coin starts with the worth of the metal (copper, silver, gold, etc) and then you add a “numismatic premium” for the rarity of the coin and the condition of the coin.
I like to think that electronics at thrift stores should work in the opposite way. You start with what a sort of idea of what the thing should be worth and then subtract a “broken-ness risk premium” for the possibility that the thing is incomplete or broken.
$50 is a fair price to pay for a fully operational, totally complete (minus instructions and packaging) reel-to-reel. But it fails to take into account my risk in buying a potentially broken item.
This Memorex S-VHS deck from the same State Road Goodwill was the first S-VHS deck I has ever seen at a thrift store.

It was in pretty bad shape and my same concern with the tape mechanisms on the boombox and the reel-too-reel applied here as well.

There was also a front panel door missing. This looked like a lot more trouble than it was worth, whatever price they had on it.
Completeness is also a common reason I don’t buy some things.
This strange thing was at the Village Thrift on State Road a few months ago. I didn’t know what it was at first. Maybe some sort of TV?
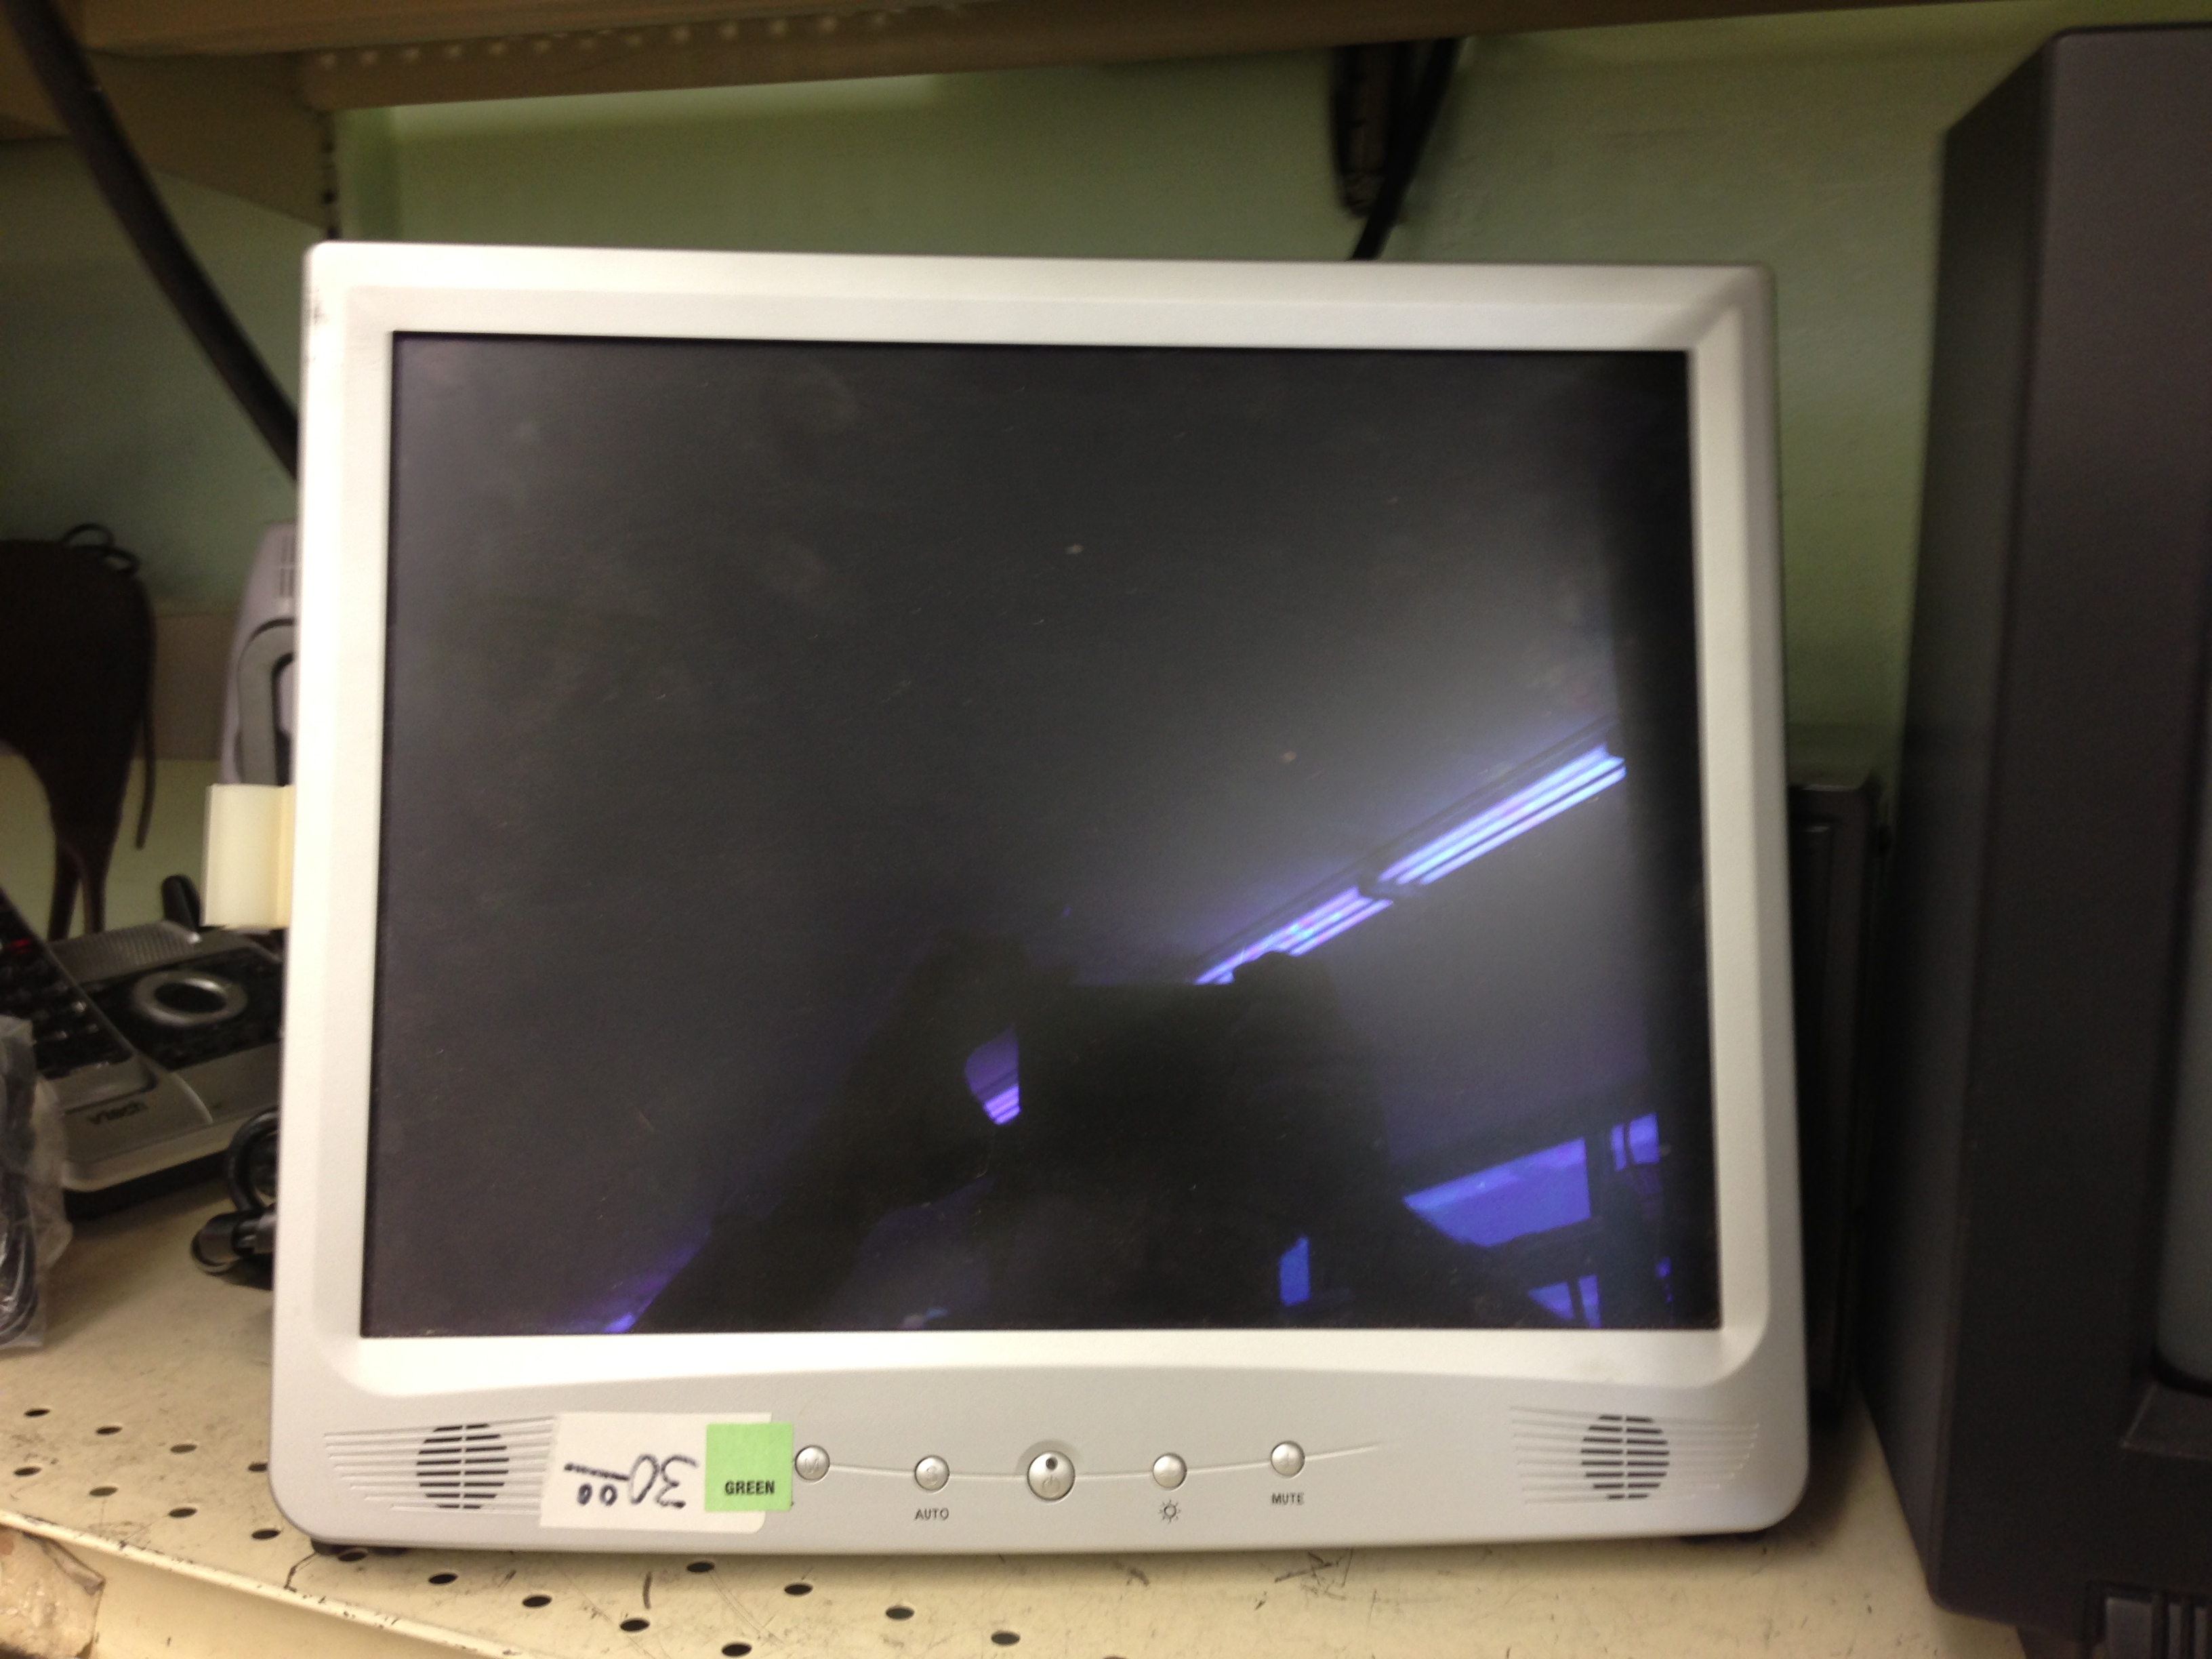
When I turned it around and read the label things became clear.

This was some sort of pen-based tablet PC input device, like a poor man’s Wacom Cintiq.
I have learned from an experience with a Wacom Intuos (which I someday may write about) that you should never buy a pen-based tablet of any type without the pen because finding a suitable pen can be very expensive.
Completeness was also the reason I didn’t buy this Sony Mavica camera.

Comparatively early digital cameras are an area I’ve wanted to start collecting, so I was happy to see this Mavica show up at the Midway Plaza Goodwill. Unfortunately, the very proprietary looking battery (Sony, natch) was missing. I looked for a place where I could at least plug in an AC adapter. Then, I realized that there was this notch cut out of the area around the battery door with a little spring loaded door. it seems like rather than having an AC adapter this model had a thing that went into the battery compartment with a cord coming out of it (hence the little spring-loaded door) that acted as the AC adapter. Another piece of proprietary crap I would have to pay shipping for on eBay. Not worth it.
Apple Macintosh Quadra 700 and AppleColor High-Resolution RGB Monitor (Part I)
Sometime between 2003 and 2006 I found this Apple Macintosh Quadra 700 at the old State Road Goodwill in Cuyahoga Falls. According to this Macintosh serial decoding site my Quadra (serial # F114628QC82) was the 7012th Mac built in the 14th week of 1991 in Apple’s Fremont, California factory.


It looks like I paid $15 for the Quadra and the massive Apple Multiple Scan 17 CRT monitor that came with it.
In fact, the Multiple Scan 17 is so large and hulking that I don’t feel like dragging it out of the closet to take a better photo.

After I started this blog I dragged over most of the vintage Mac stuff out of my parents’ attic to my apartment. I decided that the Quadra 700 should get a semi-permanent place on my vintage computing desk. The desk (which you’ve probably seen in the Macintosh SE and PowerBook G3 entries) has a credenza that limits how deep of a monitor I can use. The Multiple Scan 17 doesn’t leave enough space for the keyboard and really restricts what else I can have on the desk.
Originally my plan was to use the Quadra with an HP 1740 LCD monitor I picked up at the Kent-Ravena Goodwill so I bought a DB-15 to HD-15 (VGA) converter.

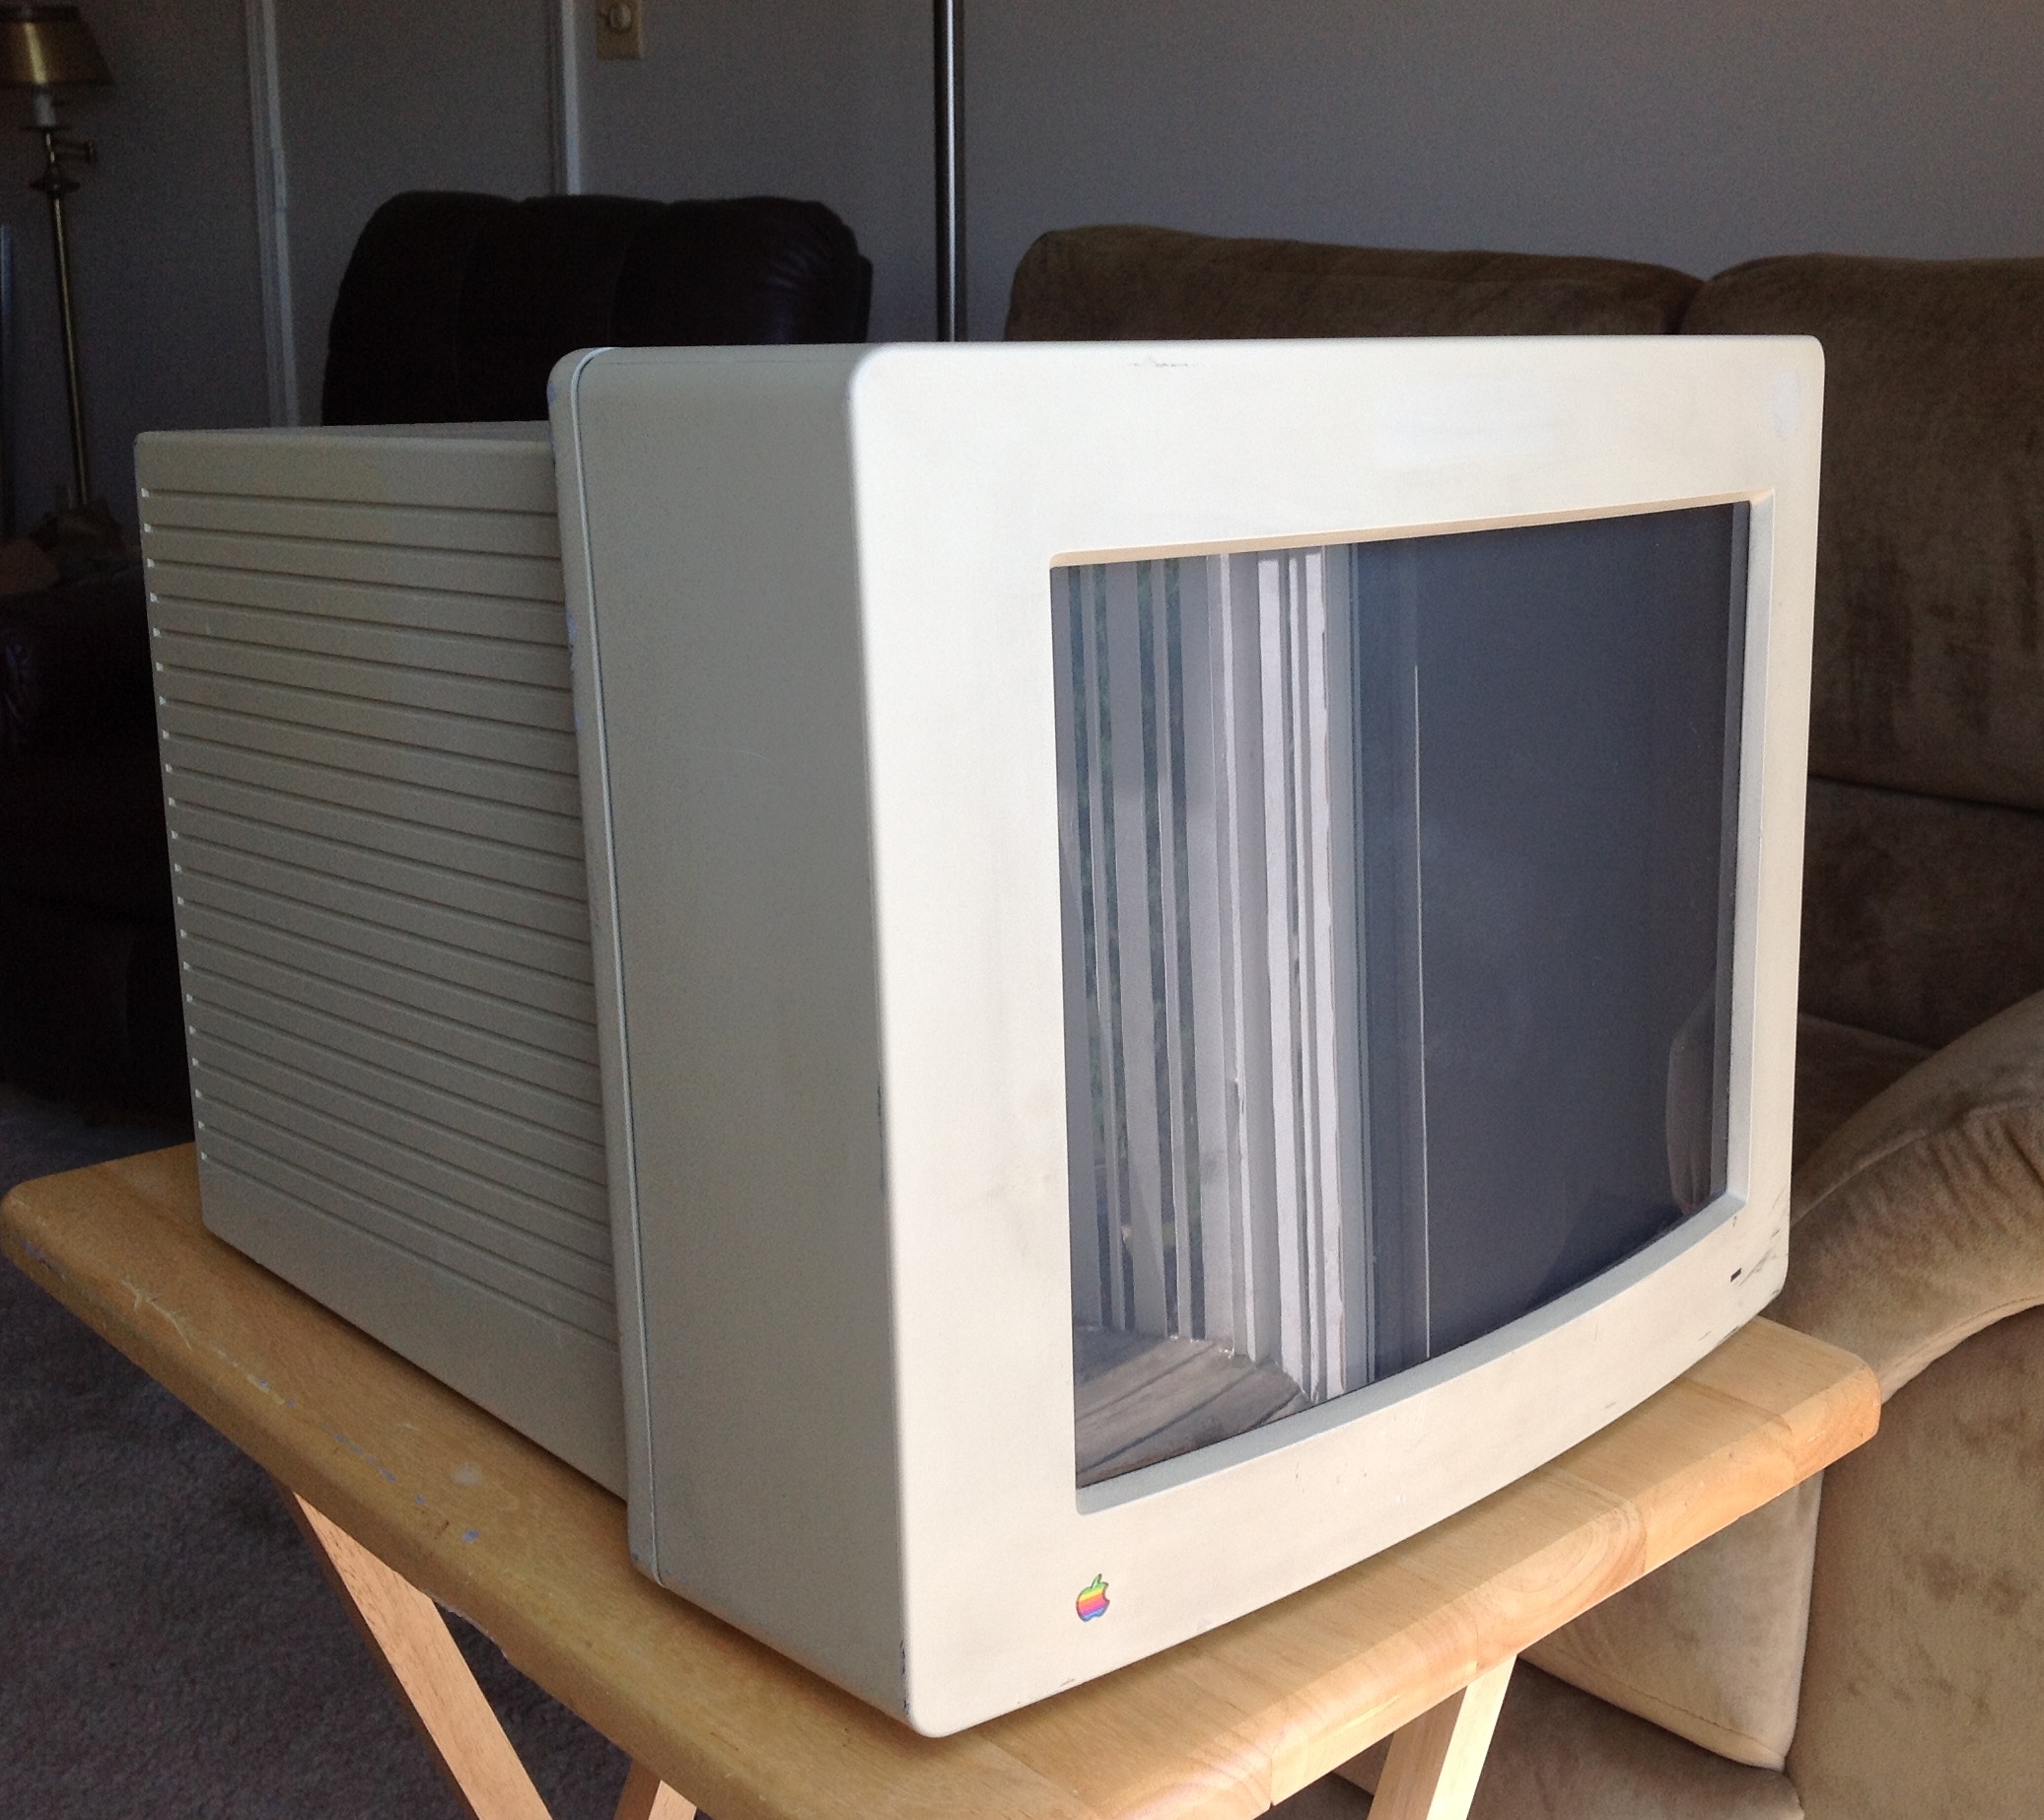
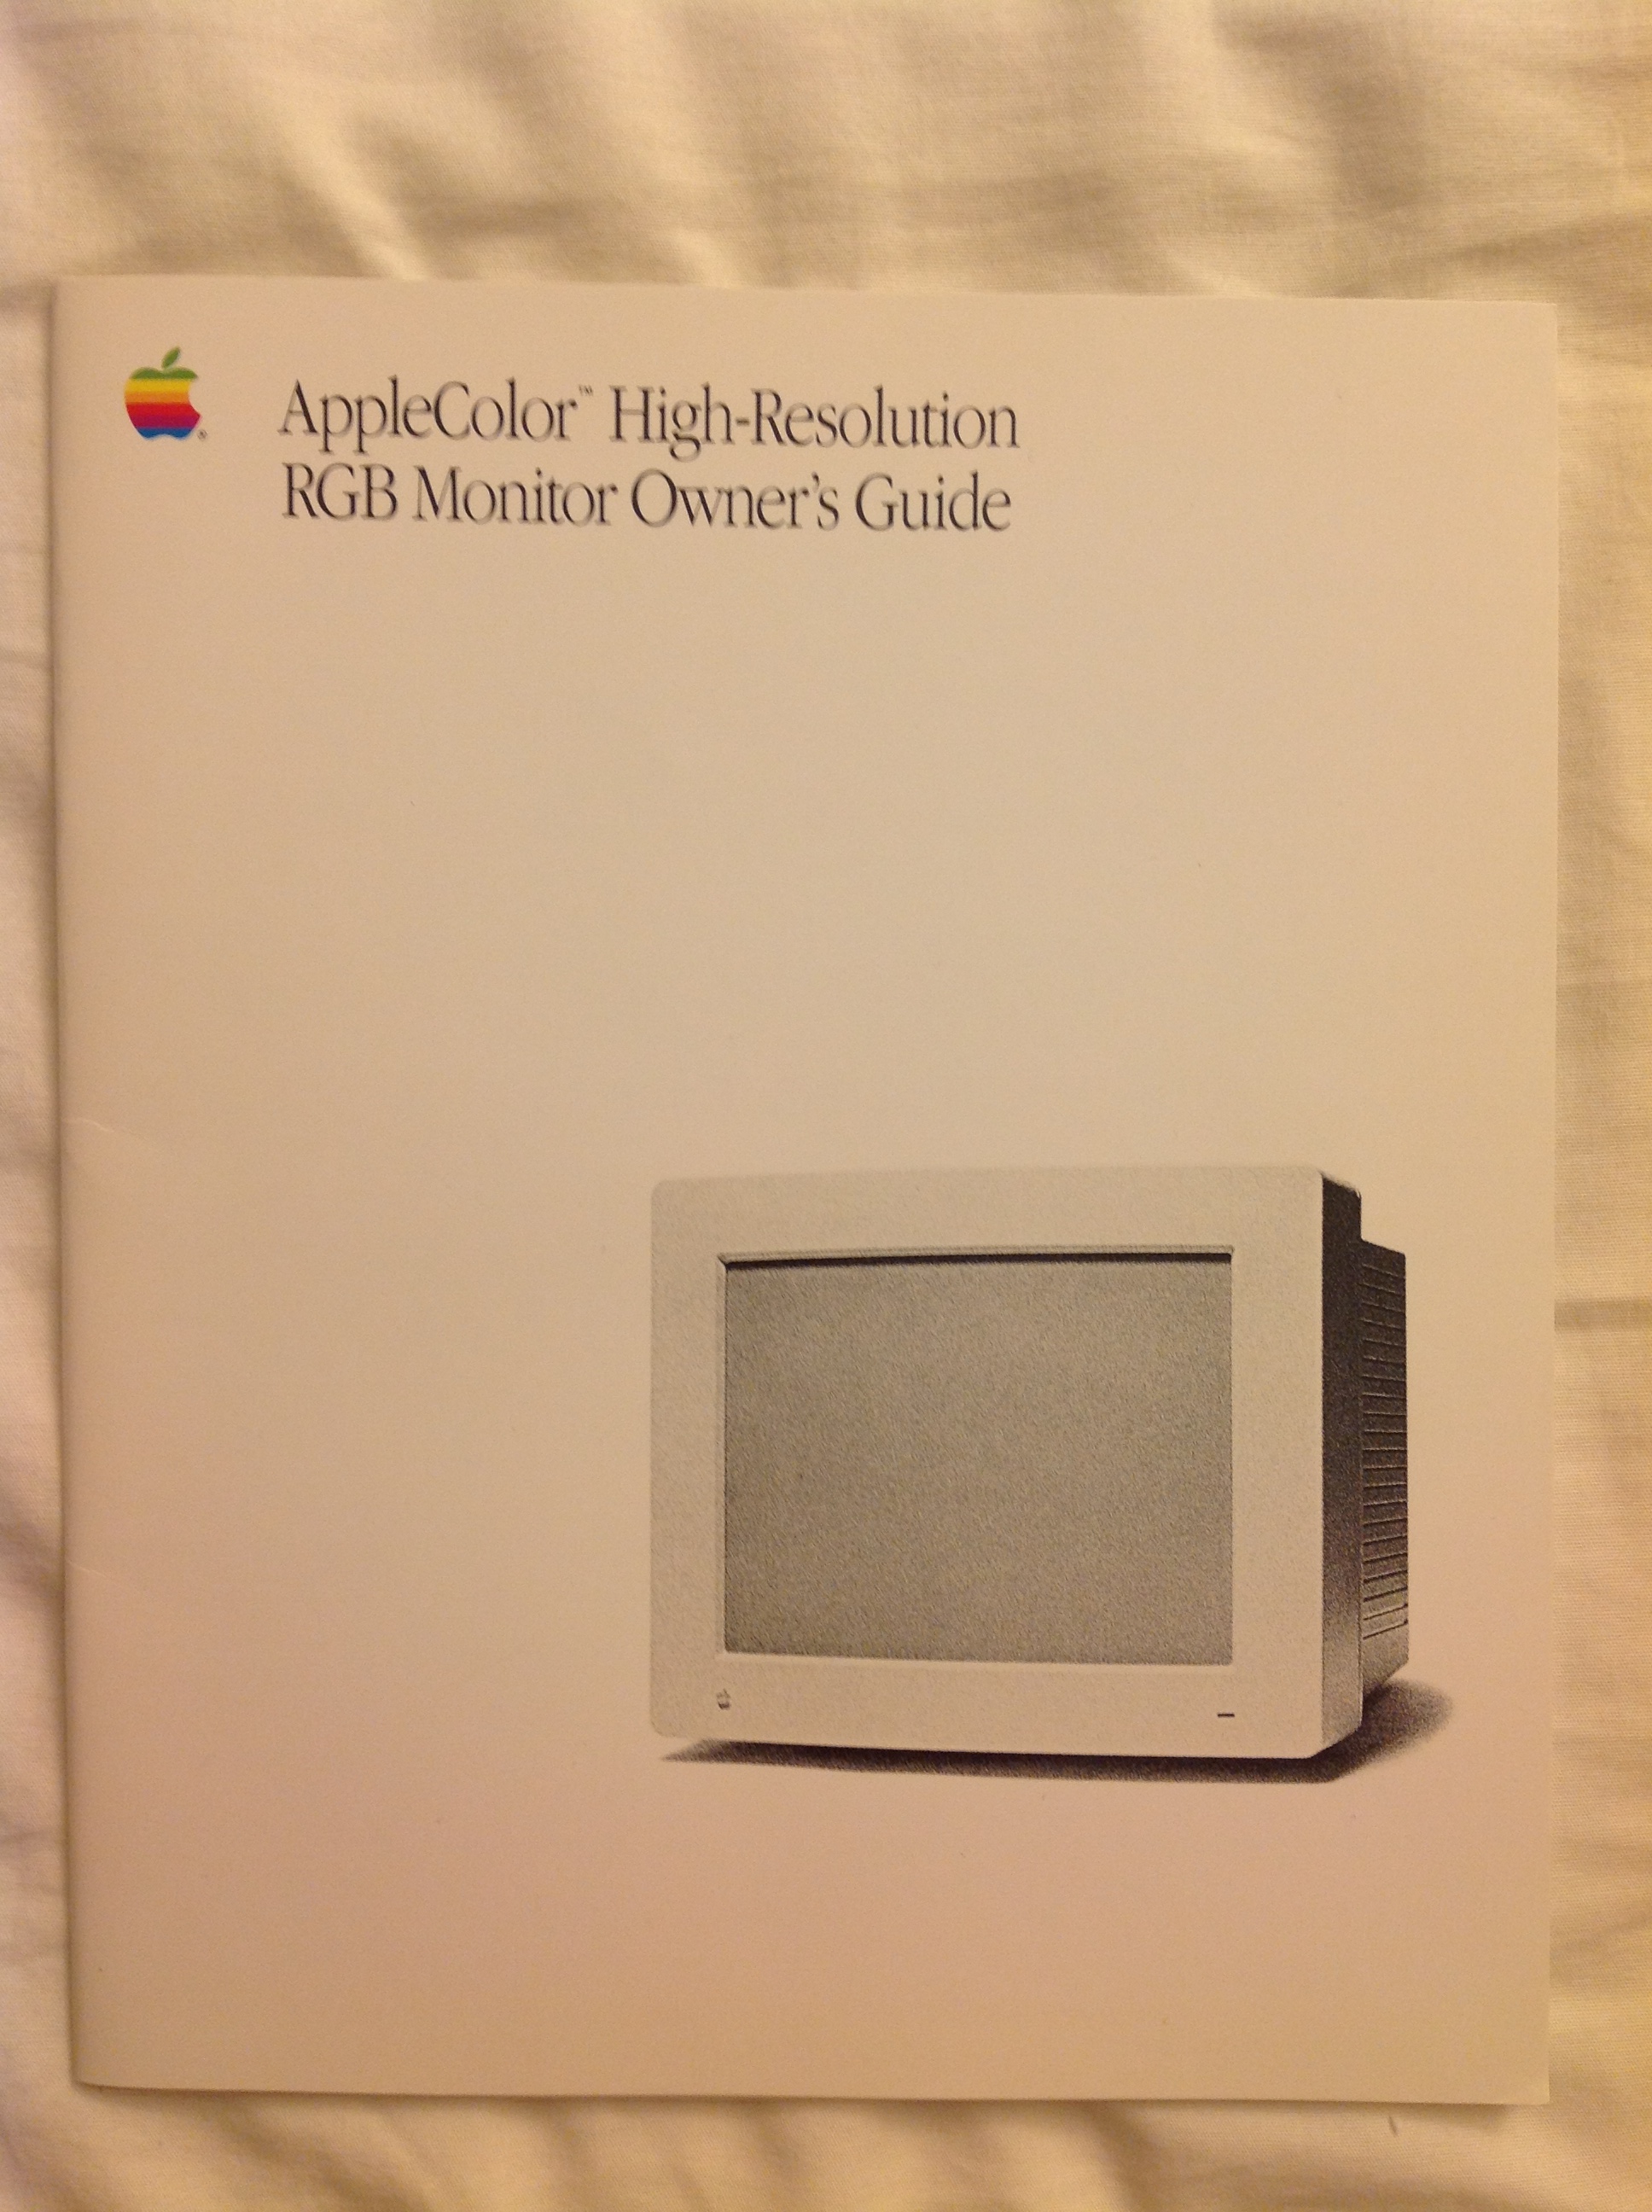
However, while digging through the Mac stuff in my parents’ attic I made an interesting discovery. Unbeknownst to me I owned AppleColor High-Resolution RGB 13″ monitor.
When I was still living with my parents there wasn’t really a lot of room in my bedroom for all of the vintage computing stuff I had accumulated. Often, I would lose interest in something and it would go into the attic.
At some point my Dad must have brought home this monitor from a thrift store. Unlike most CRT monitors where the monitor cable is attached to the monitor this one has a detachable cable which was lost when he bought it (I have since purchased a replacement on eBay). With all of the Mac stuff put away and no monitor cable to test it with, it joined everything else in the attic and I forgot about it.
Years later when I stumbled upon it deep in the shadows of a poorly lit part of the room, I thought it was the cheaper Macintosh 12″ RGB monitor that went with the LC series. But then, I saw the name plate on the back.
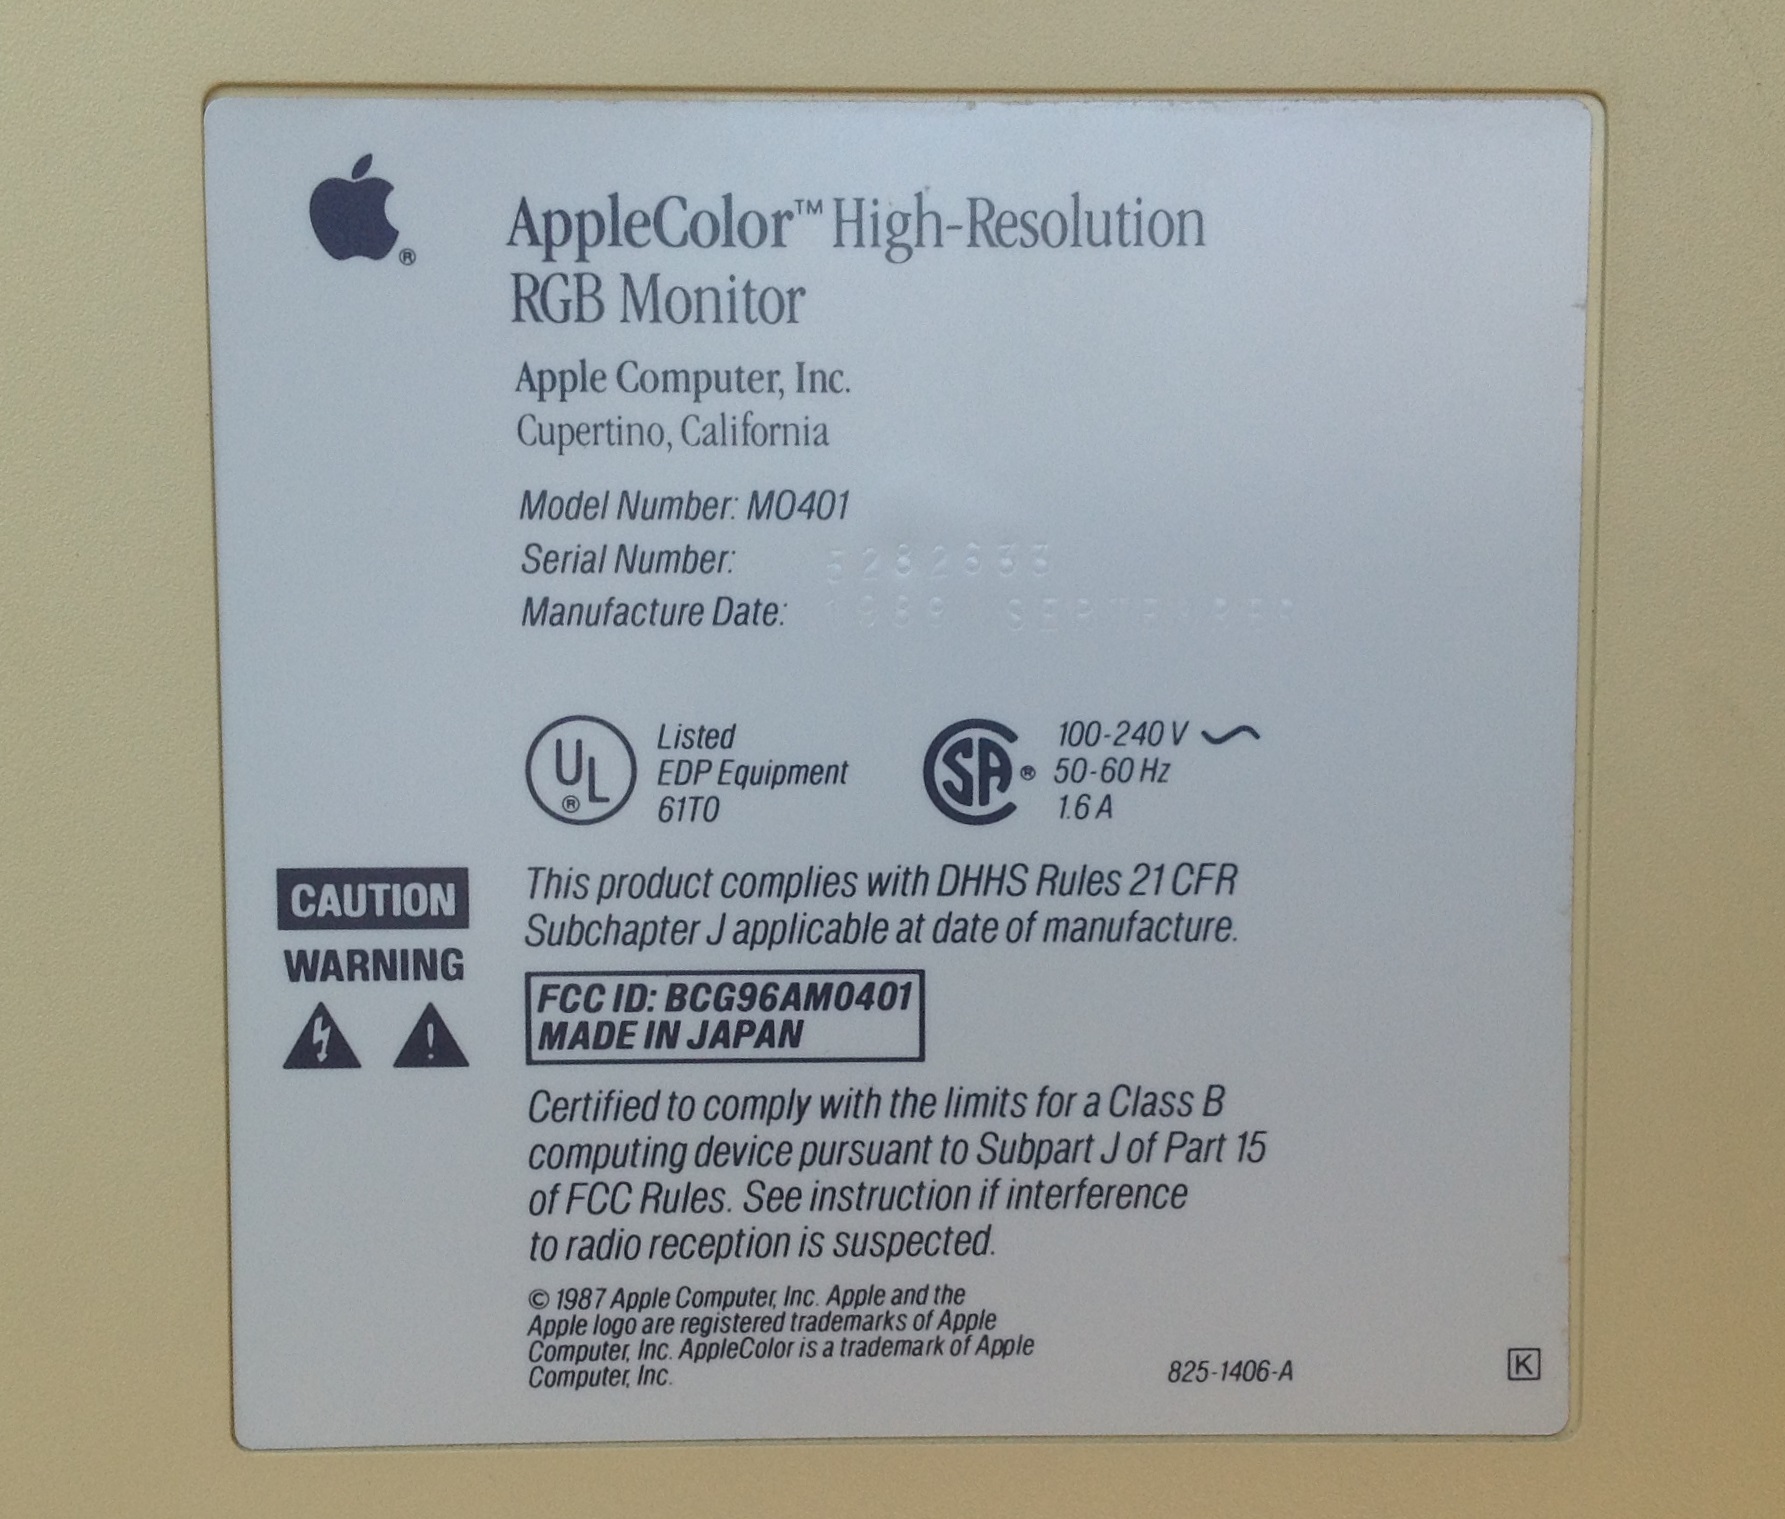
This was an amazing stroke of luck because that’s a damn fine monitor. Back in the late 80s this was one of Apple’s high end Trinitron monitors. Remember those Apple brochures my mother got in West Akron in 1989 from the Macintosh SE entry?
I’m fairly sure that the monitor sitting on the IIx in that picture is the AppleColor Hi-Res 13″. In fact, if you flip over that brochure, there it is, listed as the AppleColor RGB Monitor.

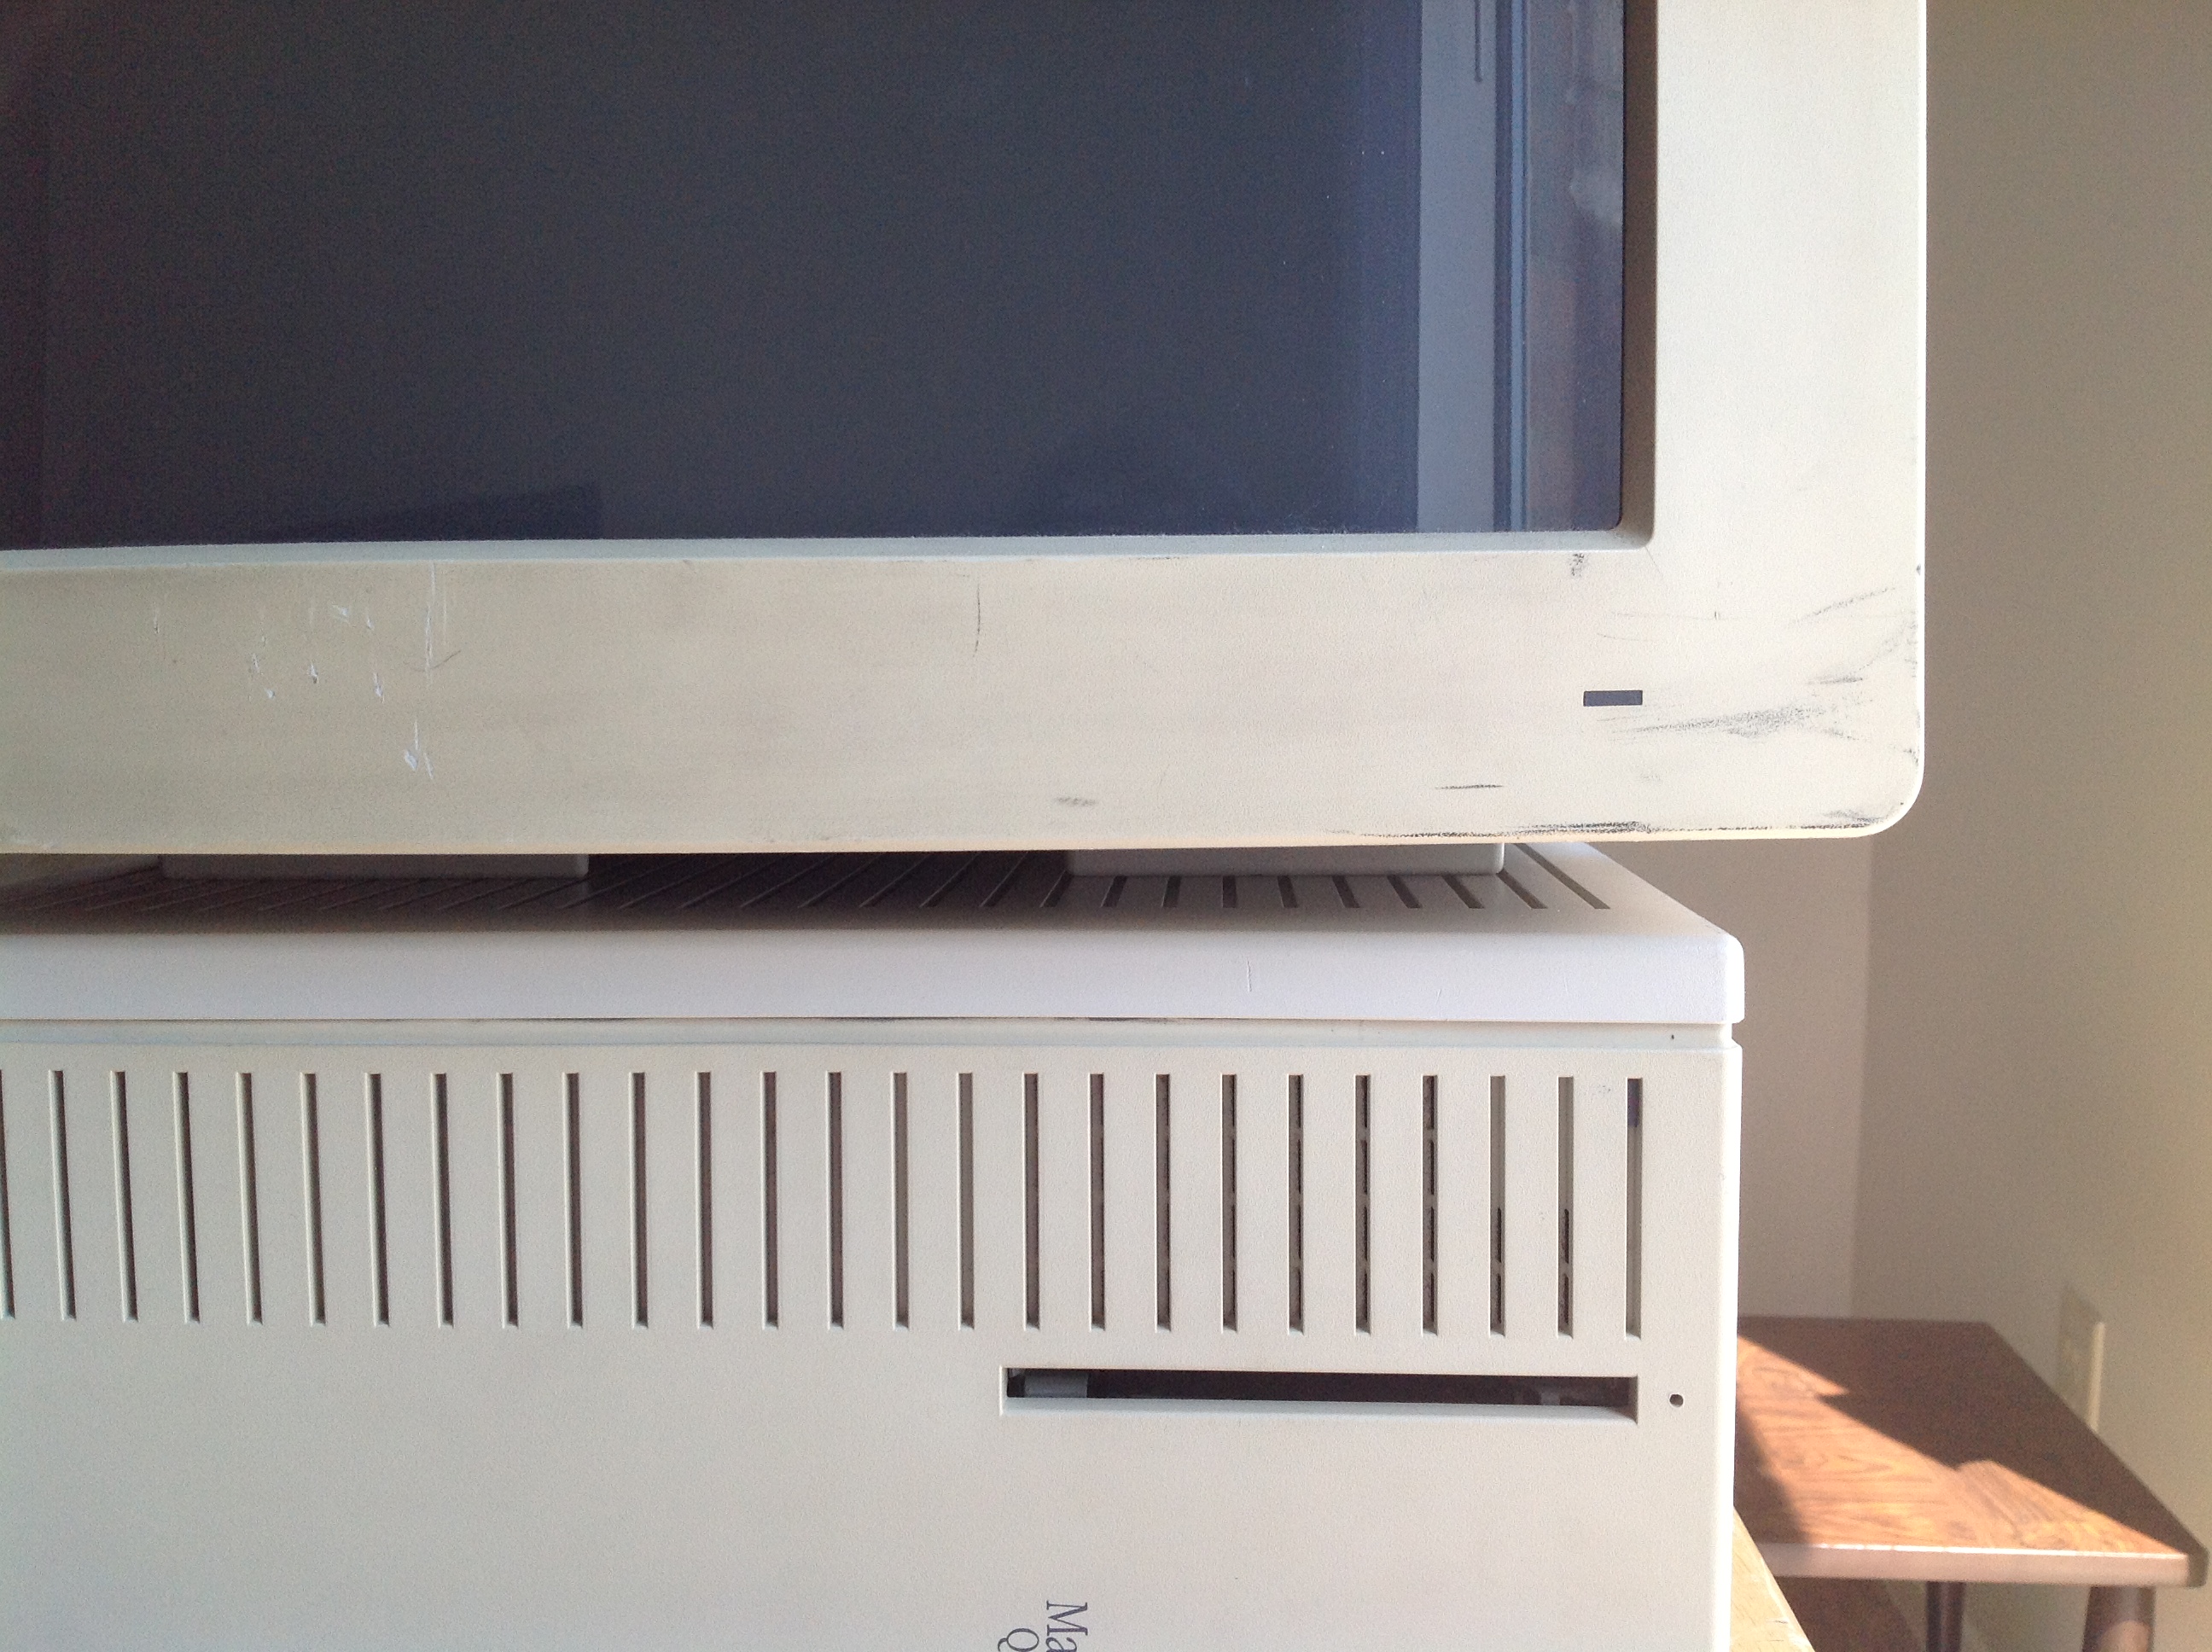
For reasons that will become obvious in a moment, the AppleColor RGB fits very nicely on the top of the Quadra 700 when it’s positioned as a desktop rather than a mini-tower.

There’s some scratches and scuffs on the monitor but for the most part it works and looks spectacular.
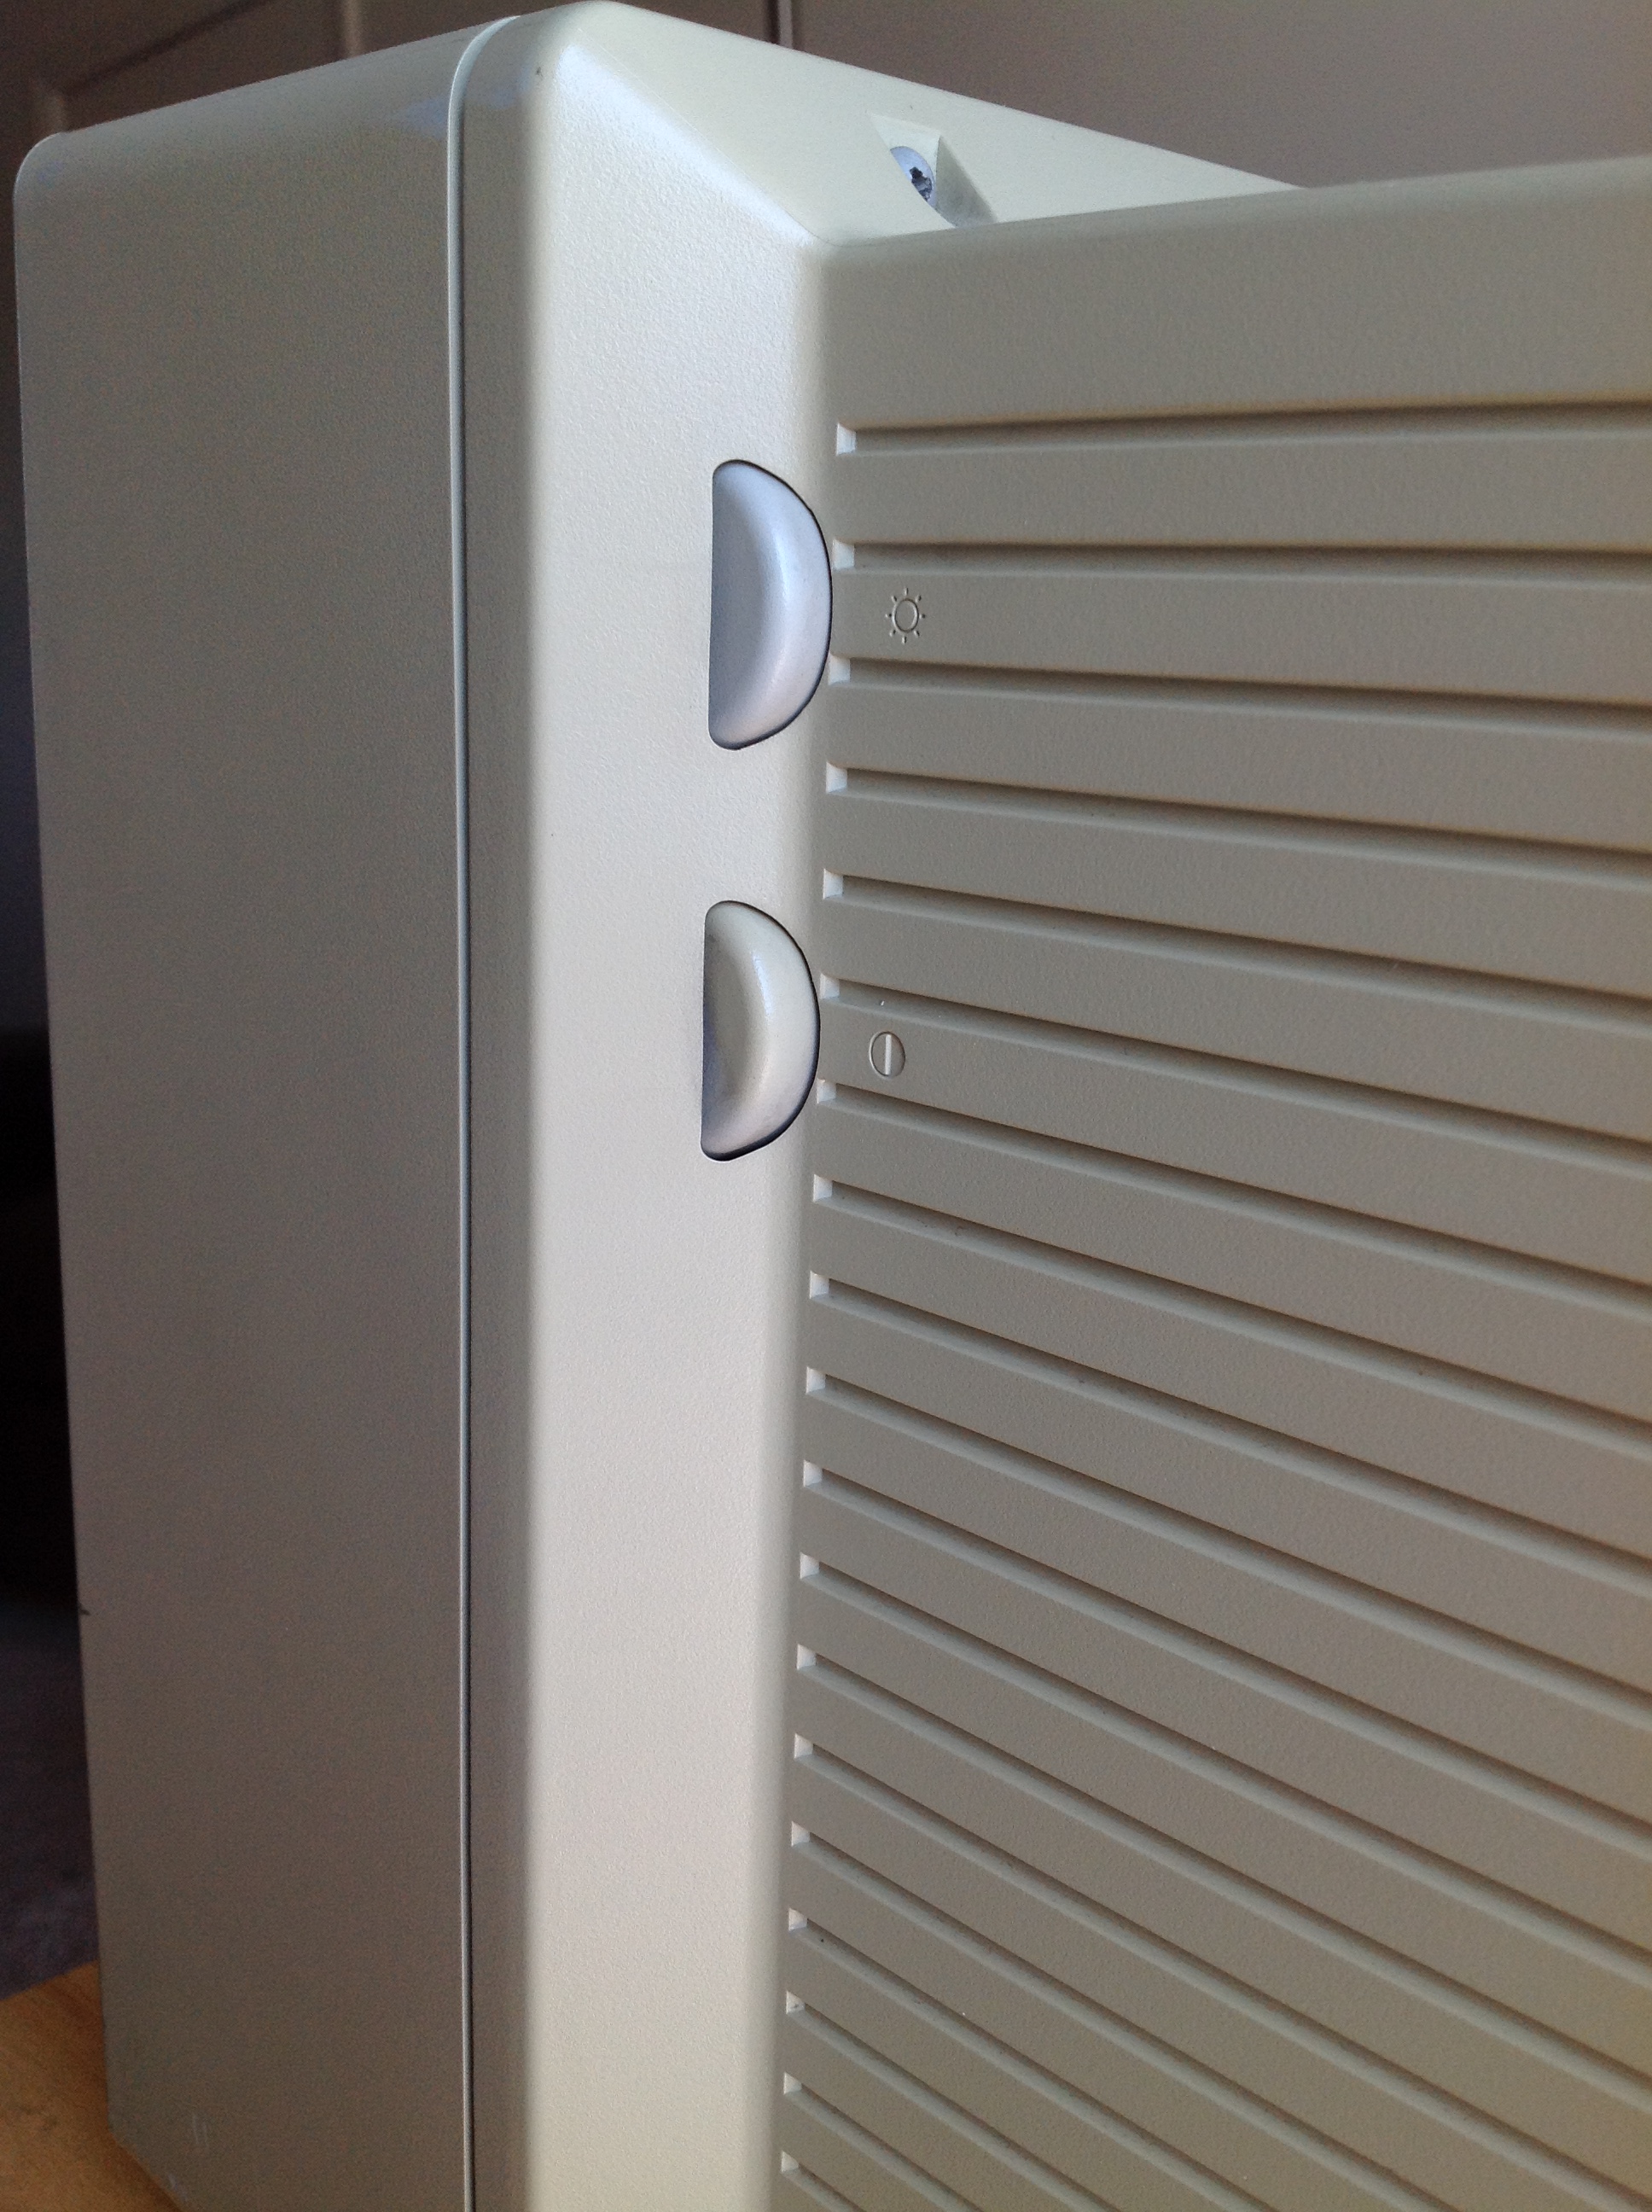
This monitor is a classic piece of Snow White era Apple design. My favorite thing about this monitor are the large brightness and contrast dials it has on it’s side.
Apple also sold a rather attractive optional base for the AppleColor RGB monitor with great Snow White detailing, as seen in this drawing from Technical Introduction to the Macintosh Family: Second Edition.

Unfortunately I’ve never seen that base come up on eBay.
Oddly enough, when I ventured further into my parent’s attic I found a box of Macintosh stuff that a college roommate had recovered from being trashed at a college graphics lab that contained, among other things, the manual for this model of monitor.
The Quadra 700 is one of my all-time favorite thrift store finds. It was the first extremely serious Macintosh I have owned from the expandable 680X0 era (roughly from 1987 to 1994 when Apple moved to PowerPC CPUs). Previously the most powerful Mac I had found was a Macintosh LC III with a color monitor. That machine introduced me to what the experience of using a color Macintosh had been like in the early 1990s but the Quadra was on another level entirely.
To put this in perspective: Macintosh LC III was a lower-end machine from 1993 that gave you something like the performance of a high-end Macintosh from 1989. The Quadra 700 (along with the Quadra 900 which was basically the same guts in a larger, more expandable case) was Apple’s late 1991 high-end machine. When it was new, the Quadra 700 cost a staggering $5700, without a monitor. The monitor could easily add another $1500.
![]()
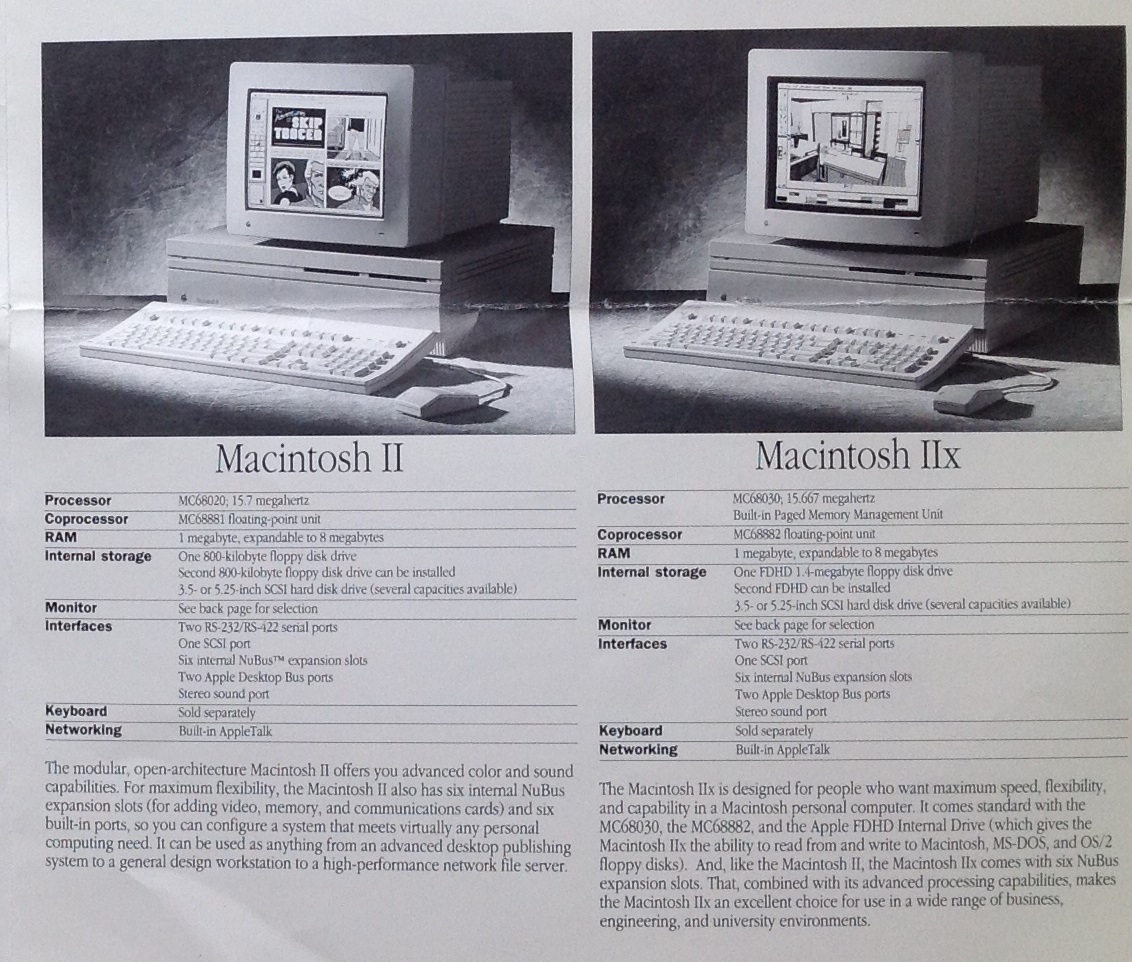
In order to talk about the importance of the Quadra I have to go back to the Macintosh II series, which I also discussed in the Macintosh SE entry.
Apple created a lot of machines in the Macintosh II series and it’s a bit difficult to keep track of them. As you can see in the brochure, the original machine was the Macintosh II, built around Motorola’s 68020 processor and for the first time in the Macintosh, a fully 32-bit bus. That machine was succeeded the following year by the Macintosh IIx, which, like all following Macintosh II models used the 68030 processor. The II and the IIx both had six NuBus expansion slots, which is why their cases are so wide.
If you’re more familiar with the history of Intel processors don’t let the similar numbering schemes lead you into thinking the 68020 was equivalent to a 286 and the 68030 was equivalent to a 386. In reality the original Macintosh’s 68000 CPU would be more comparable to the 286 while the 68020 and 68030 were comparable to the 386. In the numbering scheme that Motorola was using at the time processors with even numbered digits in their second to last number like the 68000, 68020 and 68040 were new designs and processors with odd numbers like 68010 and 68030 were enhancements to the previous model. The 68030 gained a memory mapping unit (MMU) which enabled virtual memory. The jump from the 286 to the 386 was much greater than the jump from the 68020 to the 68030.
The next machine in the series was the Macintosh IIcx in 1989, which basically took the guts of the IIx and put them in a smaller case with only three expansion slots (hence, it’s a II-compact-x). Like the II and the IIx, the IIcx had no on-board video and required a video card to be in one of the expansion slots.
Later that year Apple reused the same case for the Macintosh IIci, which added on-board video.
The case used in the Macintosh IIcx and IIci was designed to match in color, styling, and size the AppleColor High Resolution RGB monitor I have, as seen in this illustration from Technical Introduction to the Macintosh Family: Second Edition.

As you probably caught onto by now the Quadra 700 uses the same case as the Macintosh IIci but with the Snow White detail lines and the Apple badge turned 90 degrees, turning it into a mini-tower. That’s why the monitor matches the Quadra so well.

The last Macintosh to use the full-sized six-slot Macintosh II case was the uber-expensive Macintosh IIfx in 1990. It used a blistering 40MHz 68030 and started at $8970.
However, if you bought a IIfx, you may have felt very silly the next year when the Quadra series based on the new 68040 processor came out and succeeded the Macintosh II series.
The 68040, especially the full version of the chip with the FPU (floating point unit) that the Quadra 700 used, was a huge jump in processing power.
According to these benchmarks at Low End Mac, the 25MHz 68040 in the Quadra 700 scores 33% higher than the Macintosh IIfx’s 40MHz 68030 on an integer benchmark and five times as fast on a math benchmark. Plus, it was just over half the price of the IIfx.

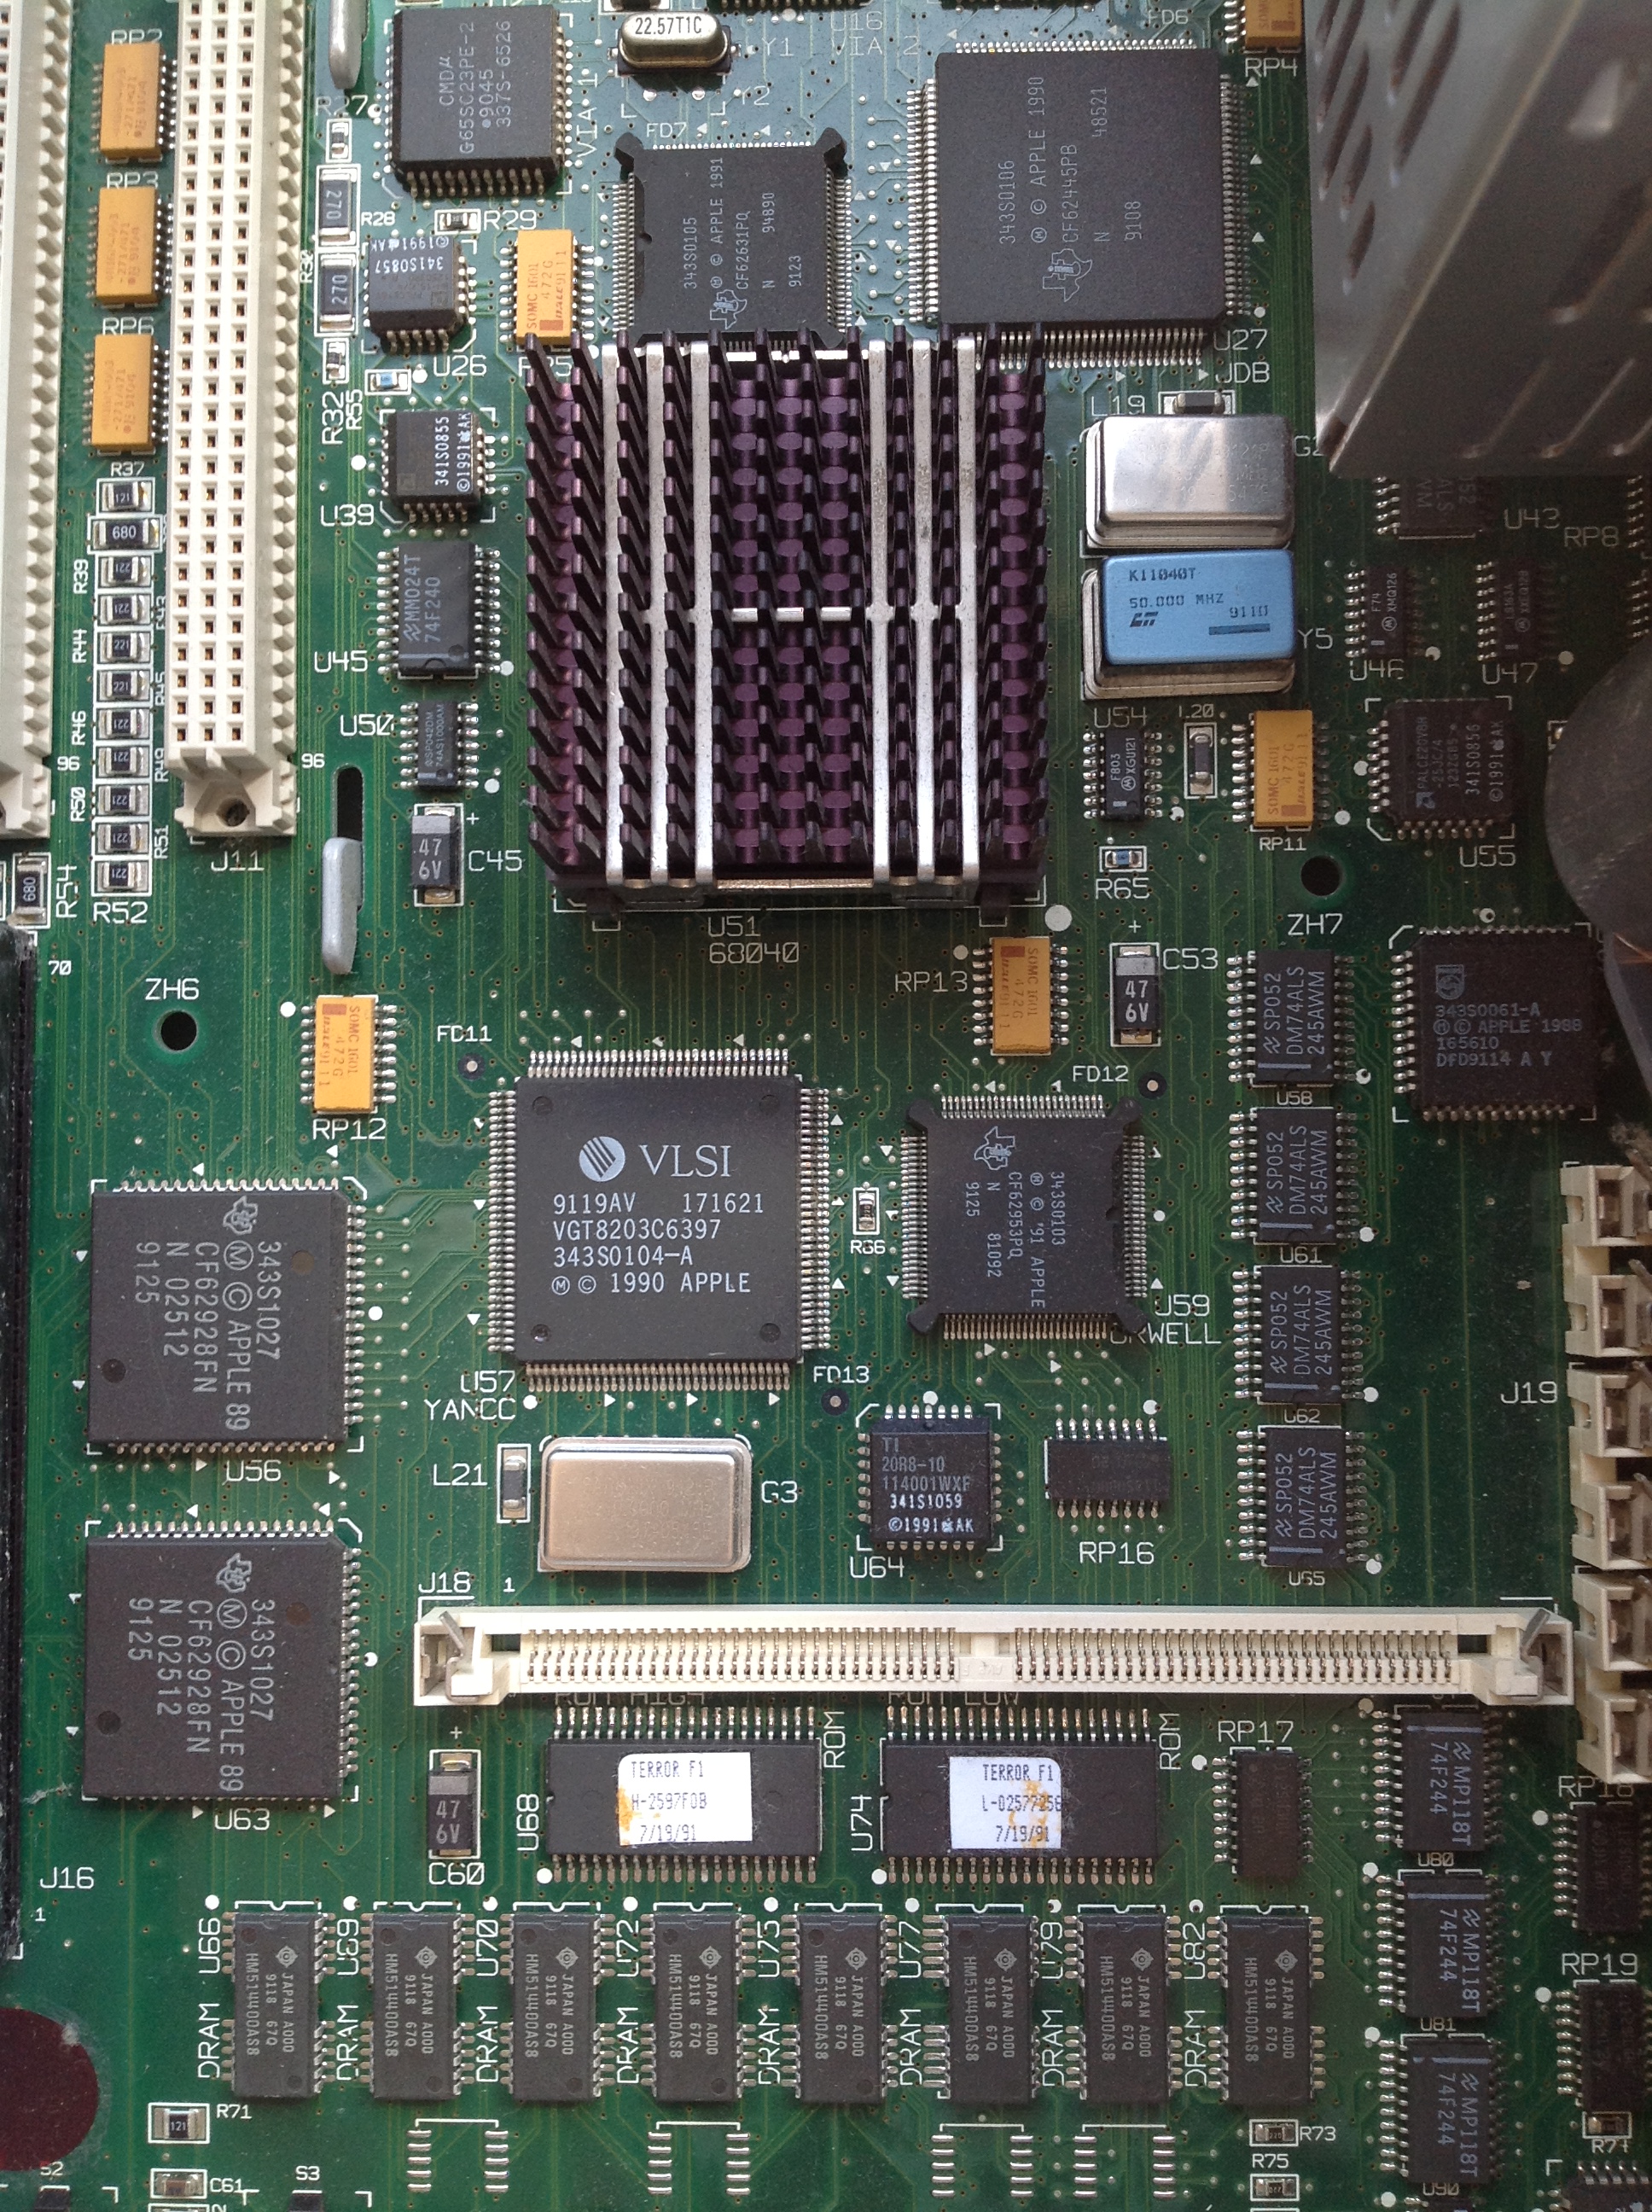
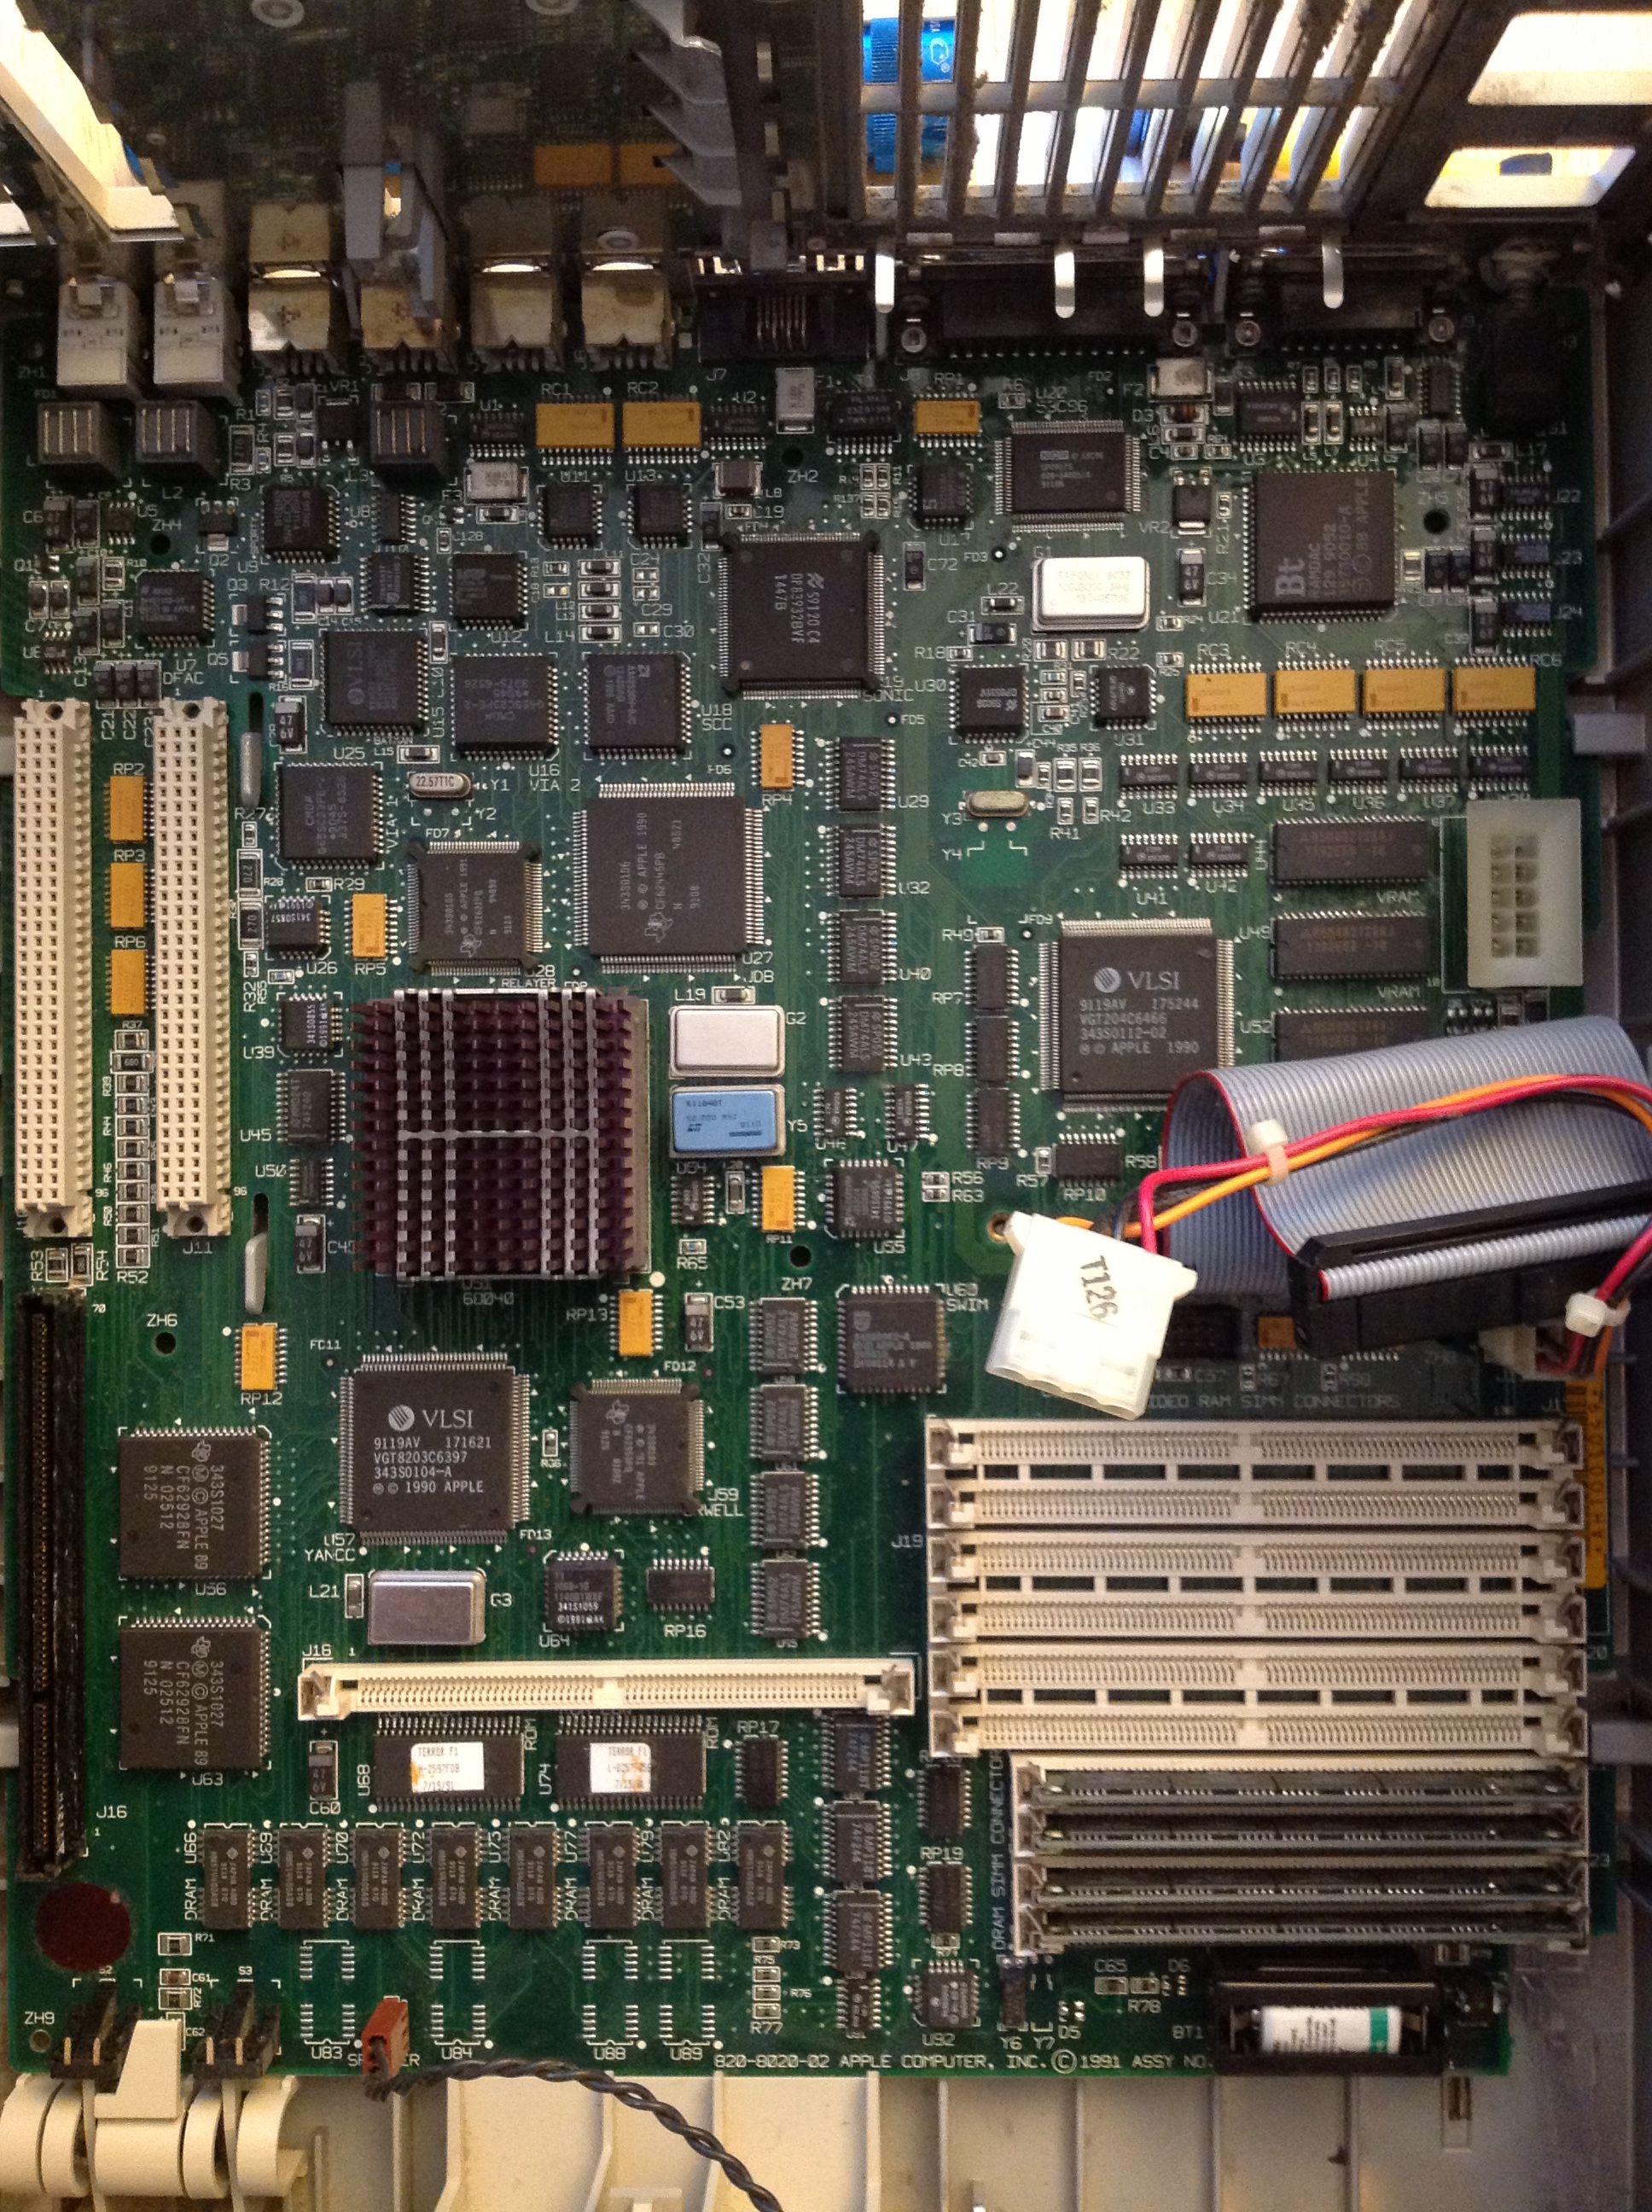
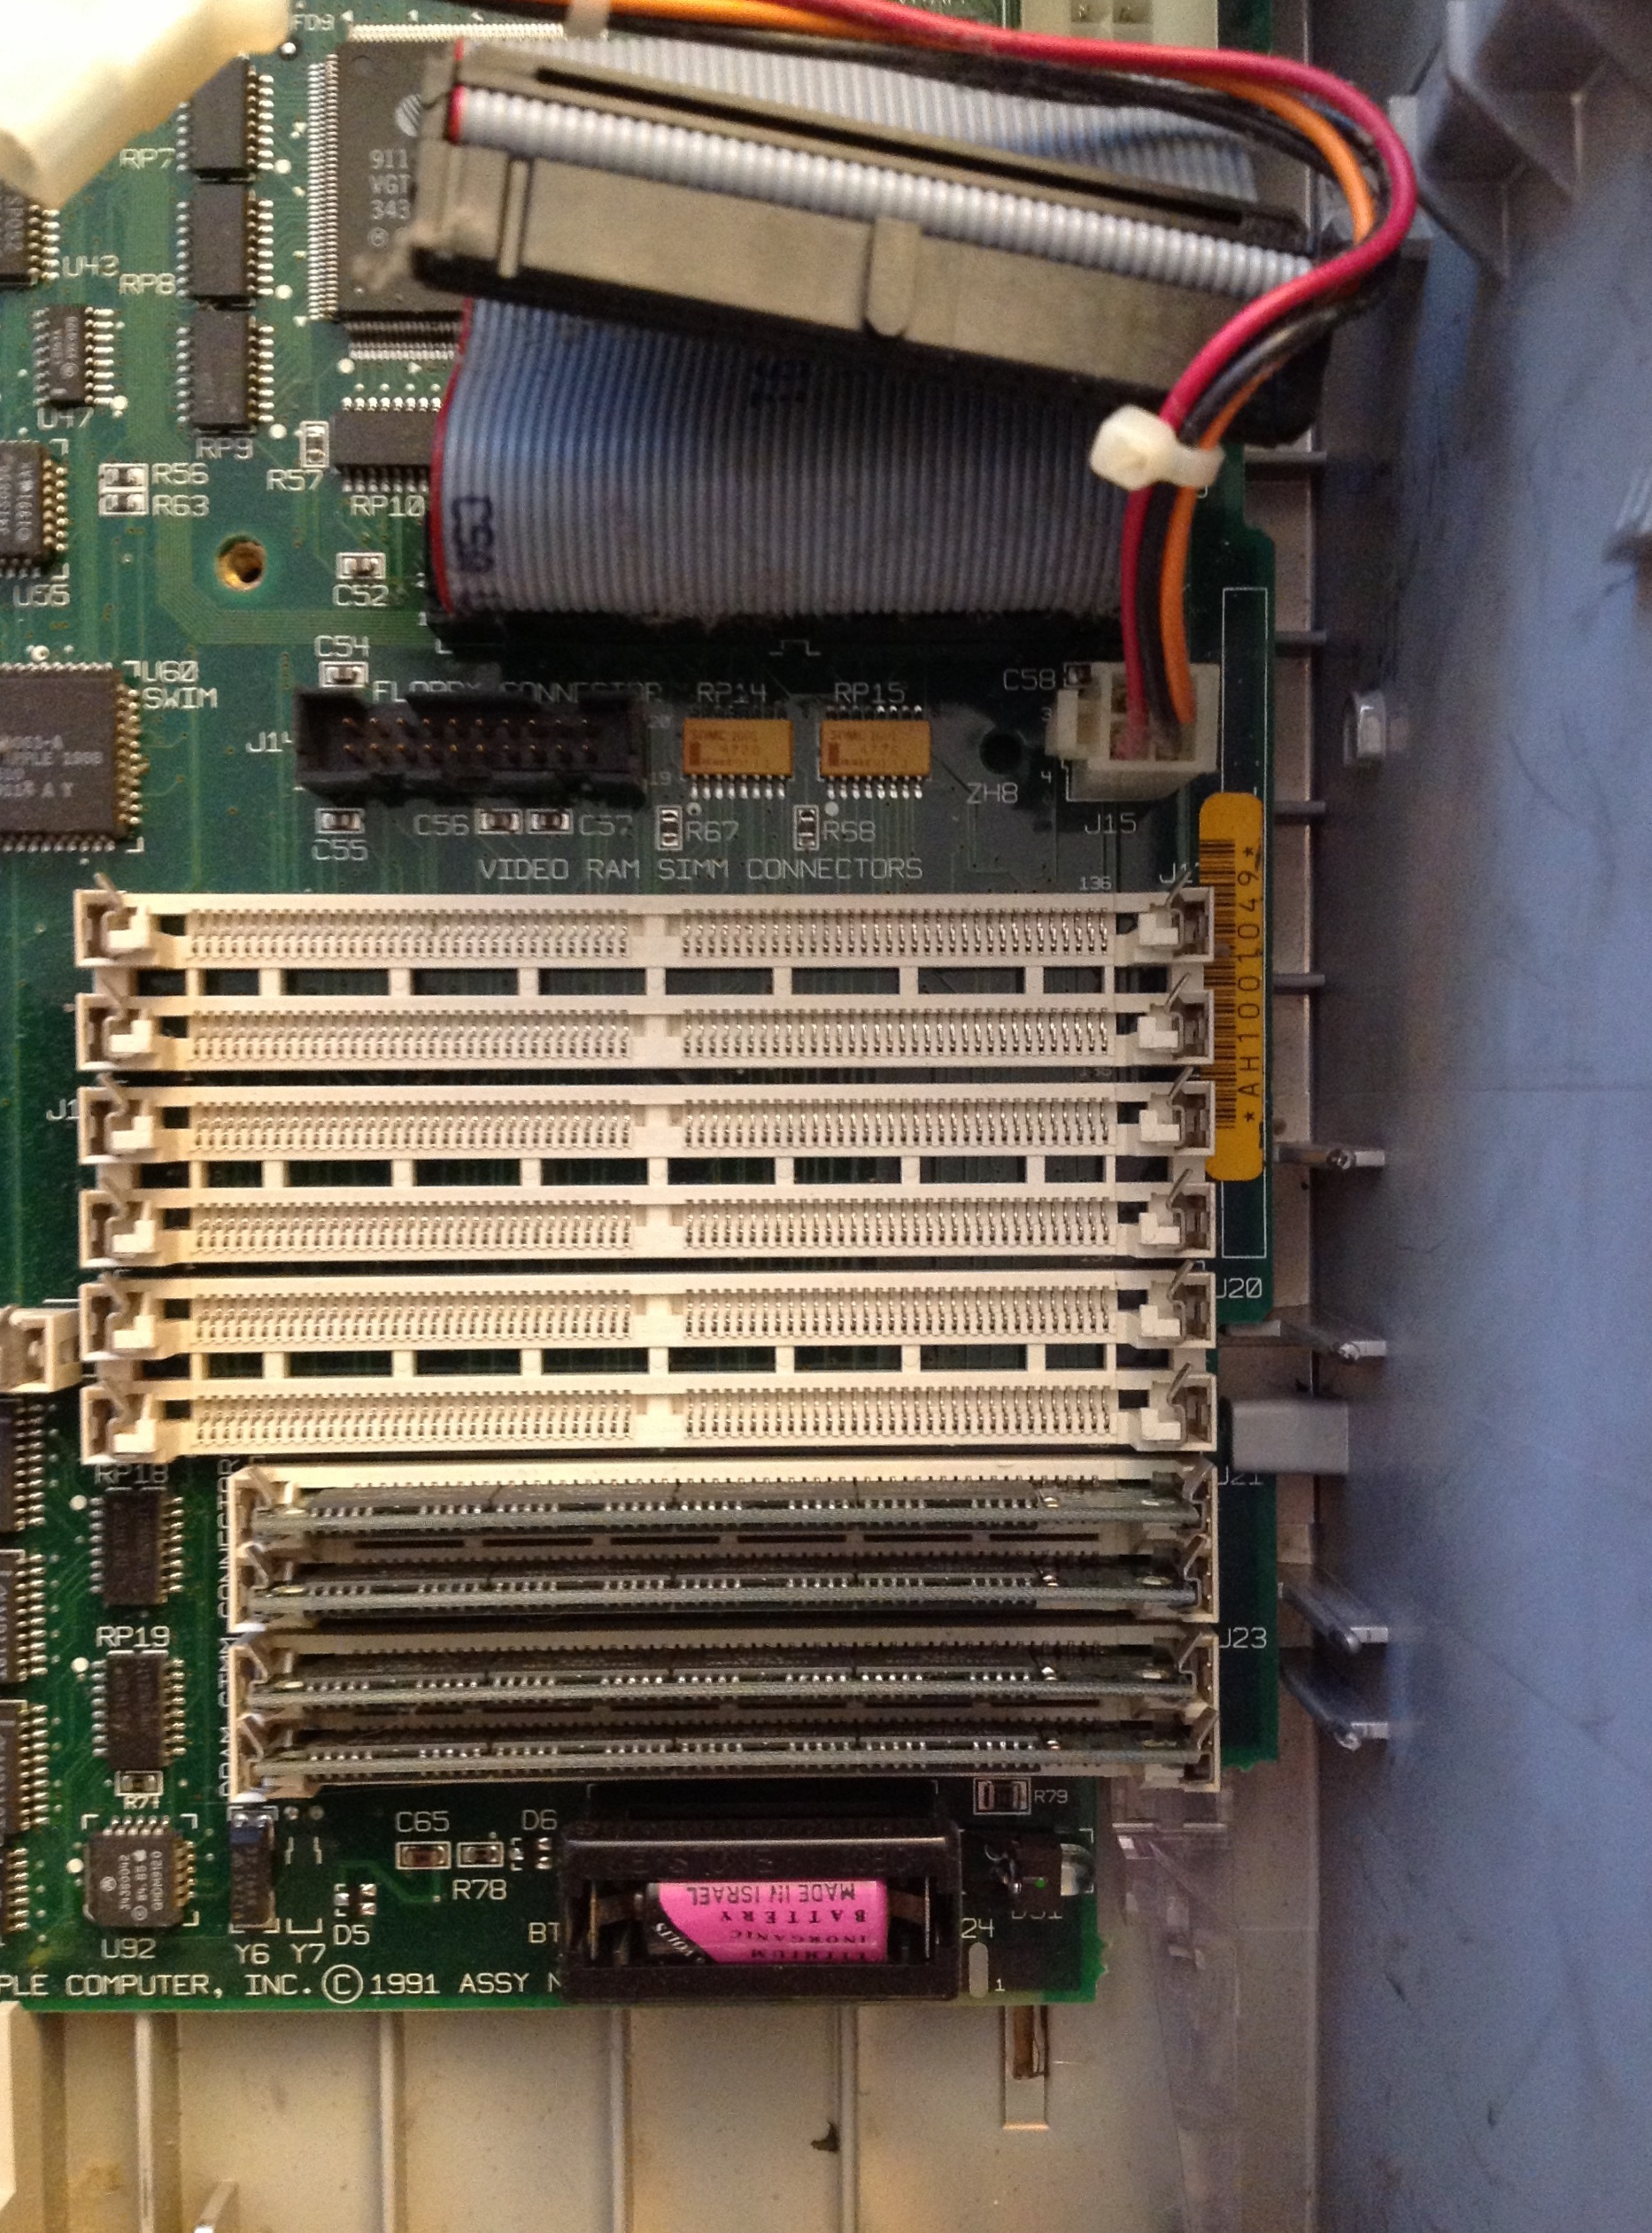
The interior of the Quadra 700 is extremely tidy. The question the hardware designers at Apple were clearly working with was: what is the most efficient case layout if you need to pack a power supply, a hard disk, 3.5″ floppy drive, and 2 full-length expansion slots in a case? In the Quadra 700 the two drives are at the front of the right side of the case, the PSU is at the back of the right side, and the two expansion slots take up the left side of the case.
You can tell how the arrival of CD-ROM drives threw a wrench in all of this serene order. You’re never going to shoe-horn a 5.25″ optical drive in this case. And when you do get a CD drive in the case you’re going to have an ugly looking gap for the drive door rather than just the understated slot for the floppy. I think Apple’s designs lost a lot of their minimalist beauty when they started putting CD drives in Macintoshes soon after the Quadra 700.

Inside the case, the way everything is attached without screws is very impressive. The sides of the case and the cage that hold the drives forms a channel that the PSU slides into. Assuming nothing is stuck you should be able to pull out the PSU, detach the drive cables, and then pull out the drive cage in a few short minutes without using a screwdriver (actually, there’s supposed to be a screw securing the drive cage to the logic board but it was missing in mine with no ill effects).
We tend to think of plastic in the pejorative. But, plastic is only cheap and flimsy when it’s badly done. This Quadra’s case is plastic done really, really well. It doesn’t flex or bend. It’s rock solid. But, when you pick the machine up it’s much lighter than you expect it to be.
Recently, I needed to replace the Quadra 700’s PRAM battery, which apparently dated from 1991.
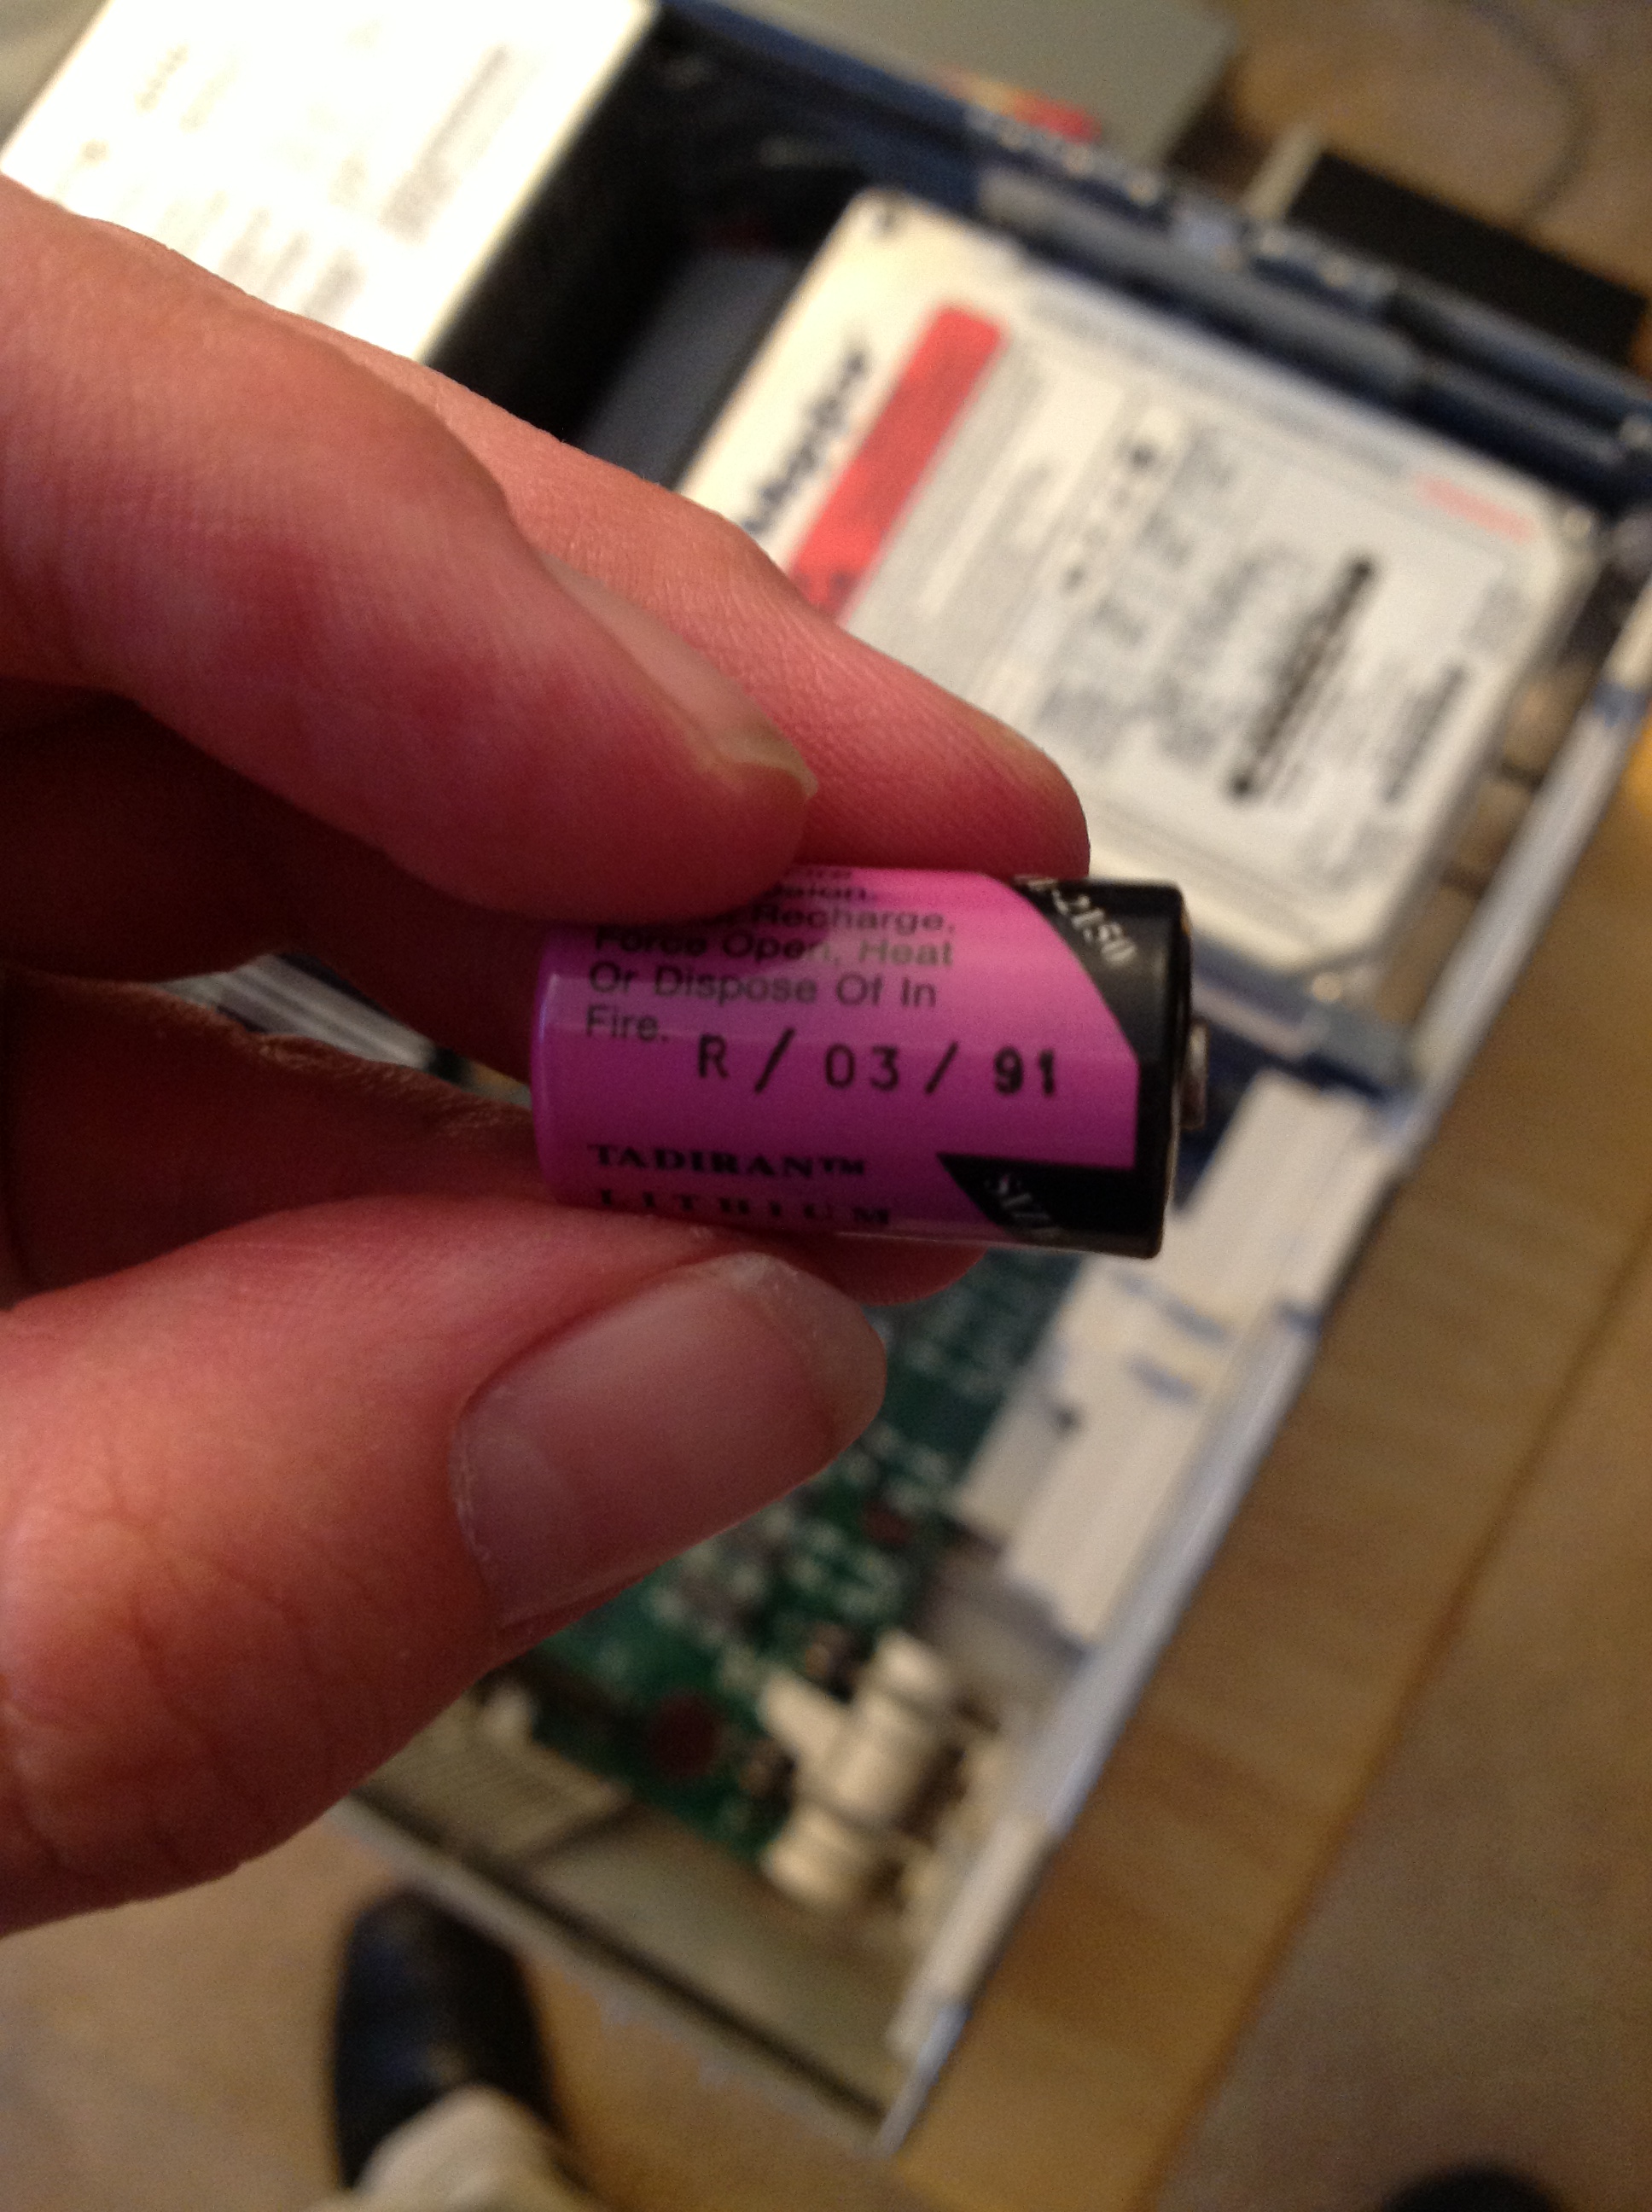
The battery is located under the drive cage so this was a nice opportunity to remove the power supply and drive cage to see the whole board.
The new battery is white, located in the bottom right hand corner.
Looking at the whole board there are two really interesting things to note here.
First the logic board itself is attached to the rest of the plastic case using plastic slats and hold-downs. Had I wanted to remove the logic board and I knew what I was doing, I could probably do that in a few minutes.
Second, notice the six empty RAM slots. Curiously enough, on the Quadra 700 the shorter memory slots just above the battery are the main RAM. I believe this machine has four 4MB SIMMs in addition to 4MB RAM soldered onto the logic board (the neat horizontal row of chips labeled DRAM to the left of the SIMMs on the bottom of the picture) The larger white empty slots are for VRAM expansion.
You can tell from this series of articles (that I assume were posted on newsgroups back in 1991) written by one of the Quadra 700’s designers how proud they were about the video capabilities of the Quadra 700 and 900.
He makes three major points:
- The way the video hardware talks to the CPU makes it really, really fast compared to previous Macintoshes with built-in video and even expensive video cards for the Macintosh II series.
- The Quadra’s video hardware supports a wide variety of common resolutions and refresh rates including VGA’s 640×480 and SVGA’s 800×600. That’s why I can use the Quadra with that VGA adapter pictured above. This was neat stuff in an era when Macintoshes tended to be very proprietary.
- If you fully populate the VRAM slots (which gives you a total of 2MB VRAM) you can use 32 bit color at 800×600.
Point 3 just blows me away. To put that in perspective, the Matrox Mystique card that my family bought in 1997 or so had 2MB VRAM and did 800x600x32-bit color. There’s a good reason the Quadra 700 was so outrageously expensive. If you were a graphics professional and you needed true color graphics, Apple would gladly make that happen for the right price.
There is a person on eBay selling the VRAM SIMMs that the Quadra uses. It would probably cost me about $50 to populate those RAM slots. It’s very tempting.
I’m planning on doing another entry on the Quadra 700 sometime in the future to talk about what actually using this machine is like.

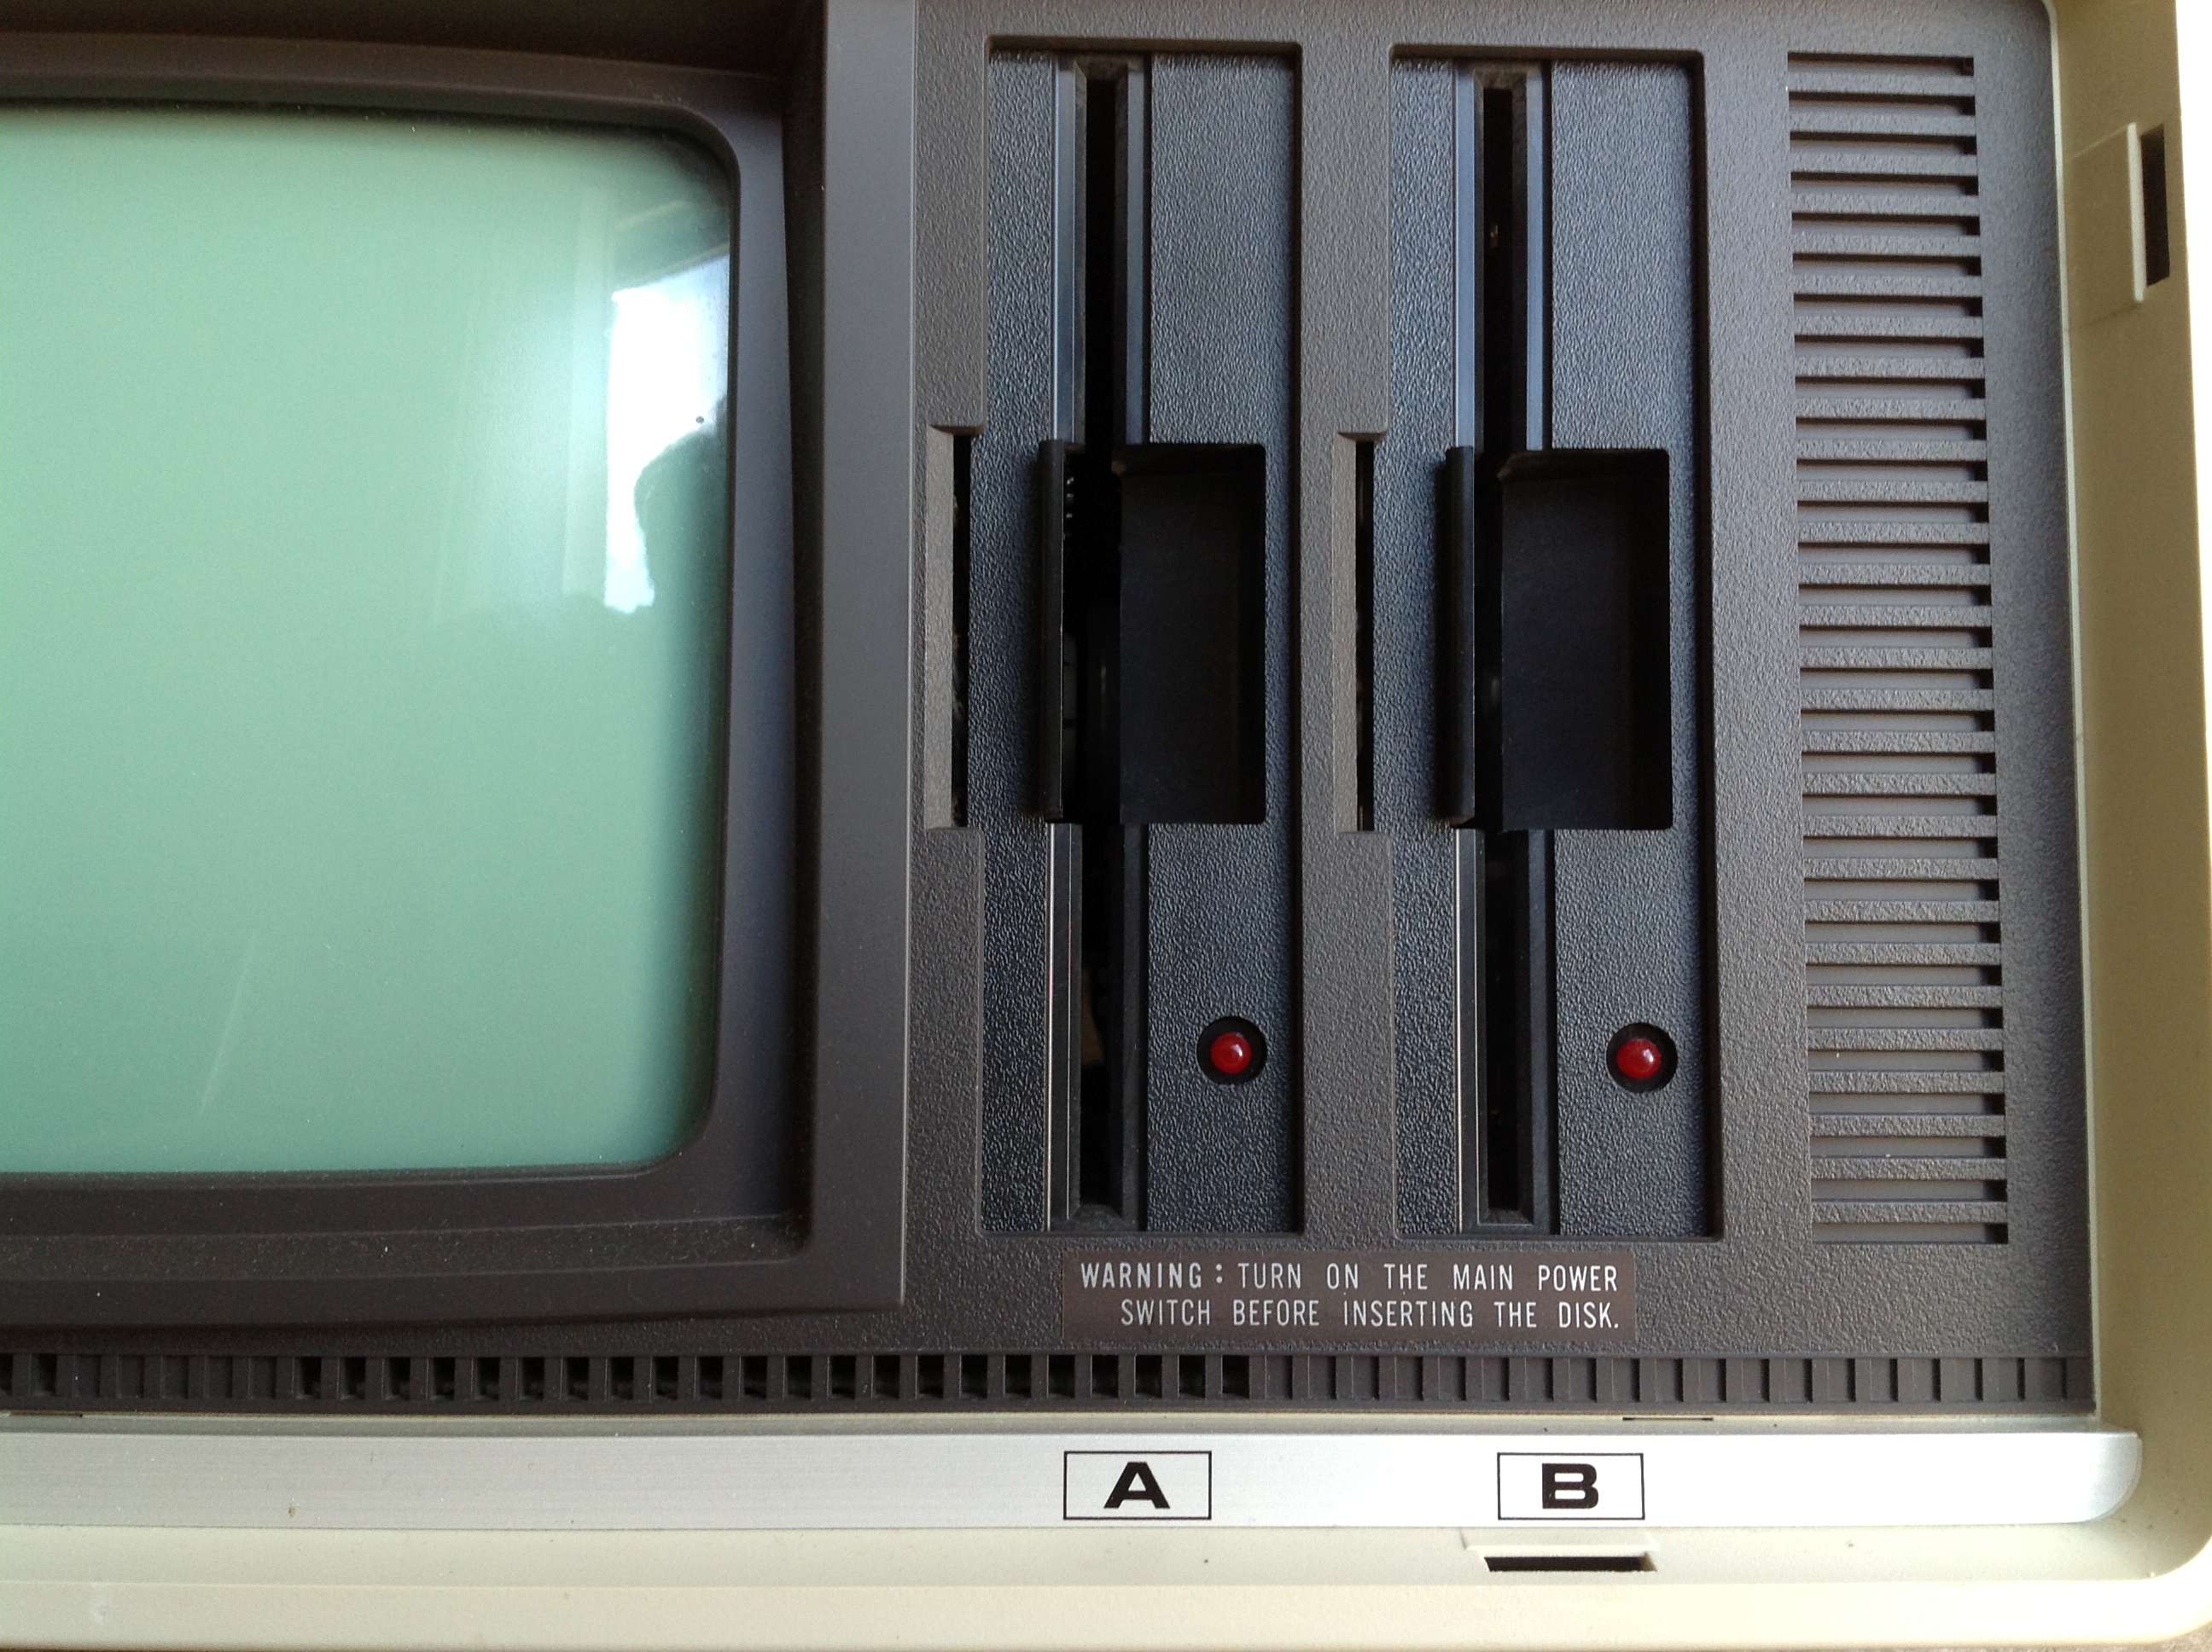
Panasonic Senior Partner
This is my Panasonic Senior Partner a “luggable” portable MS-DOS computer from the mid-1980s.

All buttoned up like this, you might wonder if it’s some sort of old video camera case.

When you open it up and plug in the keyboard, it becomes apparent that this is actually a very old PC…A very old PC that works.
I found this Senior Partner in the Fall of 2011 at Village Thrift and it’s probably one of my proudest thrift store finds of the last 5 or so years. It’s become an incredibly rare experience to find 1980s PC hardware at thrift stores and it blows my mind that this one is still in working order.

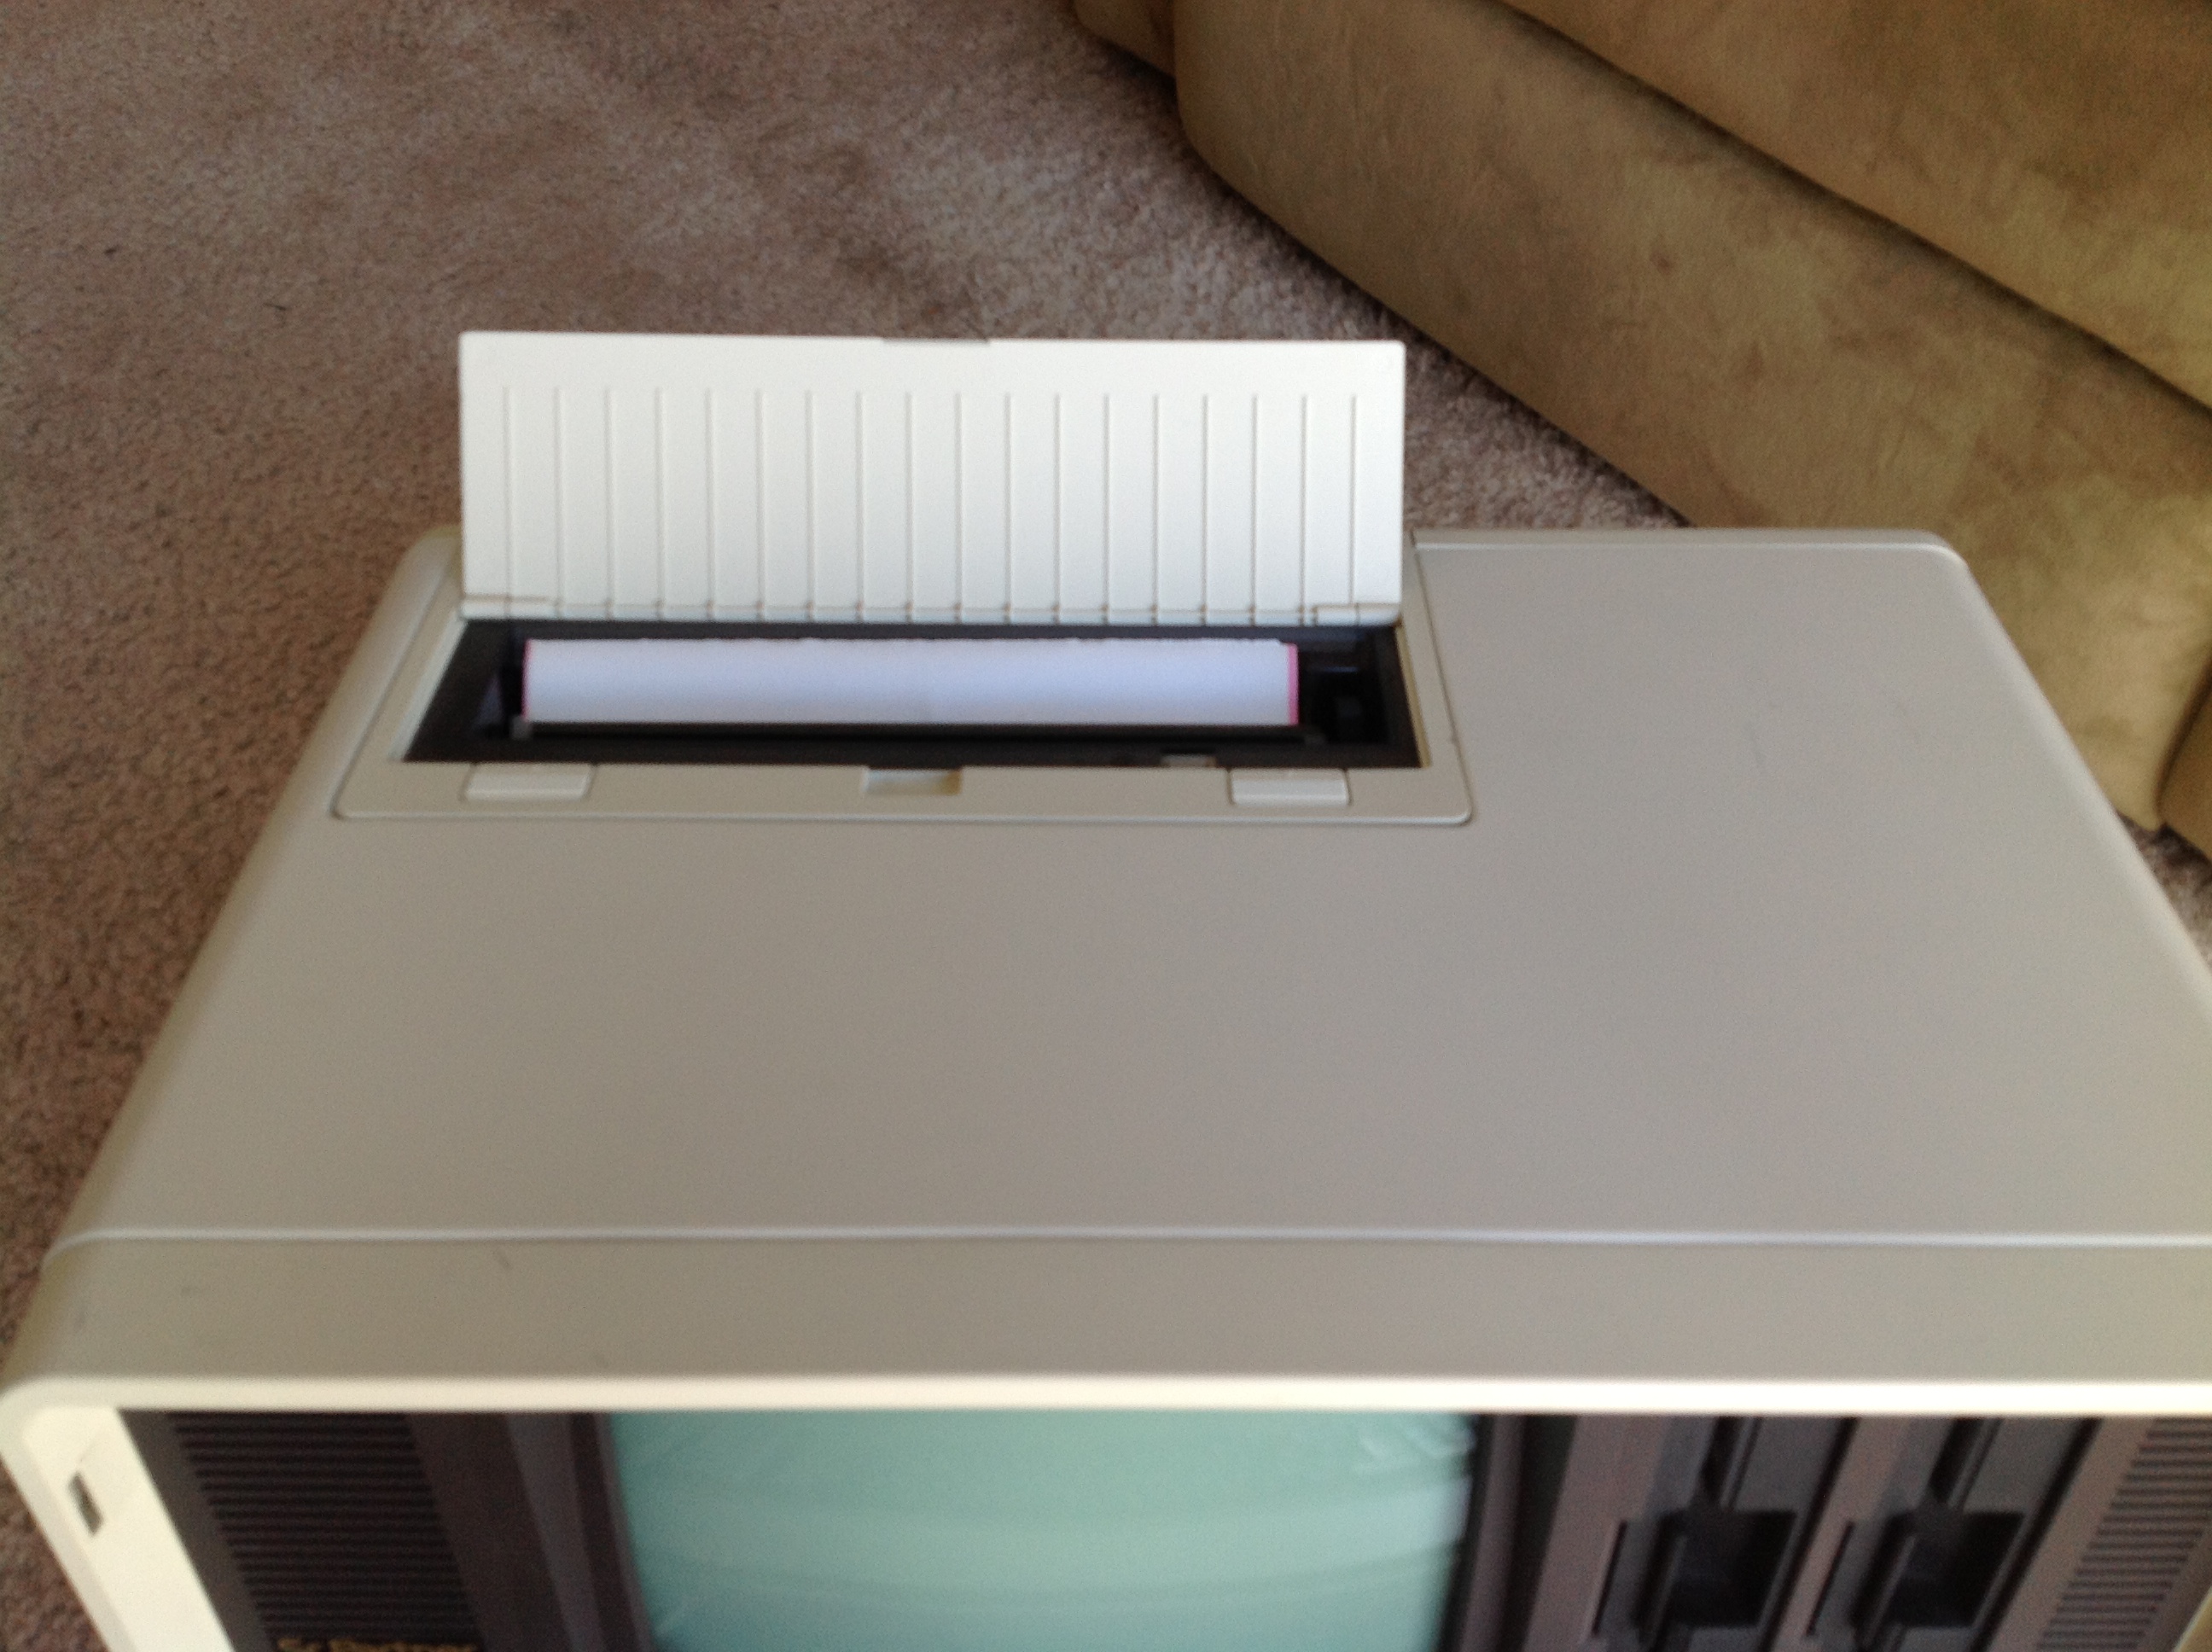
As PC hardware goes, this is almost as basic as it gets. You have an 8088, a monochrome CRT monitor (with a DB-9 connector for color RGB on the back), a serial port, a parallel and two 5.25″ disk drives. There’s no hard drive. There’s no built-in clock. This machine predates mice on the PC by several years (unless you used a serial mouse). The only “luxury” is that this machine has is 512K RAM and a built in thermal printer hidden under a flap on the top of the computer. I suspect the computer’s name derives from the fact that with a built-in printer this machine could be considered a portable office for mid-1980s businesspeople.
But, there’s no battery. This is not a mobile machine. It’s a machine you lugged from place to place where you had a place to sit it down and AC power available to plug into.

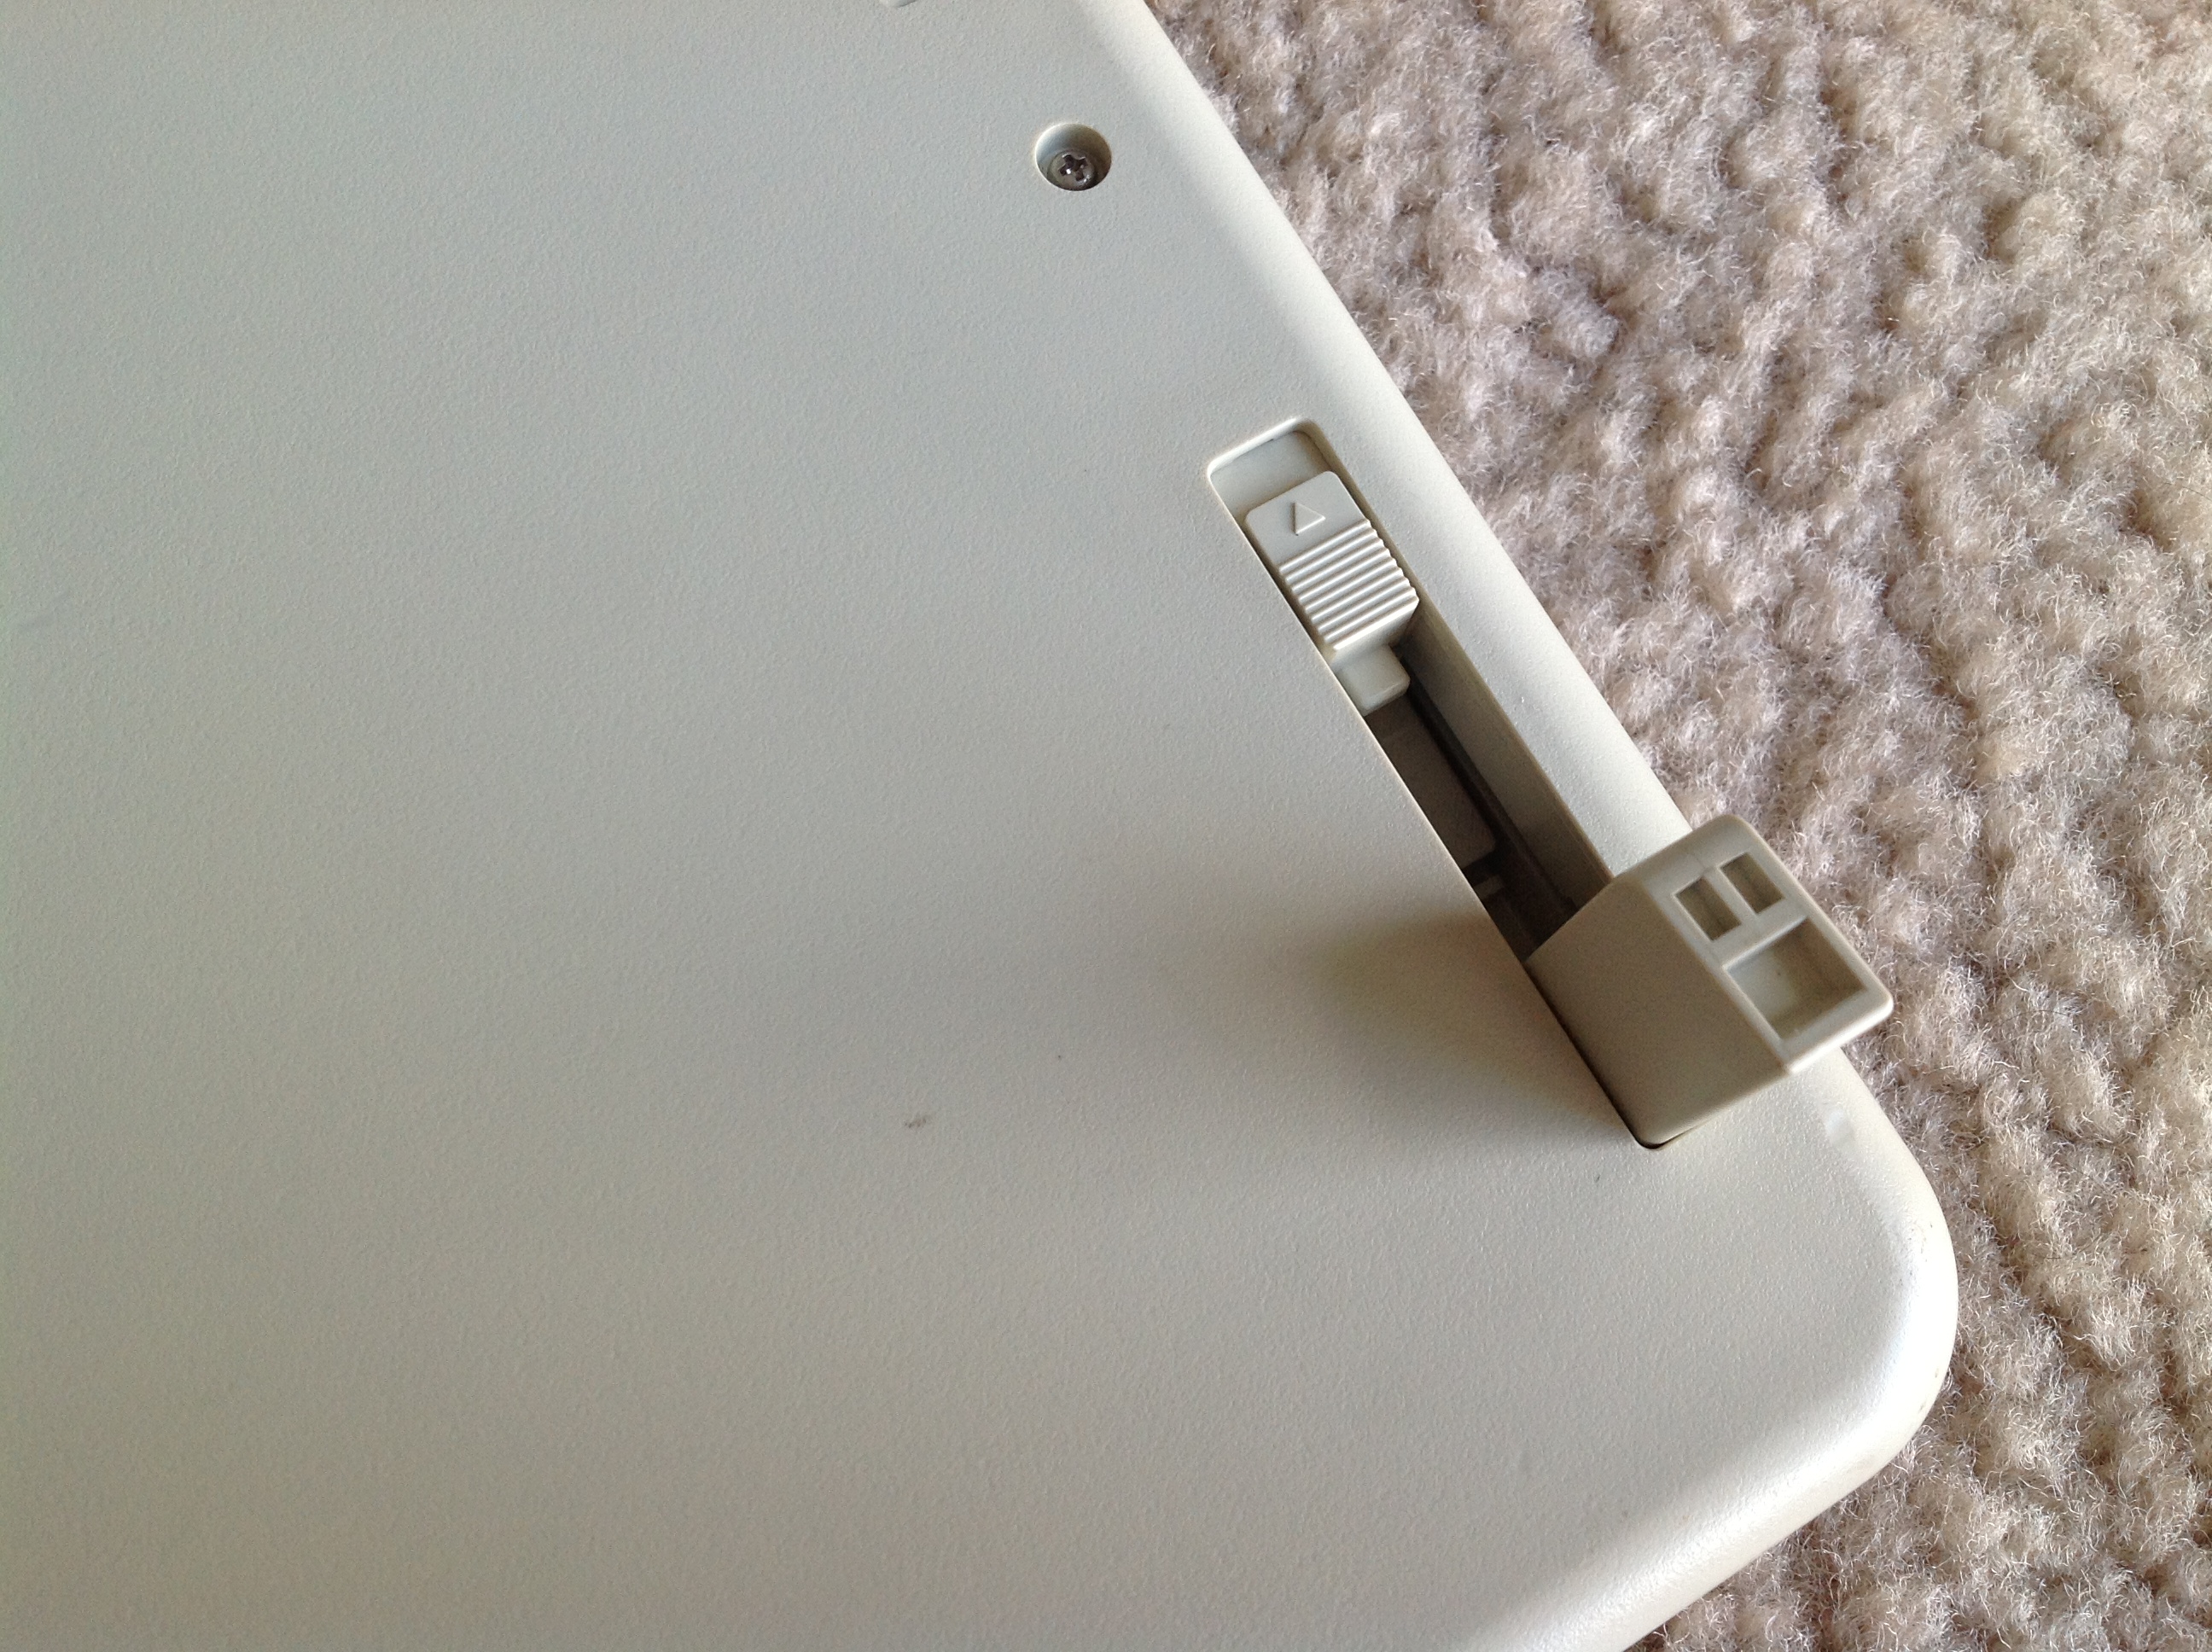
The keyboard doubles a a cover to enclose the monitor and floppy drives.

When you detach the keyboard you have to pull the retractable keyboard cable out it’s hiding place below the “Panasonic Sr. Partner” label to the left of the CRT and attach it to the connector that hides under a cap on the keyboard.

There are also little lifts you can pull out from the keyboard to place it at a comfortable angle.
As the name entails this was a machine its designers intended for business users. The monochrome CRT is extremely crisp for word processing and spreadsheets. When (before the paper ran out) I fired up an old copy of Print Shop the thermal printer gladly printed with no additional setup.
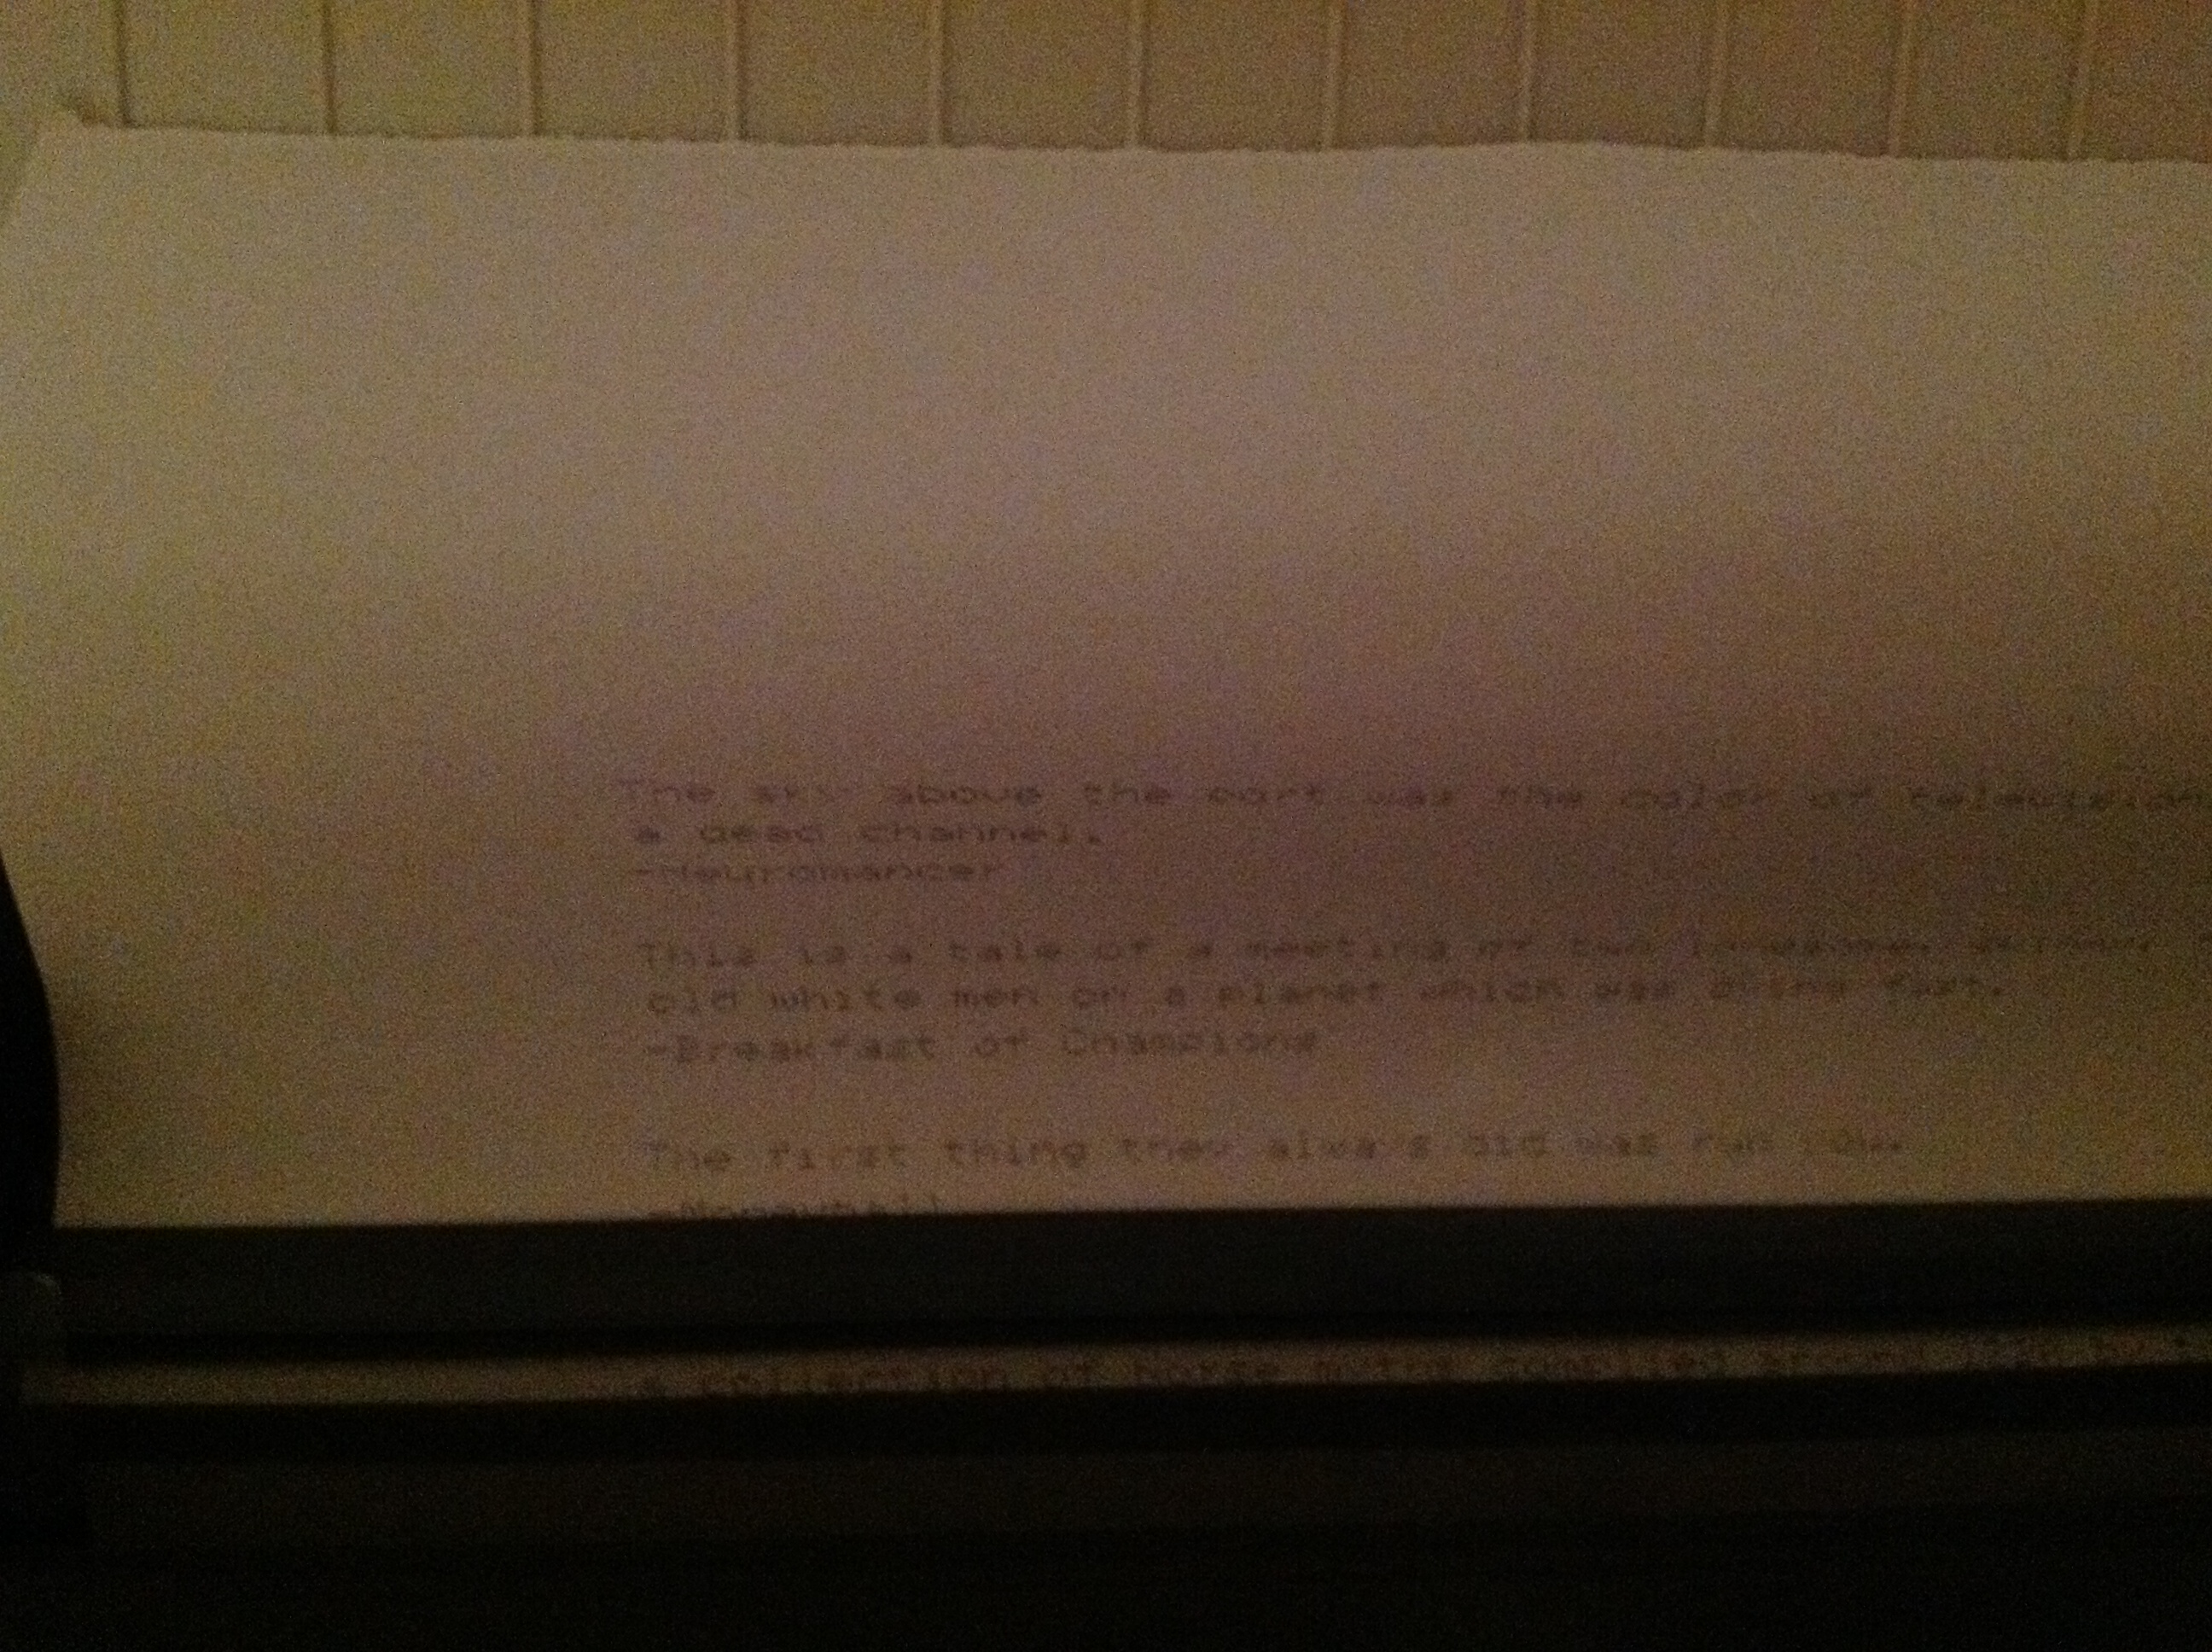
One could imagine some business travelers in a hotel room preparing for a meeting the next day huddled around the tiny green screen furiously printing curled up thermal printed documents…Almost.
Consider the fact that this thing is 35 pounds. Imagine lugging that around an airport. There’s a good reason why the luggable form factor that began with the Osbourne and the Kaypro luggables and continued with the famous Compaq Portable was a technological dead end. The Senior Partner is even larger than the Macintosh despite that machine having a larger screen not actually being intended to be luggable.
The reason for this, as I understand it is that luggables were just normal PC components with all of their heft and hungry power consumption, wedged into an unorthodox case that happened to have a handle. The engineering advances that needed to happen to make portable computers into “laptops” happened later in the PC realm (though certainly the Grid Compass and a few others were showing the way even when the Senior Partner was on store shelves).
As an antique though, this thing is fantastic. The Senior Partner is a self-contained retro-computing party.
Easy to setup and quick to put away when you’re done. When it goes back on the shelf you can easily stack stuff on it’s hard shell.

And simply as an object it looks fantastic. Sure, it does not look (or act) like the glorious 80s vision of the future embodied in the brilliant Macintosh and Macintosh SE designs. There’s no Snow White timelessness here. But, what the Senior Partner does look like is the offspring between a Mission Control command console and an armored personnel carrier. You have no doubt as to which floppy drive is which because there are huge thick drive letters printed beneath the drives. The huge embossed “Panasonic” name looks like what you see on the back of a pick up truck. This machine looks serious in a way that I just adore.
Nothing says retro quite like a brilliant glowing green CRT screen.
When you’re sitting with a machine like this you feel a closeness to technology that is unlike using a computer today. When you use a modern computer you are swathed in warm colors and pictures designed to make you feel comfortable. You can quickly switch between multiple programs or browser tabs. There are a million things saying “use me”.
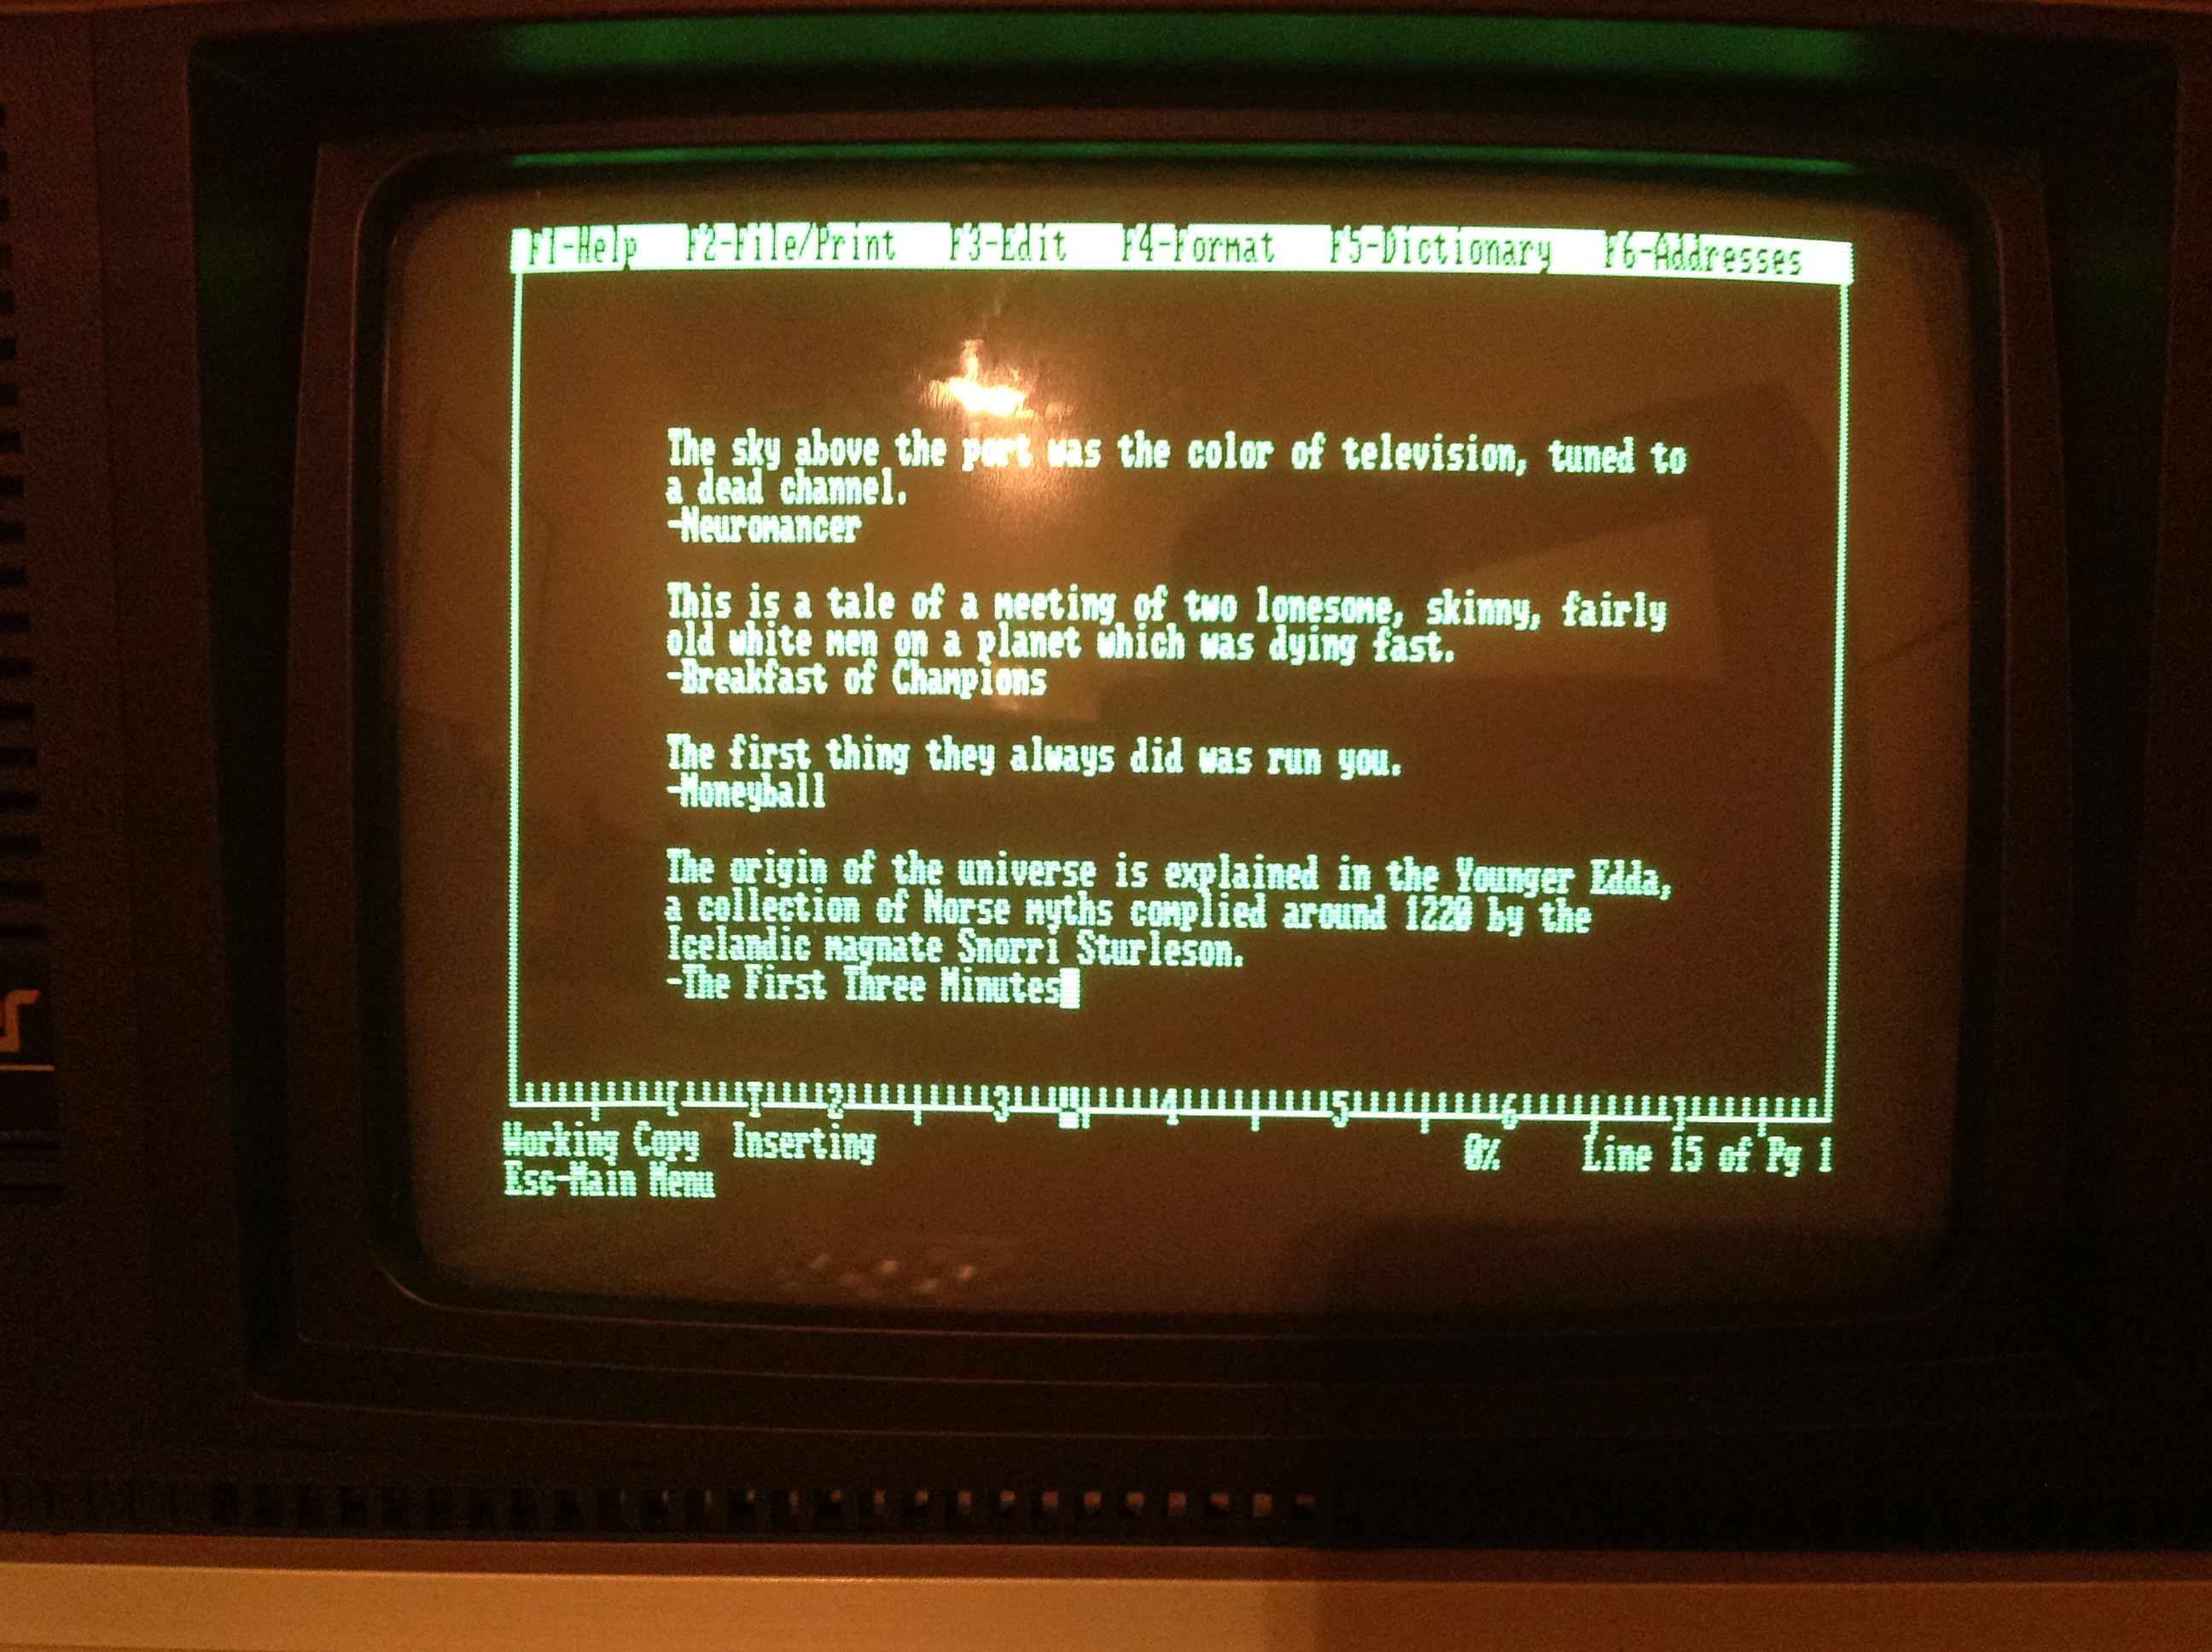
On a machine like the Senior Partner you basically have one thing in front you. You have one program with a handful of options so it demands concentration, but the high contrast of the screen makes it easier to concentrate because only the program is glowing and all else is empty darkness. This is the cyberspace equivalent of a sensory deprivation chamber.
The closest thing I can compare that feeling to is using an e-Ink Kindle.
I suspect that this machine spent a lot of it’s life “buttoned up” and that accounts for what great shape it’s in today. Despite being almost 30 years old it seems like a missing pad on the “bottom” side that faces downward then the machine is laying handle side up and a few scuffs are the only things wrong with it. There was little opportunity for dust to get into the keyboard and the disk drives. I also suspect that this machine may not have gotten that much use in general considering the lack of burn-in on the monitor.
As a retro-computing machine, it is not perfect. For one thing I have no idea how to get inside of the machine, or if that is even a good idea. On the one hand, generally if a machine has a CRT I don’t want to get inside of it. On the other hand, I can’t find an obvious way to replace the printer paper and I wonder if they just intended you to open the case for that. The back of the machine has what looks to be where an indication of an internal expansion slot, which would be more evidence that you are intended to be able to safely get inside of the machine.
Having only a monochrome screen, no hard drive, only 512K RAM, and no joystick port makes this less than ideal to play many old games or some of the more prominent software I’ve collected. As you can imagine finding software for a PC with 512K RAM, no hard drive, and only 5.25″ floppies might be an issue.
However, I’ve had some good luck in this area.
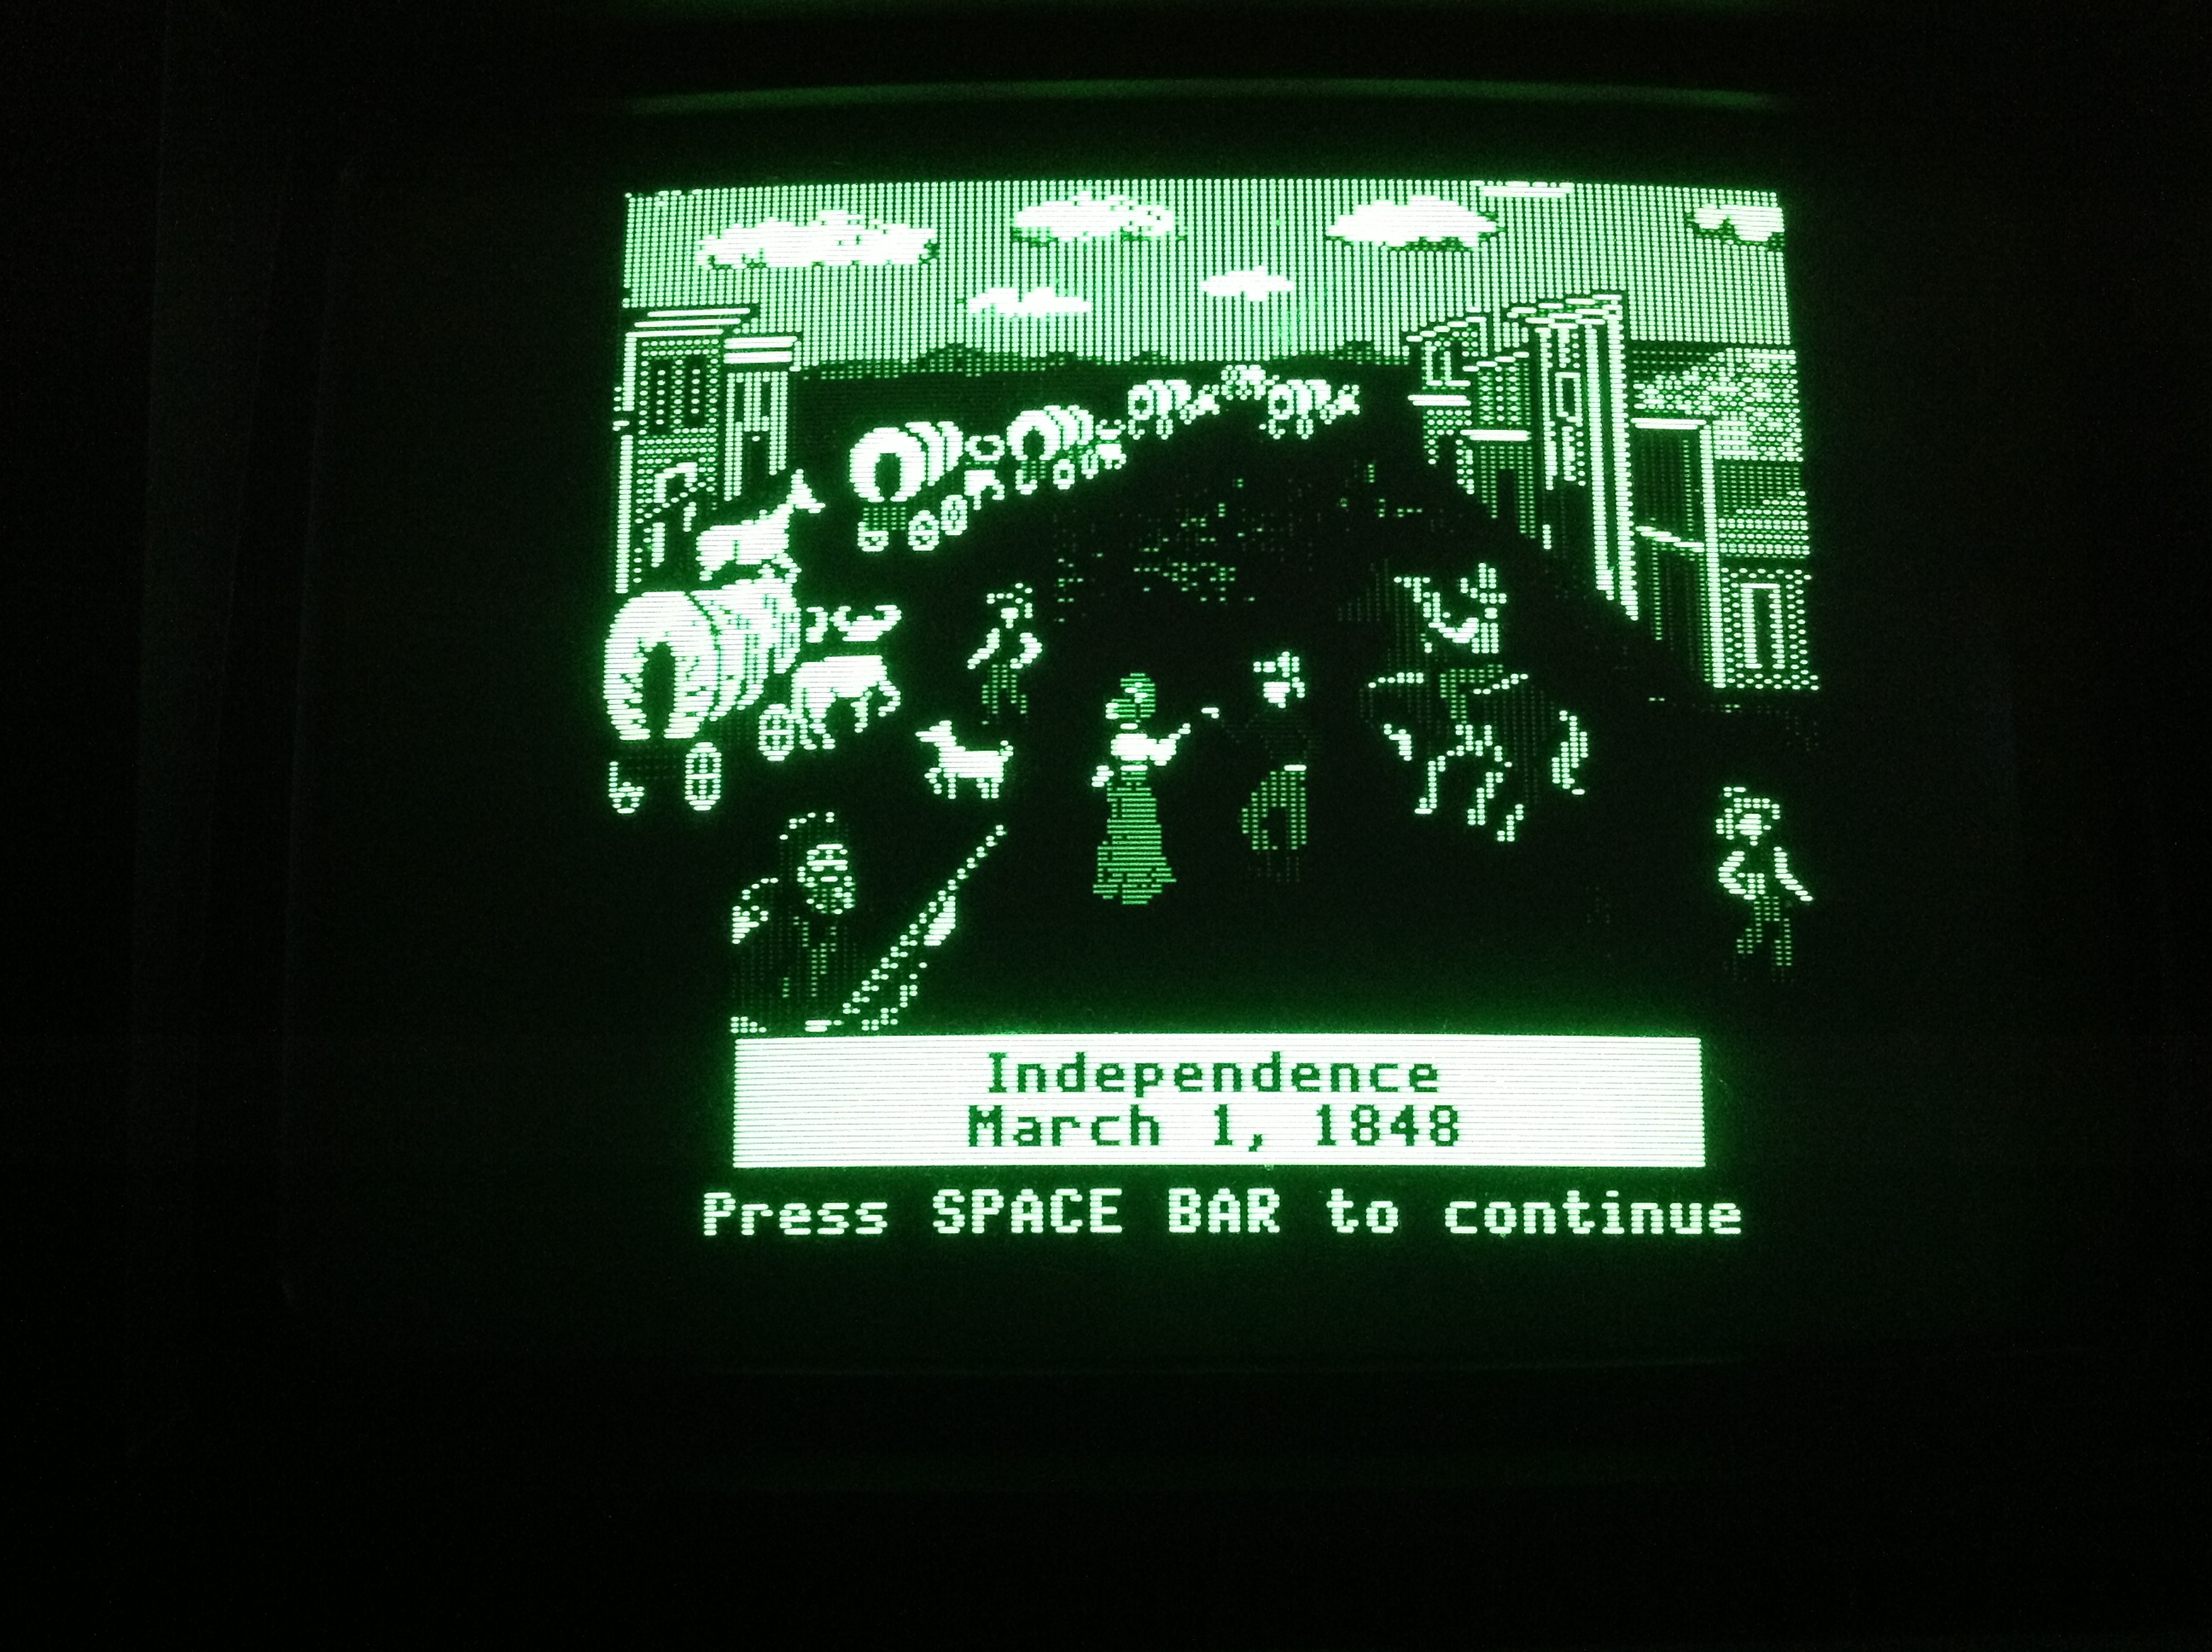
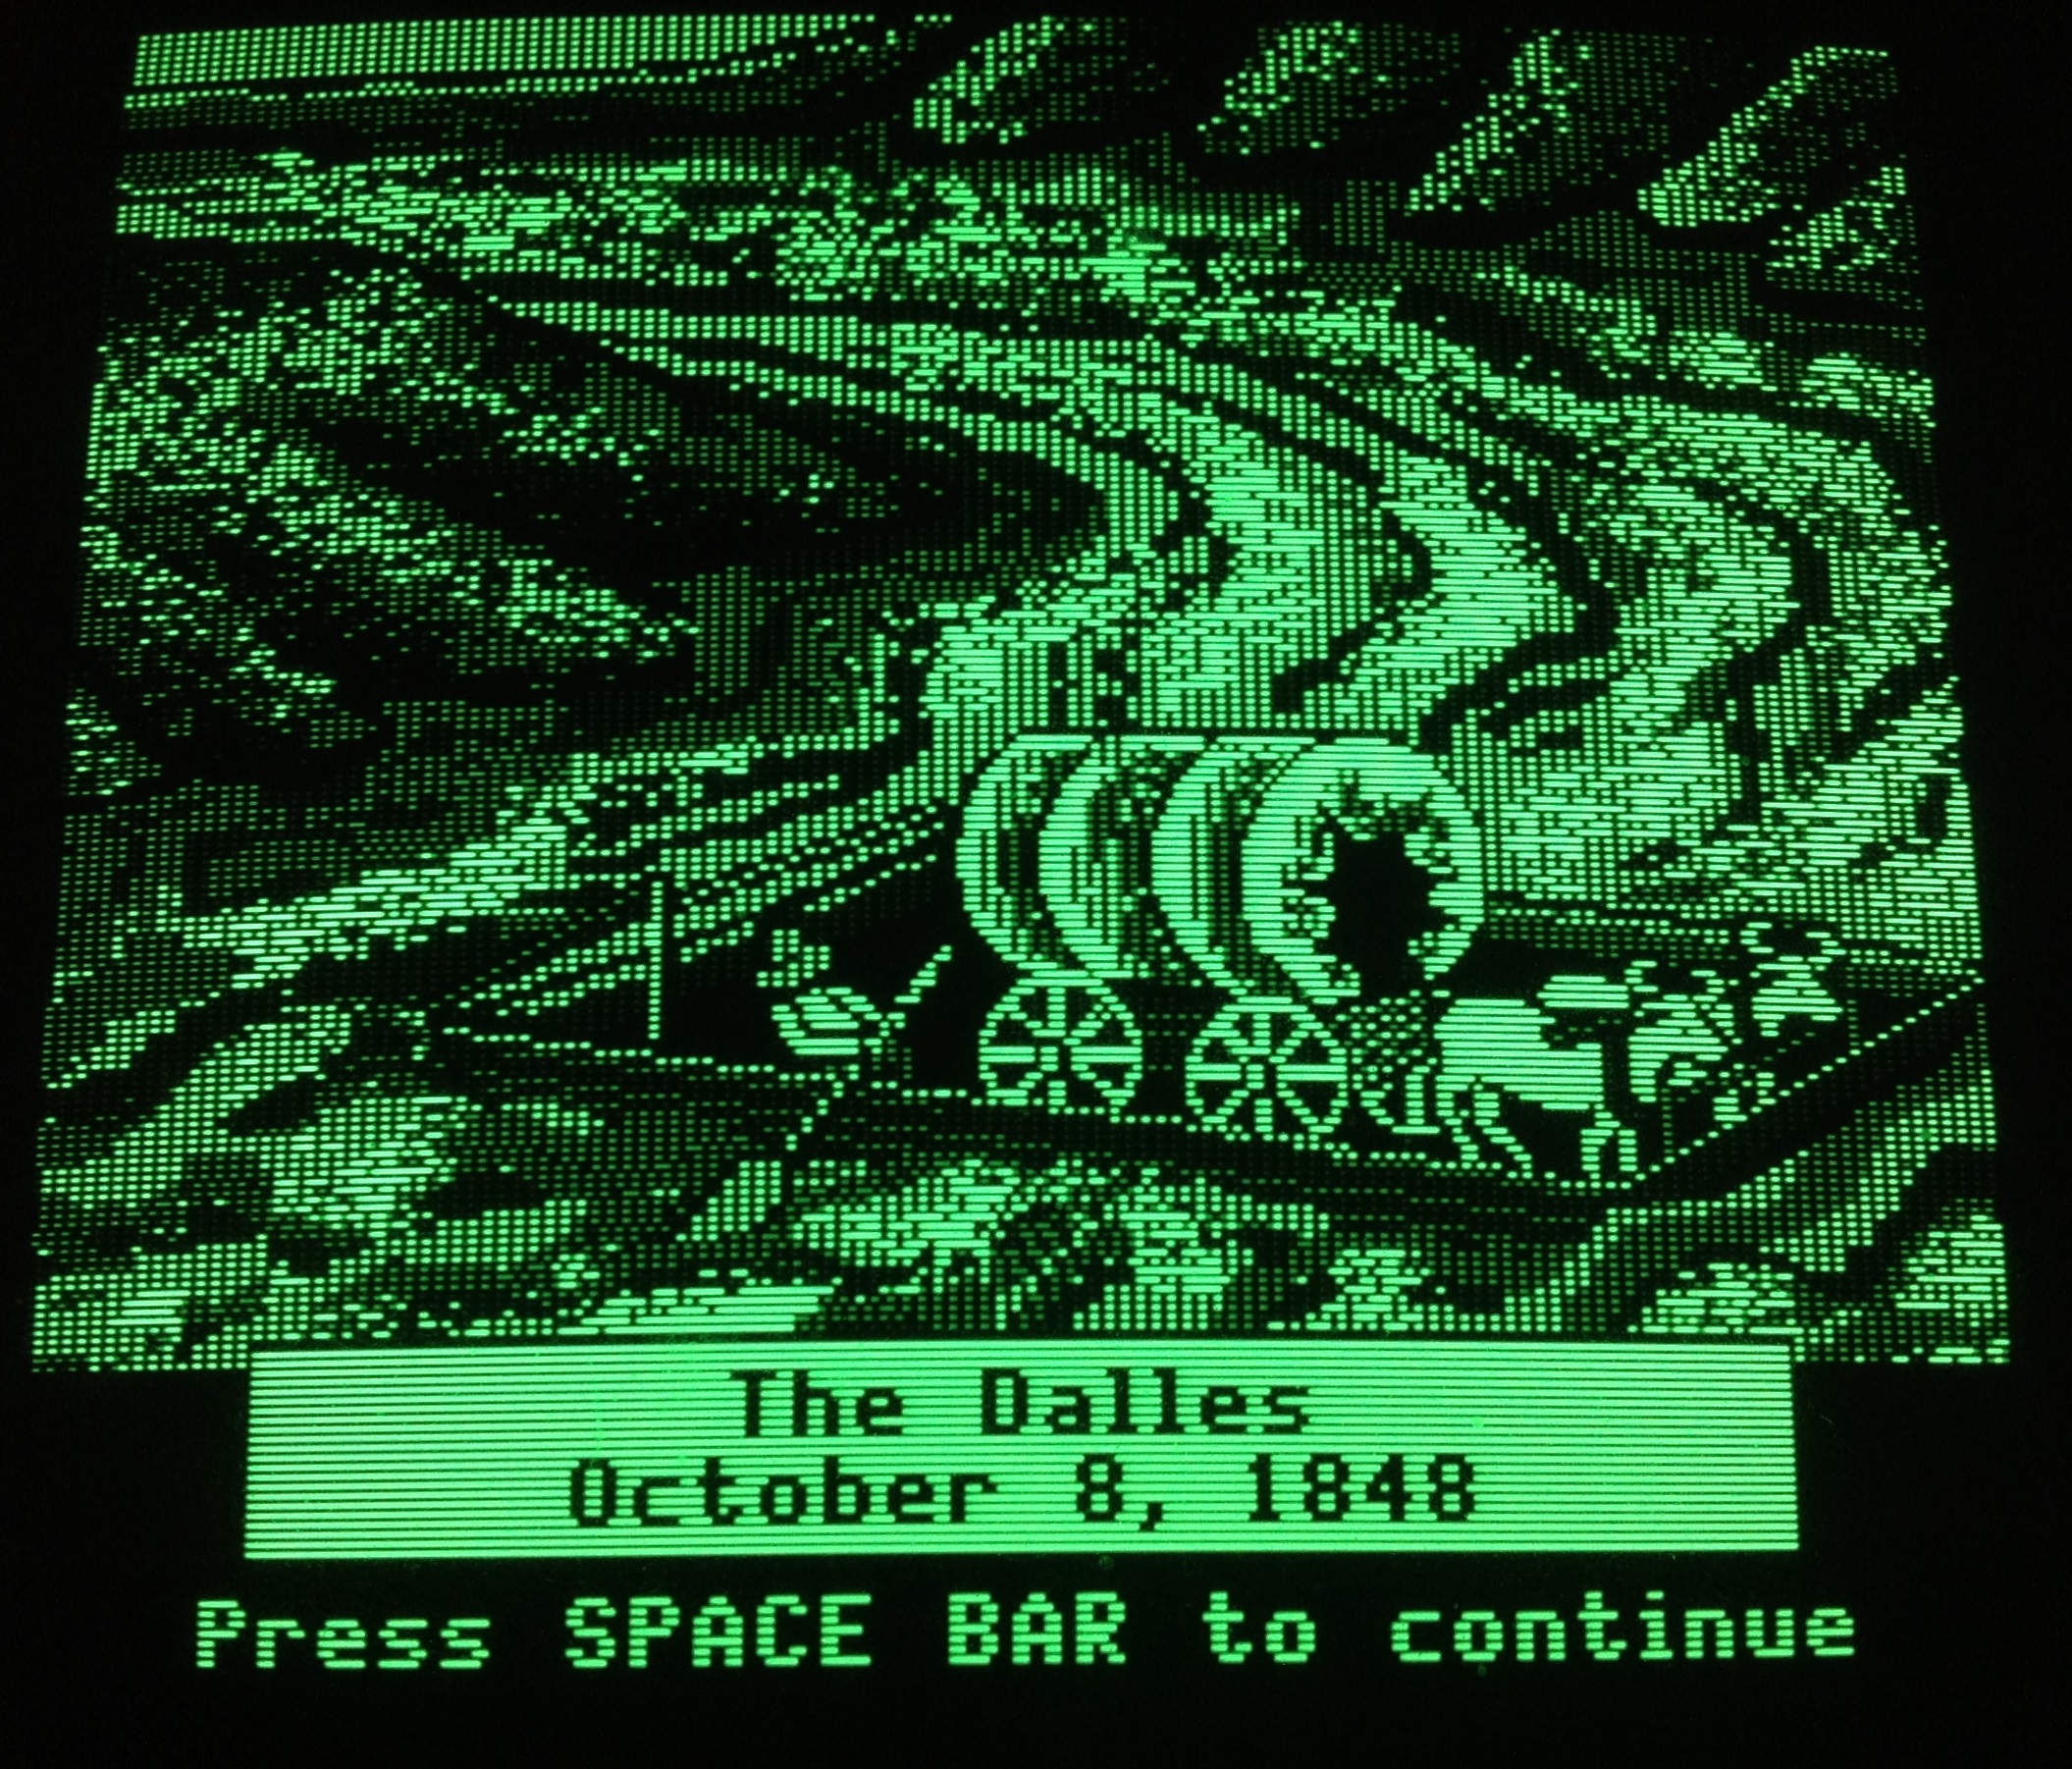
When I first bought this machine I remembered that in my parent’s attic I had saved the 5.25″ floppies from an Epson 286 we had gotten as a hand-me-down from my aunt in Cleveland in 1995. When we had discarded the Epson I had made sure to save the 5.25″ MS-DOS boot and installation disks as well as some educational programs, including the immortal classics The Oregon Trail and Where in the World is Carmen Sandiego?.

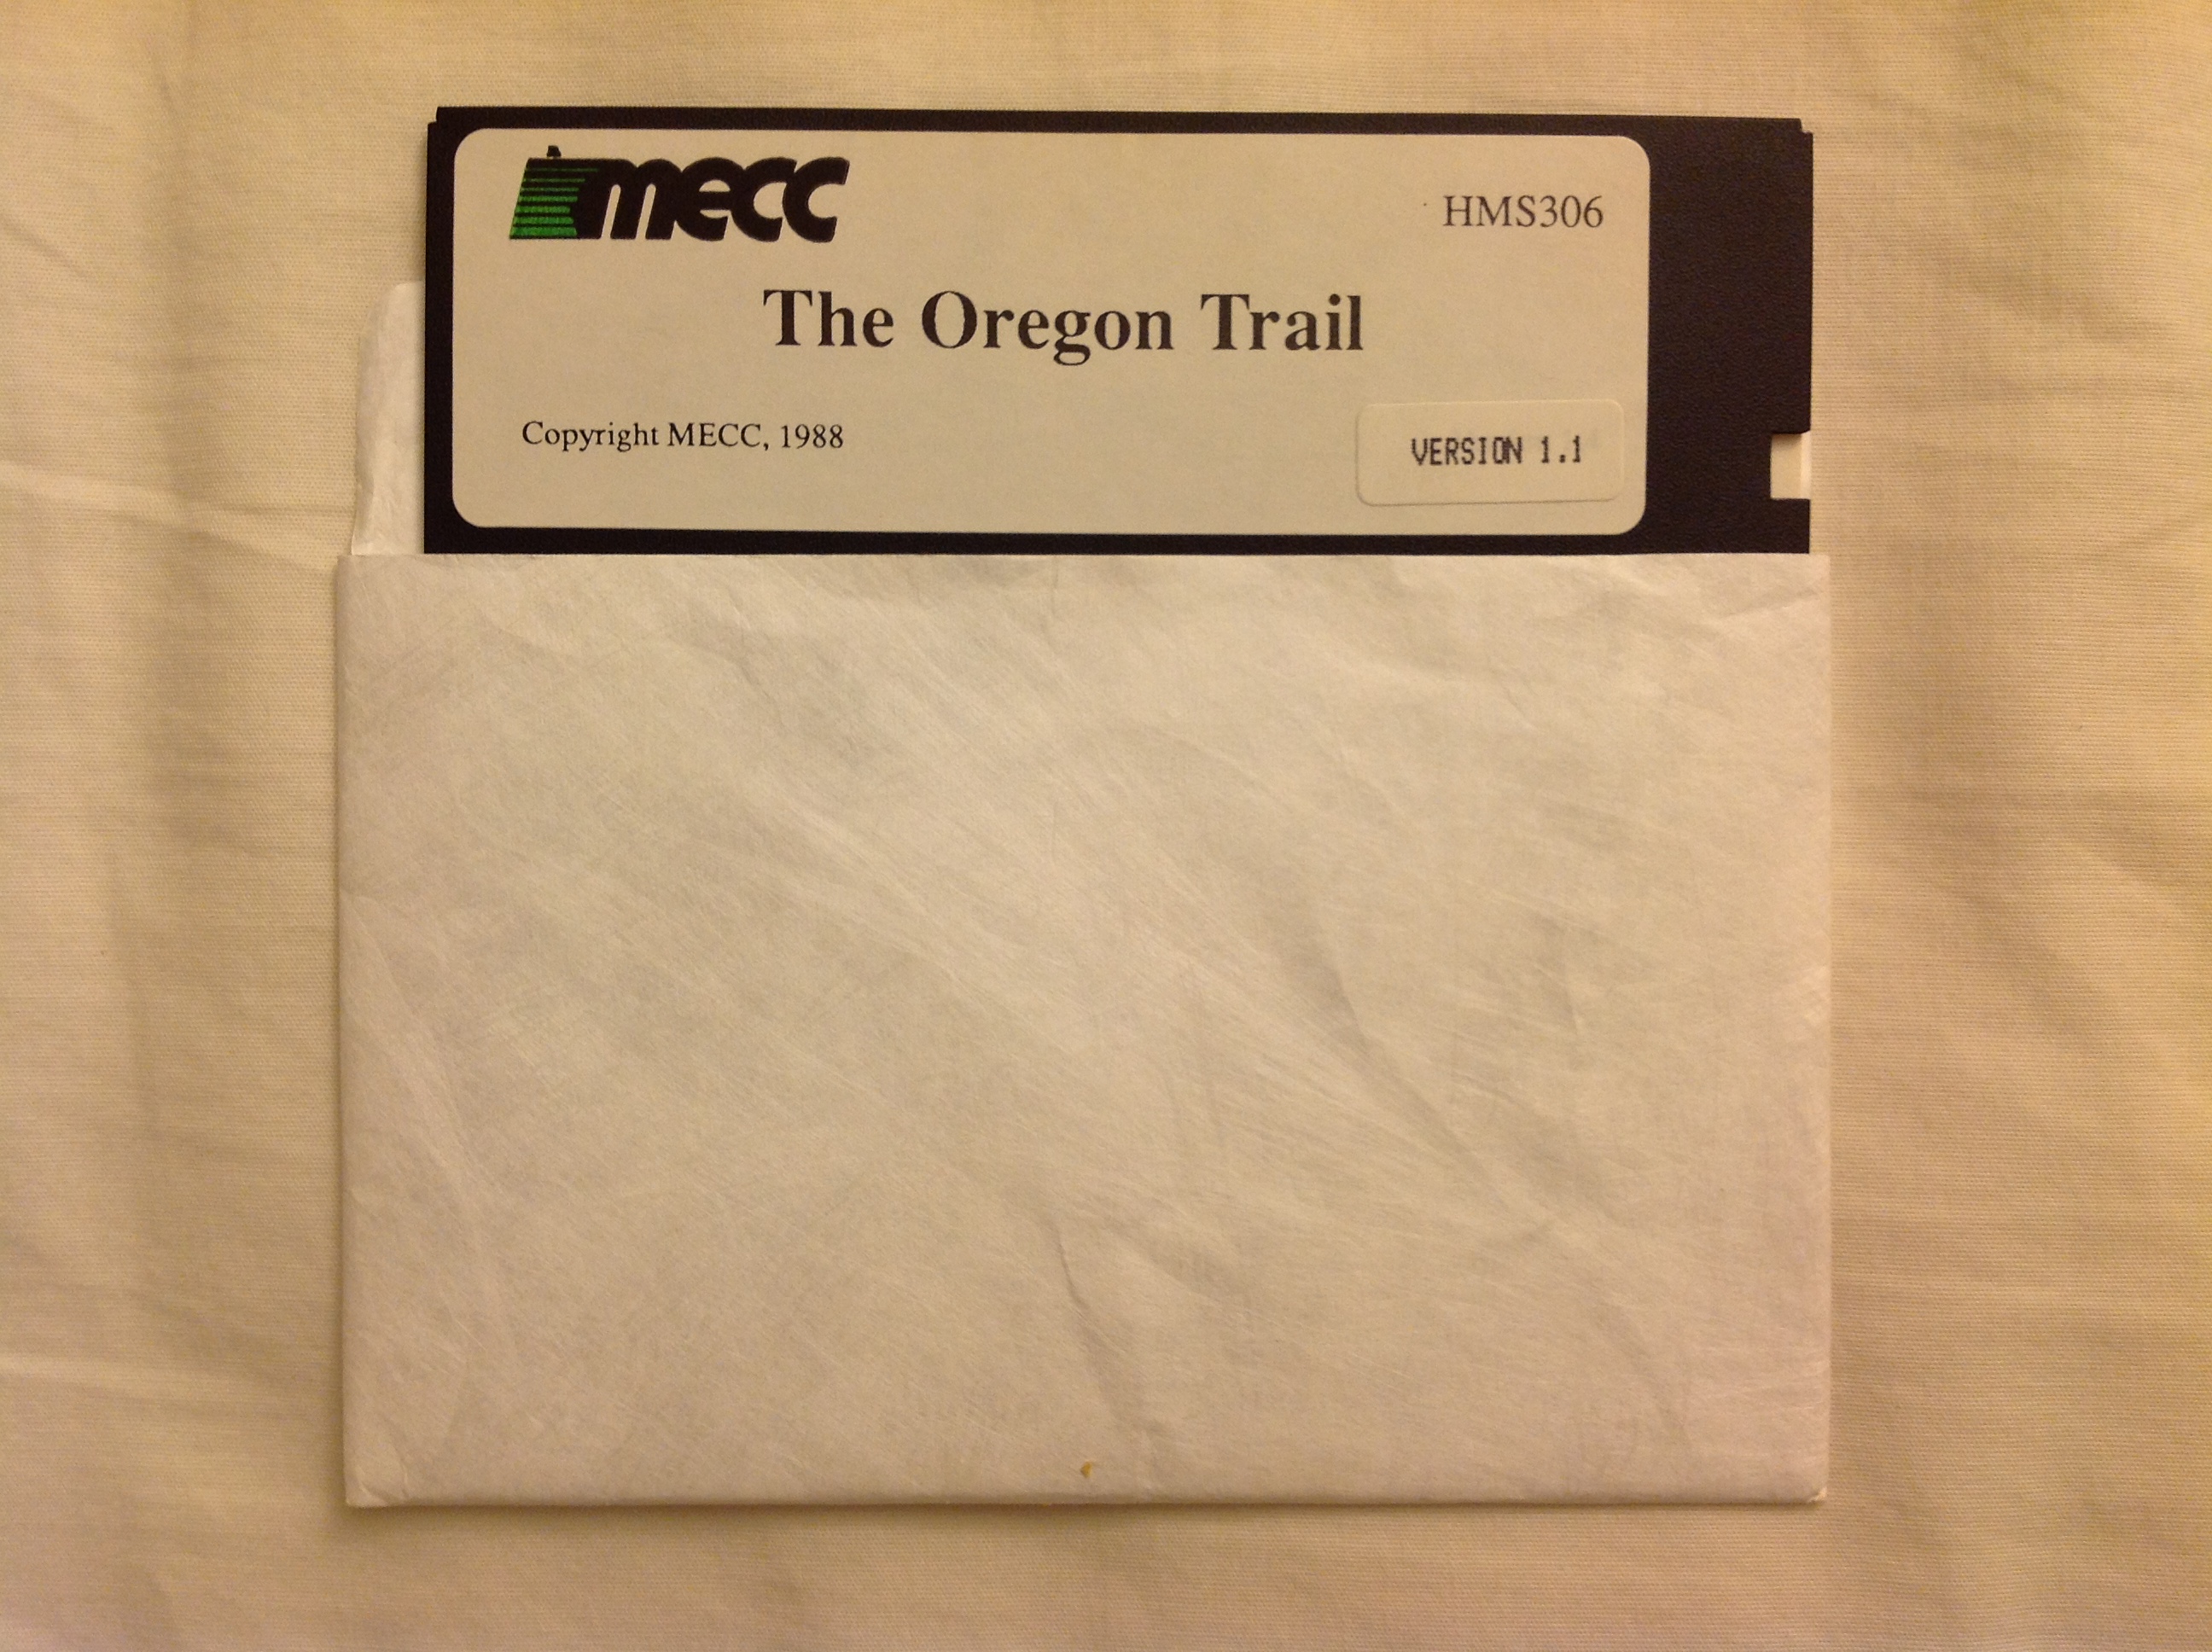
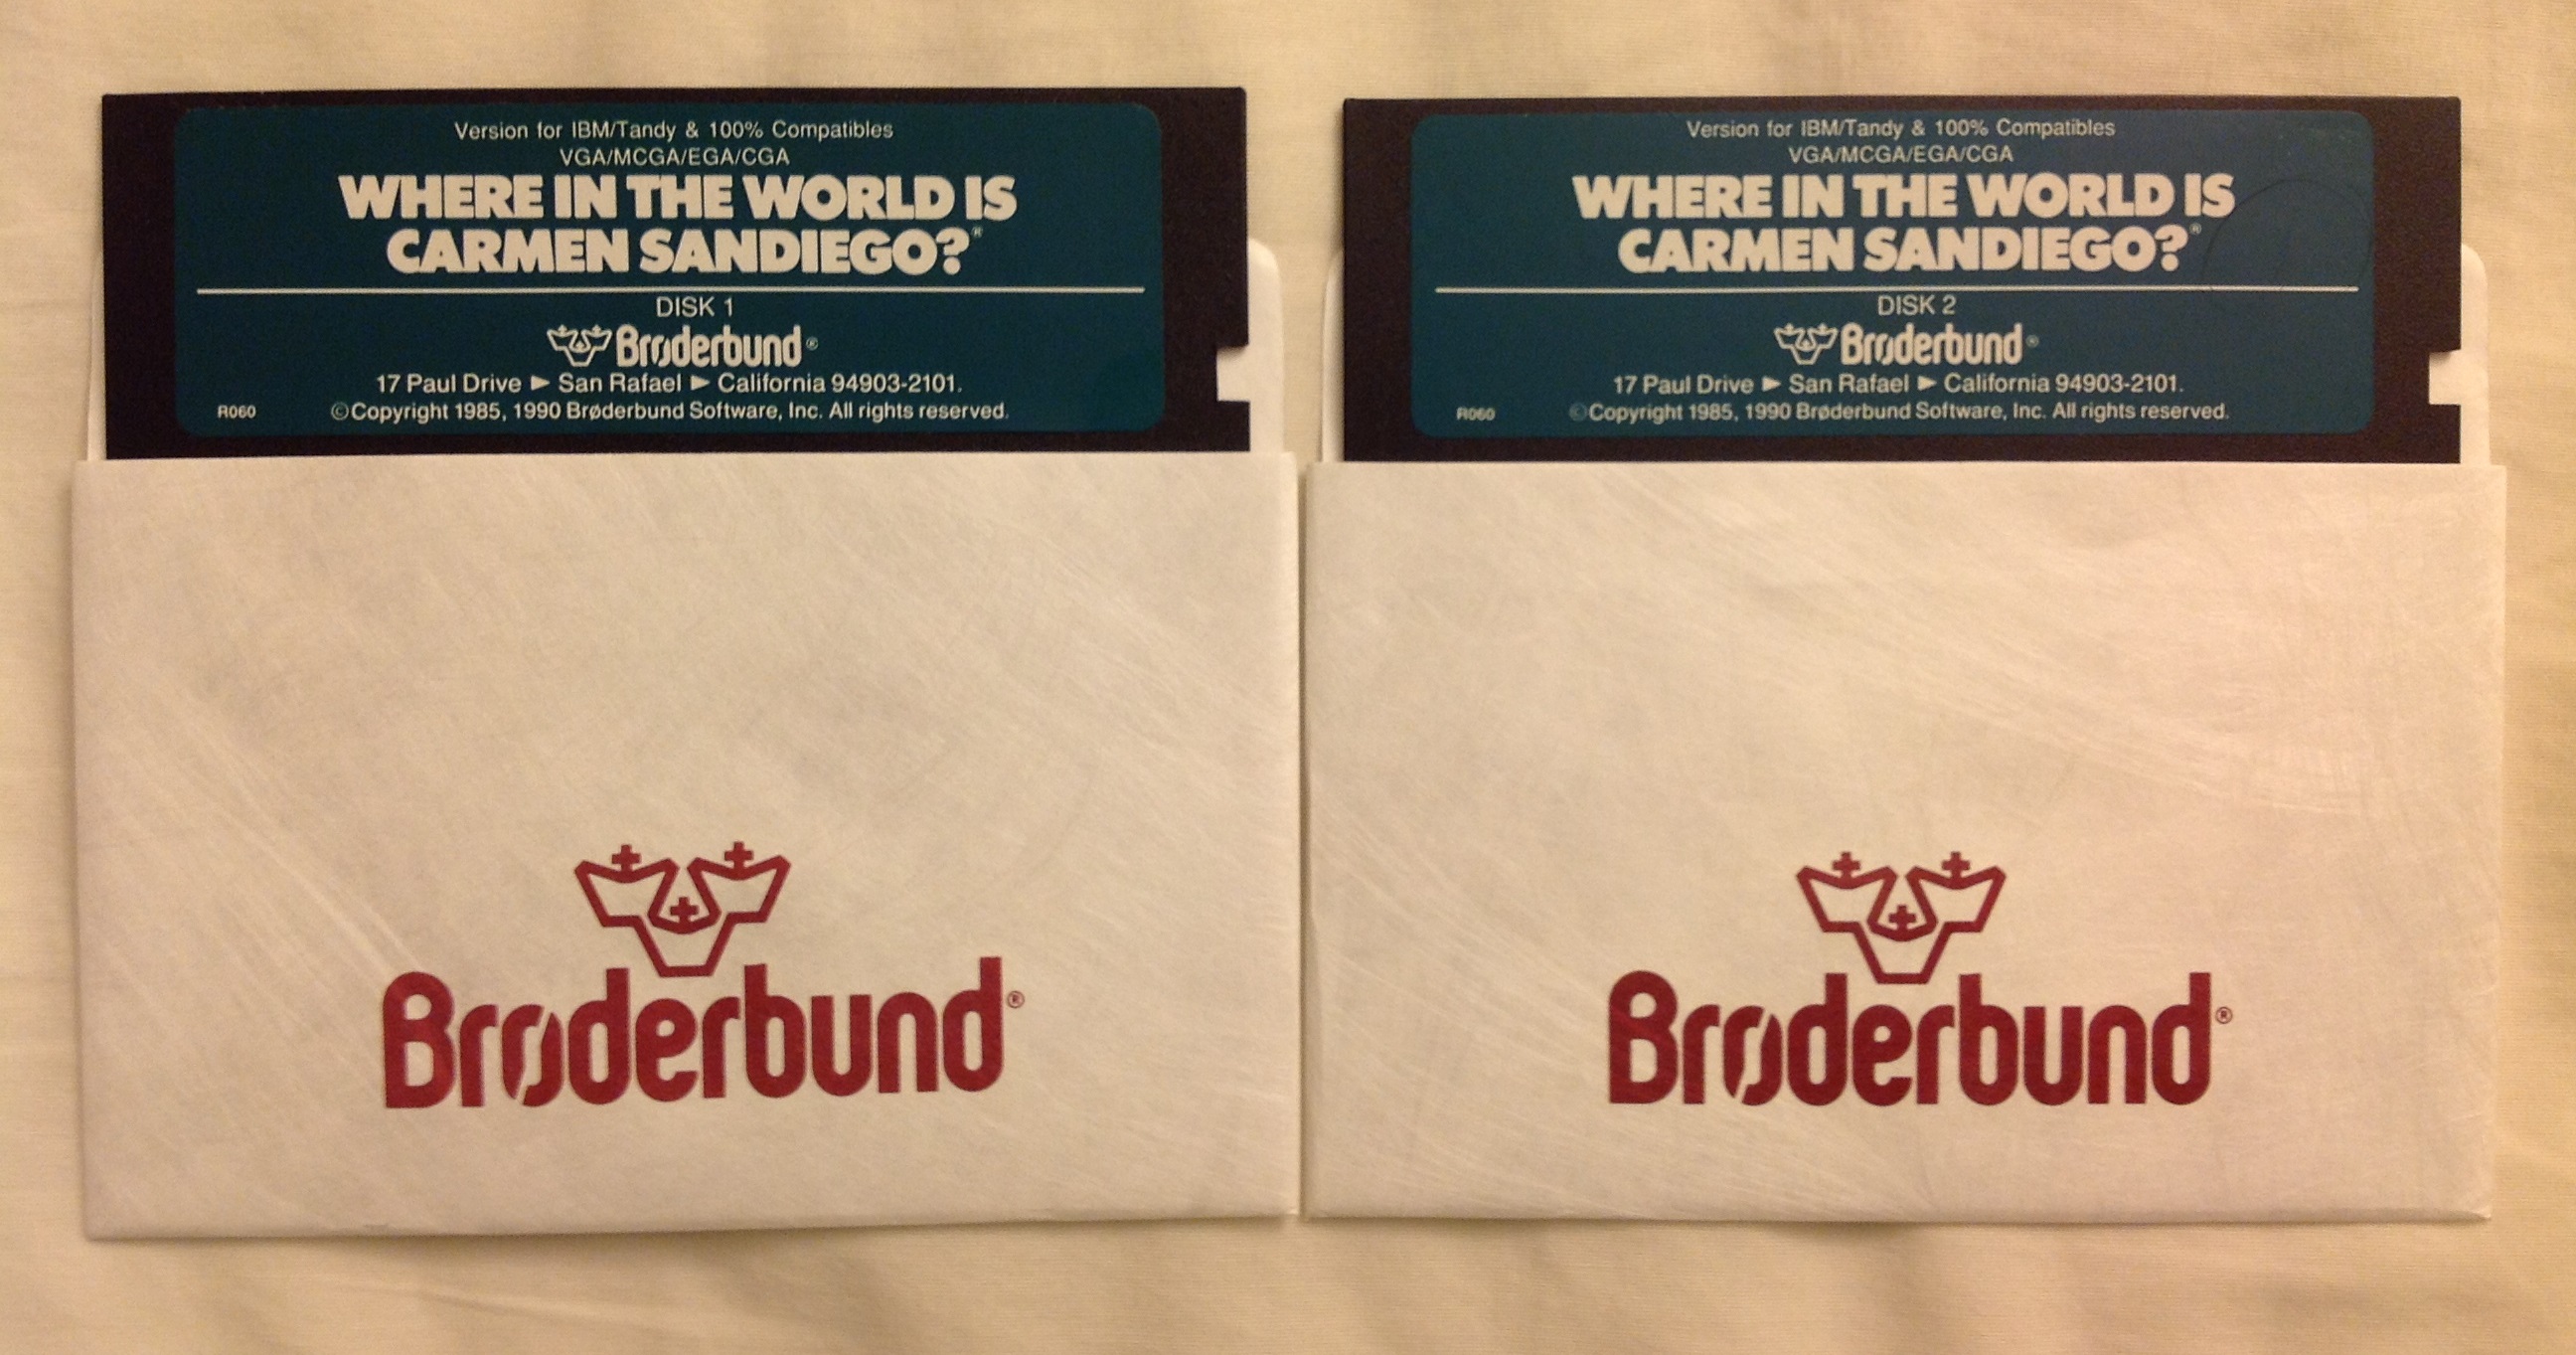
This meant that when we brought the Senior Partner home from Village Thrift I had a working DOS startup disk and a few programs so I had the bare minimum needed to see the machine working.


Several months later I found this insane lot of 5.25″ PC games on ShopGoodwill. I think I paid $16.25 for this lot including ShopGoodwill’s usually exorbitant shipping cost. What I received is a treasury of late 80s/early 90s PC games.

Here are just a few of the games in that box.
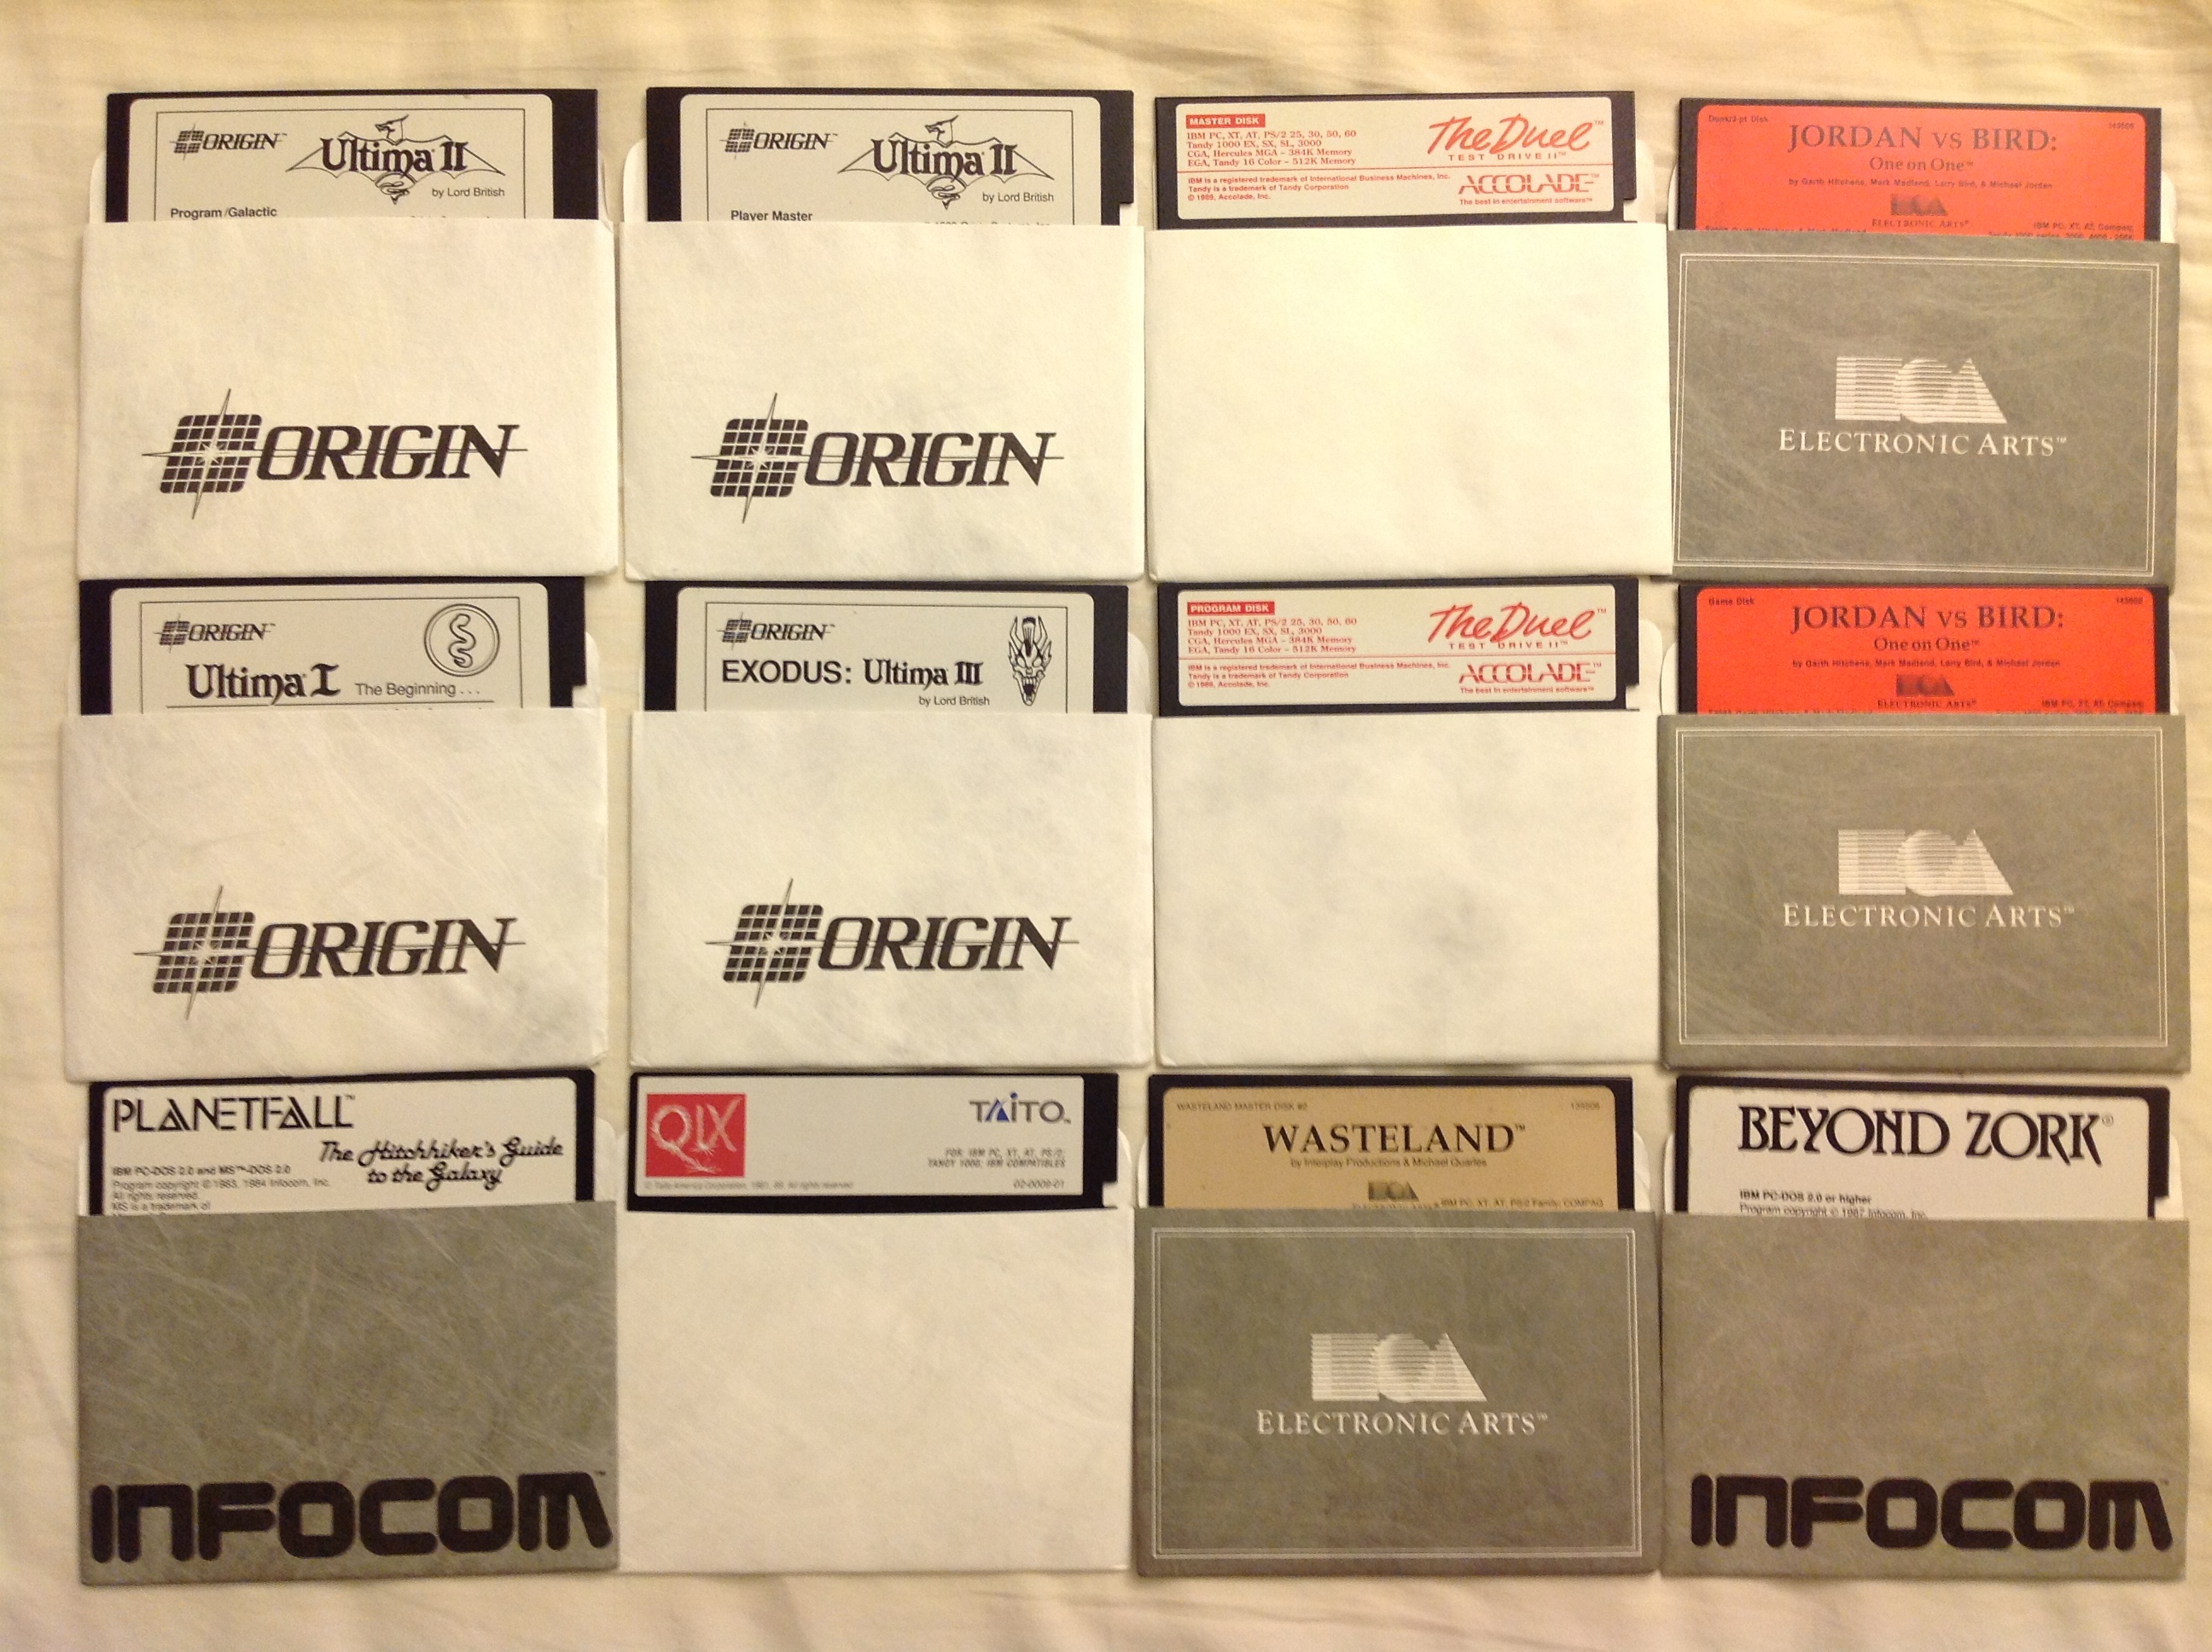
Many of these games require hard disk installation but several, like Ultima I (which we saw running on the Senior Partner in the Commodore 1084 post) and Hitchhiker’s Guide to the Galaxy are perfectly at home running on an early floppy-only PC. It turns out that many games from the late 1980s basically assumed a PC with 384K-512K RAM so they run just fine on the Senior Partner.


Finally, last year my uncle gave me his old PC and the Commodore monitor I mentioned previously. Along with that was his box of 5.25″ disks that went with the PC.
The best thing in the box was a disk labeled IBM DOS 3.2.

The Epson MS-DOS 3.30 disk I had been using was fine for booting the machine but because it was only indented as a minimal OS to be used to install the other disks it was missing several important utilities like CHKDSK. With my uncle’s DOS 3.2 disk I could finally confirm how much memory the machine had.

There was also a disk labeled Lotus 1-2-3, which I had badly wanted to see running on a vintage machine.
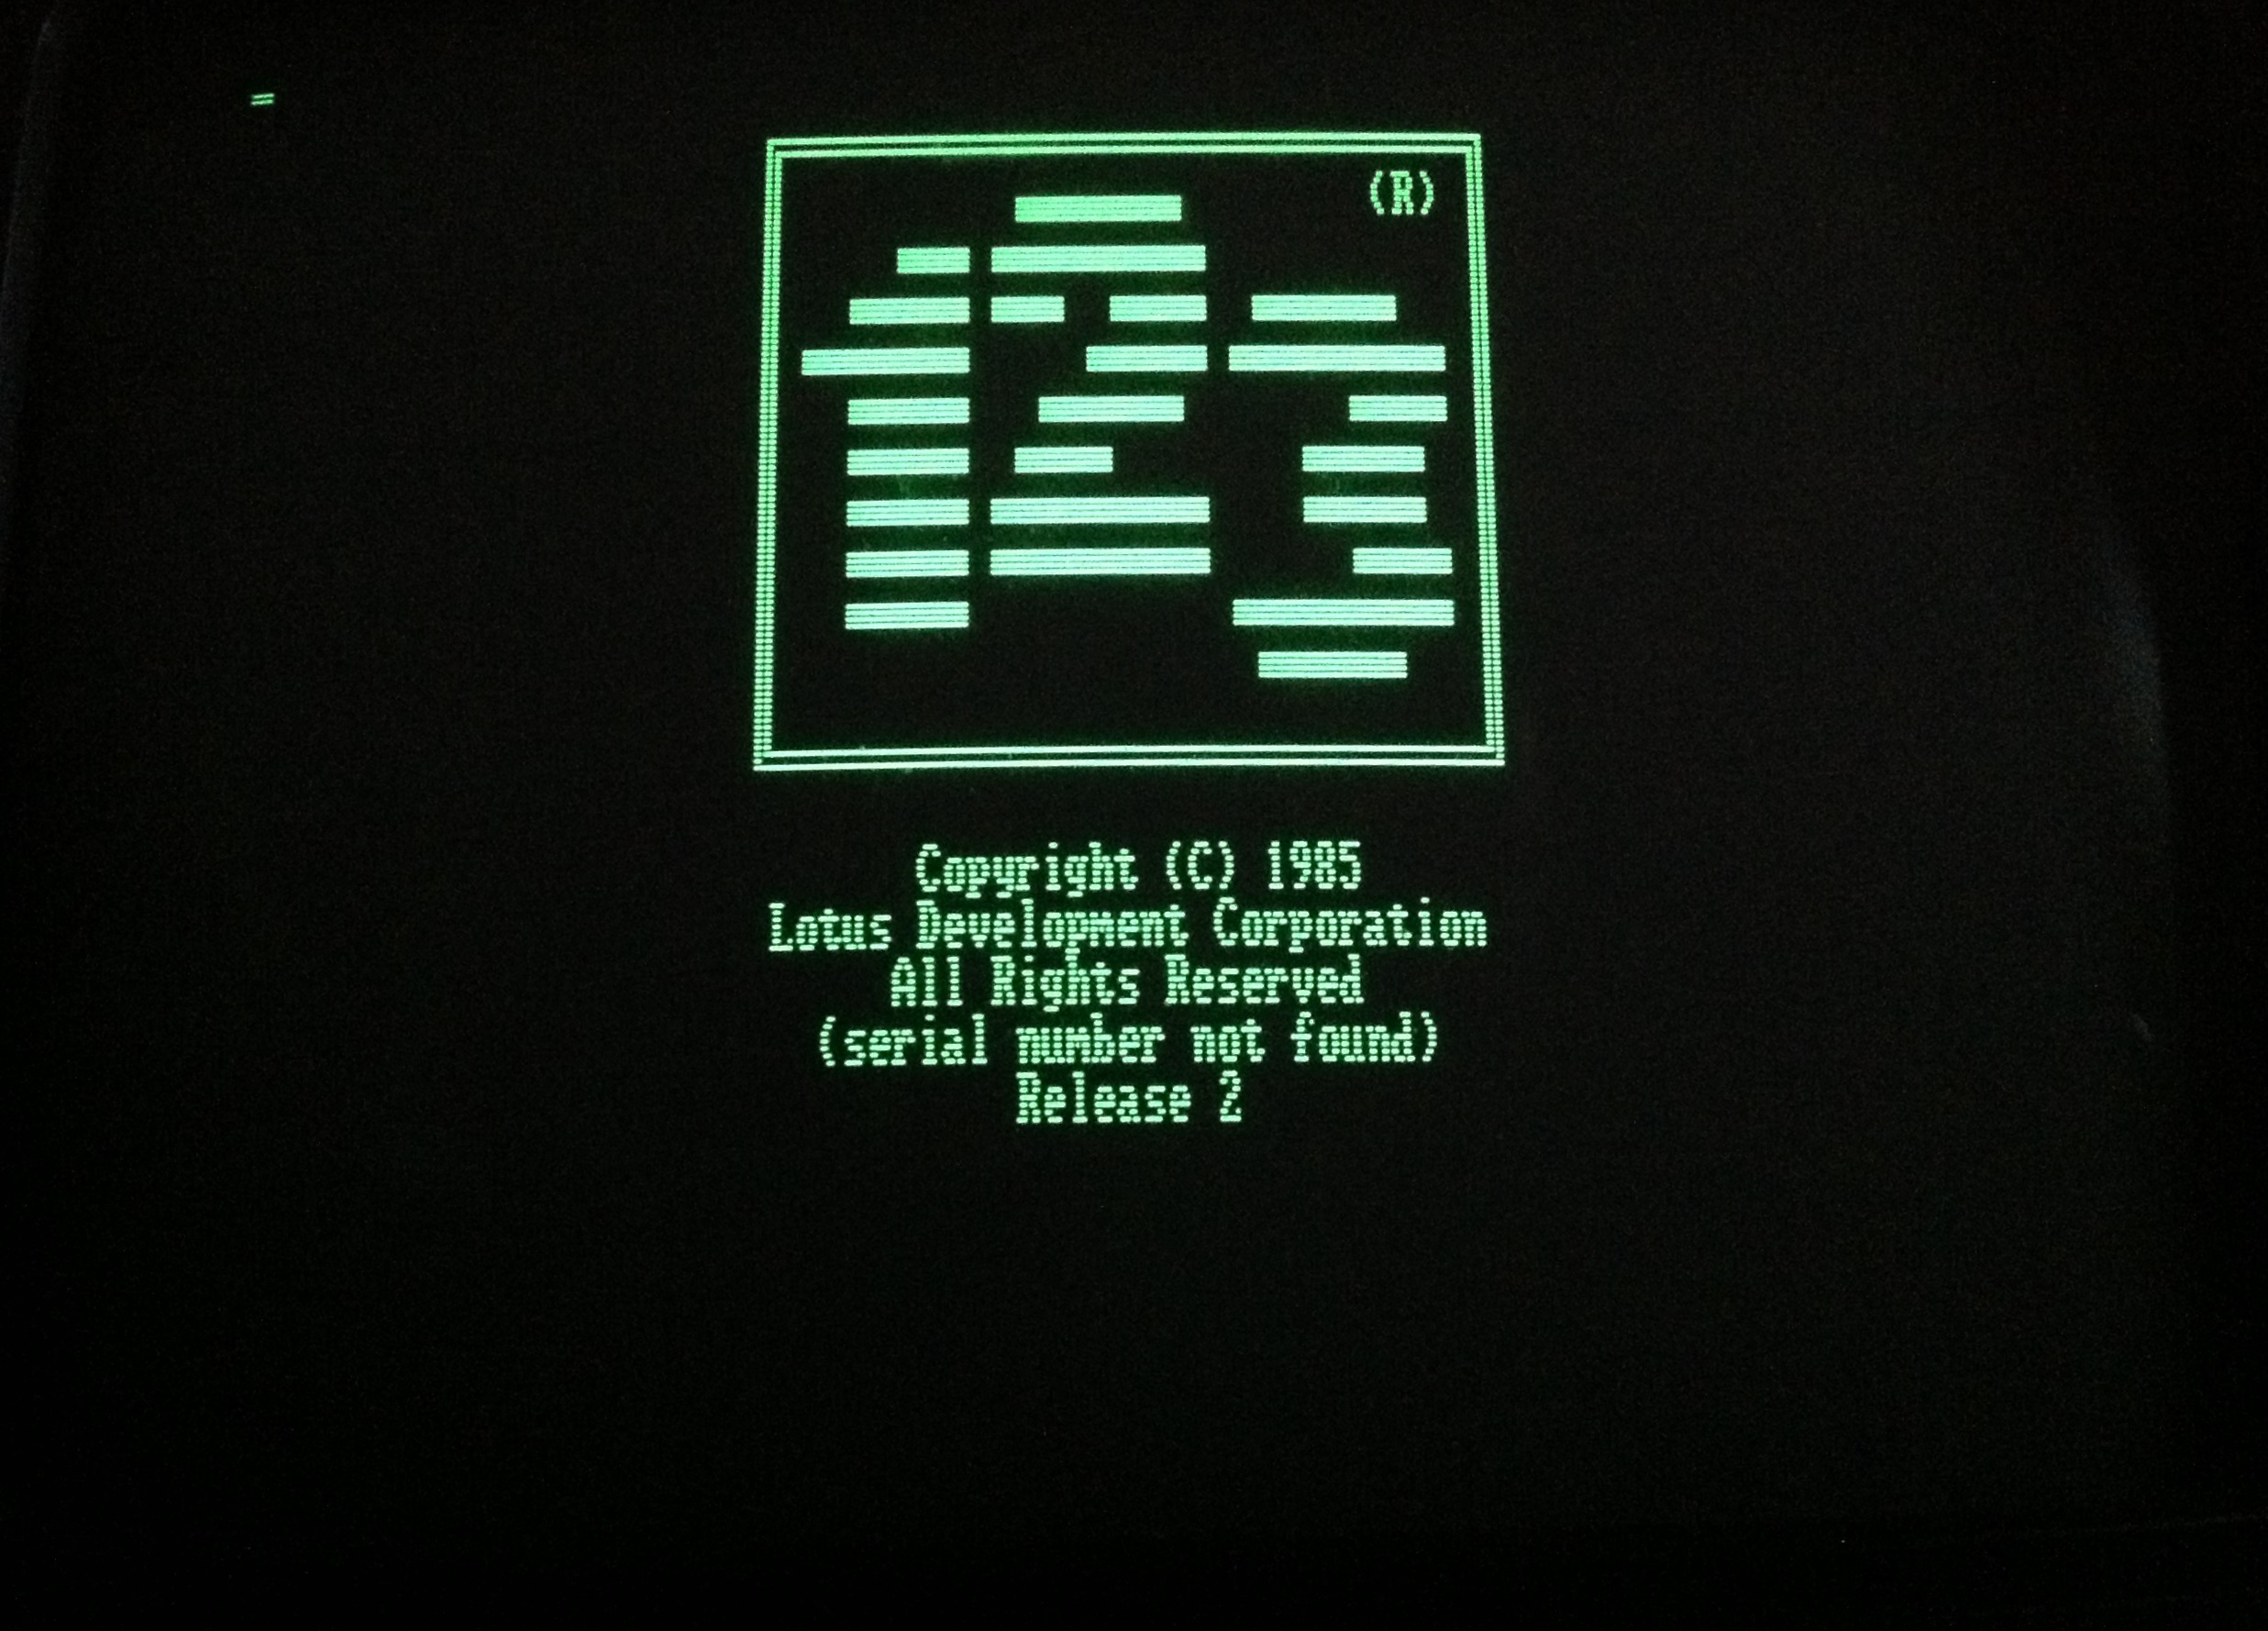

There was a time when this screen was a common as the Google homepage to computer users.
Using this machine also taught me a lot about MS-DOS. Today DOS is remembered as a difficult monster of an OS; cold to use and brutal to configure. Some of that is true. Some of that was Apple advertising crud. But I think a lot of that image of MS-DOS came from the time after about 1988 until the release of Windows 95 (and even a little after) when so many odd tricks had to be crammed into DOS so that it could use more than 640K memory and use new hardware like sound cards that were not supported without strange autoexec.cfg and config.sys changes. The nonsense you had to go through to use the hardware in your PC had was truly insulting.
However, in the earlier period the Senior Partner belongs to DOS seems almost tame. You change directories. You list the files in a directory. You run a program. You change drives. You format a disk. It almost seems quaint compared to the ordeals that people had using DOS later. DOS was clearly meant for a machine like the Senior Partner; this was its heyday. After that point it slowly turned into a curmudgeonly antique.
I remember reading DOS for Dummies and seeing all of these commands the author basically told you you shouldn’t touch with a ten foot pole. I wondered what had happened for these commands to have been put into the OS and never taken out in the intervening years. These were things for configuring serial ports and display modes that made made sense on machines like the Senior Partner in the 1980s but were increasingly less relevant as time wore on. The large group of people who first encountered PCs in the early 90s ran headfirst into this confusing period where DOS was a geological dig of successive eras stacked on top of each other.
To use a machine as old as the Senior Partner seems quaint not just because of it’s age but because it’s so old that DOS actually makes sense.

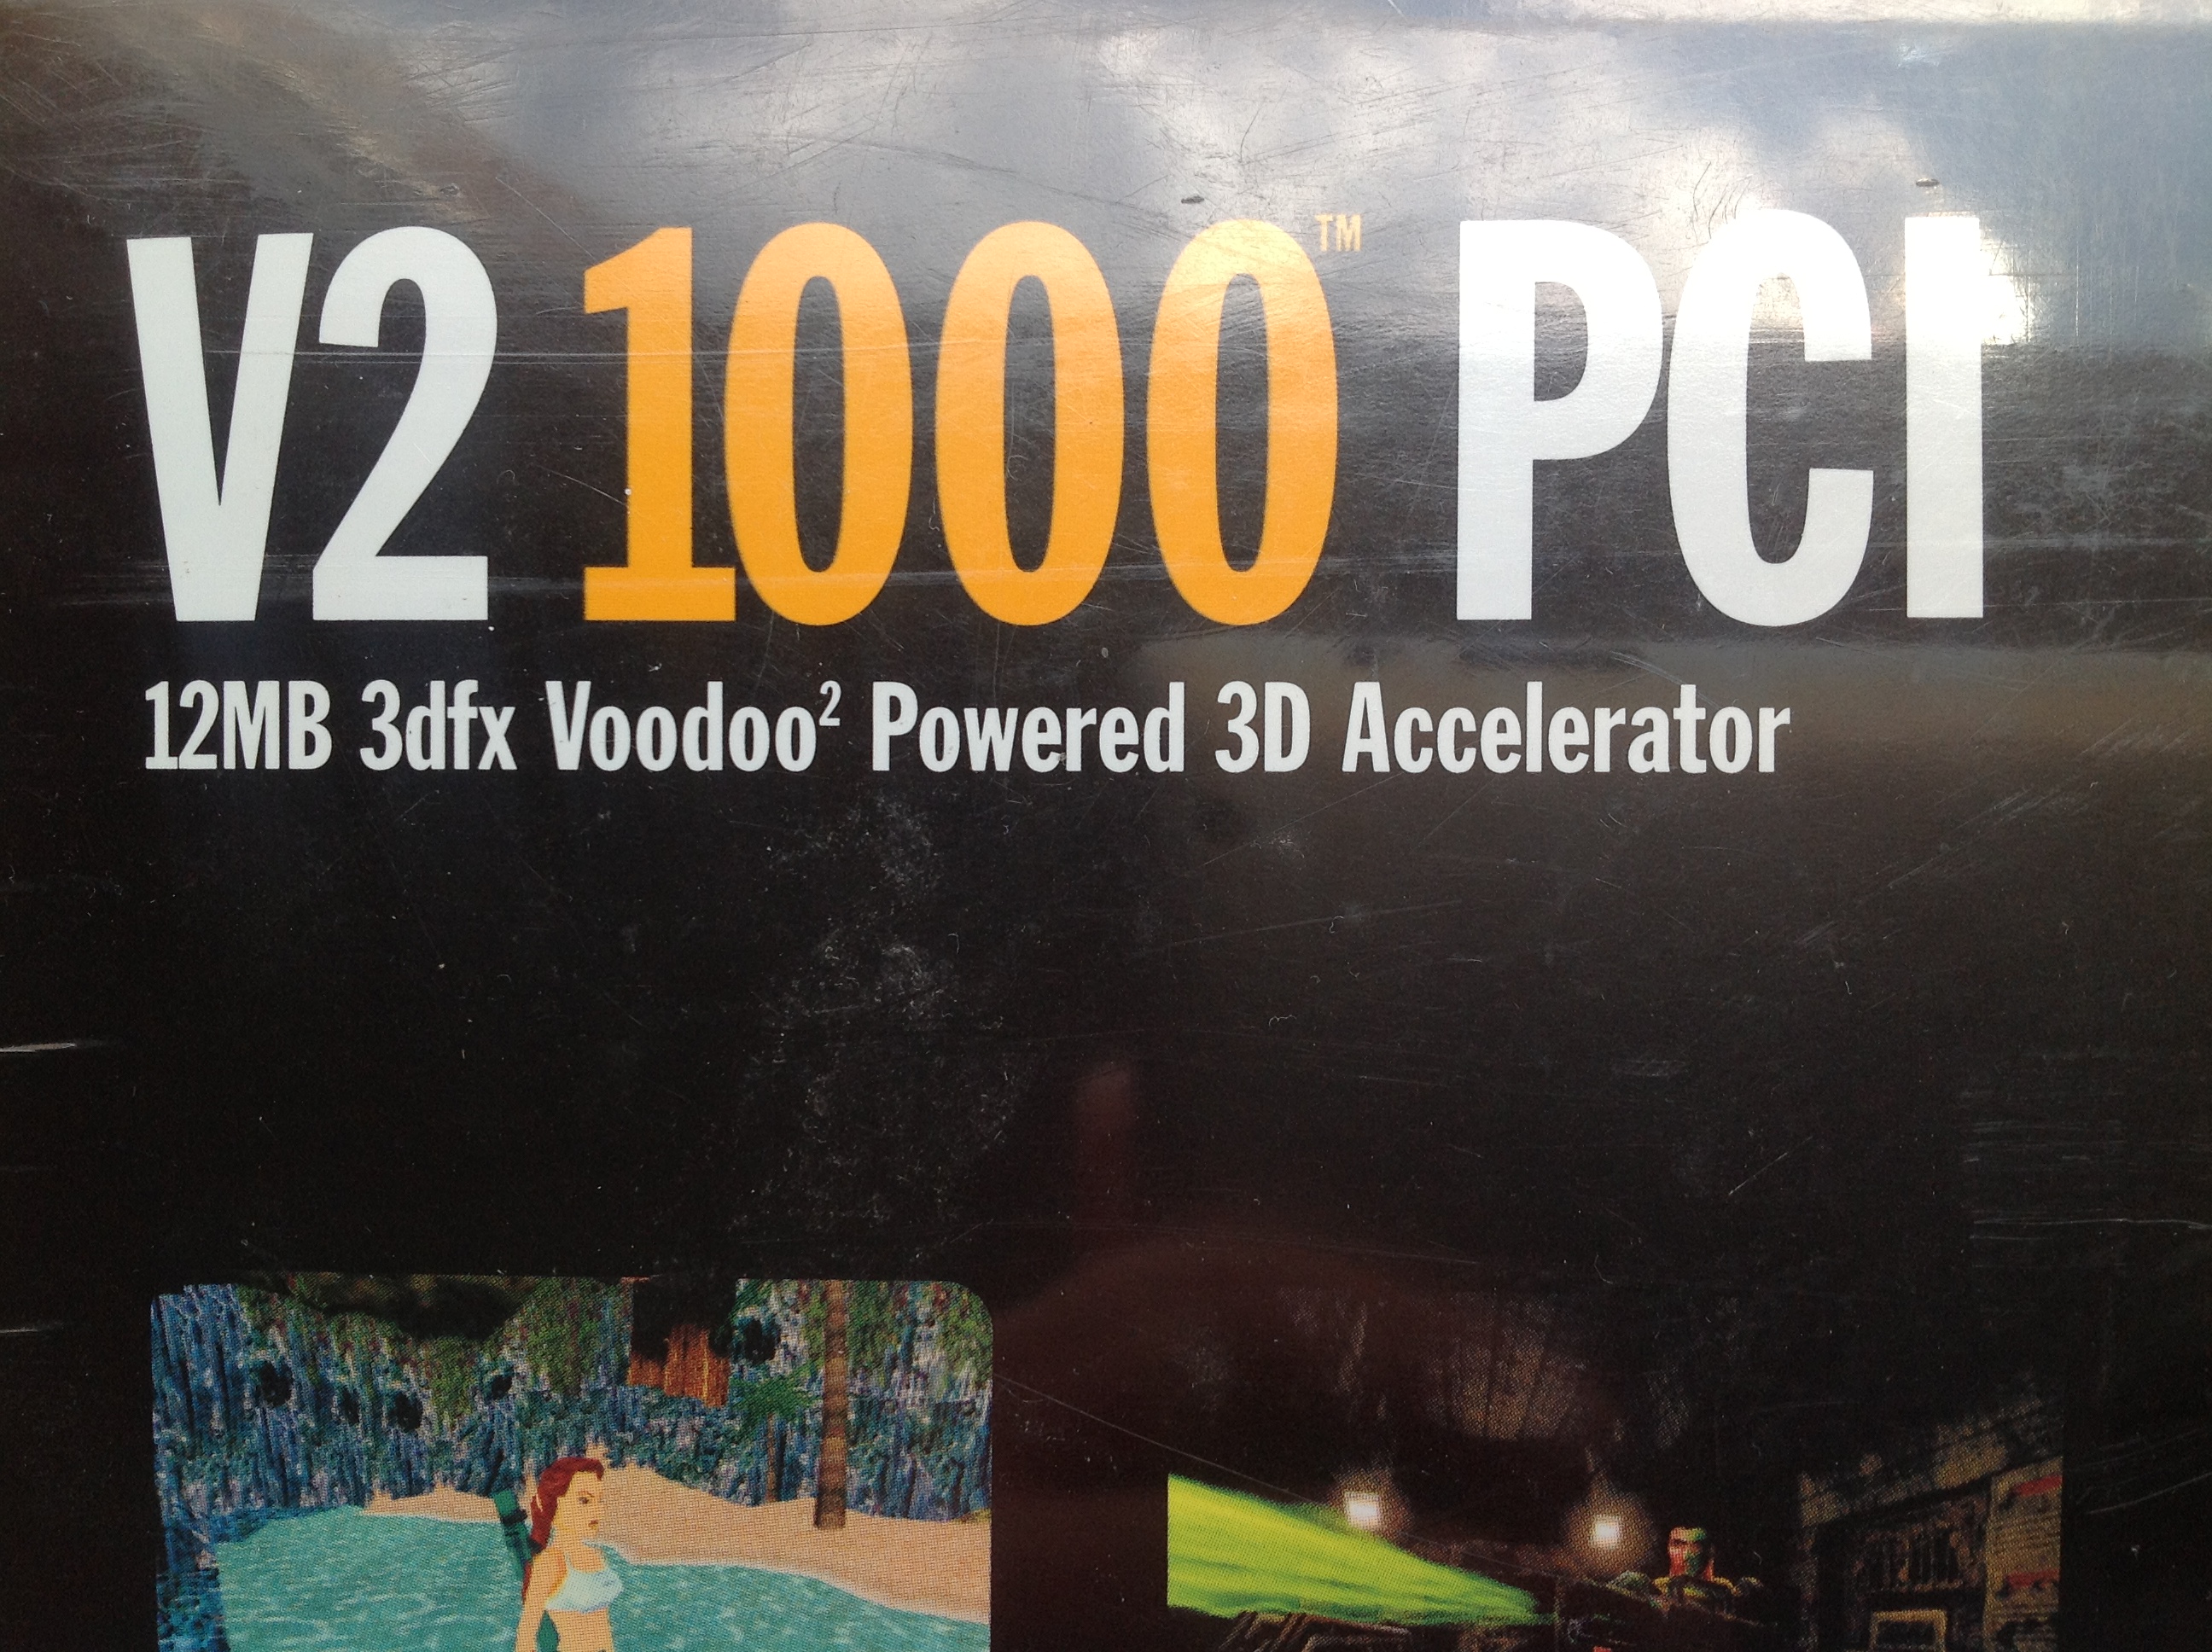
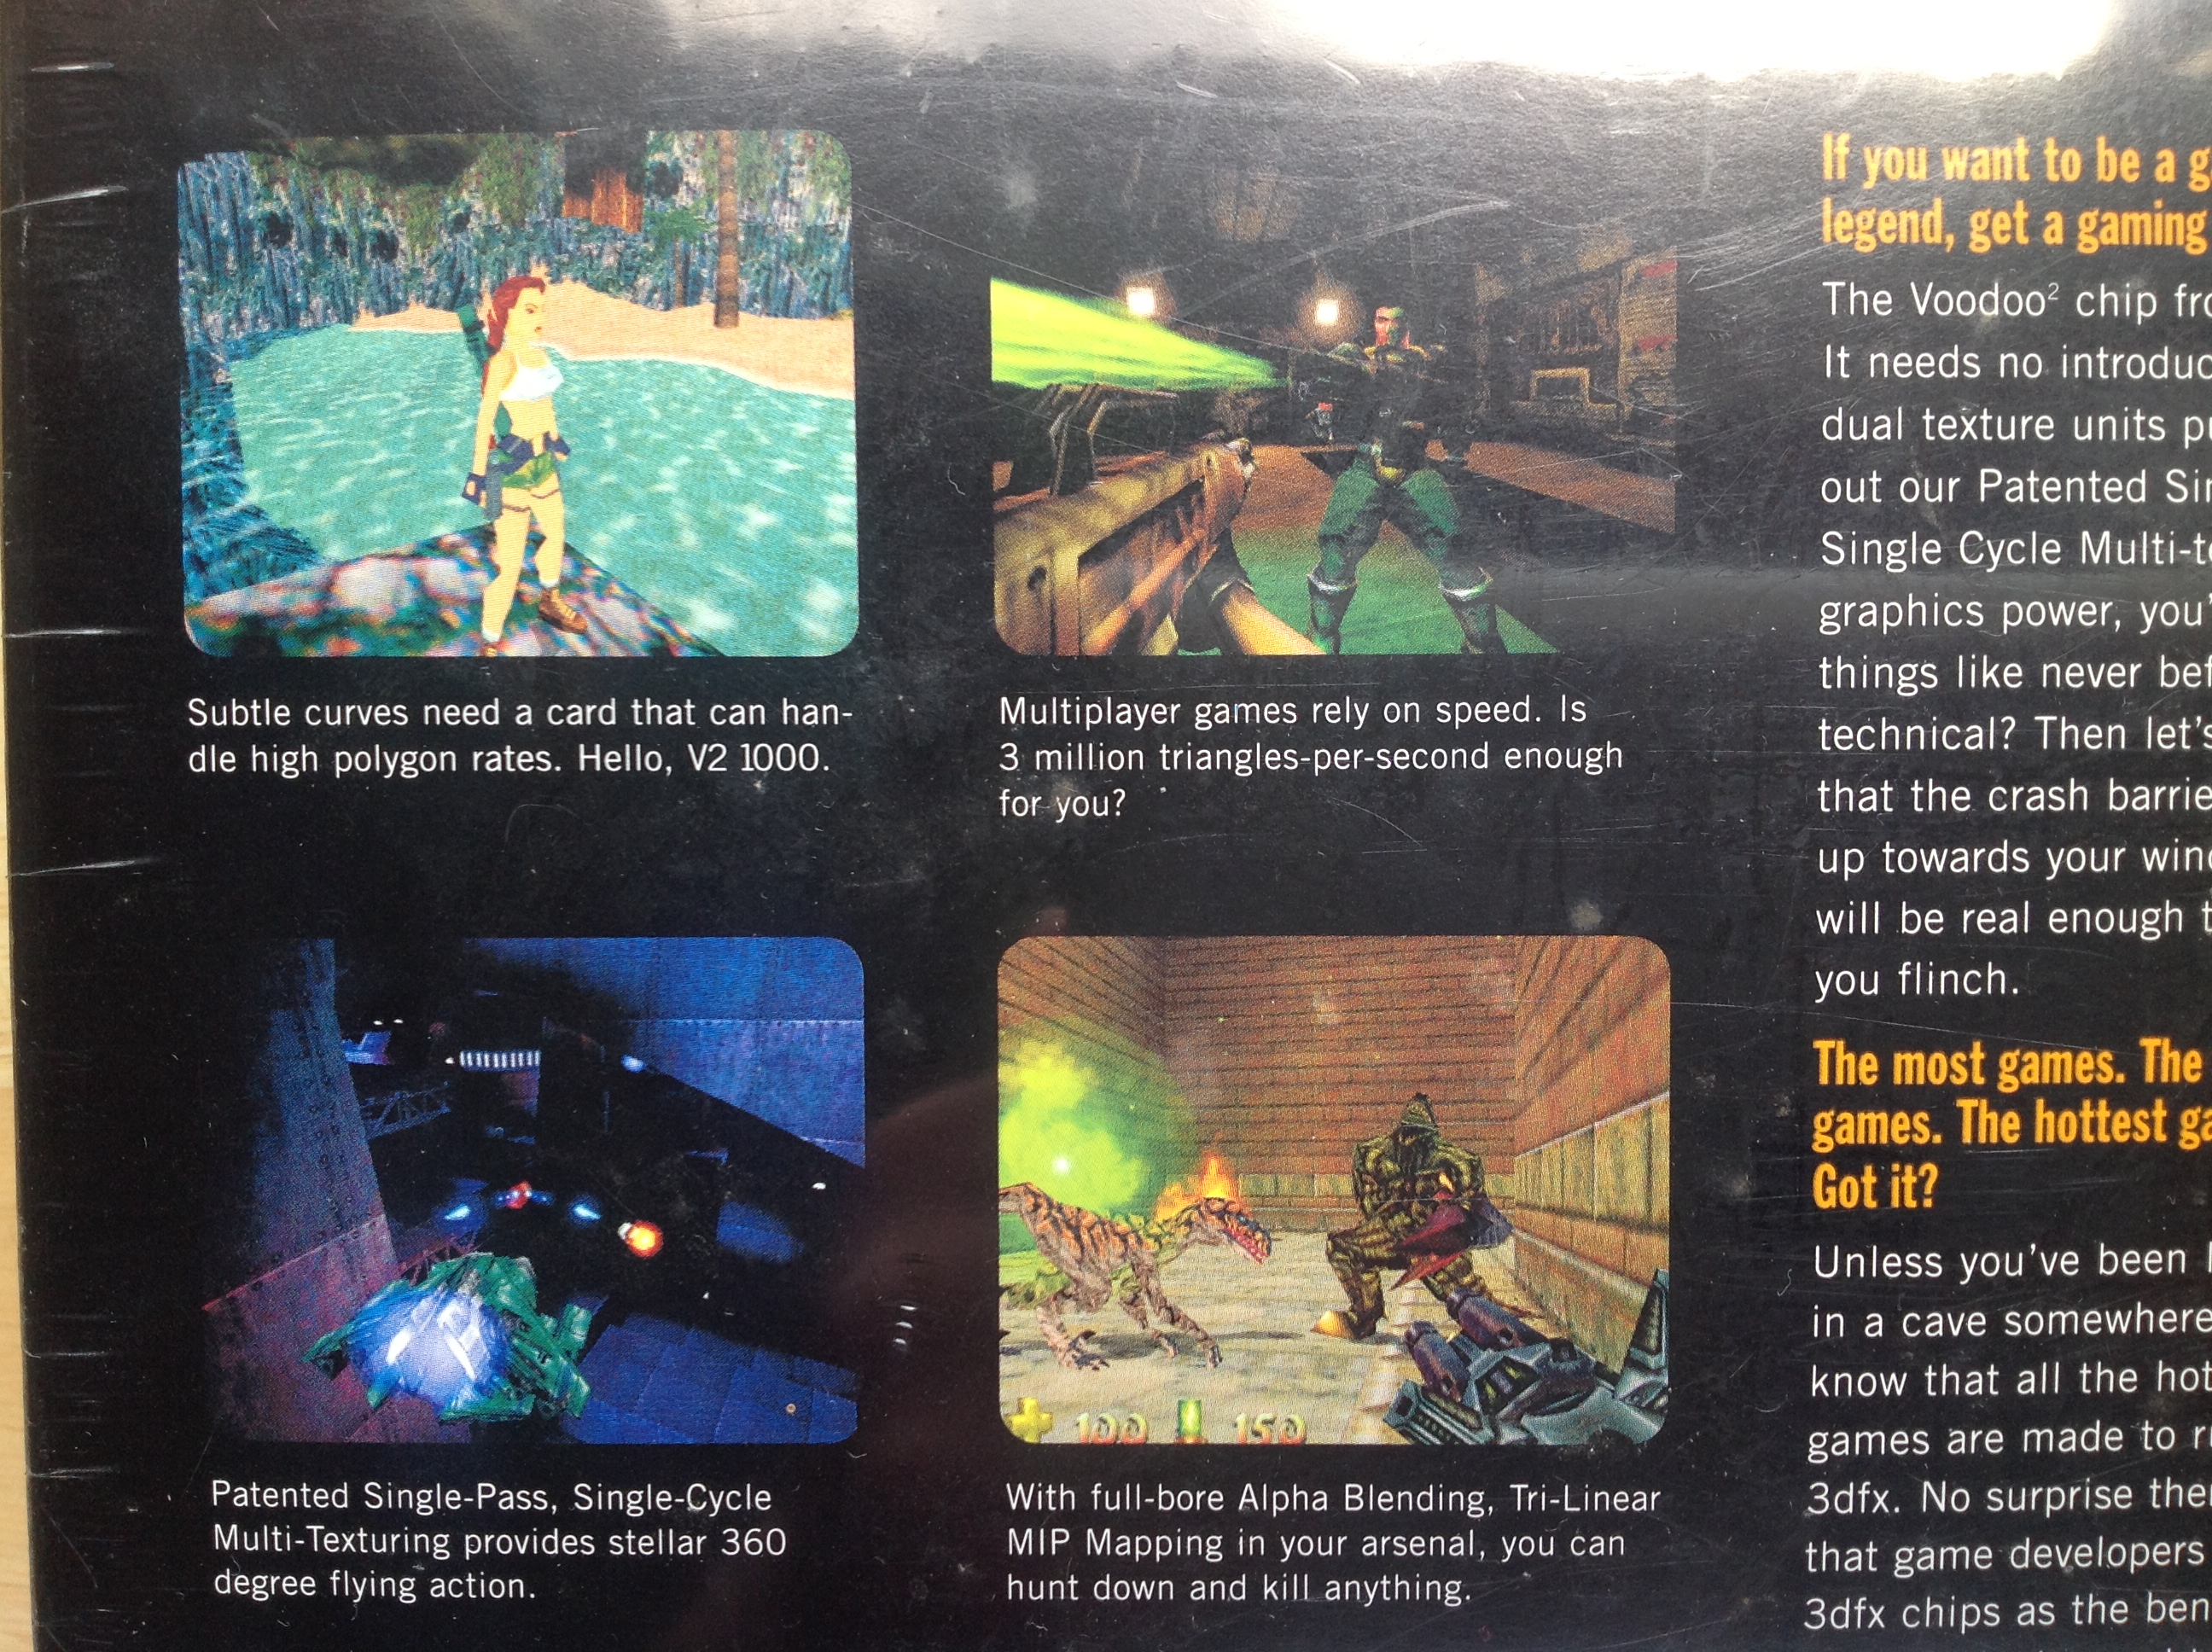
3DFX Voodoo2 V2 1000 PCI
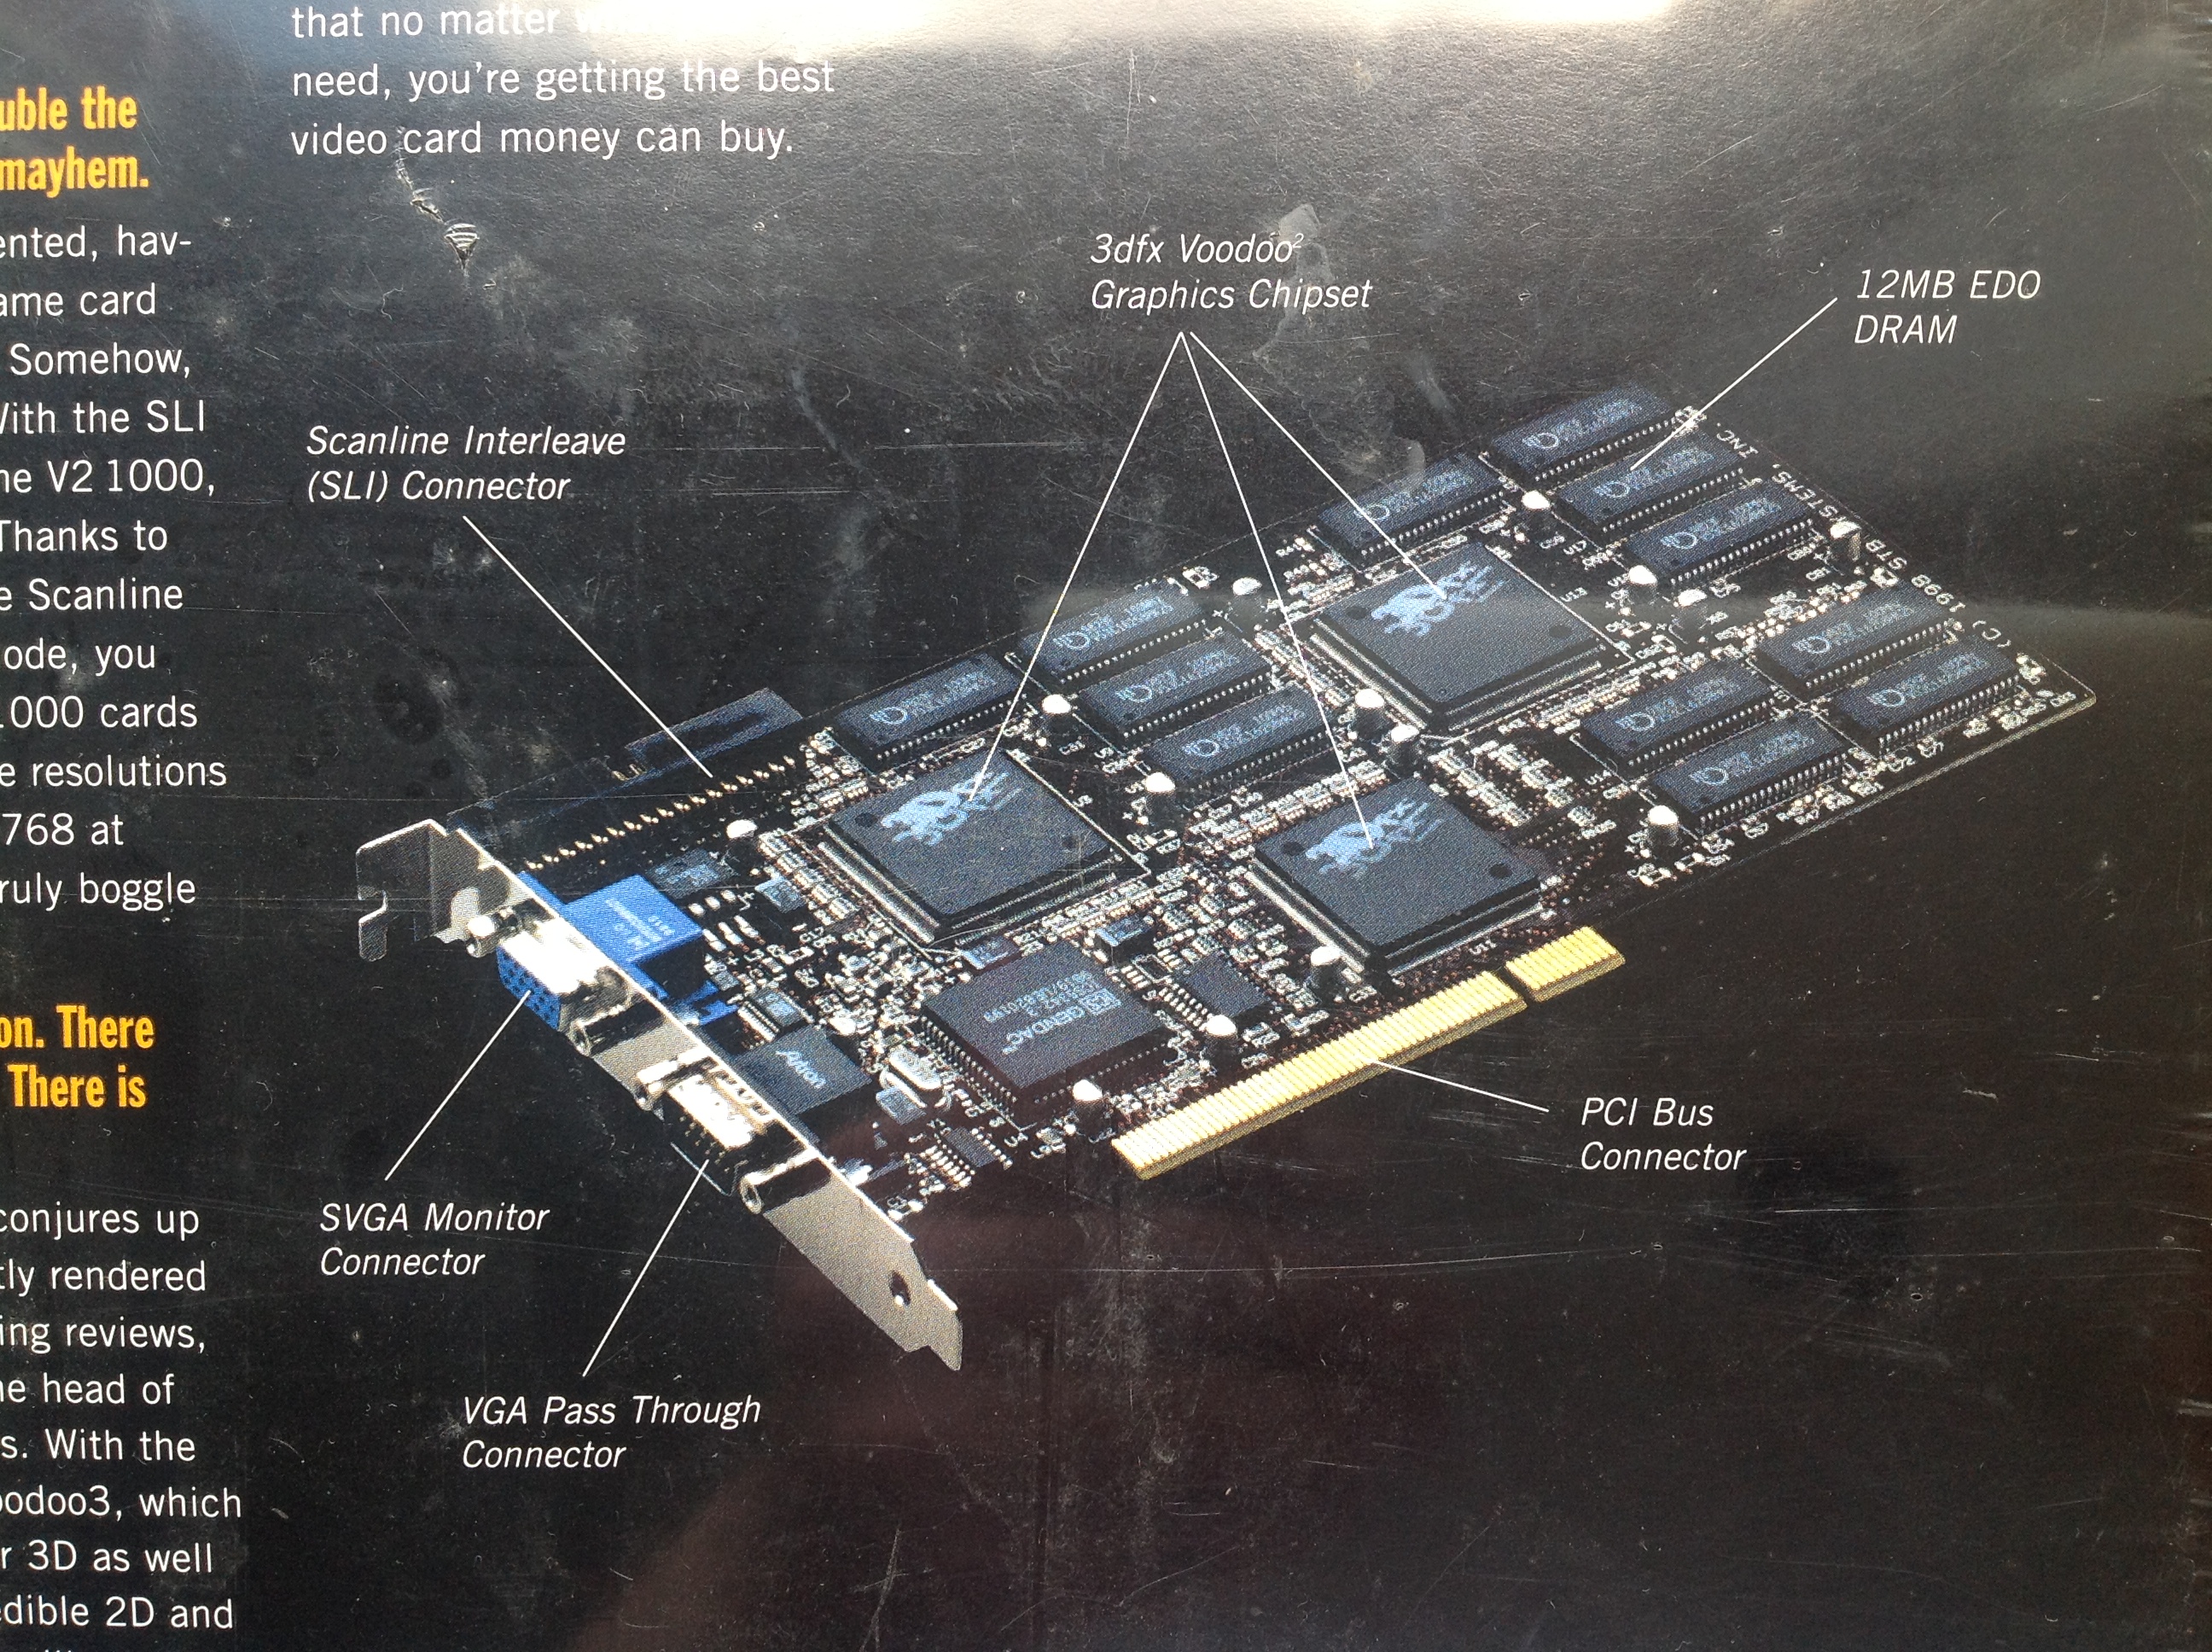
This is a 3DFX Voodoo 2 V2 1000 PCI still sealed in the box.

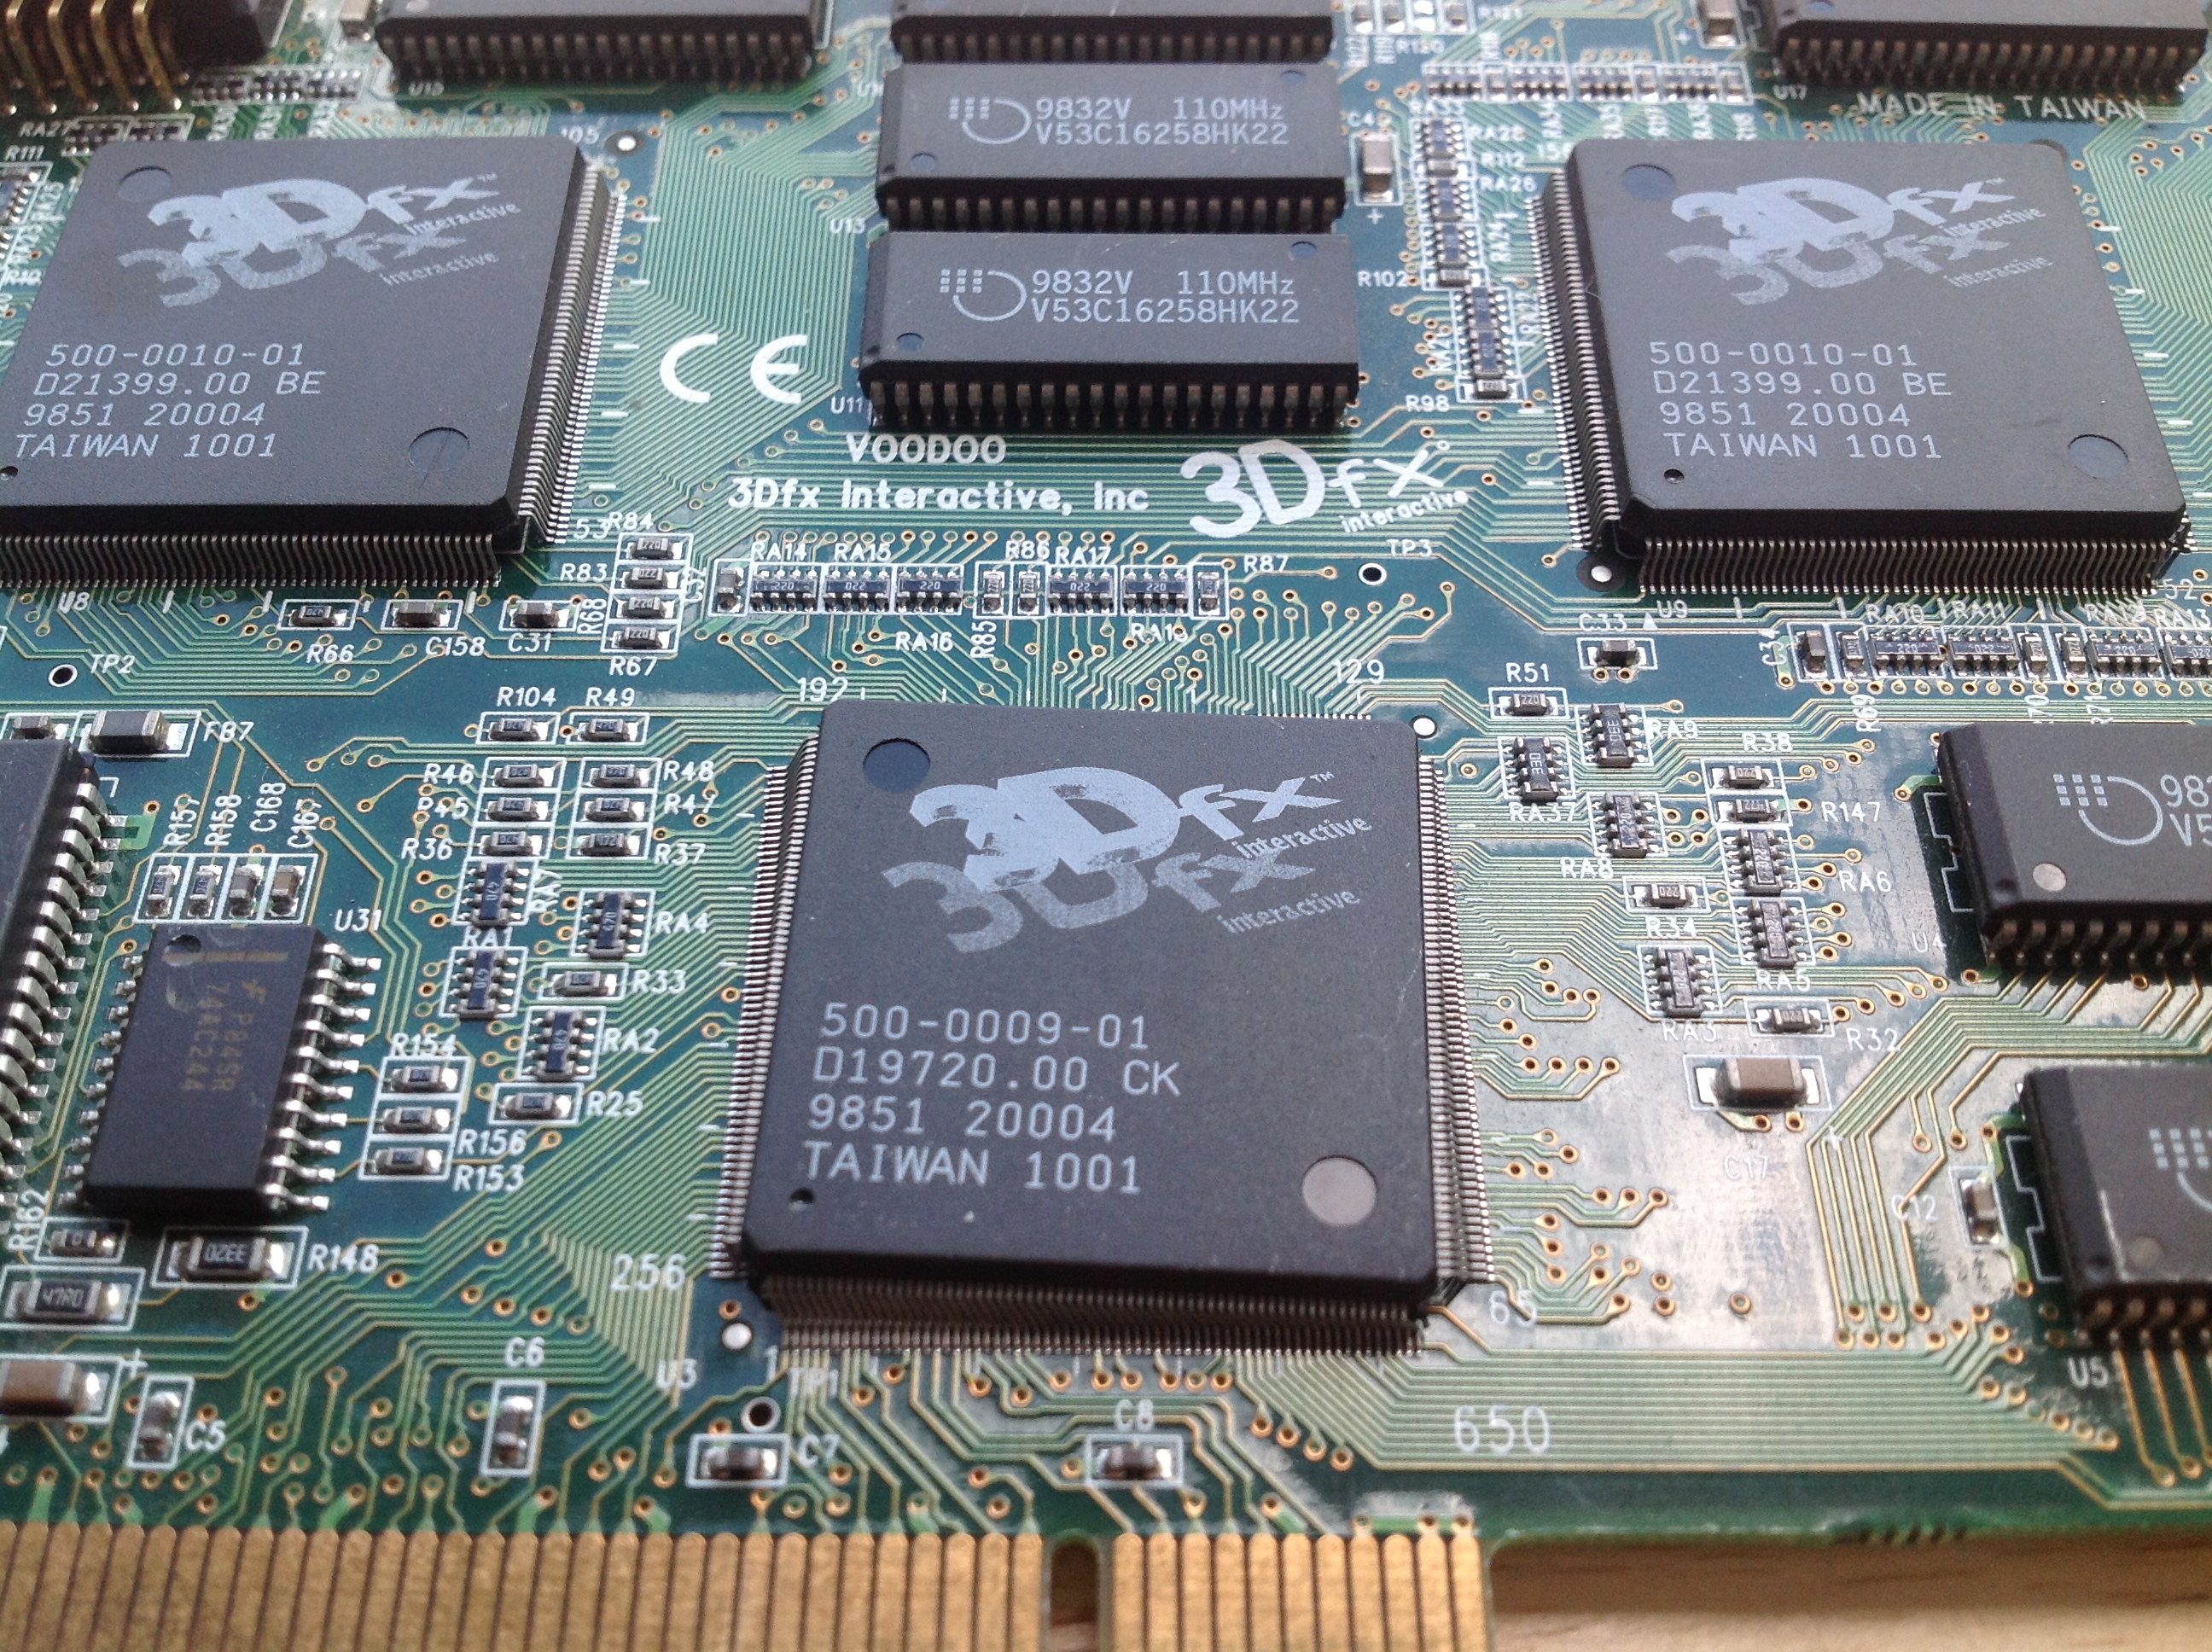
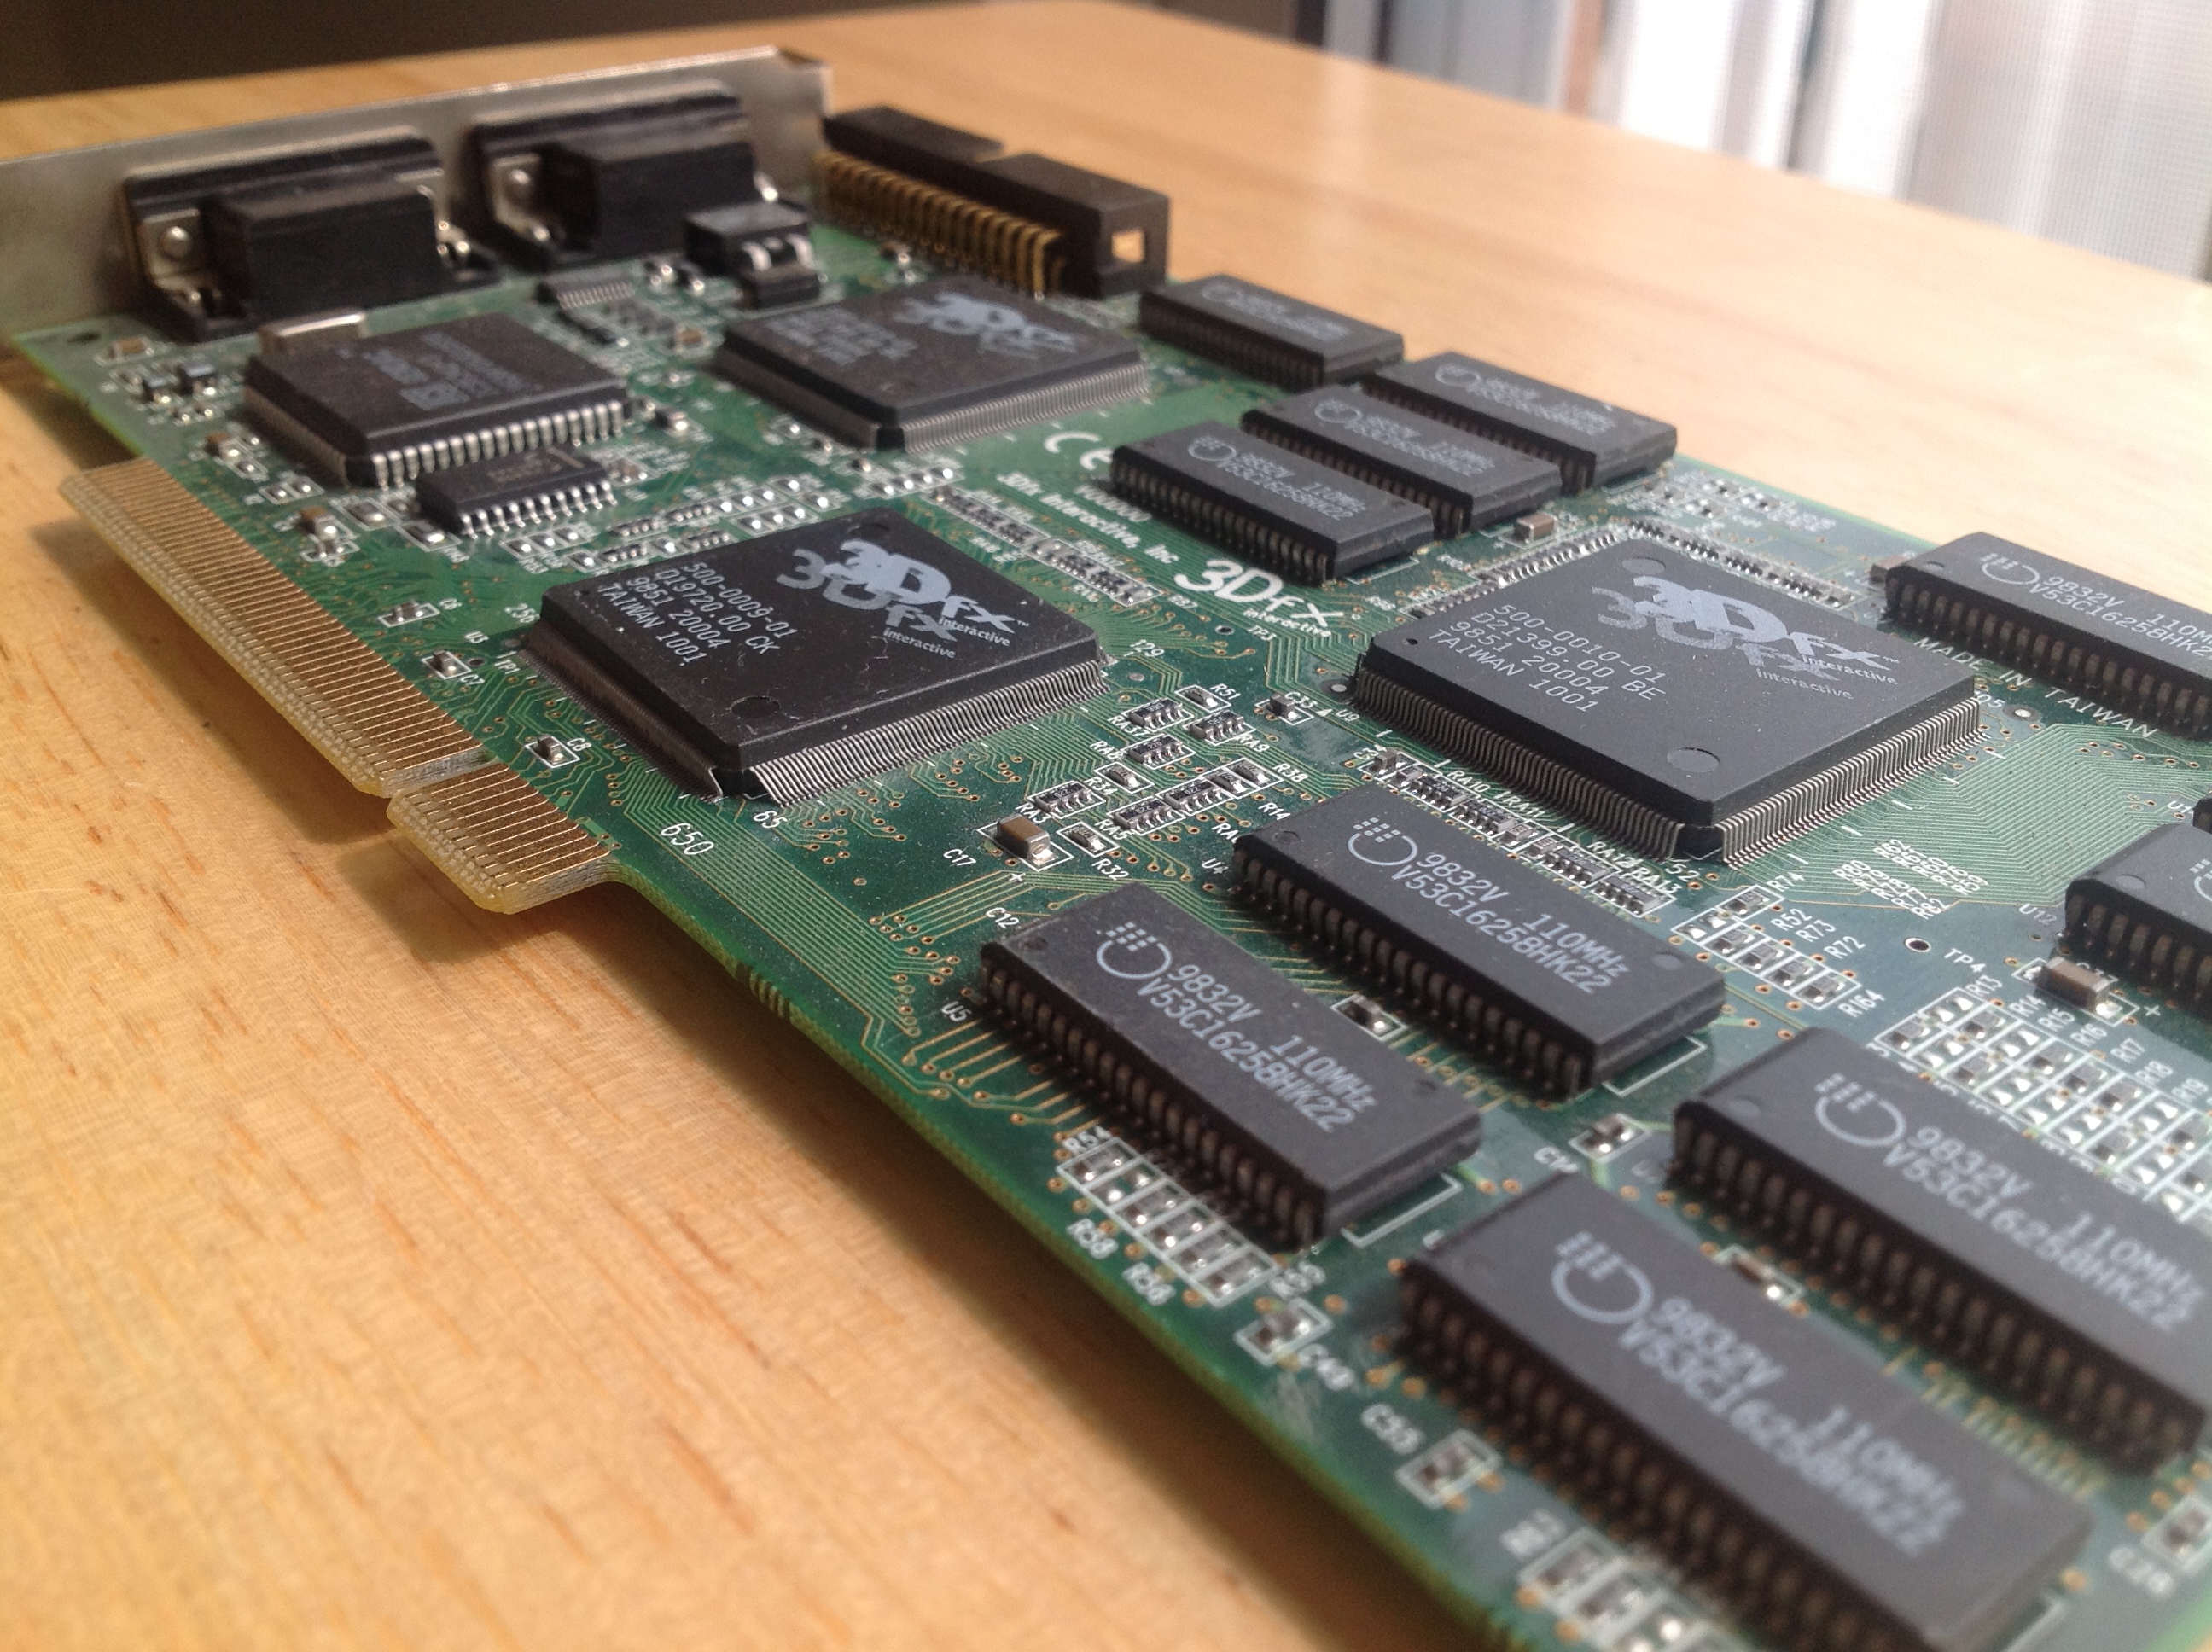
I actually own three Voodoo 2’s. The first one is a Metabyte Wicked 3D (below, with the blue colored VGA port) that I bought from a friend in high school. The second one is the new-in-box 3DFX branded Voodoo 2 I bought off of ShopGoodwill last year. The third one (below, with the oddly angled middle chip) is a Guilliemot Maxi Gamer 3D2 I bought at the Cuyahoga Falls Hamfest earlier this year.

The Voodoo 2, in all of its manifestations, is my favorite expansion board of all time. It’s one of the last 3D graphics boards that normally operated without a heatsink so you can gaze upon the bare ceramic chip packages and the lovely 3DFX logos emblazoned upon them. It was also pretty much the last 3D graphics board where the various functions of the rendering pipeline were still broken out into three separate chips (two texture mapping units and a frame buffer). The way the three chips are laid out in a triangle is like watching jet fighters flying in formation.
It’s hard to explain to someone who wasn’t playing PC games in the late-1990s what having a 3DFX board meant. It was like having a lightswitch that made all of the games look much, much better. There are perhaps three tech experiences that have utterly blown my mind. One of them was seeing DVD for the first time. Another is seeing HDTV for the first time. Seeing hardware accelerated PC games on a Voodoo 2 was on the same level.

A friend of mine in high school won the Metabyte Wicked 3D in an online contest. I remember the day it arrived at his house I had walked home from school trudging up and down piles of snow that had been piled up on the sidewalk to clear the roads and I got home exhausted…And he calls me asking if I wanted to come over as he installed the Voodoo 2 card and fired up some games. Even though I was exhausted I eagerly accepted.
I think I saw hardware accelerated Quake 2 that day…Nothing else would ever be the same. I was immensely jealous.
Ever since personal computers have been connected to monitors there has been some sort of display hardware in a computer that output video signals. Often times this hardware included capabilities that enhanced or took over some of the CPU’s role in creating graphics.
When we talk about 2D graphics we mean graphics where for the most part the machine is copying an image from one place in the computer’s memory and putting int another place in the computer’s memory. For example, if you imagine a scene from say, Super Mario Bros. the background is made up of pre-prepared blocks of pixels (ever notice how the clouds and the shrubs are the same pattern or pixels with a color shift?) and Mario and the bad guys are each particular frame in a short animation called a sprite. These pieces of images are combined together in a special type of memory that is connected to a chip that sends the final picture to the TV screen or monitor.
It’s sort of like someone making one of those collages where you cut images out of a magazine and paste them on a poster-board. The key to speeding up 2D graphics in a computer is speeding up the process of copying all of the pieces of the image to the special memory where they need to end up. You might have heard about the special “blitter” chips in some Atari consoles and the famous Amiga computers that made their graphics so great. 2D graphics were ideal for the computing power of the time but they give videogame designers limited ability to show depth and perspective in videogames.
Outside of flight simulator games and the odd game like Hard Drivin and Indy 500 almost all videogames used 2D graphics until the mid-1990s. PC games during the 2D graphics era were mostly being driven by the CPU. If you bought a faster CPU, the games got more fluid. There were special graphics boards you could buy to make games run faster, but the CPU was the main factor in game performance.

Beginning in about 1995-1996 there was a big switch to 3D graphics in videogames (which is totally different than the thing where you wear glasses and things pop out of the screen…that’s stereoscopics) and that totally changed how the graphics were being created by the computer. In 3D graphics the images are represented in the computer by a wireframe model of polygons that make up a scene and the objects in it. Special image files called textures represent what the surfaces of the objects should look like. Rendering is the process of combing all of these elements to create an image that is sent to the screen. The trick is that the computer can rotate the wireframe freely in 3D space and then place the textures on the model so that they look correct from the perspective of the viewer, hence “3D”. You can imagine it as being somewhat akin to making a diorama.
With 3D graphics videogame designers gained the same visual abilities as film directors: Assuming the computer could draw a scene they could place the player’s perspective anywhere they desired.
The problem with 3D graphics is that they are much more taxing computationally than 2D graphics. They taxed even the fastest CPUs of the era.
In 1995-1996 when the first generation of 3D games started appearing in PCs they looked like pixelated messes on a normal computer. You could only play them at about 320×240, objects like walls in the games would get pixelated very badly when you got close to them, and the frame rate was a jerky 20 fps if you were lucky. Games had started using 3D graphics and as a result required the PC’s CPU to do much, much more work than previous games. When Quake, one of the first mega-hit 3D graphics-based first person shooters came out it basically obsoleted the 486 overnight because it was built around the Pentium’s floating-point (read: math) capabilities. But even then you were playing it at 320×240.
At the same time arcade games has been demonstrating much better looking 3D graphics. When you sat down in front on an arcade machine like Daytona USA or Virtua Fighter 2 what you saw was fluid motion and crisp visuals that clearly looked better than what your PC was doing at home. That’s because they had dedicated hardware for producing 3D graphics that took some types of work away from the CPU. These types of chips were also used in flight simulators and they were known to be insanely expensive. However, by the time the N64 came out in 1996 this type of hardware was starting to make it’s way into homes. What PCs needed was their own dedicated 3D graphics hardware. They needed hardware acceleration.
That’s what the Voodoo 2 is. The Voodoo 1 and it’s successor the Voodoo 2 were 3DFX’s arcade-quality 3D graphics products for consumer use.
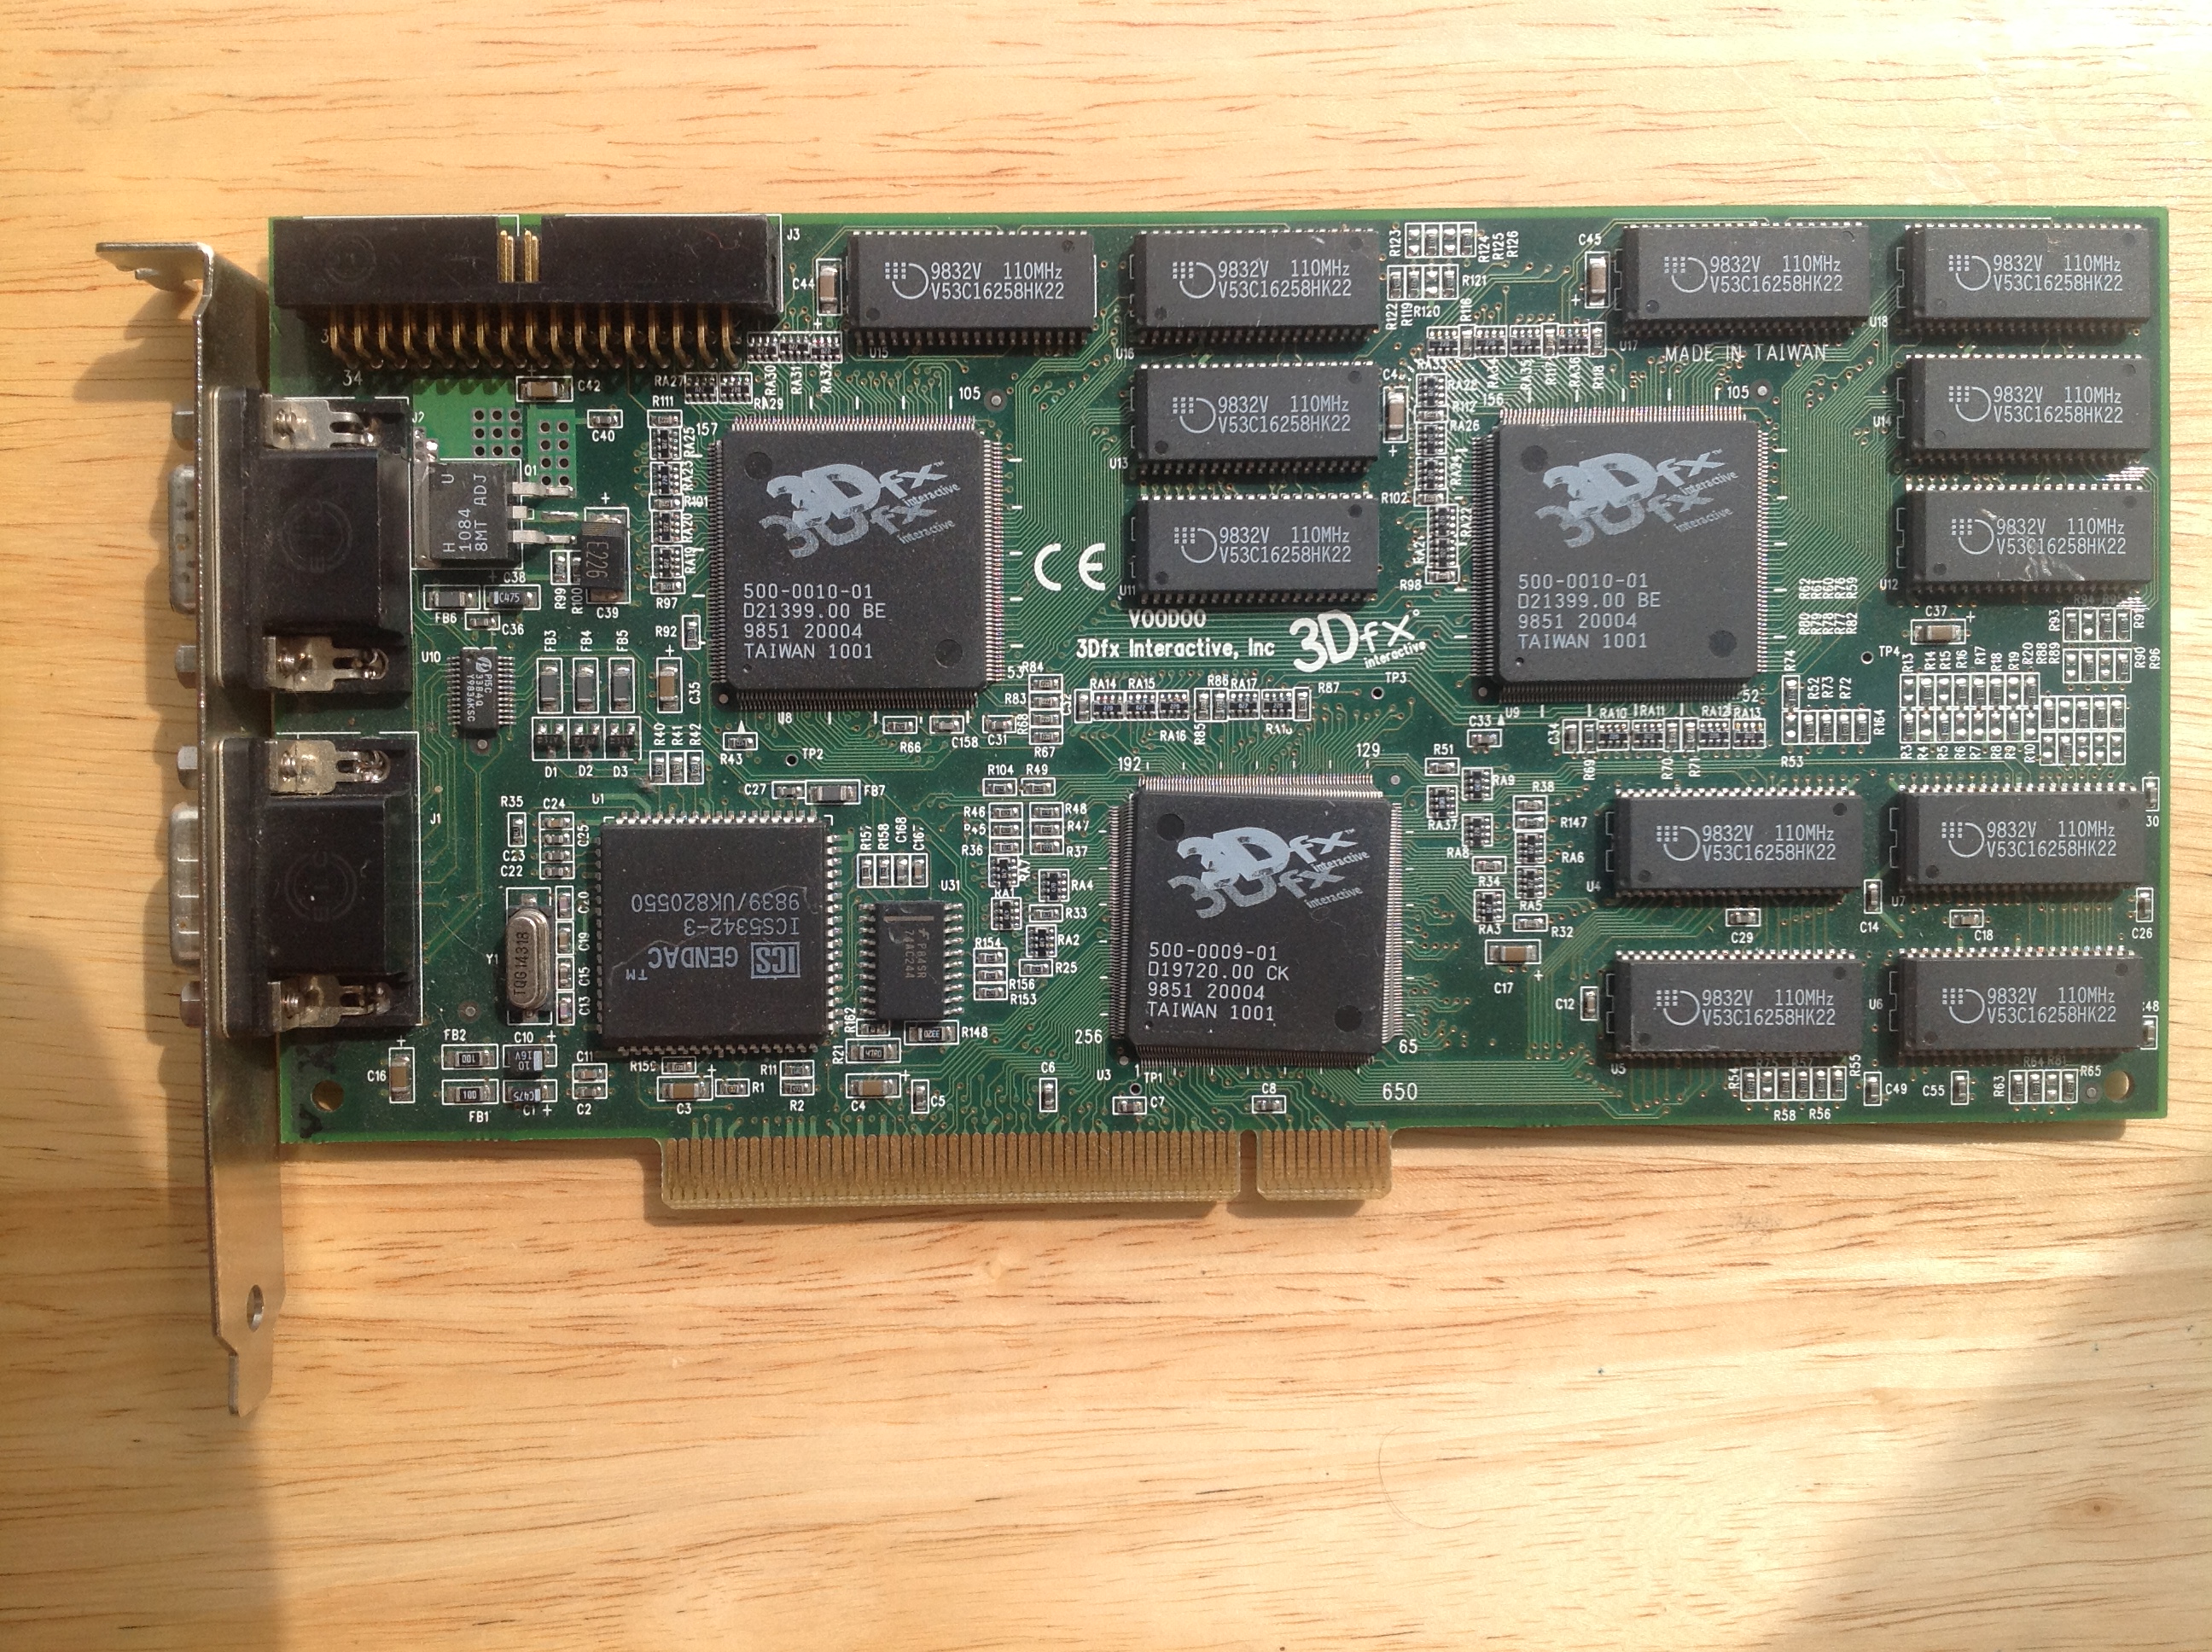
A texture mapping unit (the two upper chips labeled 3DFX on the Voodoo 2) takes the textures from the memory on the graphics board (many of those smaller rectangular chips on the Voodoo 2) and places them on the wireframe polygons with the correct scaling and distance. The textures may also be “lit” where the colors of pixels may be changed to reflect the presence of one or more lights in the scene. A framebuffer processor (the lower chip labeled 3DFX) takes the 3D scene with the texture and produces a 2D image that is built up in the framebuffer memory (the rest of those smaller, rectangular chips in the Voodoo 2) that can be sent to the monitor via the RAMDAC chip (like a D/A converter for video, it is labeled GENDAC on the Voodoo 2).
3DFX was the first company to produce really great 3D graphics chips for consumer consumption in PCs. Their first consumer product was the Voodoo 1 in late 1996. It was soon followed in 1998 by the Voodoo 2.
The Voodoo 2 is a PCI add-in board that does not replace the PC’s 2D graphics card. Instead, there’s a cable that goes from the 2D board to the Voodoo 2 and then the Voodoo 2 connectors to the monitor. This meant that the Voodoo 2 could not display 3D in a window, but what you really want it for is playing full-screen games, so it’s not much of a loss.
My friend who won the Metabyte Wicked 3D card later bought a Voodoo 3 card and sold me the Voodoo 2 sometime in 1999.
I finally had hardware acceleration. At the time we had a Compaq Presario that had begun life has a Pentium 100 and had been upgraded with an Overdrive processor to a Pentium MMX 200. It was getting a bit long in the tooth by this time, which was probably 1999. Previously I had made the mistake of buying a Matrox Mystique card with the hope of it improving how games looked and being bitterly disappointed in the results.
Having been a big fan of id Software’s Doom I had paid full price ($50) for their follow-up game Quake after having played the generous (quarter of the game) demo over and over again. Quake was by far my favorite game (and it’s still in my top 5).


id had known that Quake could look much better if it supported hardware acceleration. They had become frustrated with the way that the needed to modify Quake in order to support each brand of 3D card. Basically, the game needs to instruct the card on what it needs to do and each of card used a different set of commands. id had decided to create their own set of commands (called a miniGL because it was a subset of SGI’s OpenGL API) in the hope that 3D card makers would supply a library that would convert the miniGL commands into commands for their card. The version of Quake they created to use the miniGL was called GLQuake and it was available as a freely downloadable add-on.
It’s a little hard to show you this today, but this is what GLQuake (and the Voodoo 2) did for Quake. First, a screenshot of Quake without hardware acceleration (taken on from the Pentium III with a Voodoo 3 3000):

Pixels everywhere.
Now, with hardware accelerated GLQuake:

Suddenly the walls and floor look smooth and not blocky. Everything is much higher resolution. In motion everything is much fluid. It may seem underwhelming now, but this was very hot stuff in 1997 and blew me away when I first saw in 1999.
What we didn’t realize at the time was that it was pretty much all downhill for 3DFX after the Voodoo 2. After the Voodoo 2 3DFX decided to stop selling chips to 3rd party OEMs like Metabyte and Guilliemot and produce their own cards. That’s why my boxed board is just branded 3DFX. This turned out to be disastrous because suddenly they were competing with the very companies that had sold their very successful products in the 1996-1998 period. They also released the Voodoo 3, which combined 2D graphics hardware with 3D graphics hardware on a single chip (that was hidden under a heatsink).
The Voodoo 3 was an excellent card and I loved the Voodoo 3 3000 that was in the Dell Pentium III my parents bought to succeed the Presario. However, 3DFX was having to make excuses for features that the Voodoo 3 didn’t have and their competitors did have (namely 32-bit color). Nvidia’s TNT2 Ultra suddenly looked like a better card than the Voodoo 3.
3DFX was having trouble producing their successor to the Voodoo line and instead was having to adapt the old Voodoo technology to keep up. The Voodoo 4 and 5, which consisted of several updated Voodoo 3 chips working together on a single board ended up getting plastered by Nvidia’s GeForce 2 and finally GeForce 3 chips which accelerated even more parts of the graphics rendering process than 3DFX did. 3DFX ceased to exist by the end of 2000. Supposedly prototypes of “Rampage”, the successor to Voodoo were sitting on a workbench being debugged the day the company folded.
Back in the late-1990s 3D acceleration was a luxury meant for playing games. Today, that’s no longer true: 3D graphics hardware is an integral part of almost every computer.. Today every PC, every tablet, and every smartphone sold has some sort of 3D acceleration. 3DFX showed us the way.
![]()
Odds and Ends #2
I mentioned last week how much I loved going to the library as a child. These days rather than going to the library I tend to buy used books from thrift stores and used book stores.
I used to look at thrift store book sections with disdain because they were mostly filled with romance novels, out-of-date political books, self-help guides from the 70s, and other forms of useless drivel.
But, what I came to realize is that there’s always a diamond in the rough and considering how much rough thrift stores tend to have, the rate of finding diamonds is pretty high. The beauty of it is that because these books tend to be so cheap you can really indulge your curiosity without feeling like you’re throwing away money.
Sometimes I’ll buy a book because I know nothing about the subject matter.
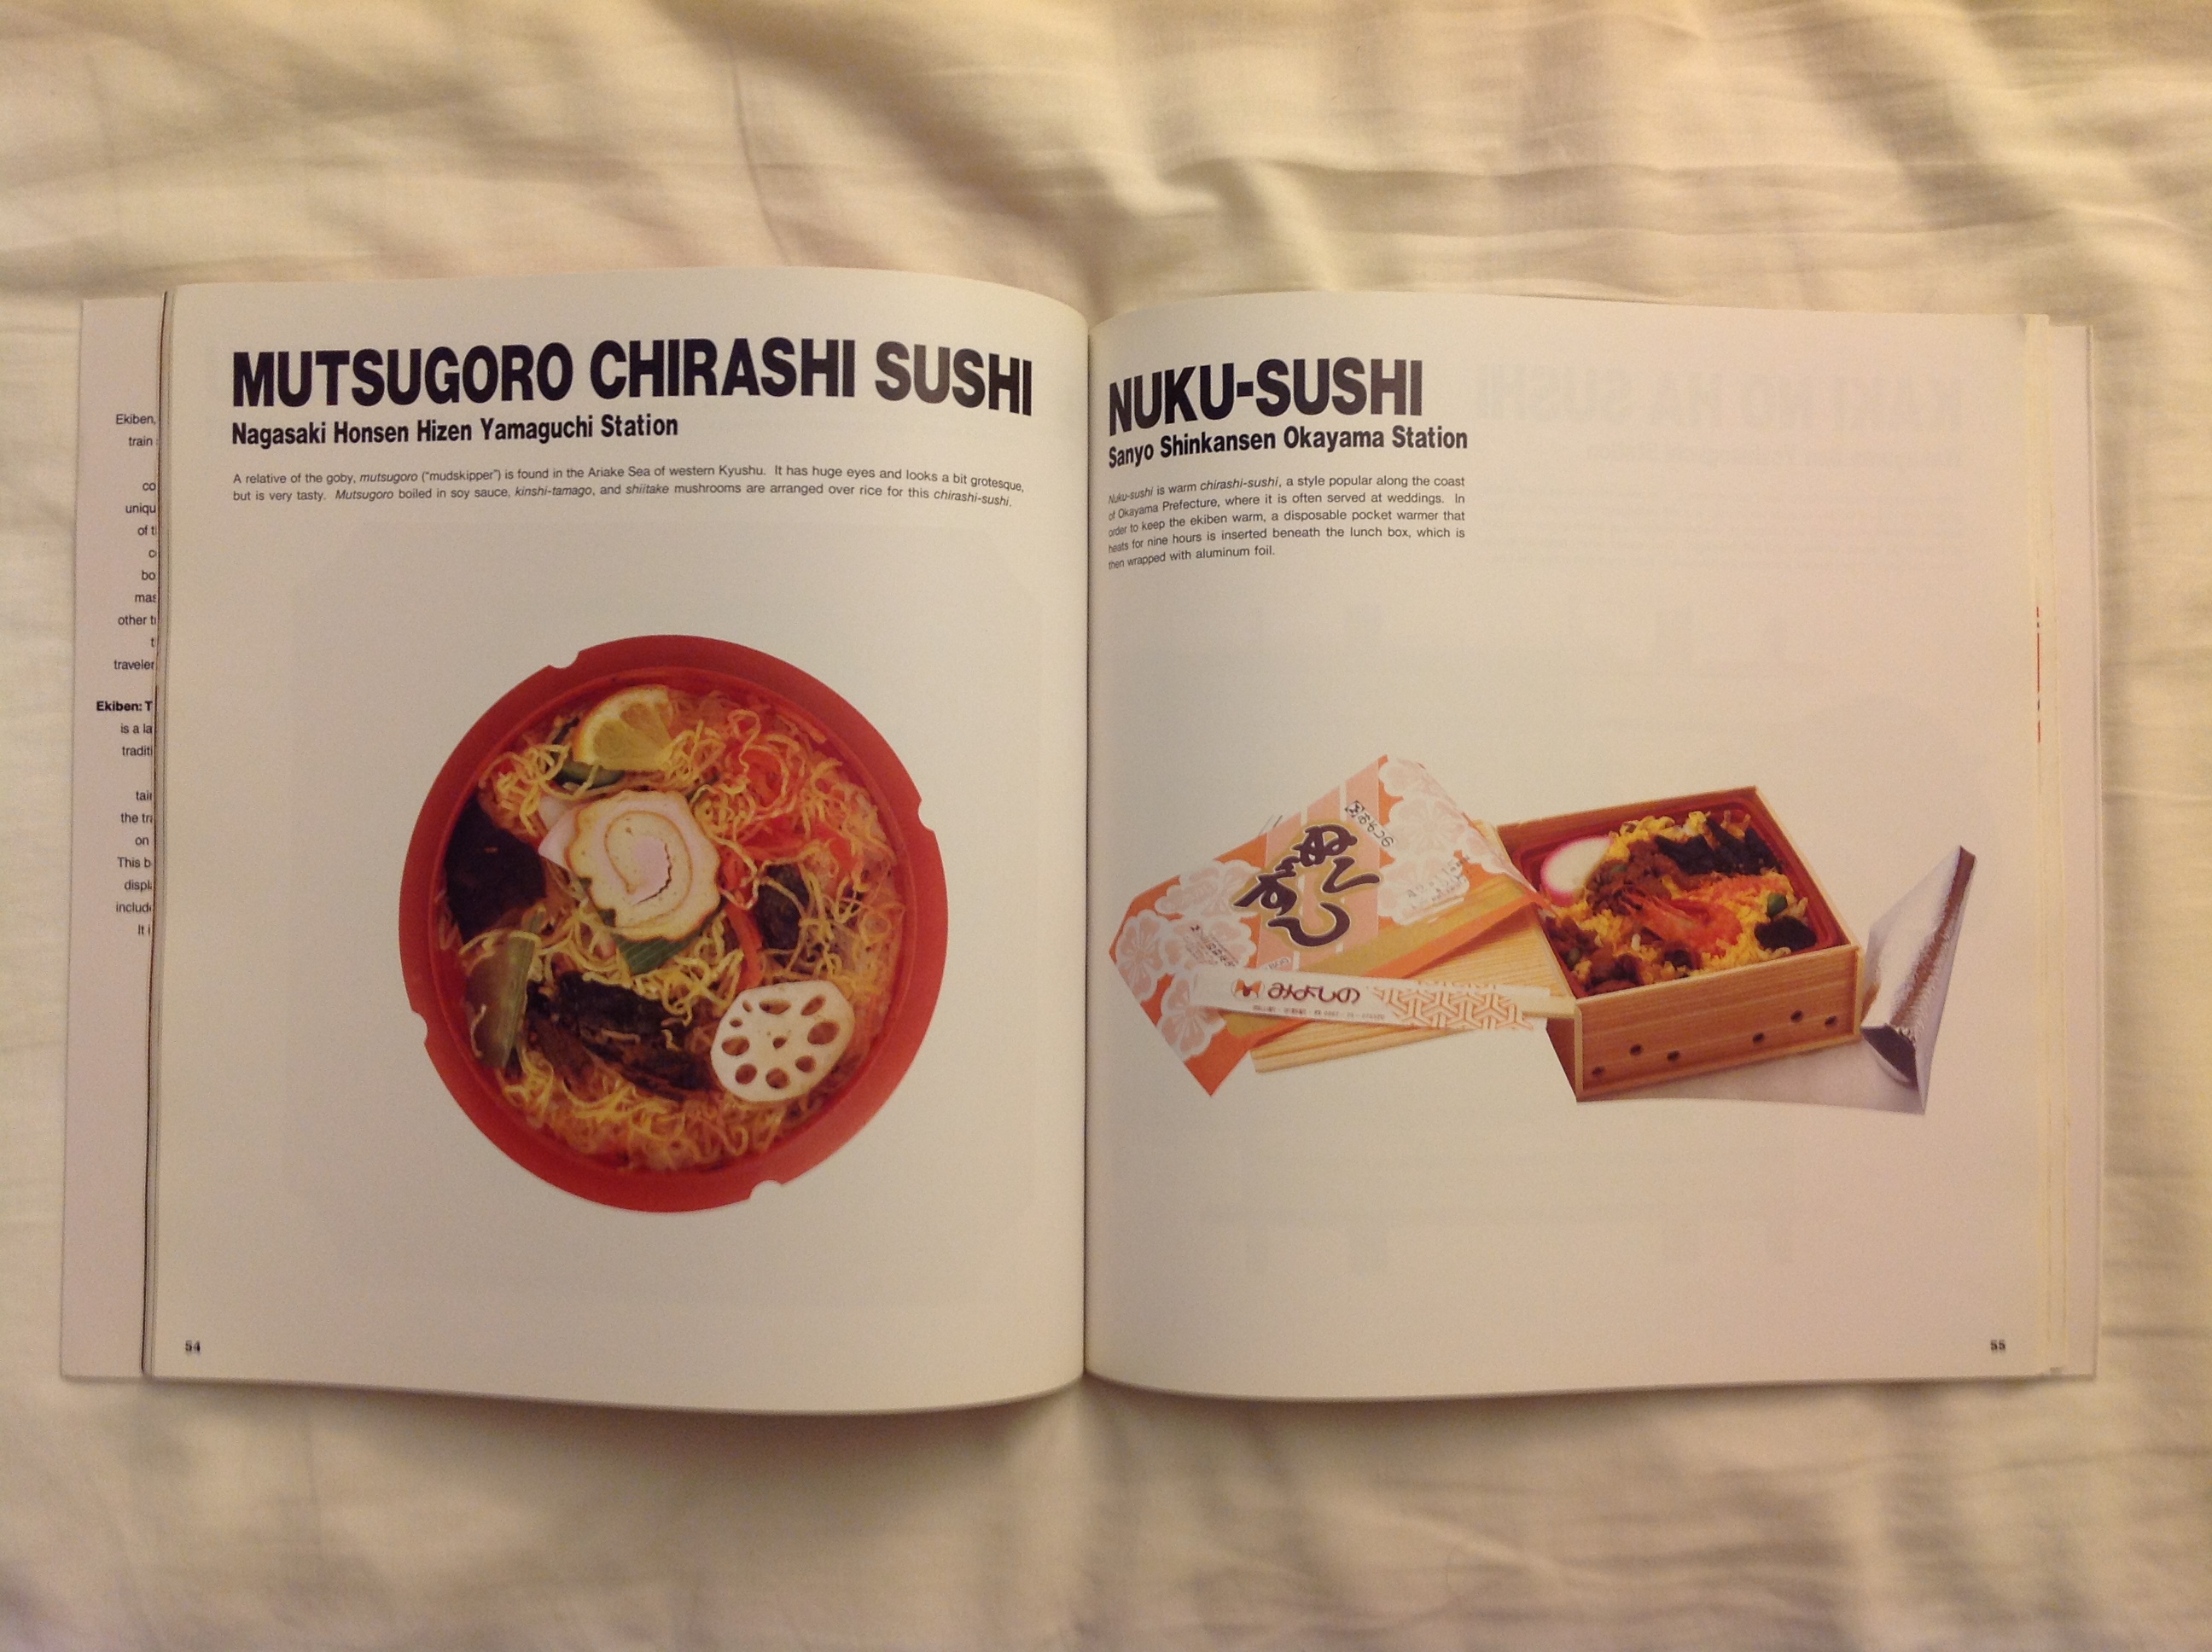
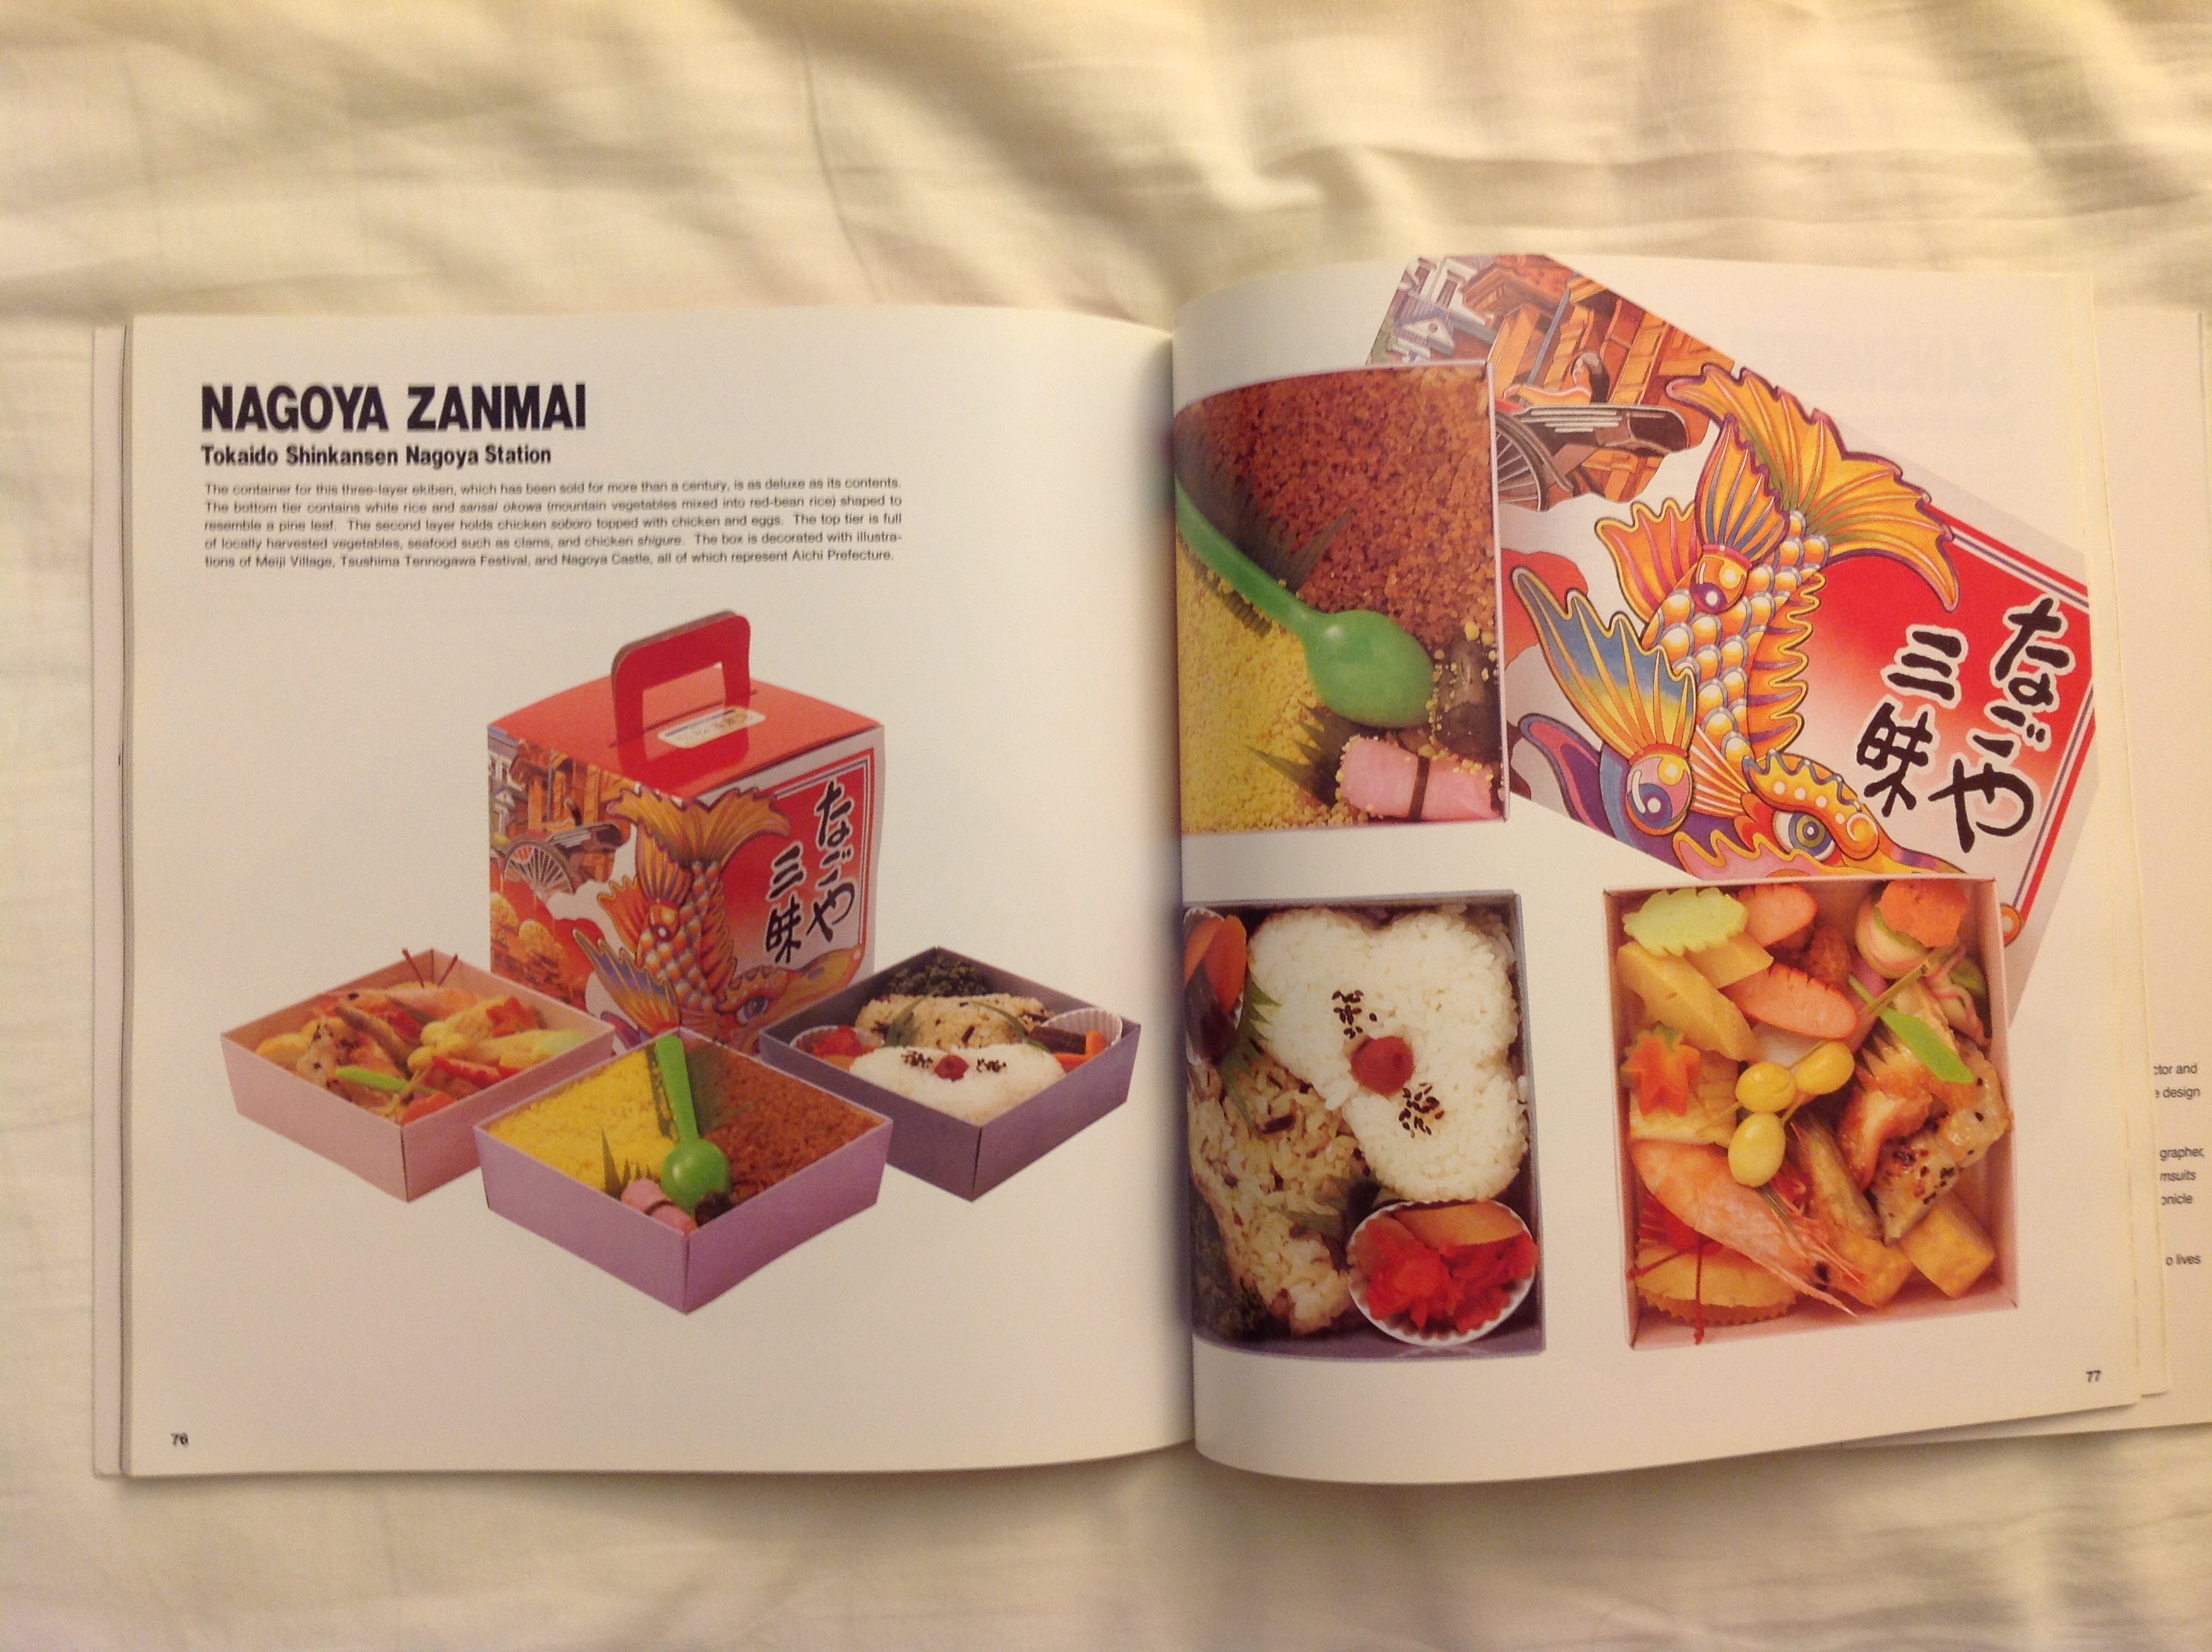
Ekiben: The Art of the Japanese Box Lunch
I was at the Goodwill on State Road in Cuyahoga Falls recently when I found this 1989 coffee table book about Ekiben, the Japanese tradition of creating special Bento box lunches for sale at train stations so that people can eat them on the trains.


I can’t imagine a similar book about American airline food, can you?
Other times I will buy a book because I am very familiar with the subject matter or I’m collecting books on a specific subject. Ever since my parents bought me the Encyclopedia of Soviet Spacecraft as a child I’ve been interested in collecting books about spaceflight, including books by or about astronauts.
We Have Capture: Tom Stafford and the Space Race
I think I found this copy of We Have Capture, the autobiography of astronaut Tom Stafford (co-written with space writer Michael Cassutt) at the Waterloo Road Goodwill in Akron.

Among the Apollo astronauts Tom Stafford is somewhat forgotten because he didn’t walk on the Moon and until I read We Have Capture I didn’t realize how much of an impact Stafford had made. After flying on Gemini 6 and Gemini 9 , Stafford commanded the Apollo 10 mission, which was a dress rehearsal for Apollo 11. He and Gene Cernan descended in the Lunar Module to about 47,000 feet above the Moon’s surface before testing the Lunar Module’s ability to abort during landing.
However, the most interesting part of Stafford’s career came after the Moon landings. In 1971 was sent as a US representative to the funeral for the cosmonauts who died on the Soyuz 11 flight. Later he would command the Apollo-Soyuz Test Project (ASTP), the flight that is depicted in the jacket image. ASTP is somewhat forgotten today but in a historic moment of the Cold War in 1975 the final US Apollo flight docked with a Soviet Soyuz spacecraft in order to demonstrate international cooperation. What’s fascinating is that in the 25 years after ASTP Stafford continued to act as an adviser for NASA and helped to shepherd the Shuttle-Mir flights and the transformation of the failed Space Station Freedom project into the joint US-Russian-European-Japanese International Space Station project. In many ways the most interesting parts of the book have to do with Stafford’s techno-bureaucrat functions on that ground more than what he did in space.
Incidentally, I hope someday a space writer like Michael Cassutt, Andrew Chaikin or Dwayne Day writes a book-length history of the origins of the International Space Station (ISS). From what I understand there were some unique political, diplomatic, and engineering challenges that were overcome to create the ISS.
The best writer to tell that story may be William Burrows, author of books including Deep Black and Exploring Space.
Exploring Space: Voyages in the Solar System and Beyond
I found this copy of Exploring Space at the Waterloo Road Goodwill in Akron. This is a funny book because to look at the cover this looks like your standard “spaceflight is so great” kind of hagiography that’s common among books about spaceflight. In Exploring Space from 1990, Burrows actually takes a more critical approach.

I don’t think Burrows dislikes us spending money on exploring space. Rather, he’s unhappy, perhaps even disgusted with the way we’ve gone about doing it. The history of spaceflight is rife with good ideas that were poorly executed repeatedly before the engineers got them right (JPL’s early flights in the Pioneer, Mariner, Ranger, and Surveyor series) , good ideas that we spent way too much money on before they were finally executed right (Viking and Voyager) and questionable ideas that were forced to be realized because of political pressure (like the Space Shuttle). The bizarre way that we fund spaceflight through political kabuki lends itself to these kinds of costly messes. I suspect that if Burrows were writing Exploring Space today he would be more sympathetic to NASA’s cost controlled Discovery program, very unhappy with the James Webb Space Telescope, and seething with rage about the forthcoming SLS launch vehicle.
An interesting example of when spaceflight vision and reality collide is well illustrated by…
Challenge of the Stars: A Forecast of the Future Exploration of the Universe
This thin coffee-table sized volume is another book I found at the Waterloo Road Goodwill. I remember that I spotted it right after one of the book’s authors, the English astronomer and television presenter Patrick Moore, had died late last year.
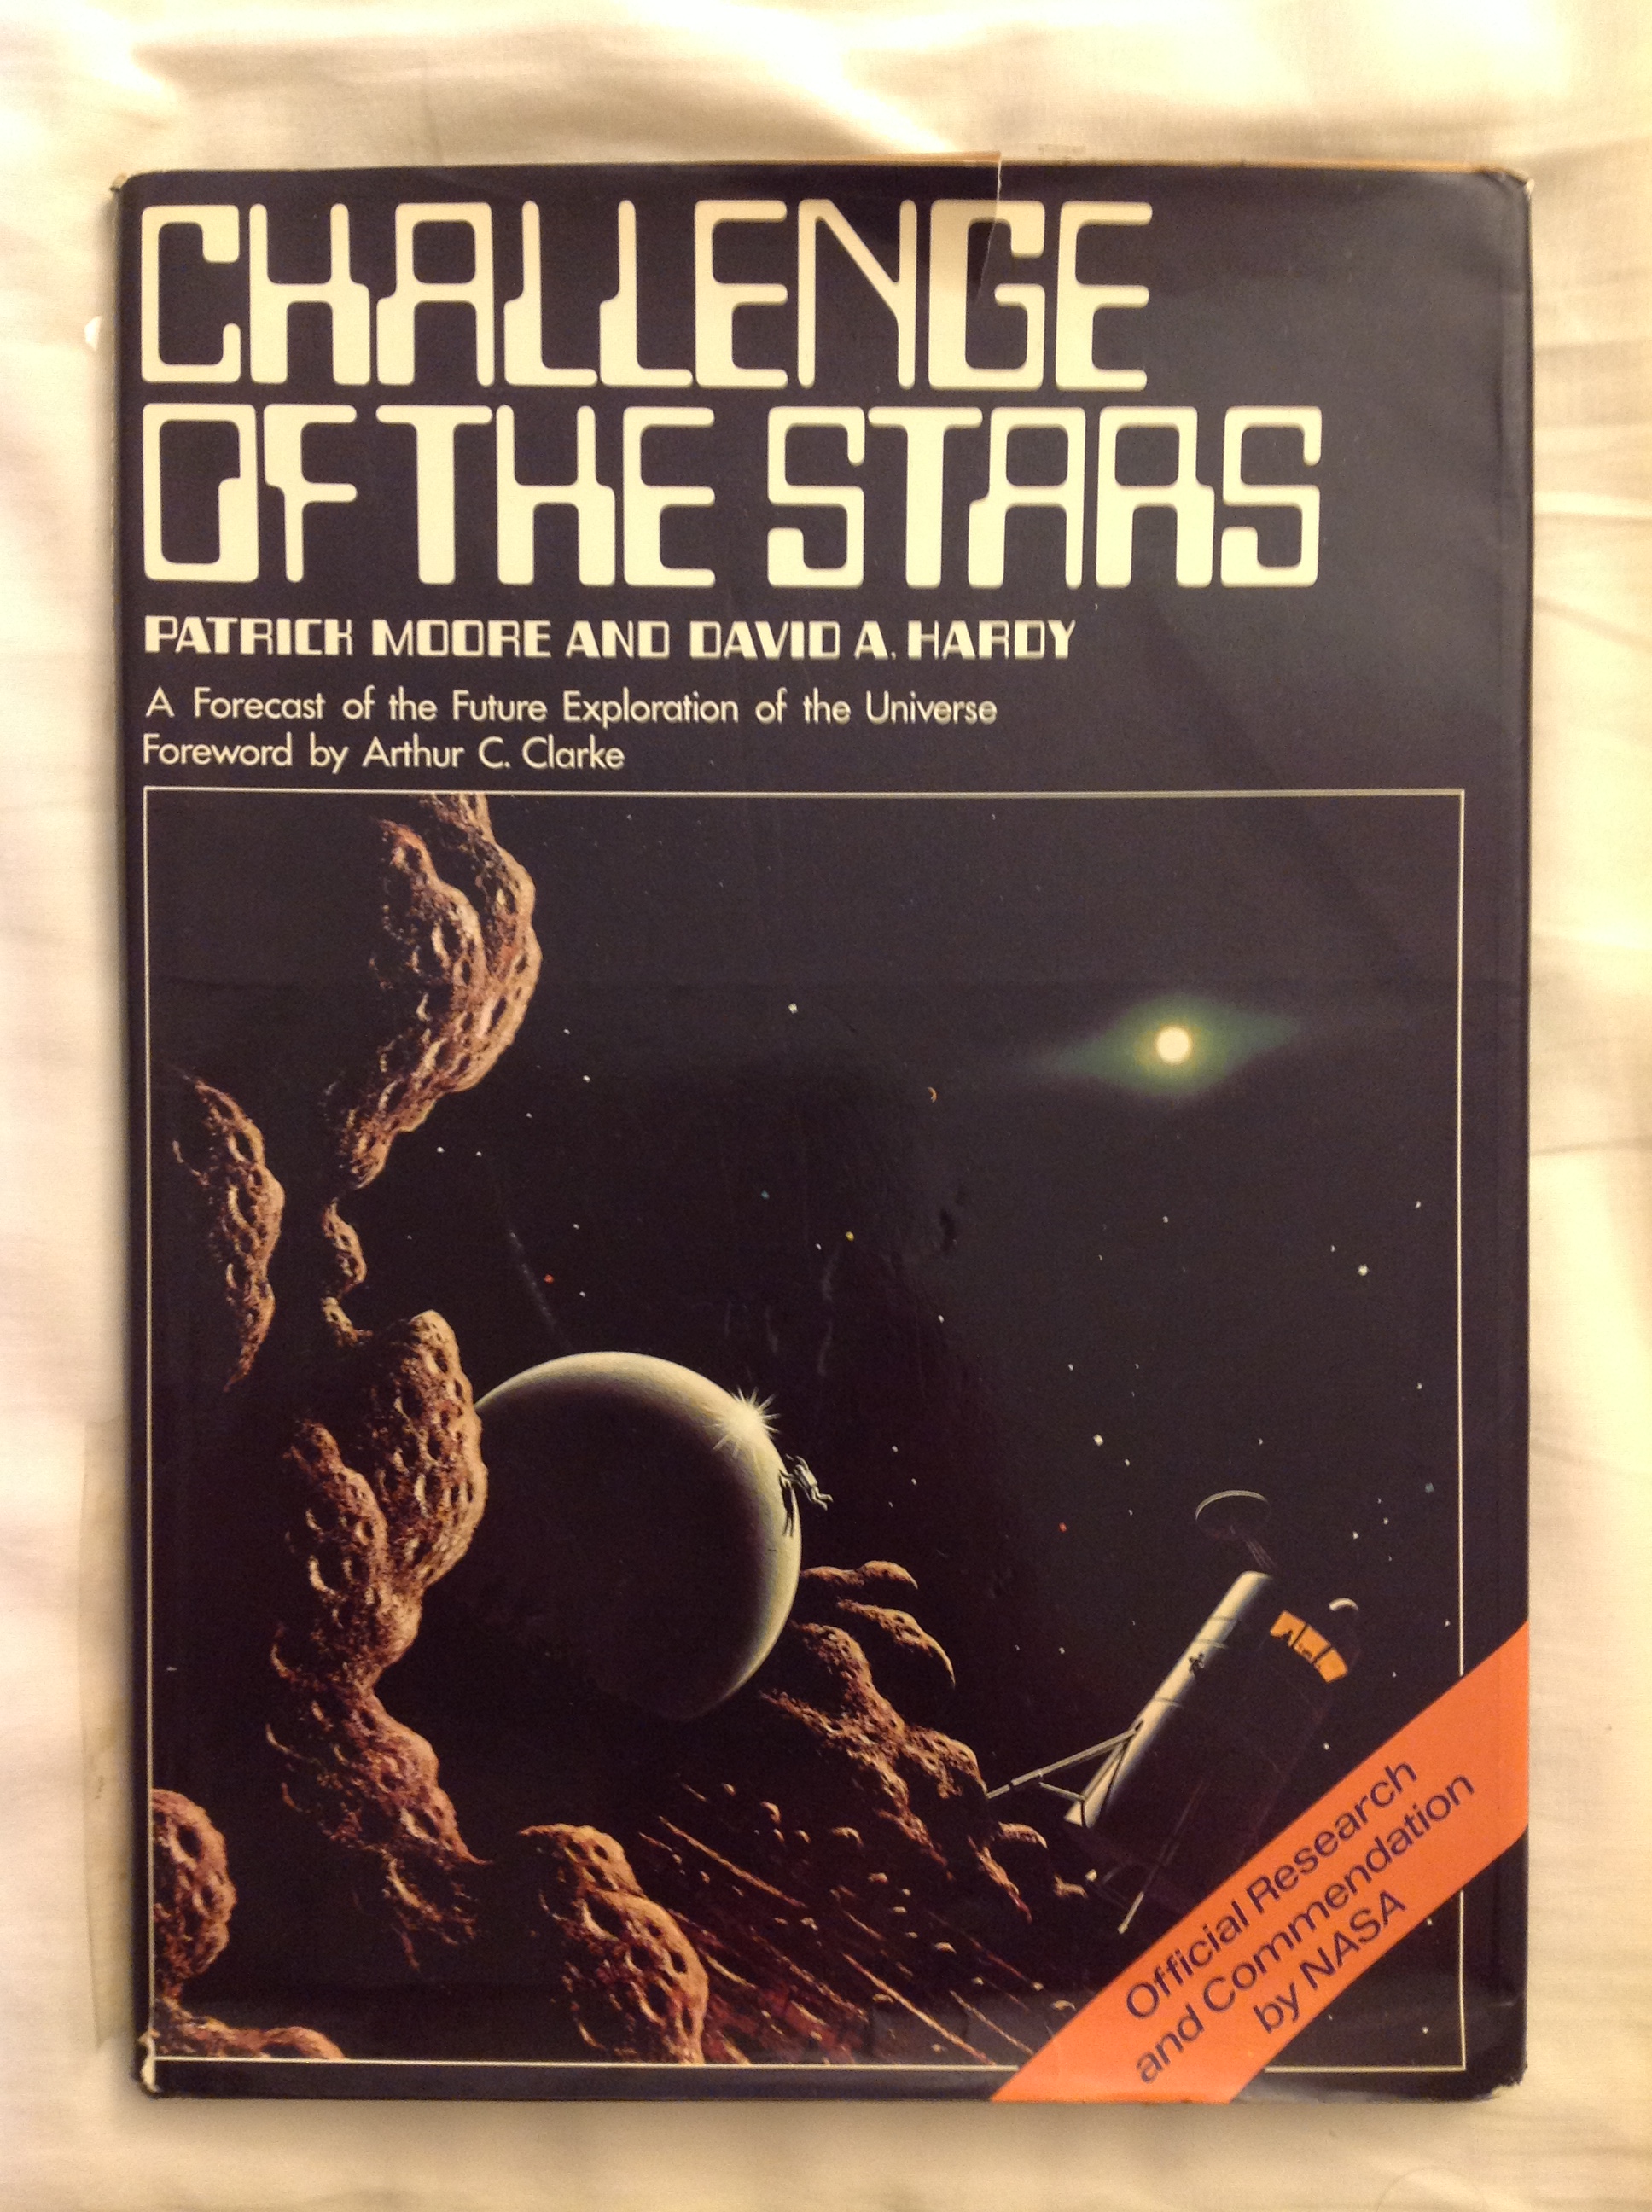
Much like The Compact Disc Book, I mentioned last week, the fun of Challenge of the Stars is seeing if what they predicted would occur that has occurred and what has not occurred. One thing they got right was the “Grand Tour” of the solar system that became the Voyager 1 and 2 probes.

This stunning illustration of a proposed docking between a Soviet Soyuz and the US’s Skylab space station (note the Apollo CSM waiting in the distance). This idea was turned down in favor of the Apollo-Soyuz Test project flight that Tom Stafford flew.
What really caught my eye though, was the section on space stations and a manned Mars landing.

On the bottom left is one of the earlier proposals for the Space Shuttle. Rather than the External Tank and Solid Rocket Boosters we bacame so fami,iar with, this earlier proposal used a liquid-fueled booster that would fly back to the launch site and land rather than being discarded like the External Tank.
The real prize though, is the photo on the opposite page. Here’s a closer view.
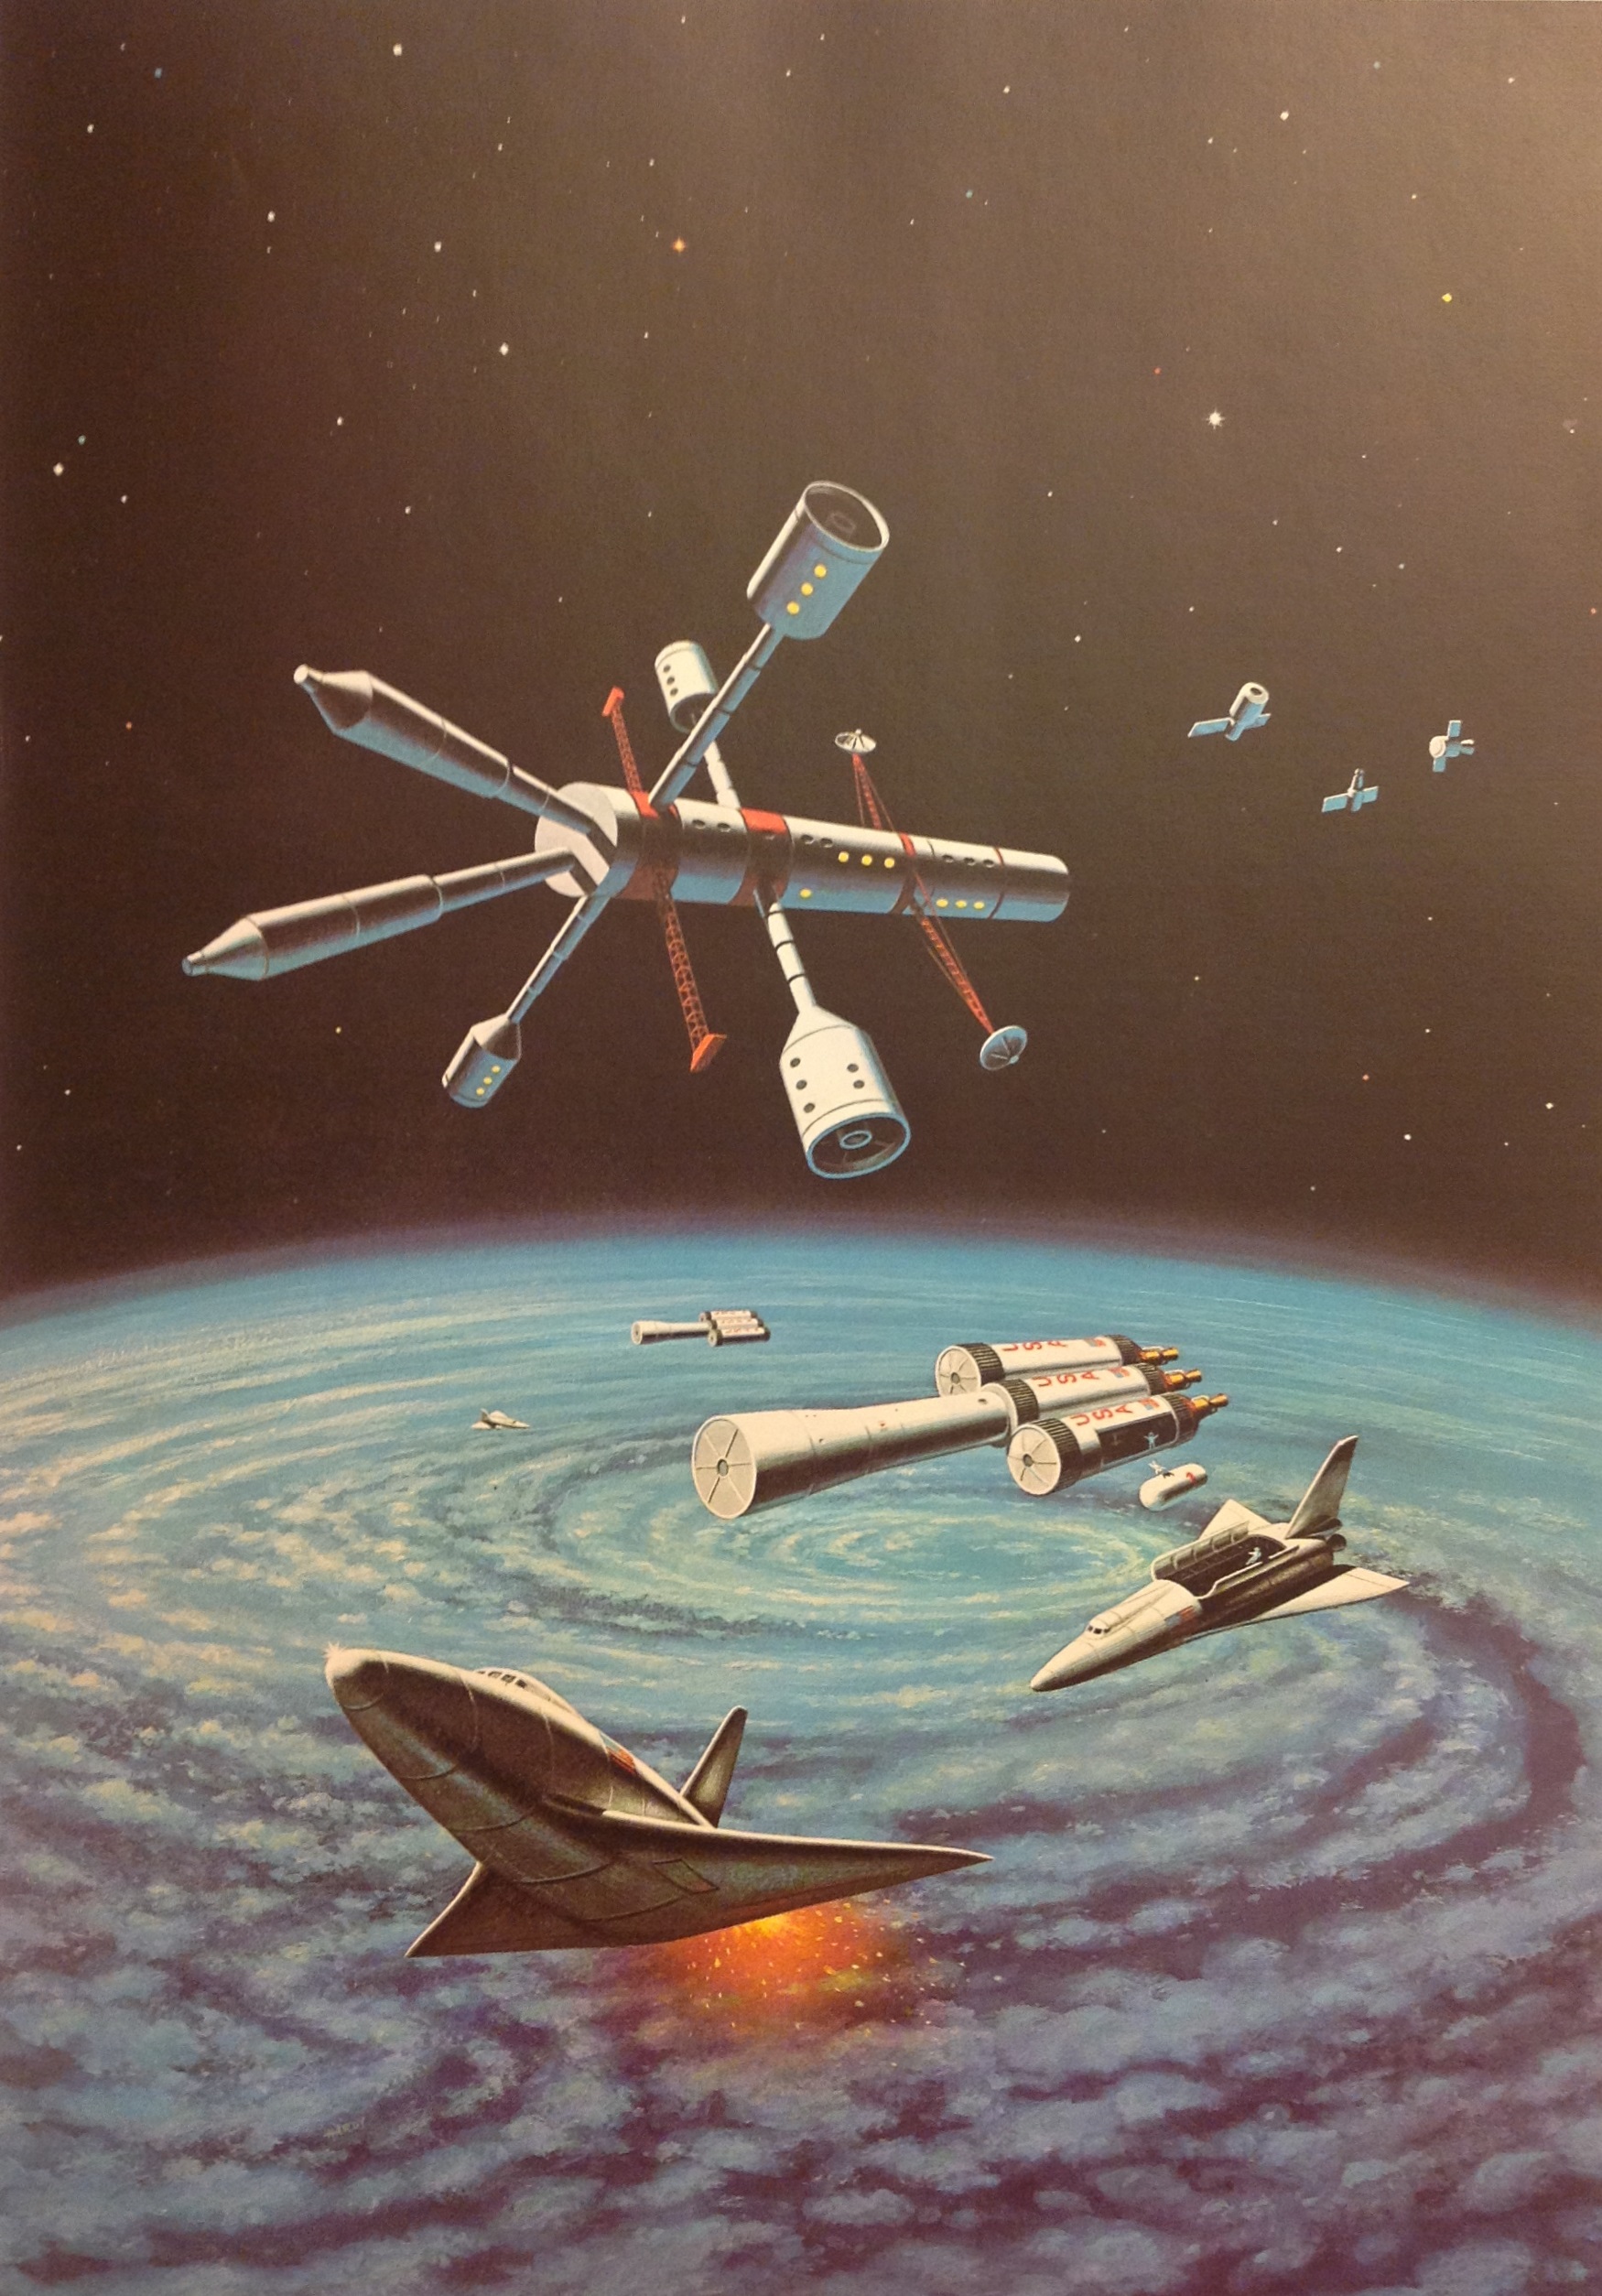
Other than the fact that this is a beautiful piece of art, there’s quite a bit of political history attached to this image. This was produced for a study that Von Braun’s group at Marshall Spaceflight Center conducted in 1969 about what to do after Apollo.
That blunt-nosed craft in the middle of the image with the three cylinders with the USA insignia on them are Von Braun’s idea for a manned-Mars exploration ship. The three USA-labeled cylinders are actually nuclear powered rockets. Here a space shuttle is delivering a fuel shipment to the craft while it’s being assembled in orbit nearby a space station. What you’re seeing envisioned here would have taken dozens of Saturn V launches to get into orbit.
On a later page is an illustration of what the Mars Excursion Module, Von Braun’s Mars lander, would have looked like sitting on Mars. Note that it’s basically a giant-sized Apollo command module.

The excellent False Steps blog goes into more detail but essentially this outrageously expensive proposal was laughed out of the room in Washington. One of the reasons we got the Space Shuttle after Apollo was that the Space Shuttle was seen as more cost effective than Apollo, and into this atmosphere NASA’s spacecraft designers at Marshall were tilting at windmills rather than proposing a more cost-effective alternative to the Shuttle.
It’s fascinating to imagine what might have been though, had Von Braun’s Mars mission proposal been accepted by Nixon. In fact…
Voyage
Voyage, by Stephen Baxter is a science fiction novel that explores an alternate history where a version of Von Braun’s proposal was actually carried out and the United States landed on Mars in 1986.

I believe I found this paperback at Last Exit Books in Kent.
Voyage is a real treat for spaceflight fans because it goes into immense detail about the trials and tribulations of the political squabbling, engineering feats, test flight mishaps, and other nerd candy that lead up to the Mars landing. Clearly Baxter studied the various Mars mission proposals from the late-1960s and early 1970s carefully because many of the details from Von Braun’s plan, like upgrade versions of the Saturn V and the NERVA nuclear rocket project make their way into Voyage. He also takes cues from real life as well. For example, rather than the Challenger disaster, a gruesome mishap occurs with on a NERVA rocket test flight. Rather than the ASTP mission flying, the Soviets are invited to a US Skylab-style station orbiting the Moon. If you’re a space nerd at all, Voyage is going to be right up your alley.
Sometimes I stumble onto neat space memorabilia in unexpected places.
Atlas V AV-003 Interactive DVD
I was at the Kent/Ravenna Goodwill a few weeks ago browsing at the DVDs and suddenly I see a DVD that says Atlas V AV-003 on the side.
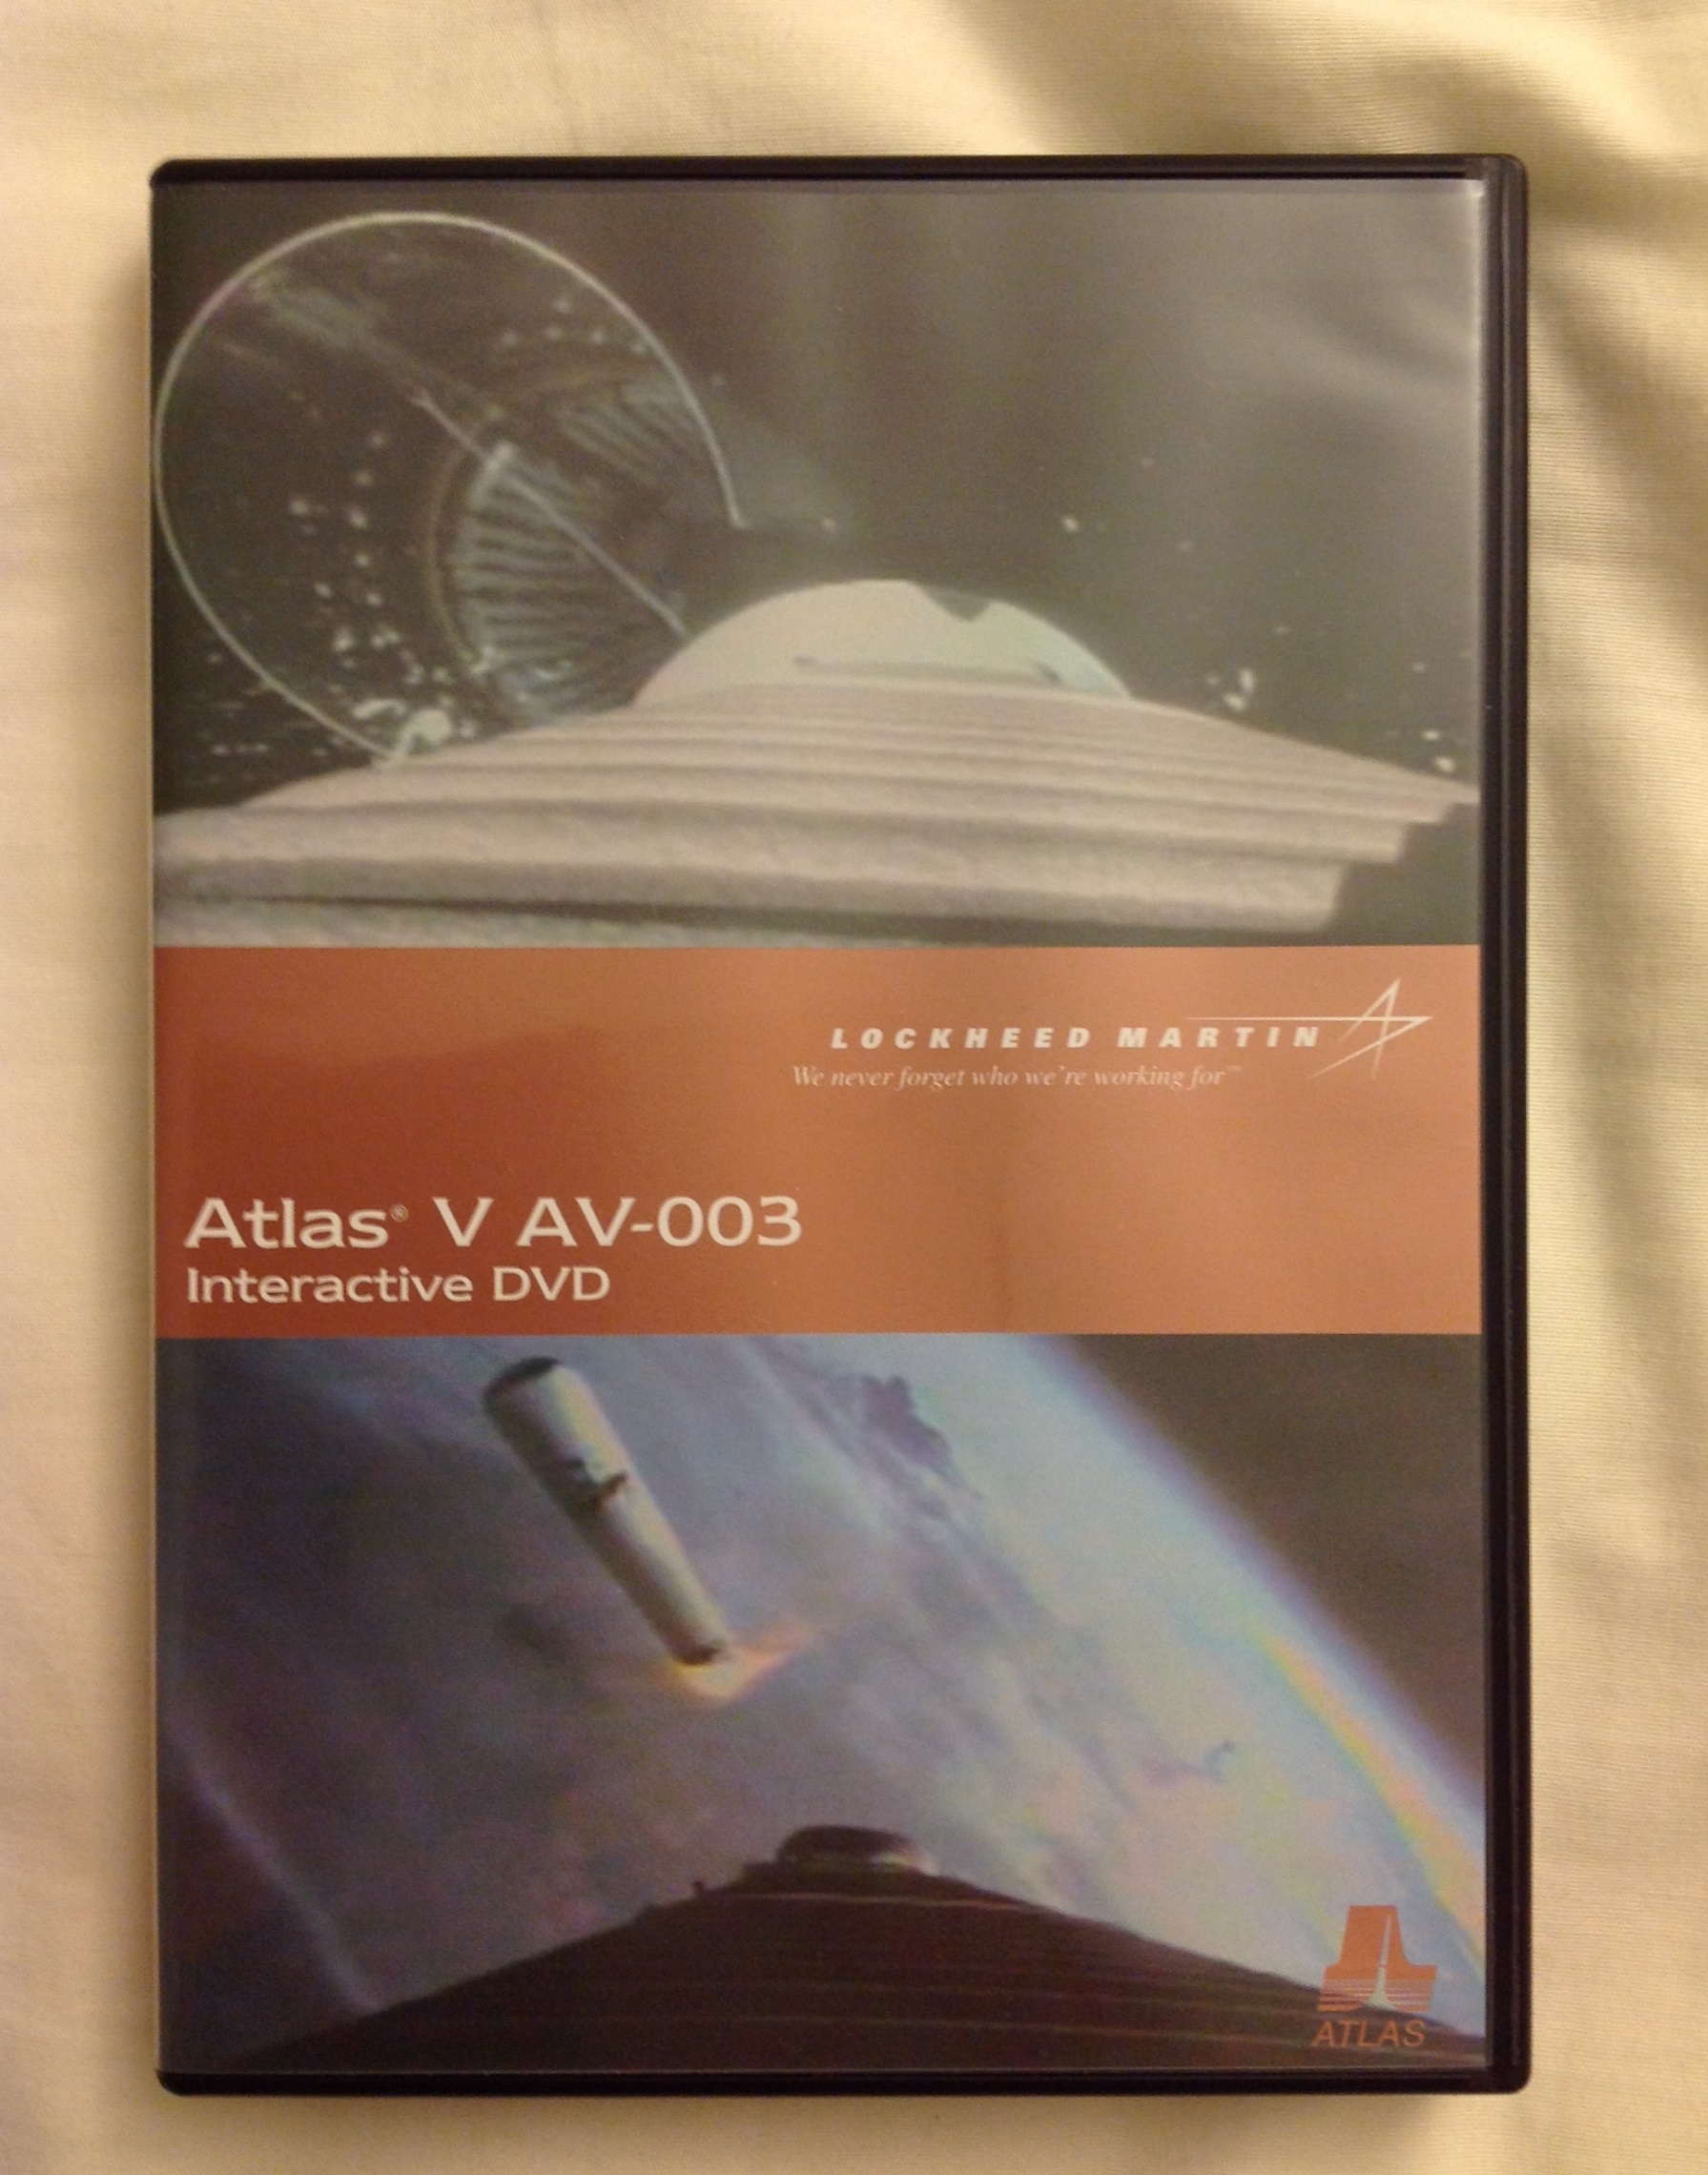
I expect to see Atlas V rocket serial numbers the on the NASASpaceflight.com forums, not on something at Goodwill.
The Atlas V is a launch vehicle originally developed by Lockheed Martin and currently built and operated by the United Launch Alliance. You might remember the original Atlas rocket that began as an ICBM in the 1950s, flew astronauts during the Mercury program in the early 1960s, and became a workhorse for launching satellites and space probes well into the 1990s. Since then, the Atlas name has become a sort of brand name for the Atlas rocket family. The current Atlas V has design heritage that goes back to the Titan and Atlas-Centaur rockets and uses a first stage booster engine built by the Russians.

This is the Atlas V AV-003 Interactive DVD. AV-003 refers to the serial number of the rocket, so this DVD documents the launch of the third Atlas V in 2003.
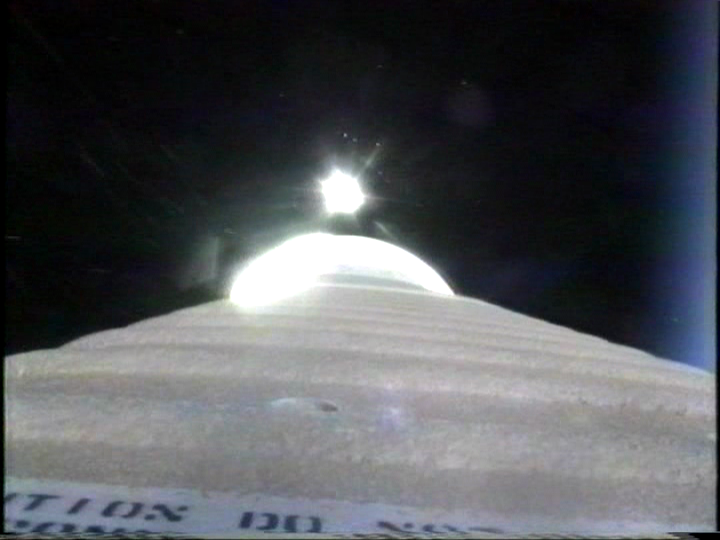
At first I was a bit disappointed in this DVD because it seemed to be full of standard marketing video drivel and over-produced launch video crud. That is until I found the menu where they let you watch every camera that was covering the launch. There are the cameras you expect to see: cameras on the pad and tracking cameras that track the rocket from afar.
![]()
But then there are cameras mounted on the first and second stages. I’ve seen these used on launch videos before, but I had never had the chance to just watch the raw footage with no commentary or editing.
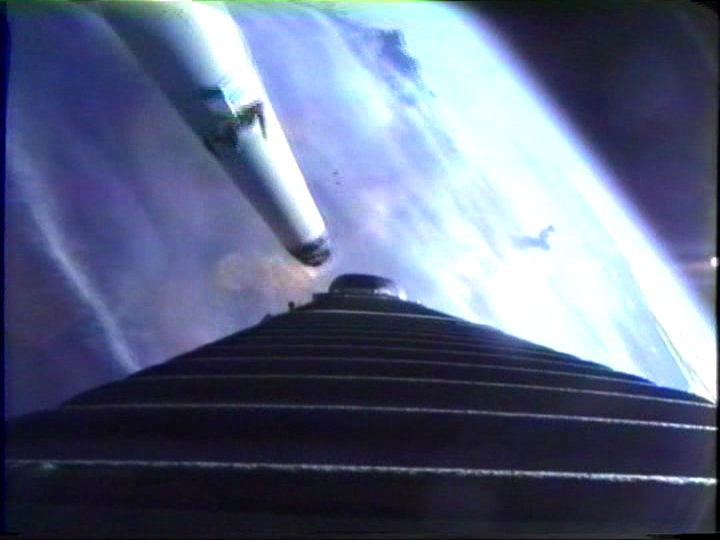
Here is a view on the first stage looking downward as one of the solid rocket boosters separates.

And there it goes tumbling away.

This camera is looking upward as the payload fairing (aka the nose cone) separates after the rocket has gotten far enough out of the atmosphere that it can shed the weight of the fairing.
This is from the same camera looking upwards after the first stage has shut down and the second stage, a Centaur upper-stage, has started and speeds away from the dead booster.
I have no idea how a DVD like this made it’s way to the Kent Goodwill, but it made my day when I found it.

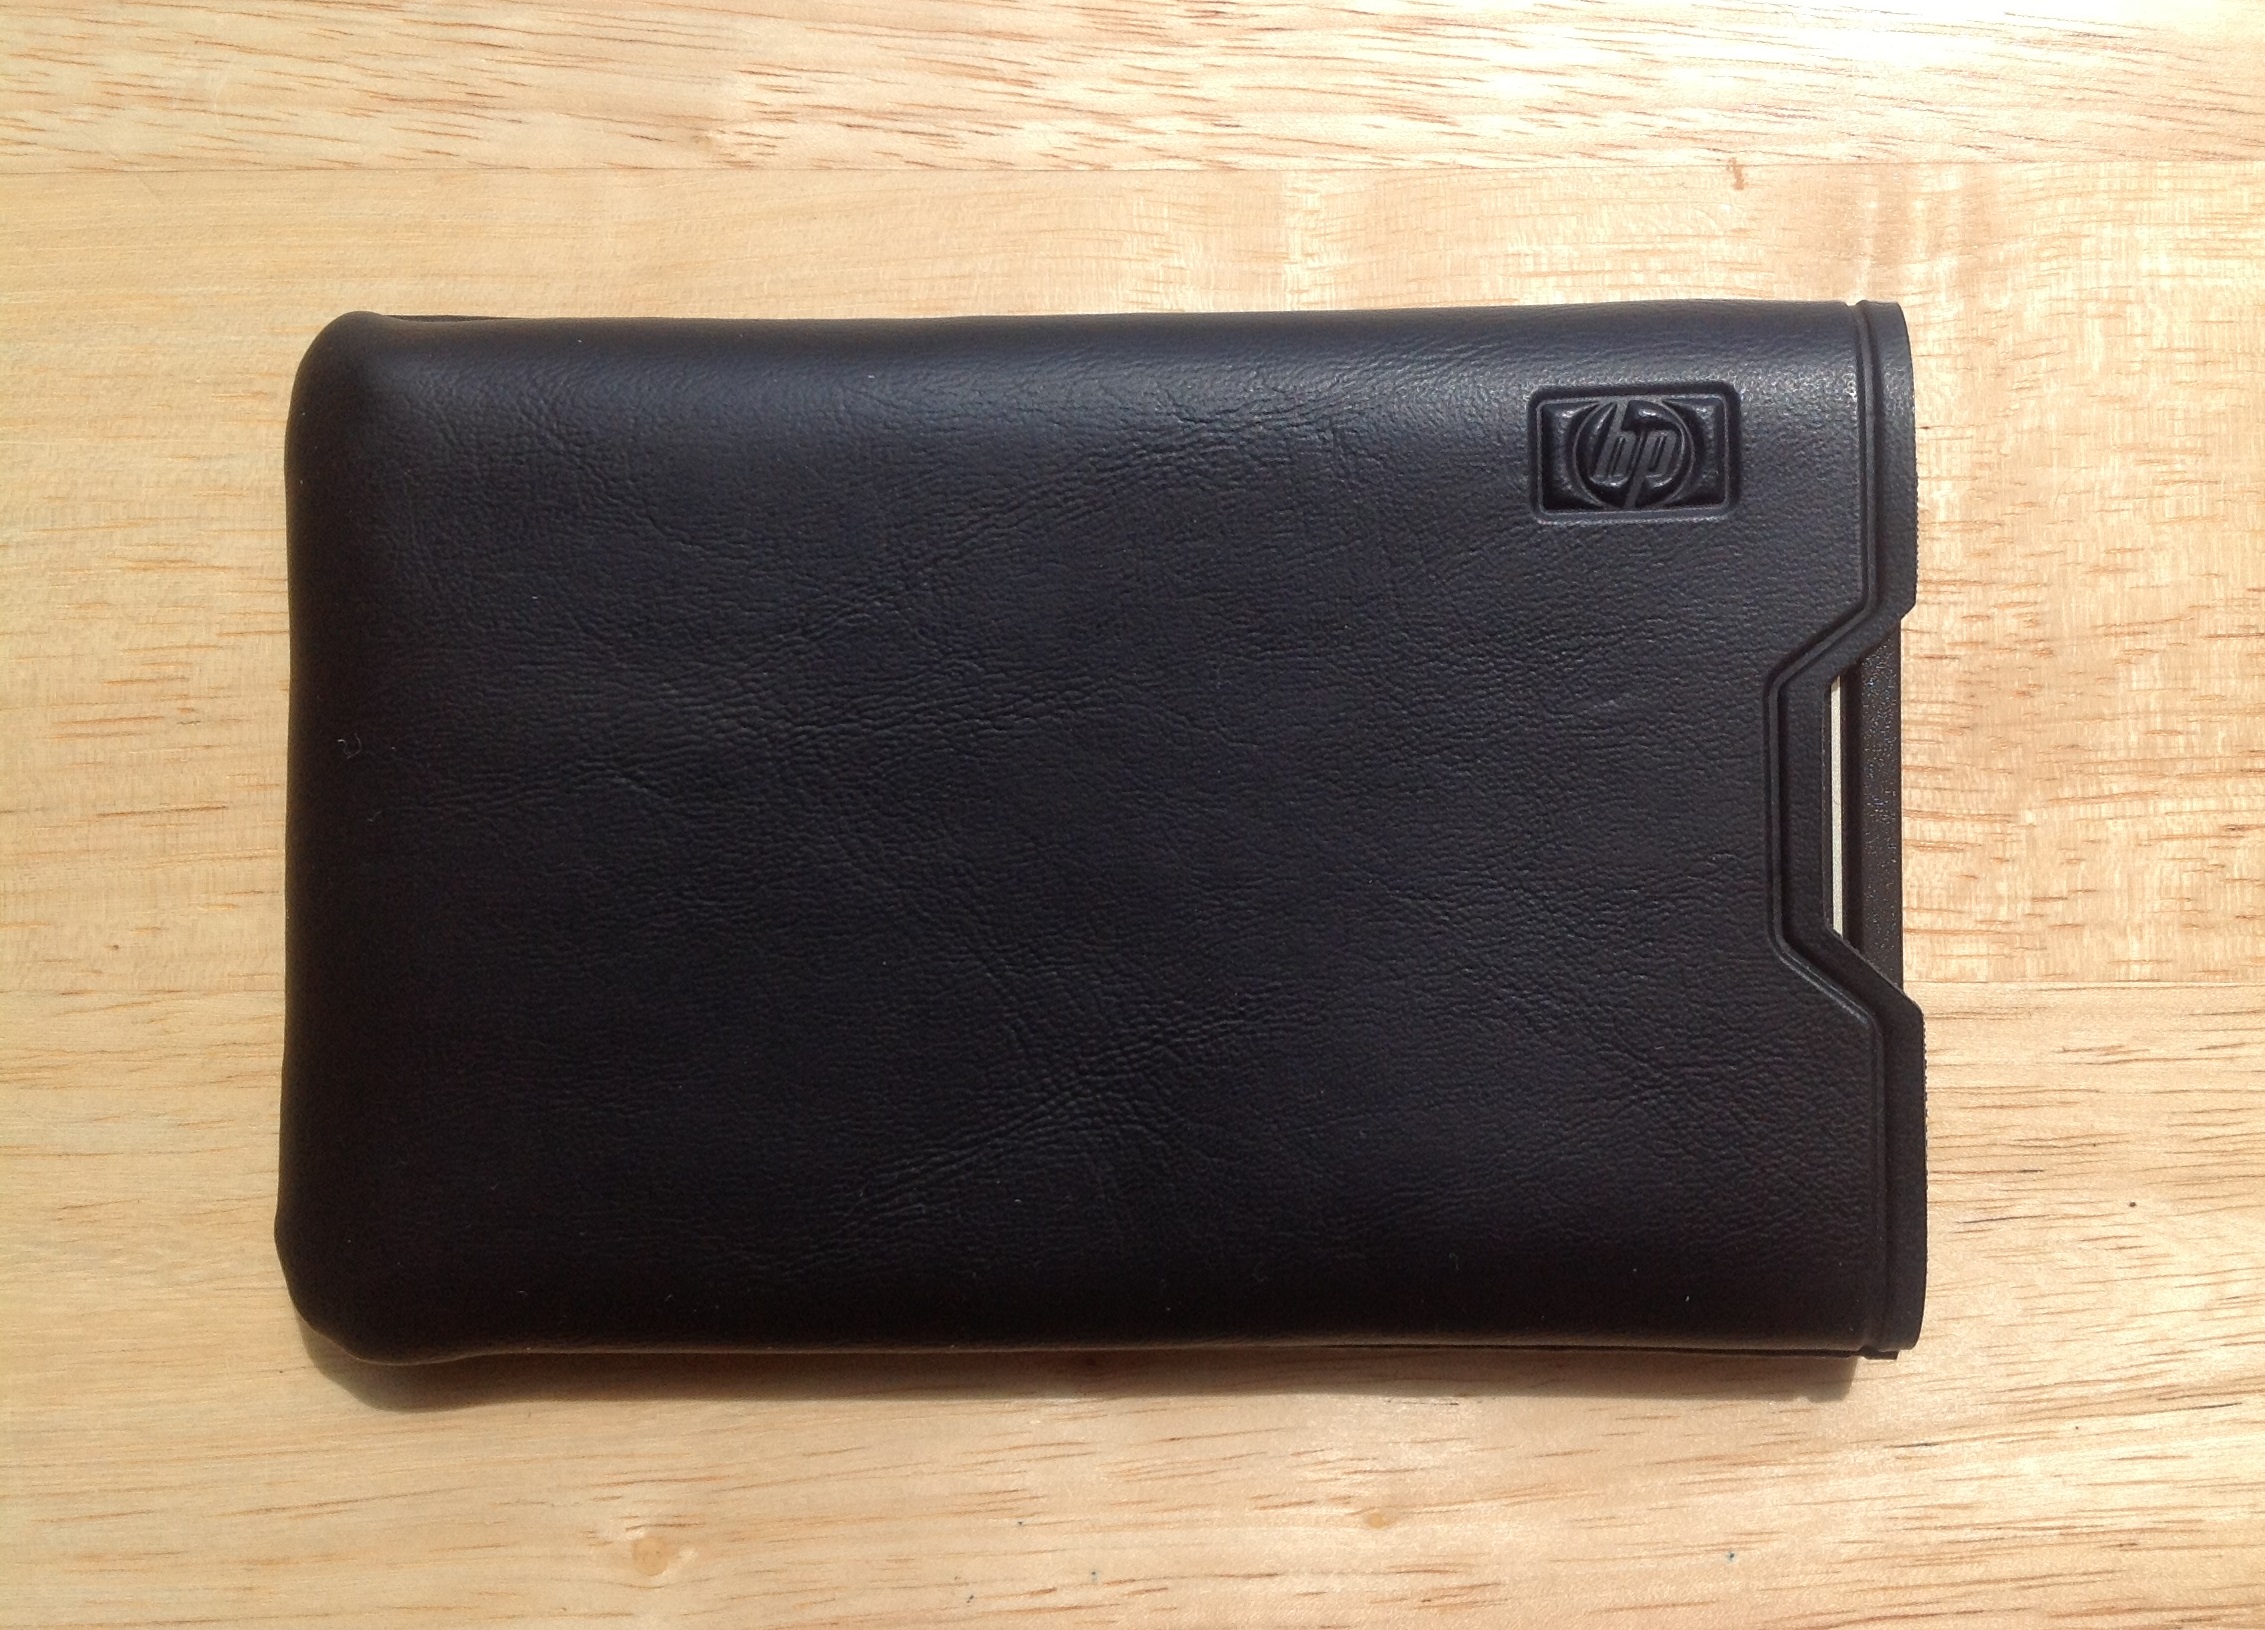
HP-12C
This is my HP-12C financial calculator, which I bought from Shopgoodwill last year. It came in this beautiful case and just required some new batteries to start working.
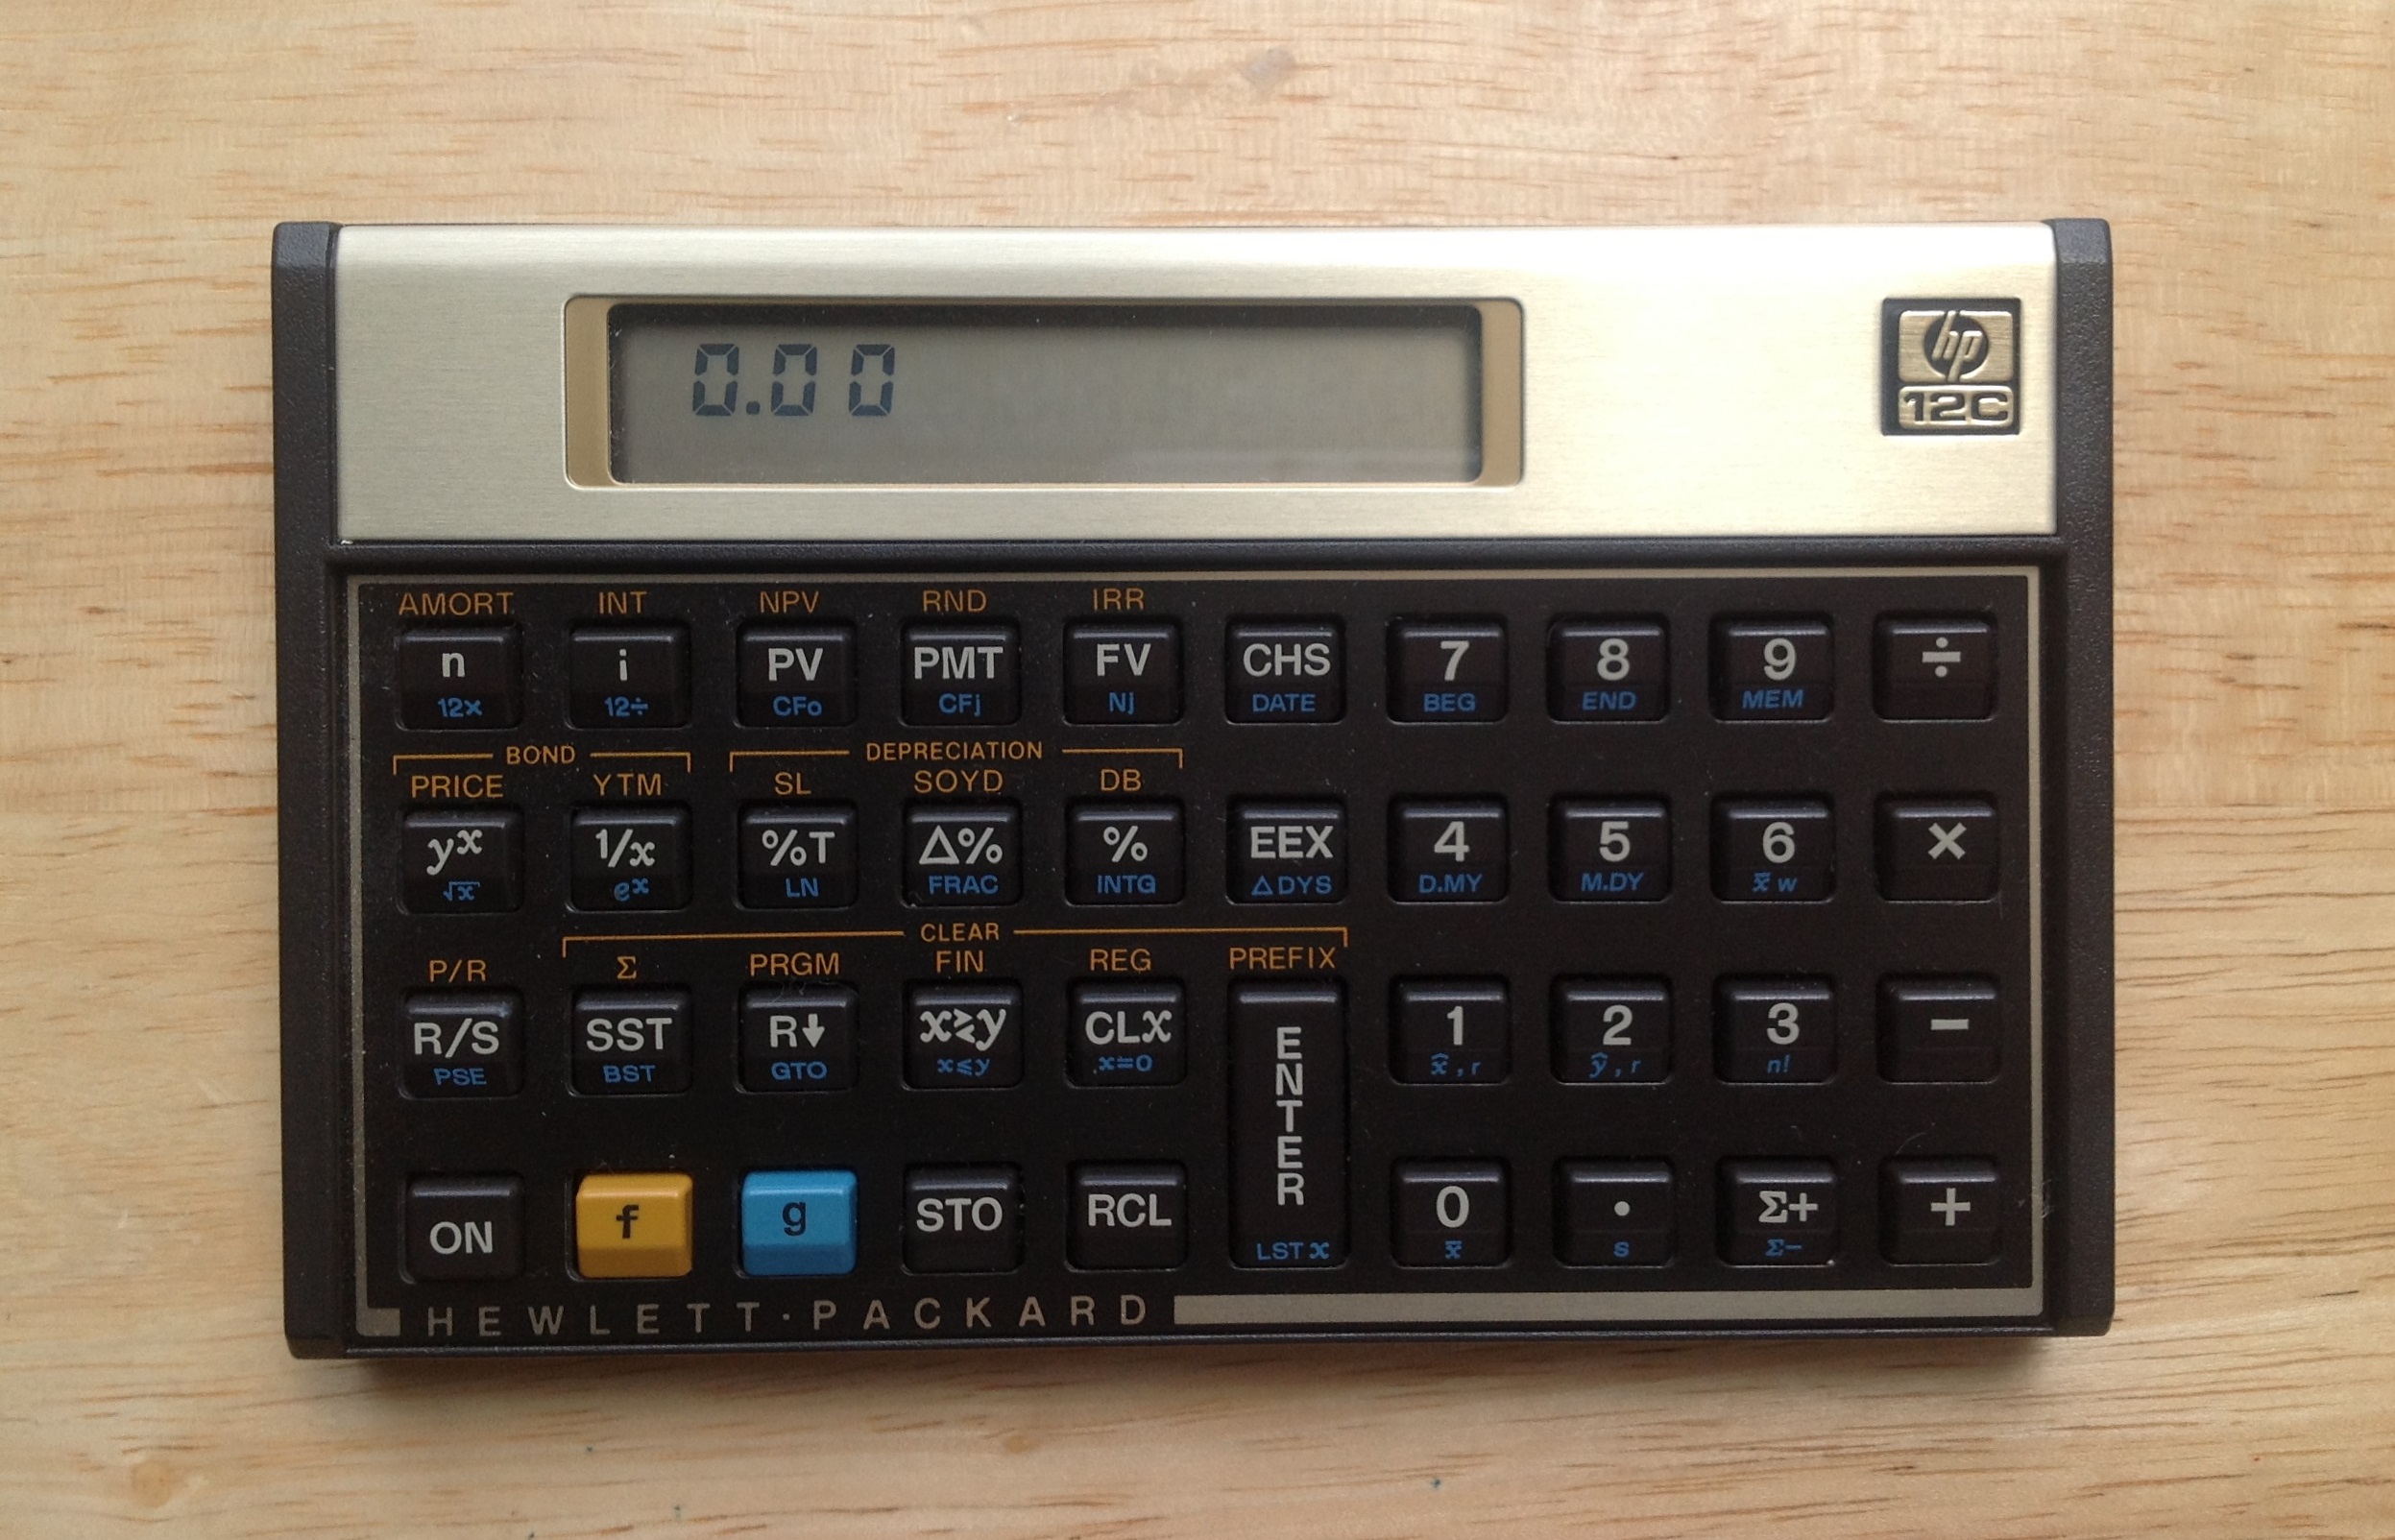
To the extent that it’s possible for a pocket calculator to be legendary, that’s what the HP-12C is. When it turned 30 in 2011, it was covered in the Wall Street Journal and on major blogs like Technorati. HP even posted a celebratory video on YouTube entitled HP 12c Calculator — Then & Now. Despite the fact that it was first released in 1981 (the same year as the IBM PC) it’s still being sold today. You can buy one new at Amazon, or from Staples, or OfficeDepot, or Walmart and the price you will pay is not what I would call cheap.
I don’t actually have much use for a financial calculator but I bought this HP-12C for two reasons: First, because a Reverse Polish Notation calculator seemed like a great nerd novelty item and second because it’s a classic of early 1980s technology.
Today the vast majority of pocket calculators and small desktop calculators you see are extremely cheap commodity crap. But, there was a time when a calculator was a prized possession, probably the most advanced piece of technology a person owned. The HP-12C is one of the last remnants of that era.
The HP-12C is a member of a line of calculators that HP created for different professions in the early 1980s including the HP-10C, HP-11C, and HP-15C scientific calculators and the HP-16C programmer’s calculator. The HP-12C apparently has endured because finance professionals loved their portability and reliability of the HP12-C and required newcomers to learn how to use them.
![]()
Unlike most calculators the HP-12C uses Reverse Polish Notation (RPN). In order to add two numbers you do not type 2 + 4 and press =. Instead, you press 2 and then press Enter. Then you press 4 then you hit the + button and your two numbers are added together and 6 shows up on the screen. You enter the numbers first and then the operation. Why would you want a calculator that works like this?
It’s best if I let this page at HP’s site about RPN explain the difference:
Believe it or not, the process of using RPN is similar to the way you learned math. If you think about it, you have to modify the way you learned math in order to use an algebraic mode calculator.
Here’s an example
3+5
—
7+6Or (3+5) / (7+6) = x
Algebraic method: Add 3+5=8. Write down the answer or store it in memory. Add 7+6=13. Now enter the 8 from the first answer and then divide it by entering the second answer to get x=0.62.
RPN method: Touch 3 then the ENTER key. Touch 5 then the + key. Touch 7, and then ENTER. Touch 6 then the + key. Note that the answer to the second sum is displayed. Now here’s the magic part. Touch the divide key and the calculator gives the answer, 0.62.
Algebraic: 13 strokes, not counting the effort to write down or memorize the first answer while you calculated the second answer.
RPN: 9 strokes, and no need to write anything down.
The beauty of this is that in RPN the order of operations is explicit. As computer science buffs are aware, RPN works on a stack. Basically each new number you put in is pushing down a new entry on the stack and each operation is popping off numbers from the stack in a last-in, first out order.
The tricky bit to imagine in that example above is that each time you enter numbers, the stack is being pushed down. So 3 is pushed into the stack and then 5 is pushed into the stack and then + pops them off the stack and then pushes the answer 8 back onto the stack. Then 7 is pushed onto the stack, 6 is pushed onto the stack and they’re added together to make 13, which is pushed back onto the stack. At this point the stack looks like this:
13
8
As a result, when the divide button is pressed 13 and 8 are popped off of the stack and 8 is divided by 13 giving us 0.62. Because there’s a stack there’s a fairly sophisticated memory function basically built in.
The HP-12C is actually a small computer. Unlike most pocket calculators which have a relatively primitive fixed-function calculator IC there is actually a CPU inside of an HP-12C. When you push a button the calculator is actually loading a tiny program into the CPU.
The HP-12C and the other members of the HP-10C line all used the same CPU, referred to as Voyager, with different code assigned to the different buttons on each model.
The HP-12C is actually programmable. That is to say that it has what we would today call a macro language where you can store up to 99 lines of operations and recall them at a button press.
Because it is programmable there are honest-to-goodness games (warning: PDF) people have written for this pocket calculator. You have to key them in one line of code at a time, like old BASIC programs on early home computers.
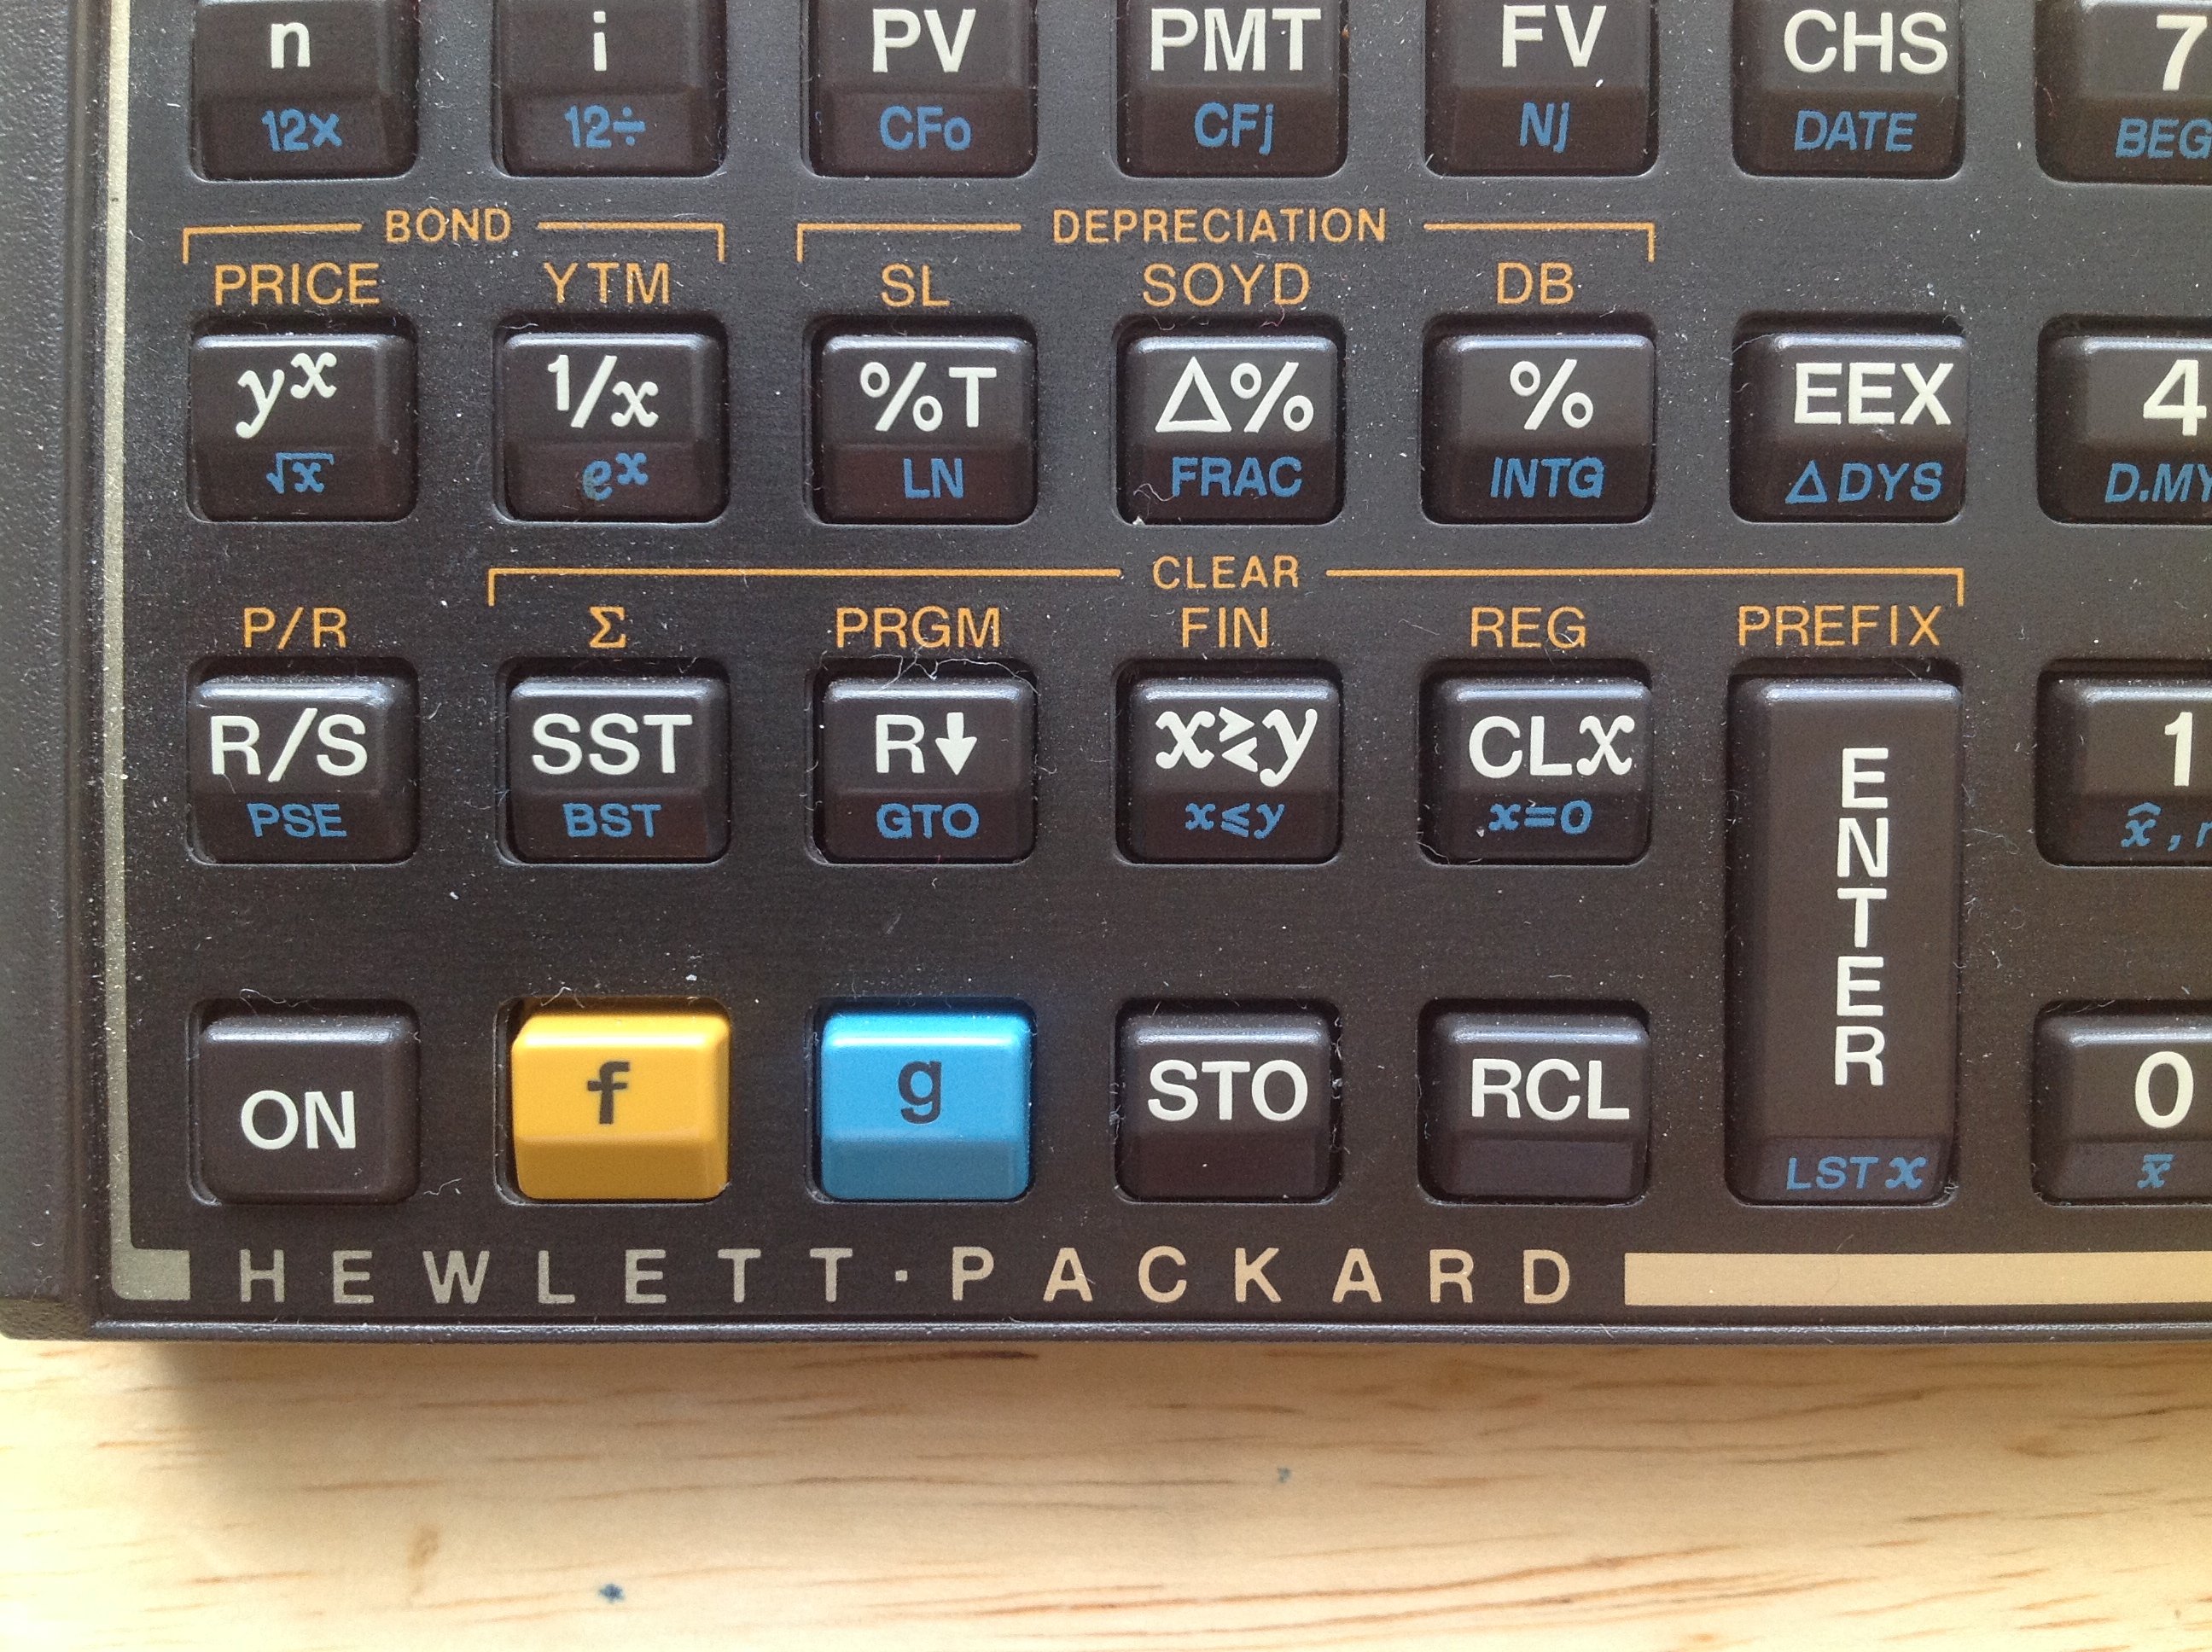
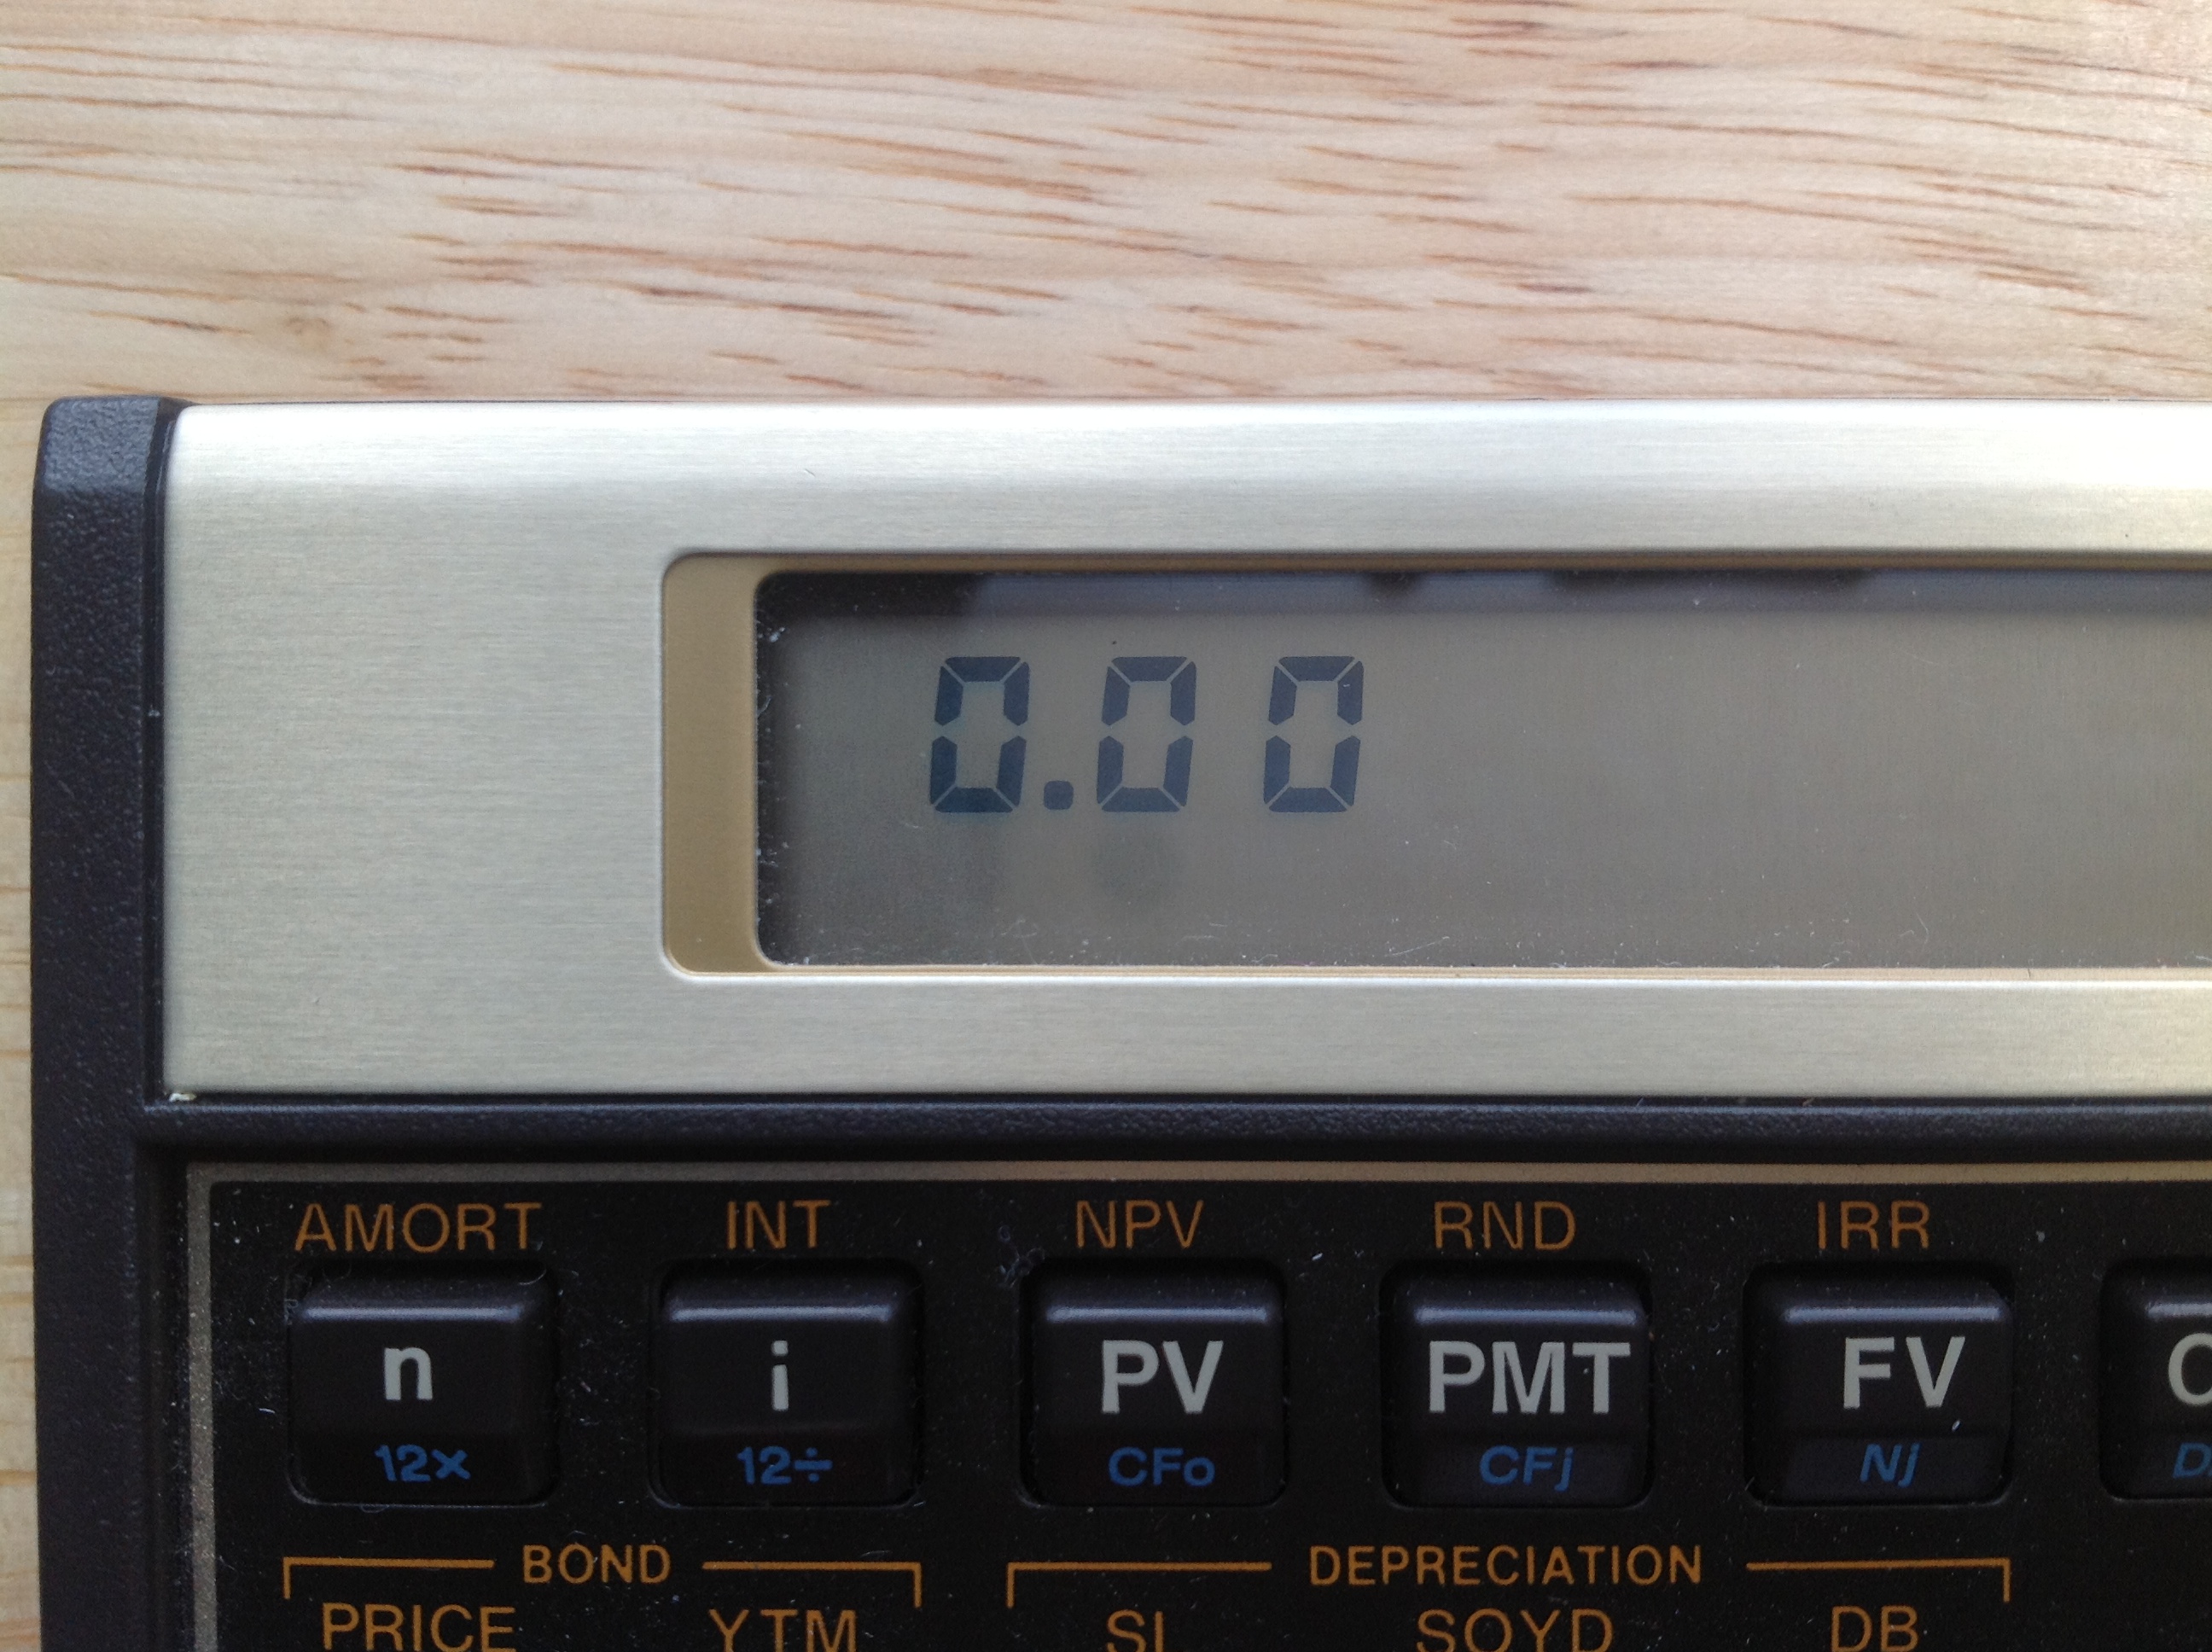
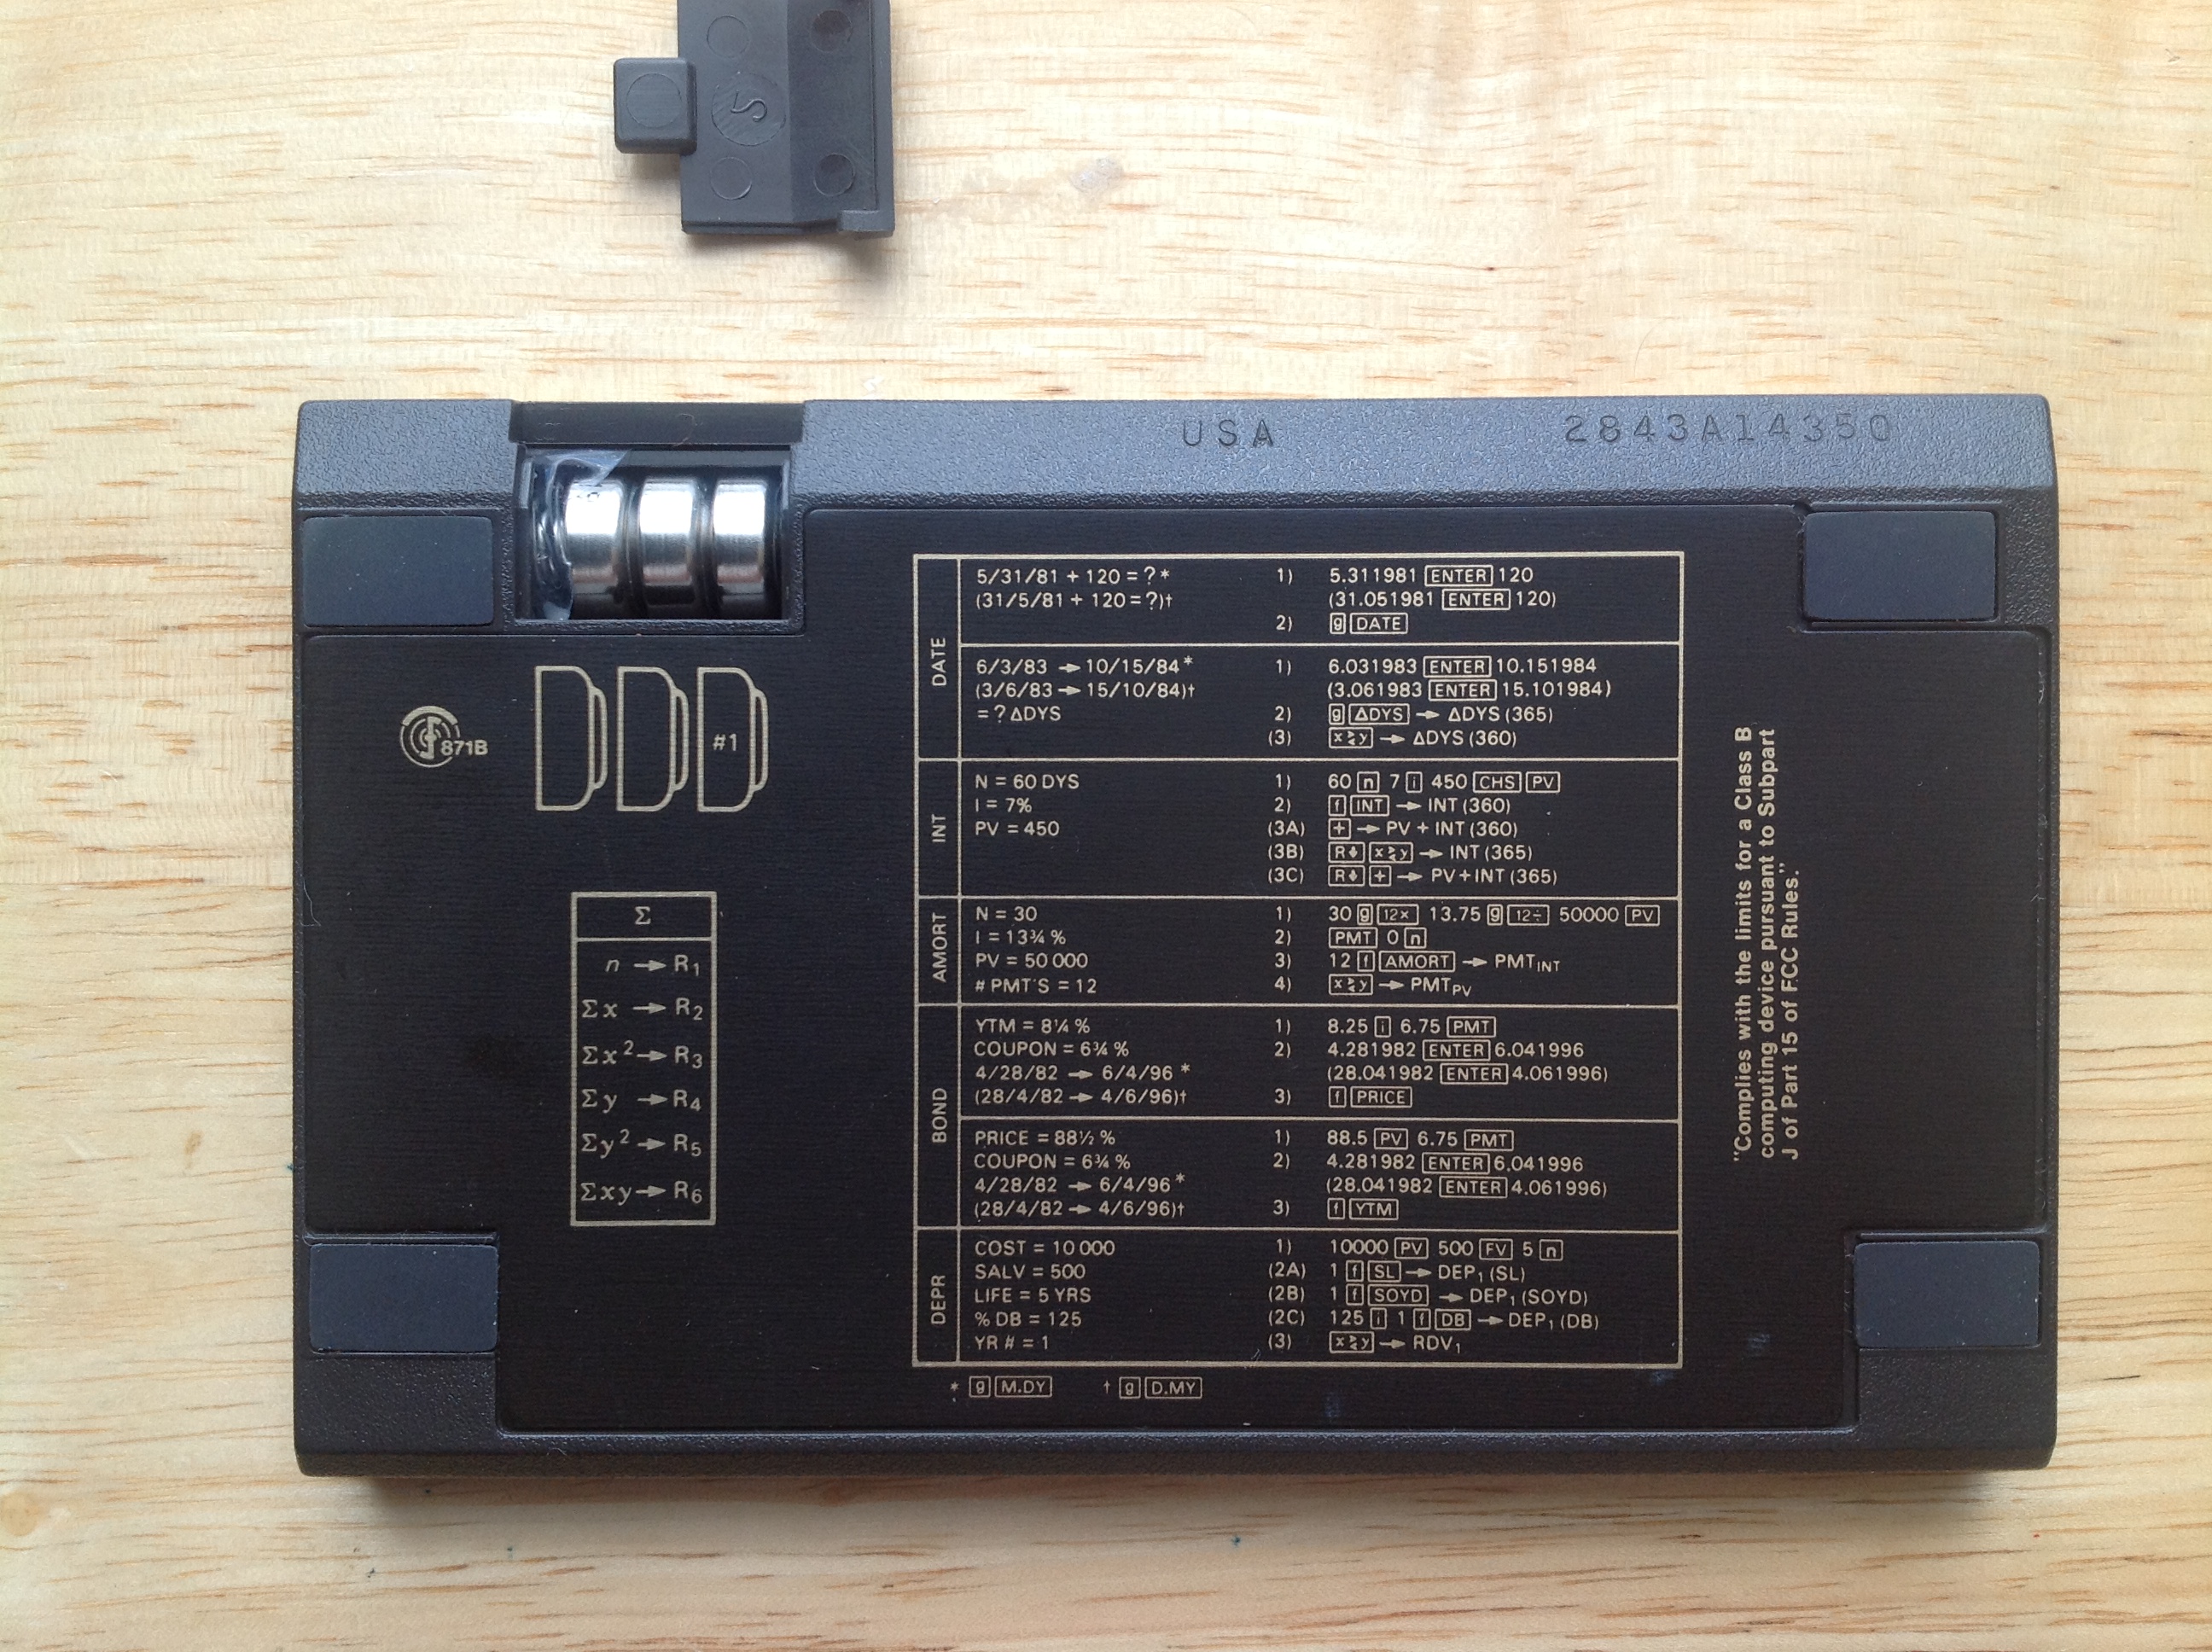
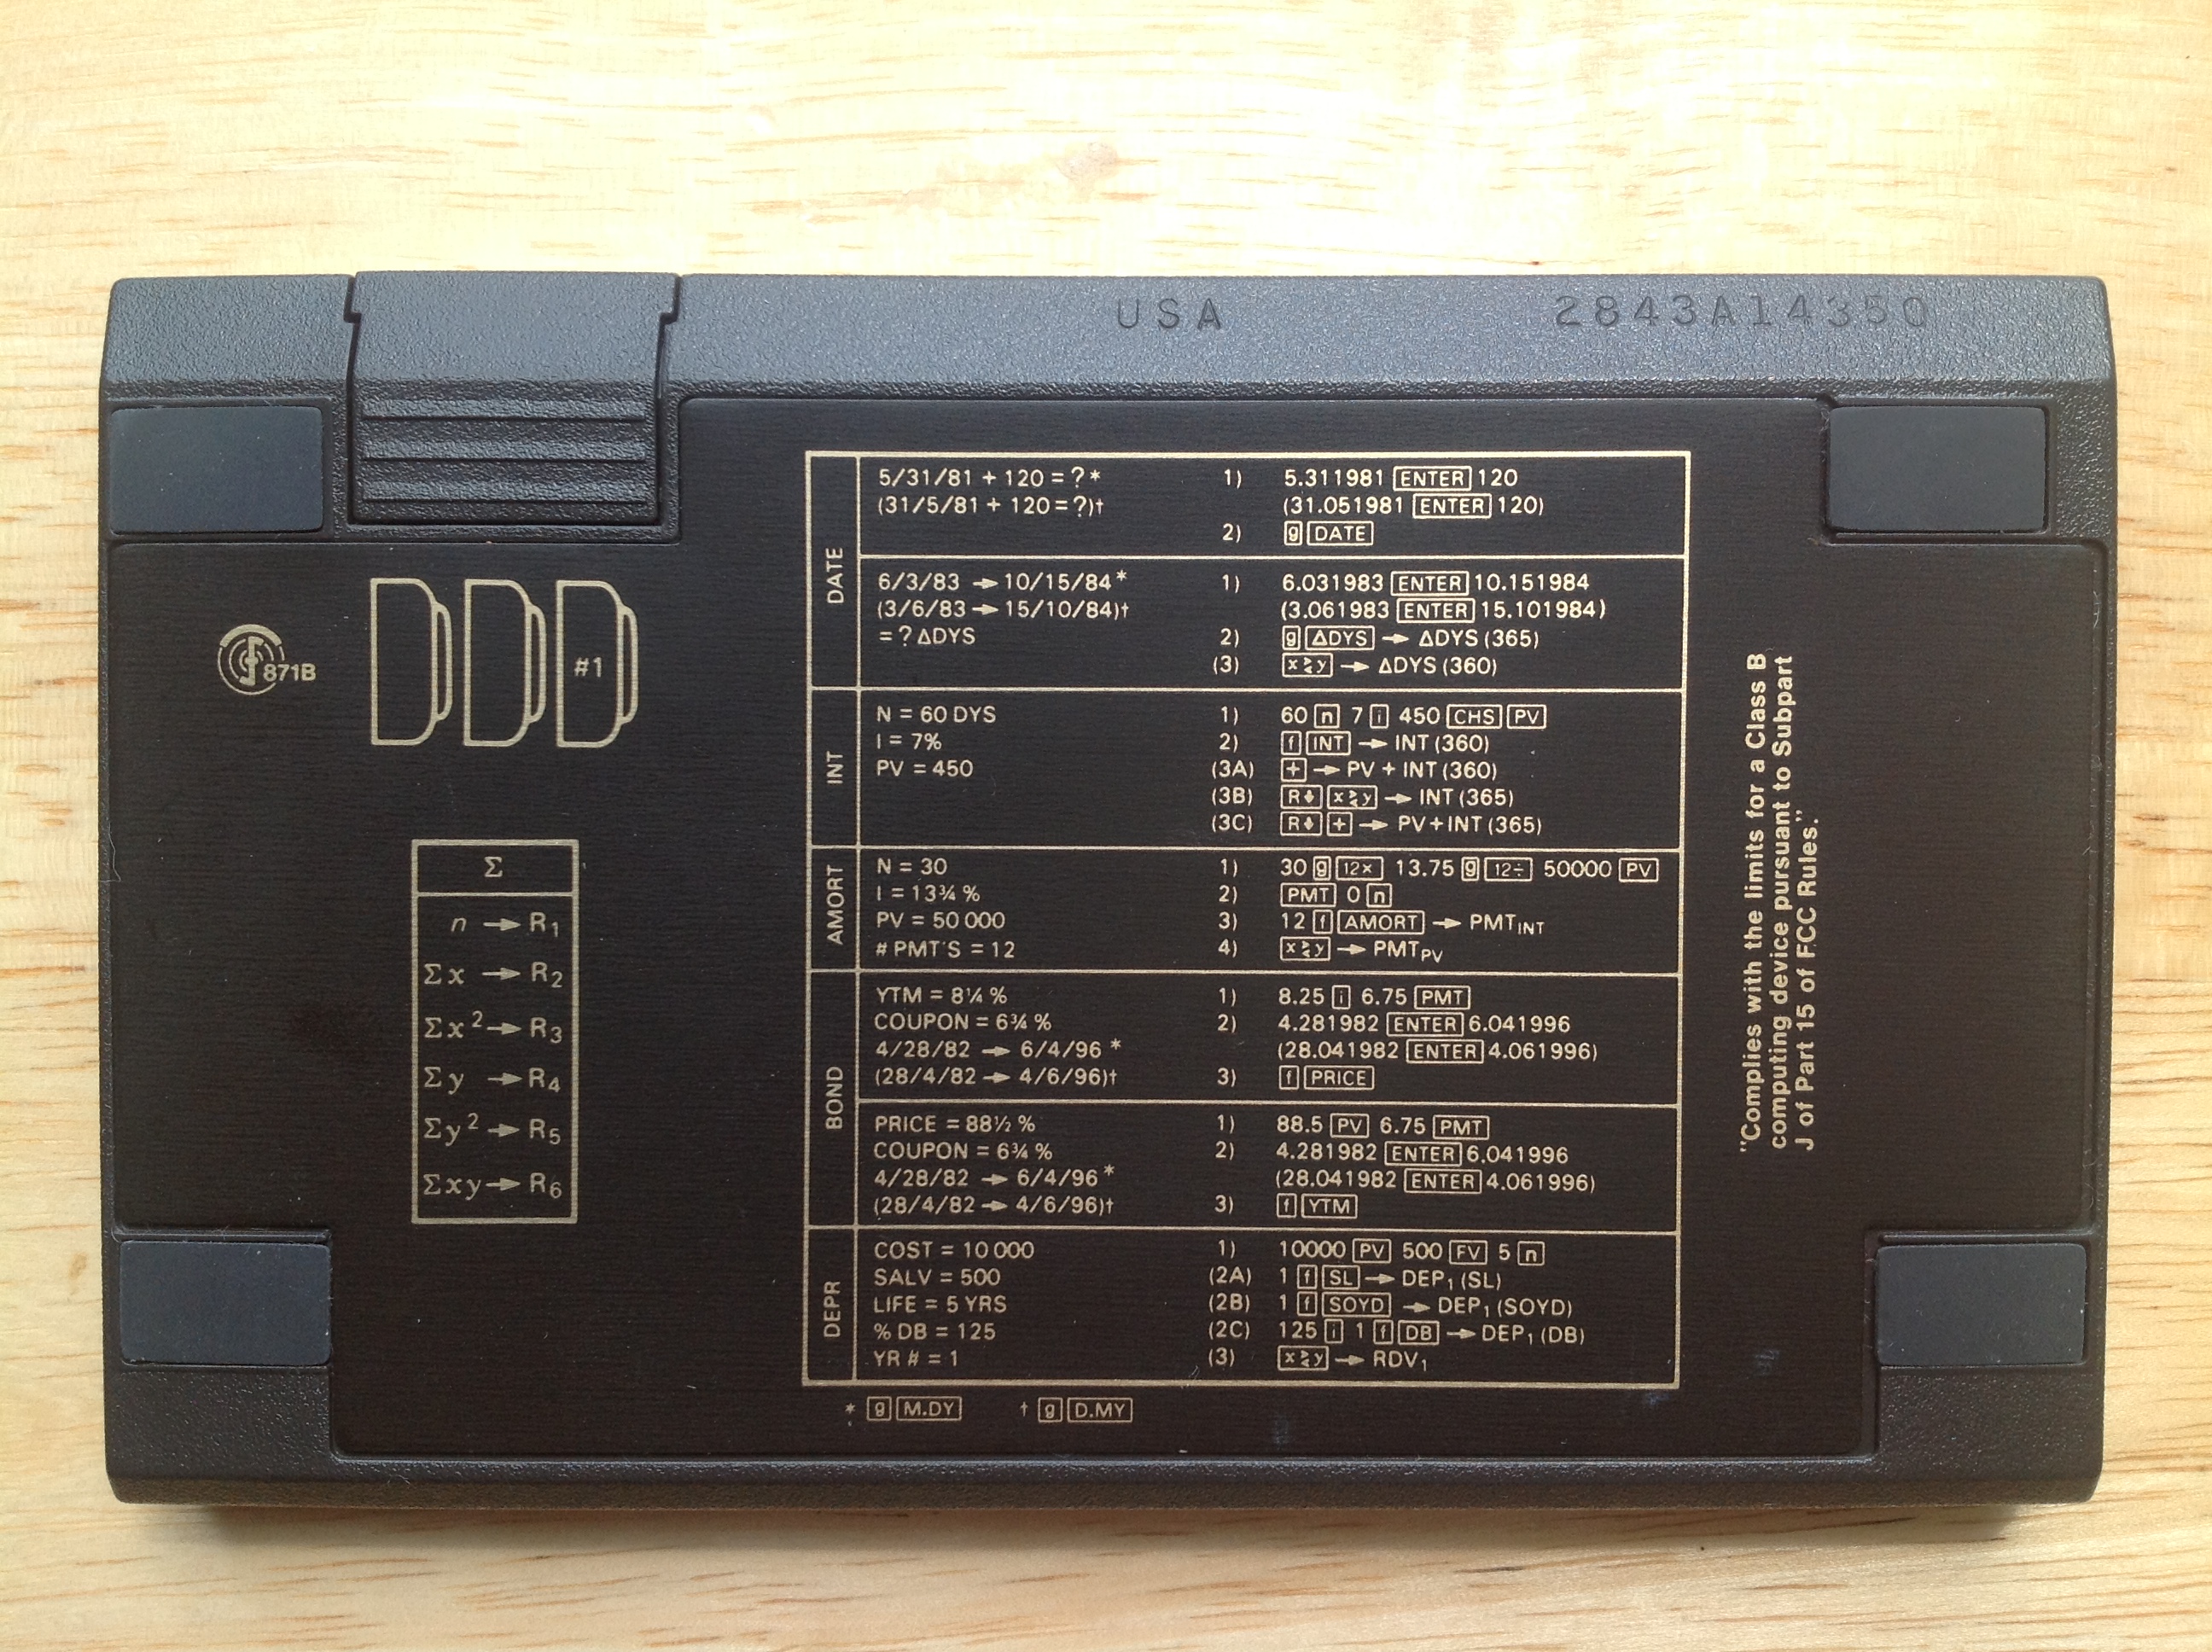
On the back of the HP-12C is this sort of quick explanation of some of the calculator’s functions. The fact they’re written in gold lettering, and that there’s a ton of information contained in them that’s somewhat hard to decipher reminds me a bit of the pictograms on the Voyager Golden Record.
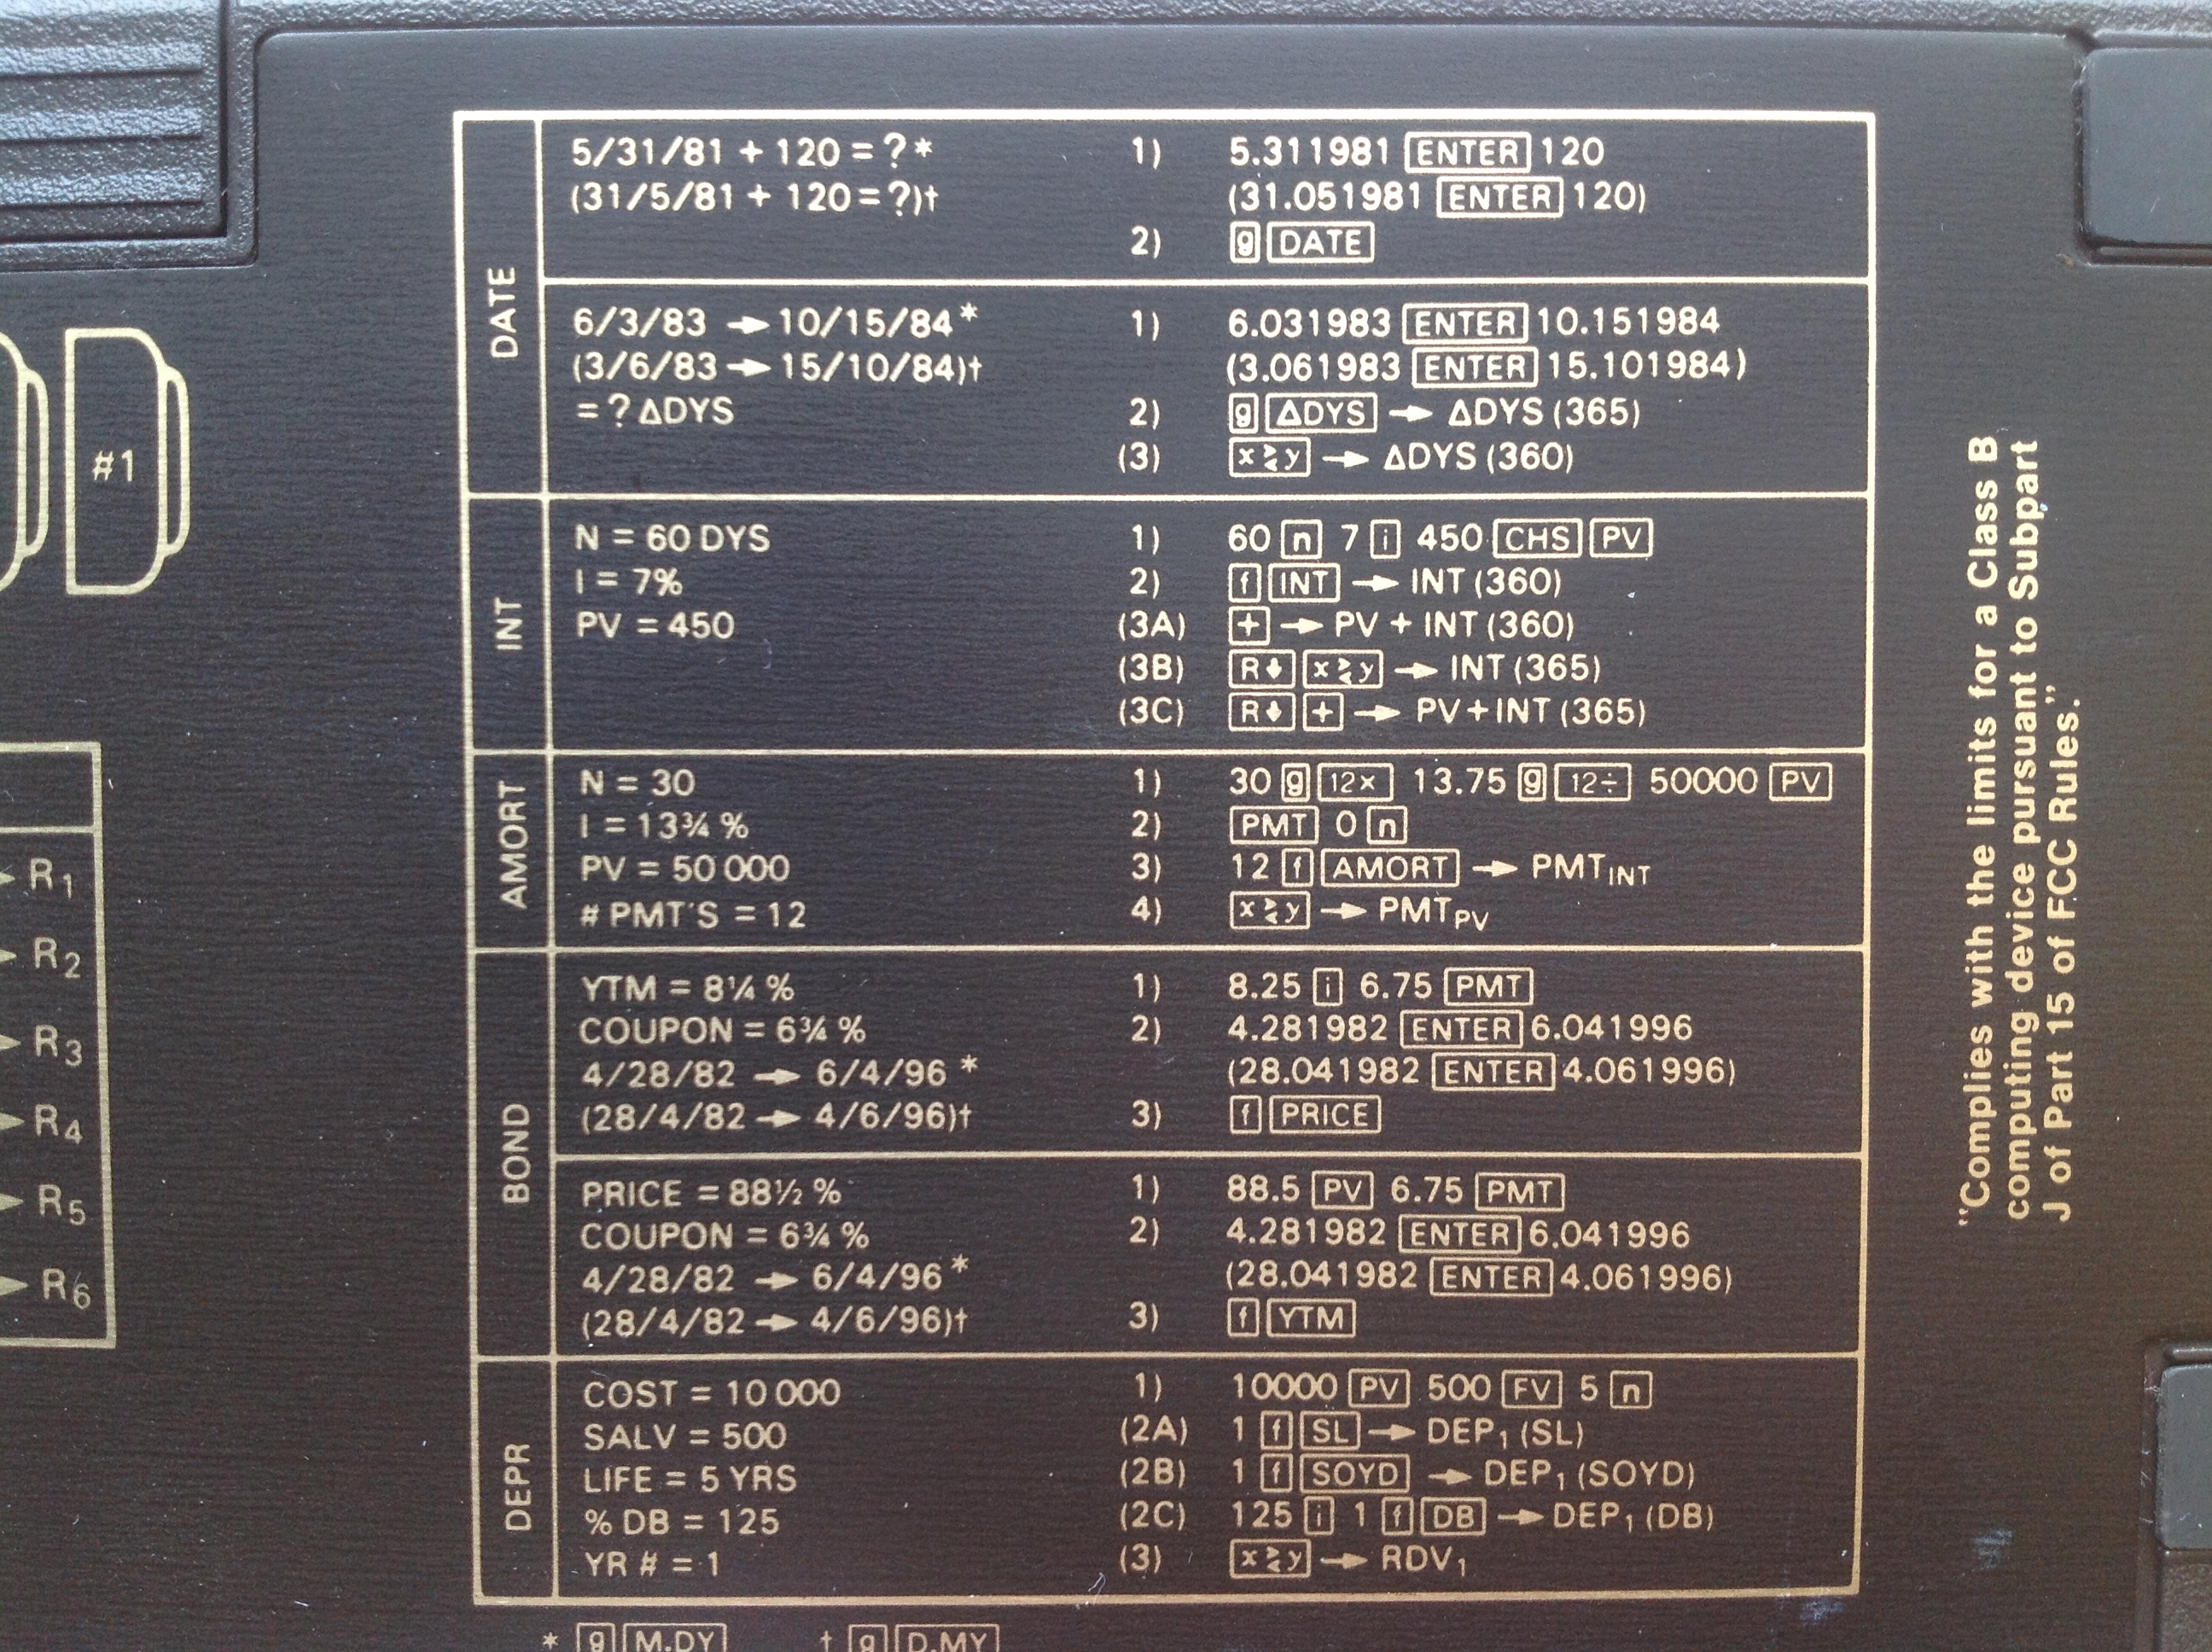
The gist of these things is that the programs trigger by those buttons are capable of some sophisticated data conversions, like finding the number of days between two dates. Additionally there are five special registers (basically memories) for Time Value of Money financial calculations called n, i, PV, PMT, and FV. A wide variety of financial calculations can be done by entering numbers into those registers and running the little programs on them.
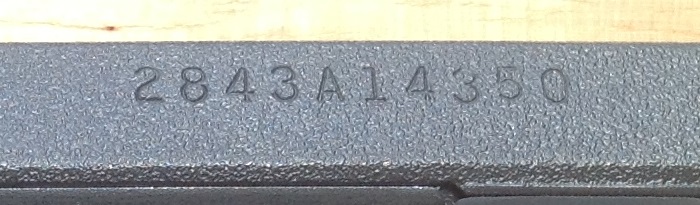
If this serial number decoding explanation is correct then my HP-12C was made in the United States during the 43rd week of 1988.
As you would expect from a consumer electronics device that has been made for three decades, there have been several revisions of the HP-12C over time. Suffice to say that over the years they have kept the button arrangement and external appearance the same but re-arranged the innards several times.
According to this site, the HP-12C originally had two chips: a CPU chip and a ROM/RAM/Display Driver chip. By the 28XX series like mine the two chips had been merged into a single chip where the Voyager CPU chip also contained the other chip’s functionality.
Interestingly, if you buy an HP-12C today what you get is outwardly nearly identical but very different inside that the older one I have. The old Voyager CPU has been replaced with an ARM-based CPU. ARM CPU cores have been famously used in everything from the Game Boy Advance to the iPhone and Android devices. They’re ideal for situations where you need a CPU that uses a tiny amount of power for a specific task.
In the HP-12C, I believe what they’ve done is created an emulator that uses the ARM CPU to faithfully reproduce the functionality of the old CPU, but with faster execution speed.
These newer HP-12Cs can be identified visually by the fact that they now have two button batteries that go in horizontally, rather than three that face vertically.
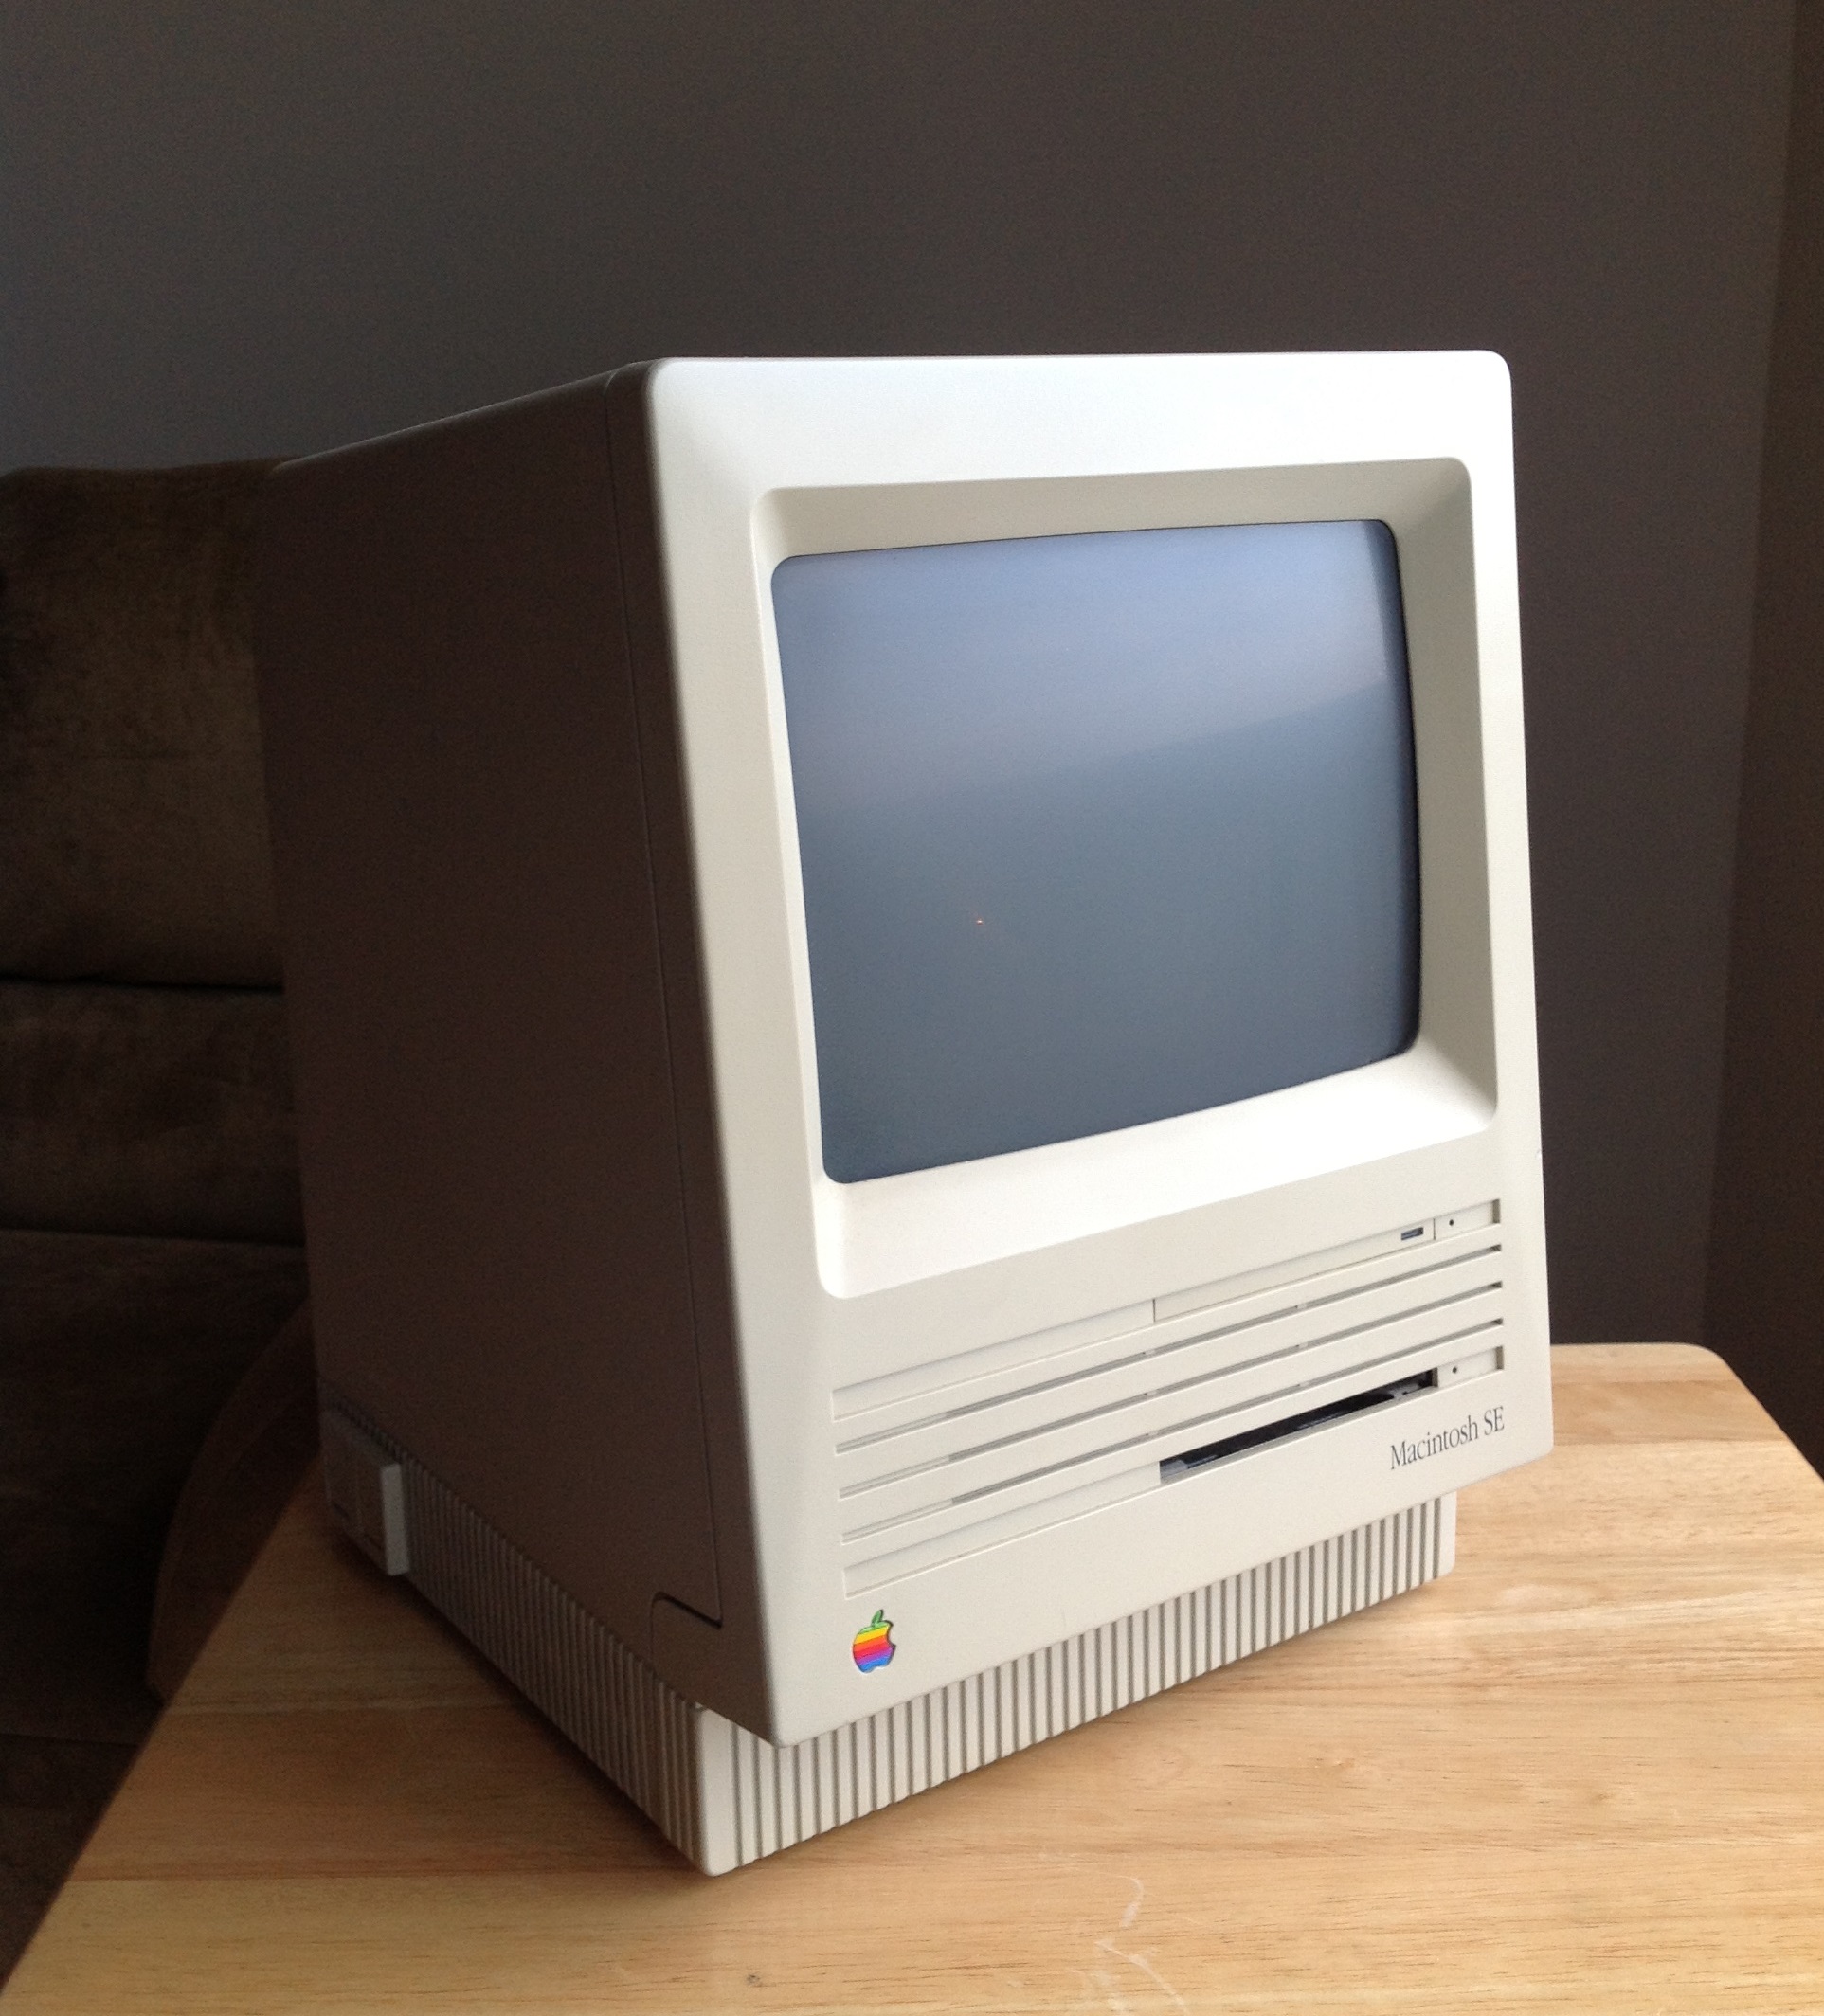
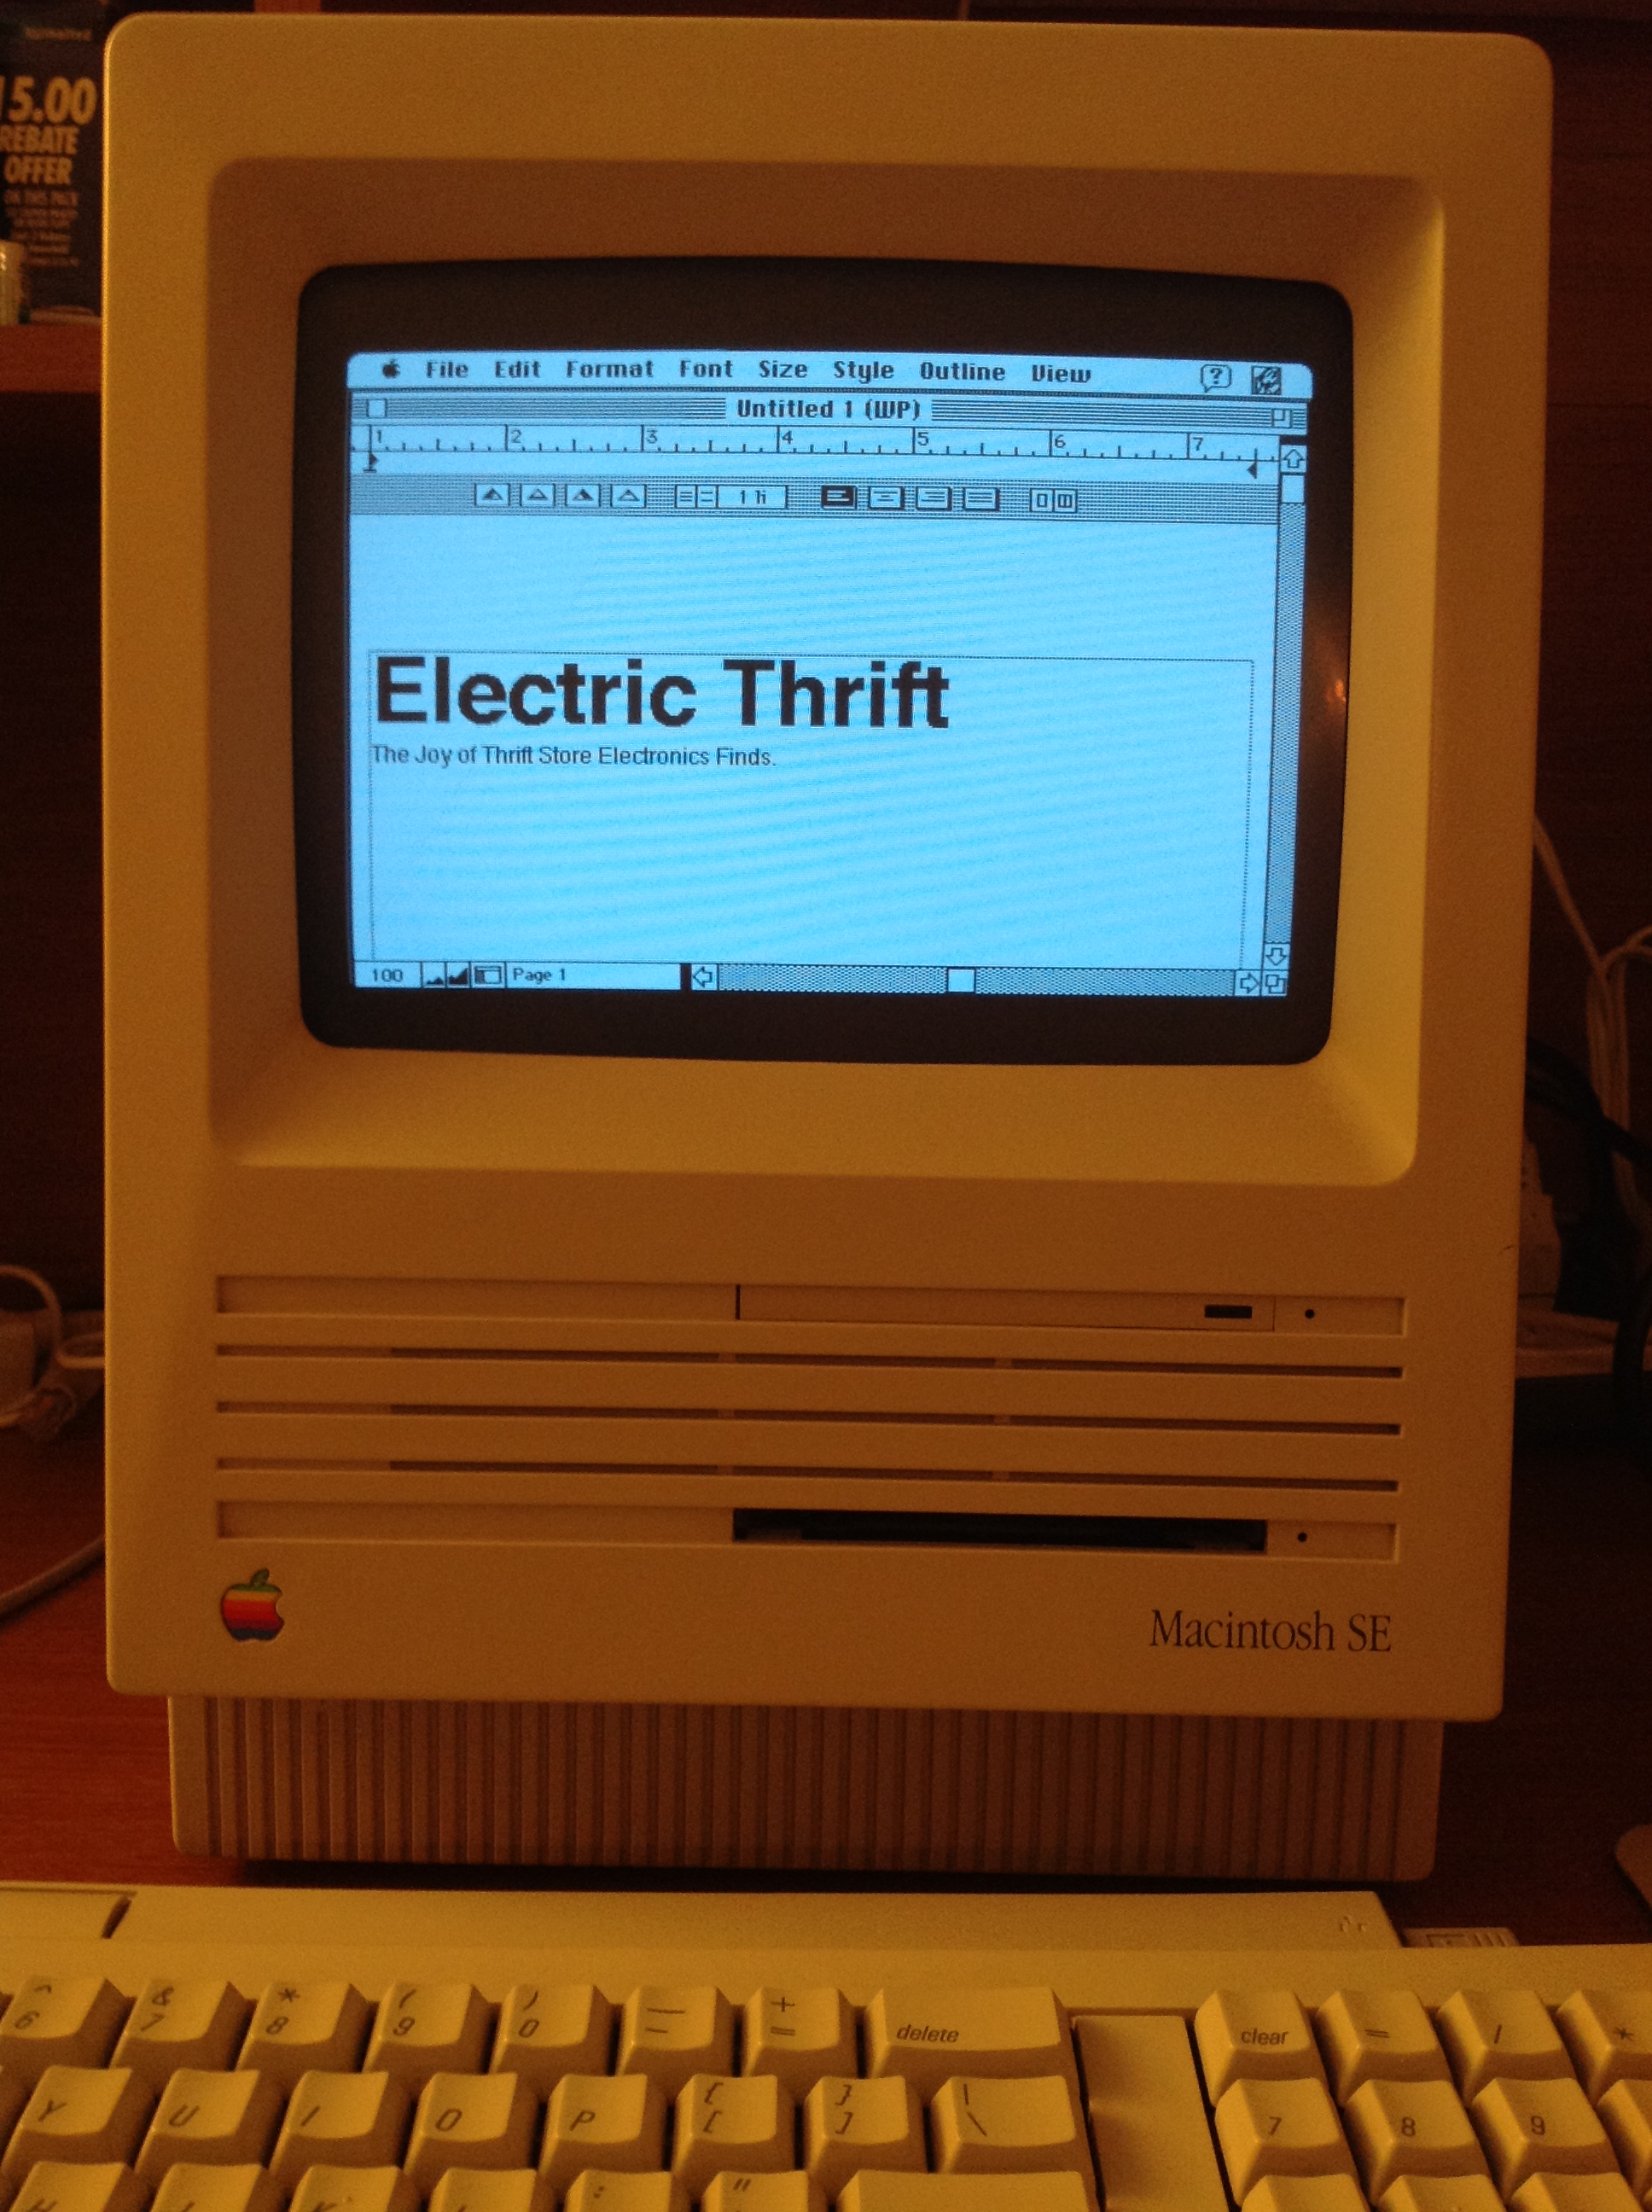
Apple Macintosh SE
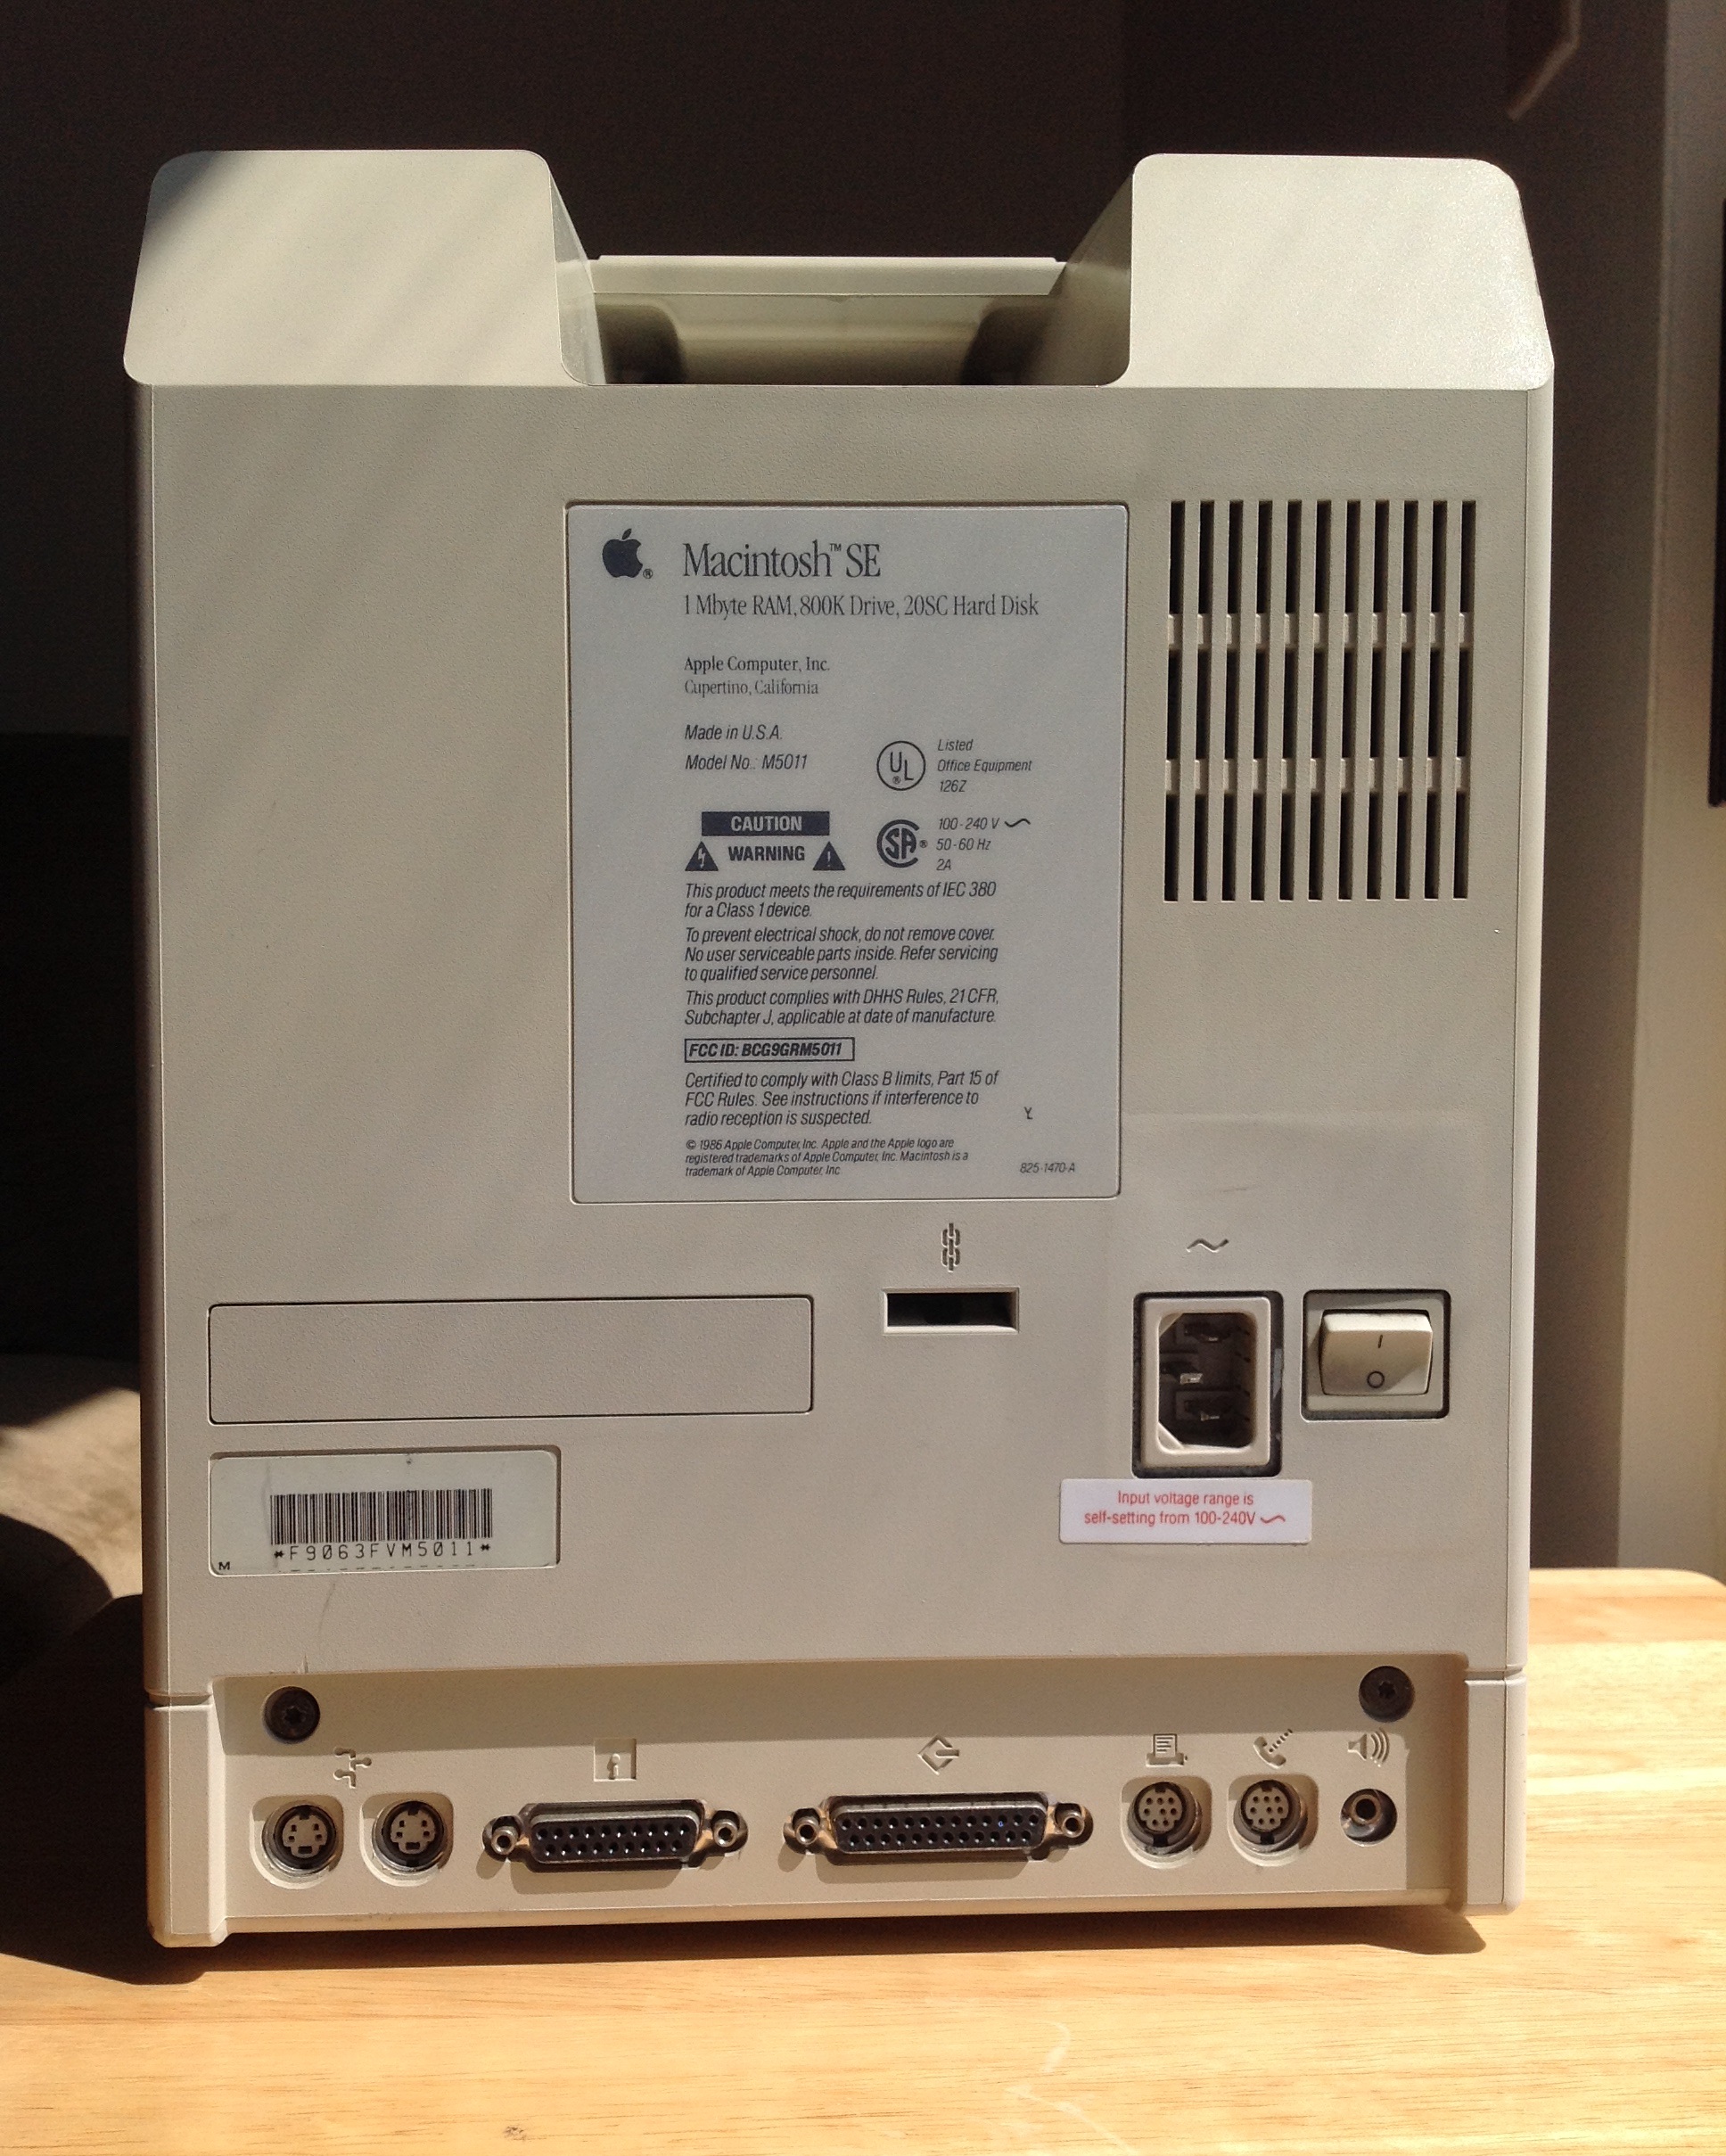
This is my Macintosh SE, that I purchased sometime before mid-2003 at the old State Road Shopping Center Goodwill. If we believe this Apple serial number decoder my Macintosh SE (serial # F9063FVM5011) was built in the 6th week of 1989 in Fremont, California.
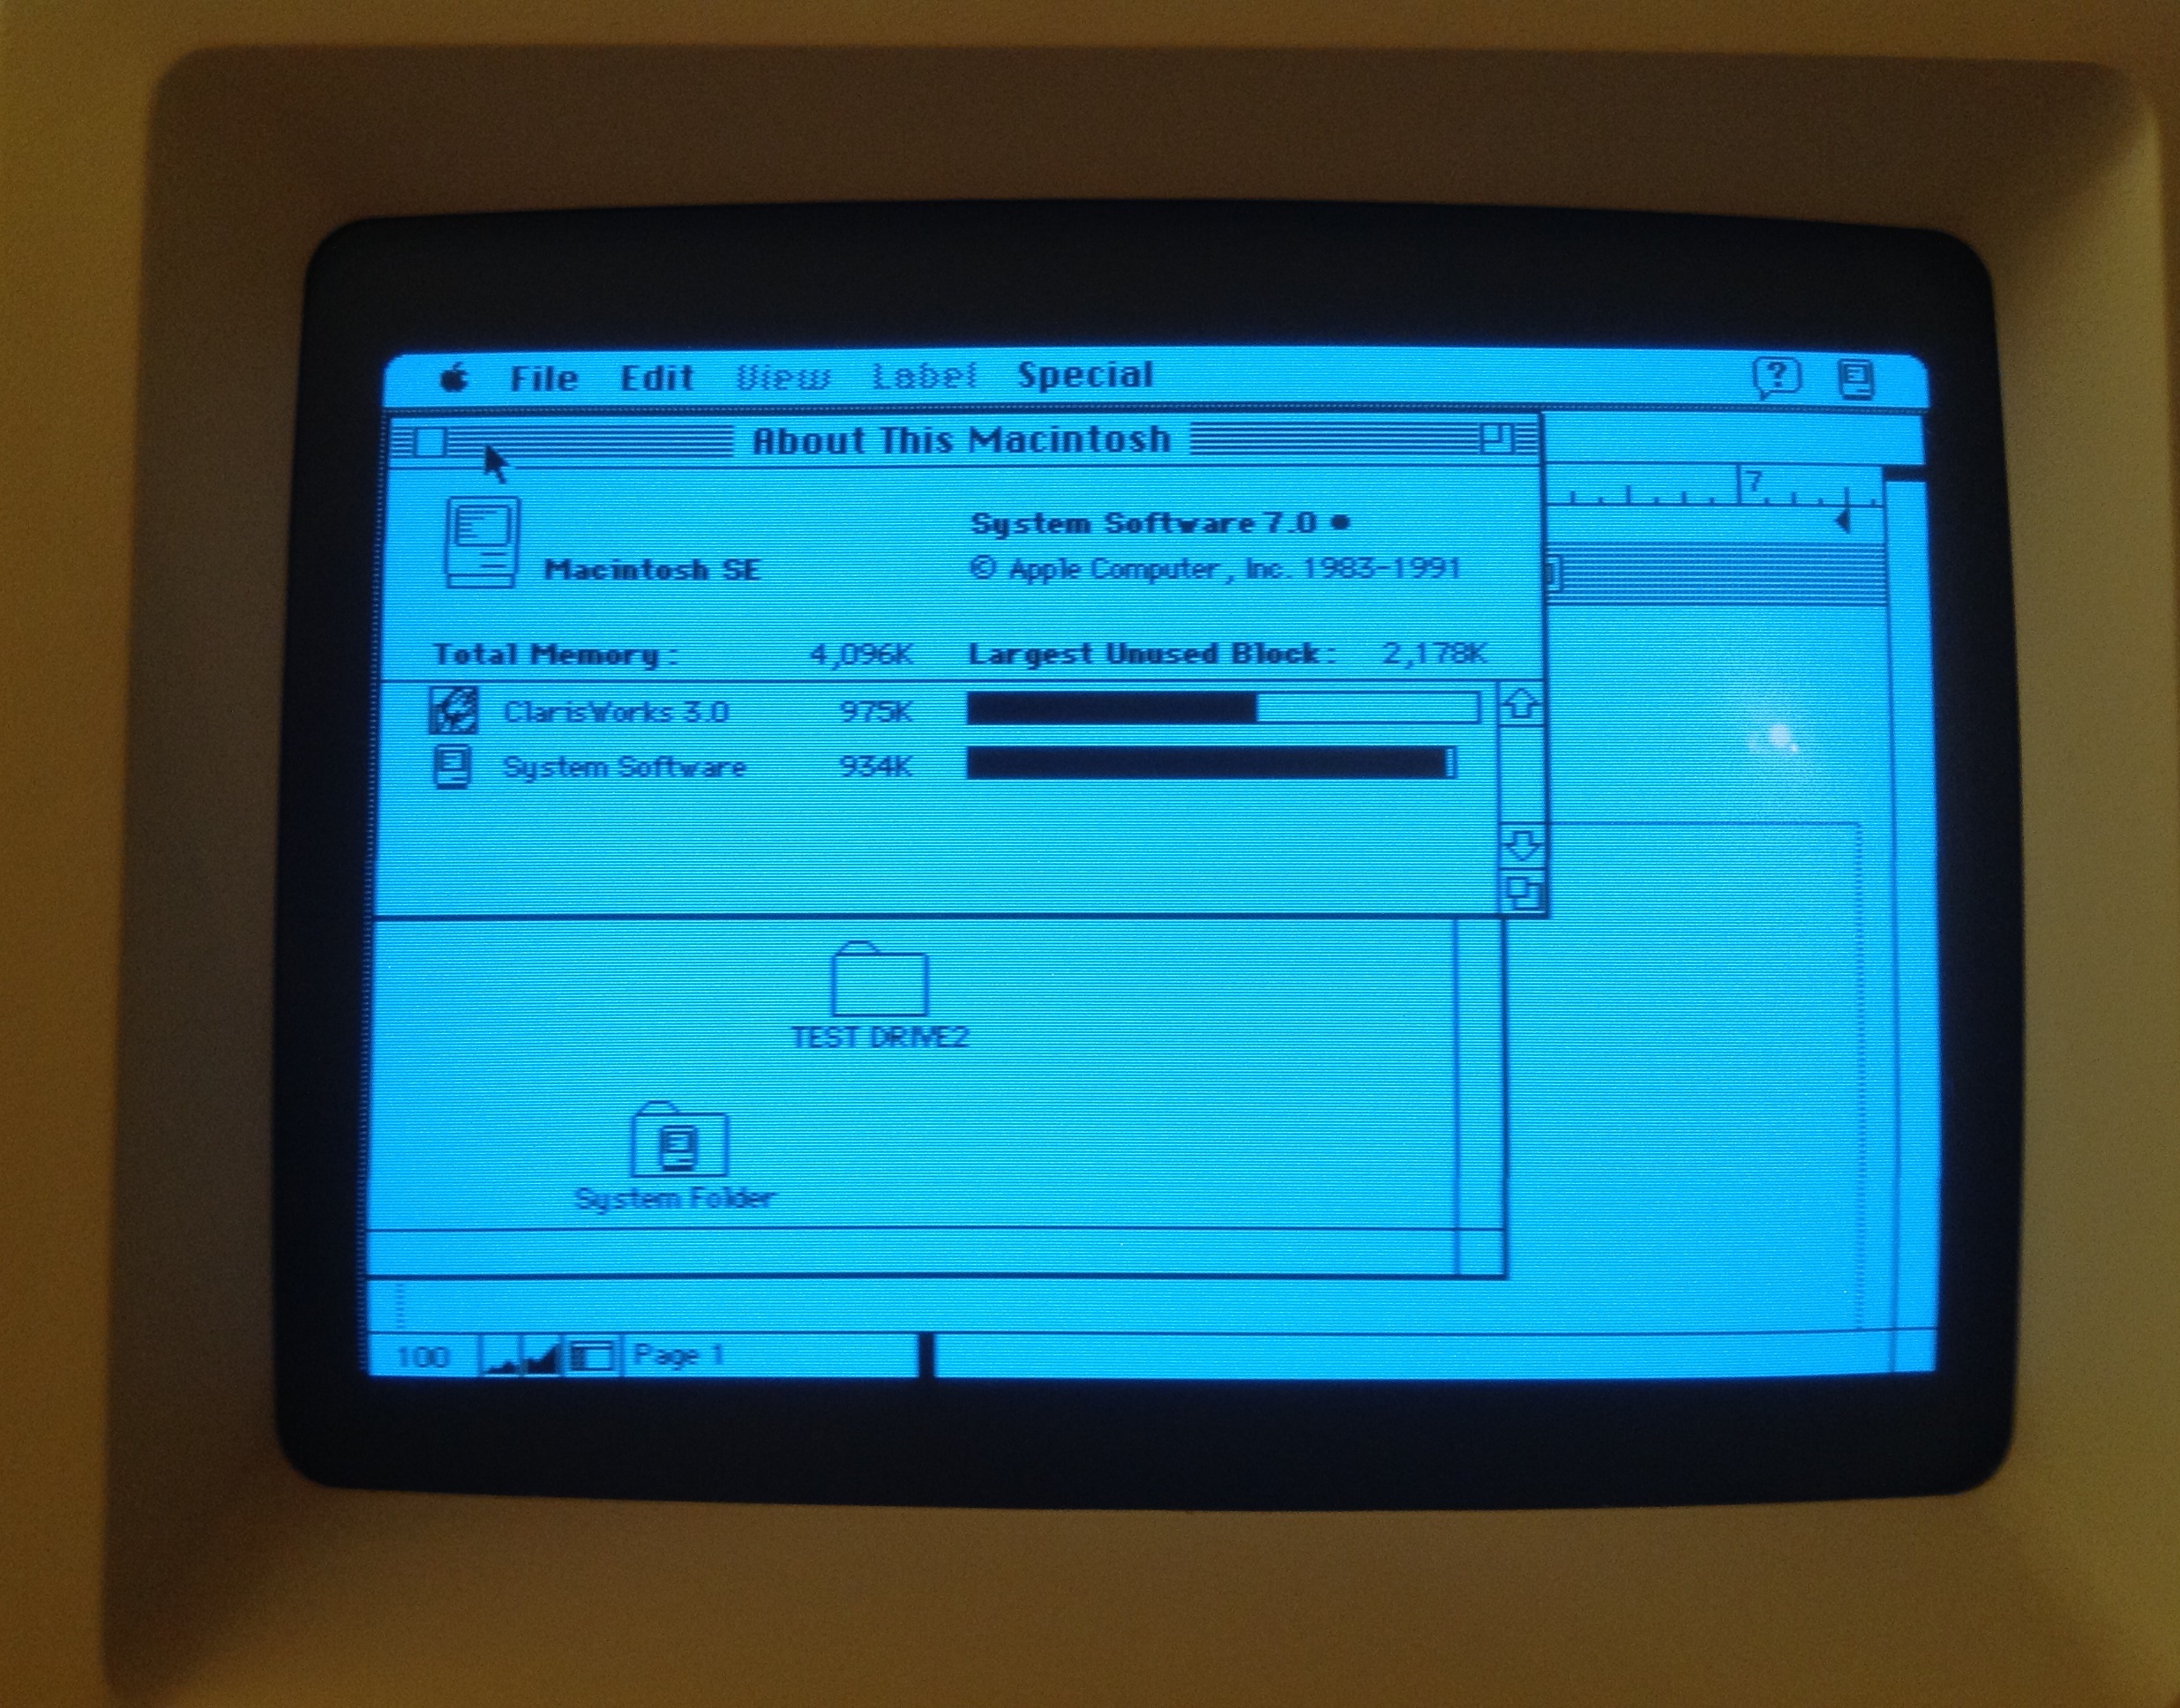
This Macintosh SE still works, outside of the fact that I’ve never seen the hard disk activity light blink. It runs System 7.0 and seems to have been upgraded from the stock 1MB RAM to 4MB. At the moment this is my oldest working Macintosh.

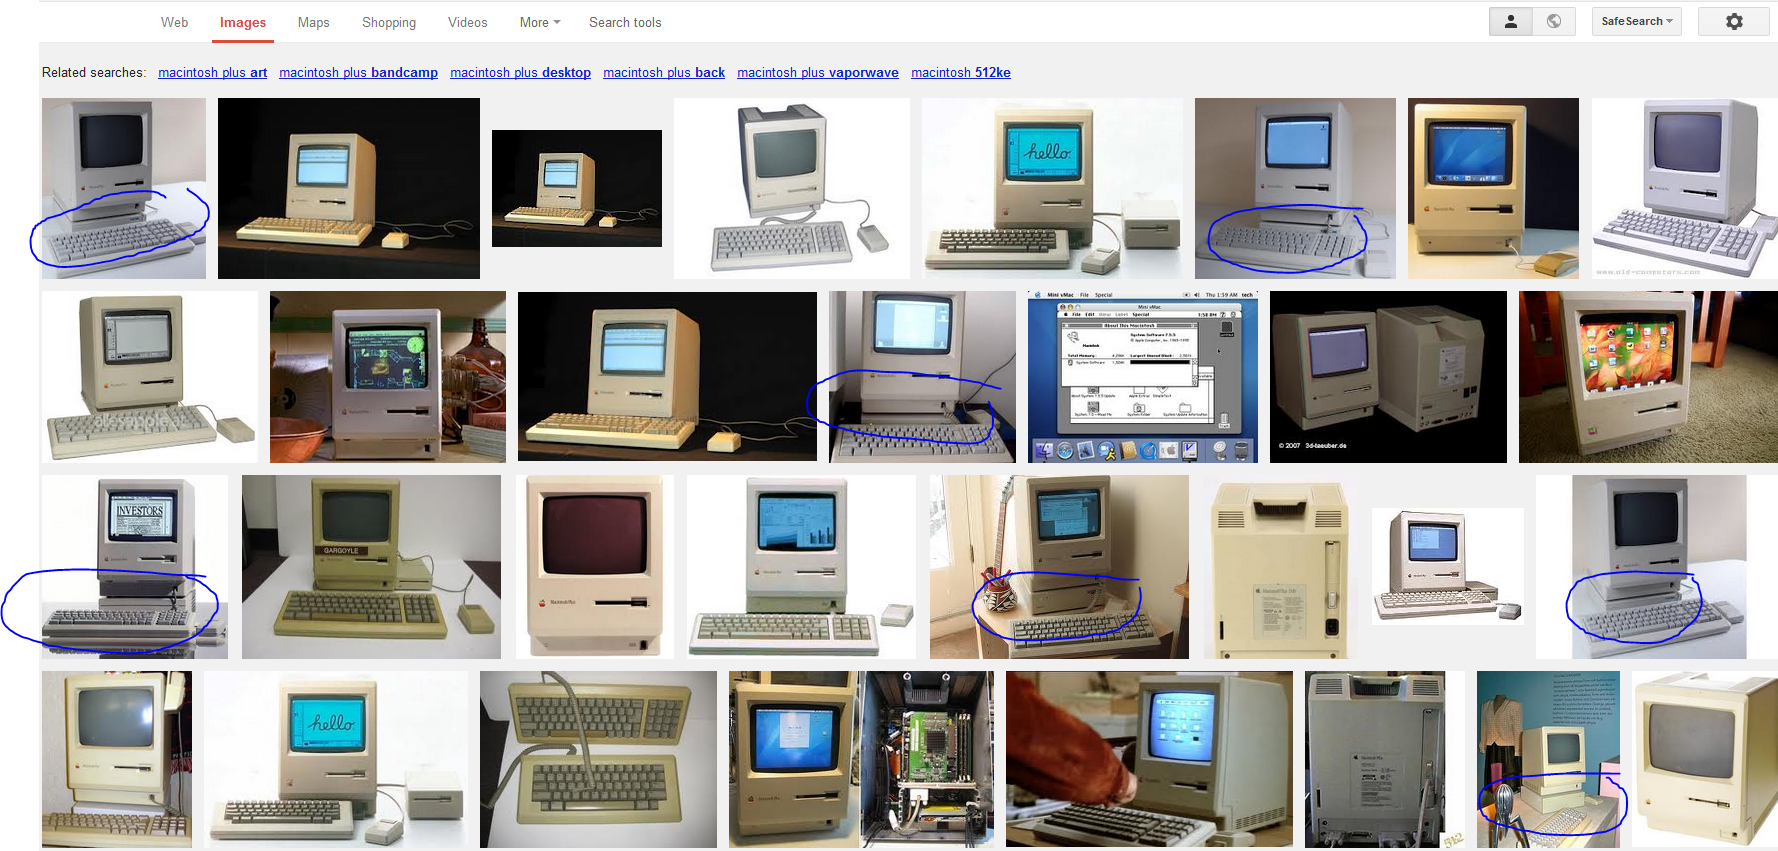
In my post about the original Macintosh I said that machine held a lot of promise but was incomplete. The Macintosh Plus vastly improved the situation in 1986 by adding 1MB of RAM standard and a SCSI port for adding a hard drive. But considering how many pictures you see of Mac Pluses sitting atop an external hard drive you can’t really call that machine totally complete either.
The Macintosh concept really lent itself to having an internal hard drive.
It wasn’t until 1987 when the Macintosh SE was released with an option for a built-in hard drive and the Apple Desktop Bus for peripheral accessories that you could really say for the first time the original vision of the compact Macintosh was complete. In addition there was an expansion slot crammed in the back of the machine (behind Torx screws), which is where Apple got the “System Expansion” moniker from. The SE was based on the same Motorola MC68000 CPU running at 7.83Mhz as all previous compact Macintosh models but added a fan that probably led to increased reliability due to better cooling.
It’s notable then that at the same time the Macintosh SE was released in March 1987 the Macintosh II was also released, which totally changed the conception of what the Macintosh was.
Some time in 1989 my mother visited a computer store in west Akron and picked up some Apple brochures that sat preserved in a drawer for years until I found them. From one of those brochures, here is the state of the Macintosh lineup in early 1989.
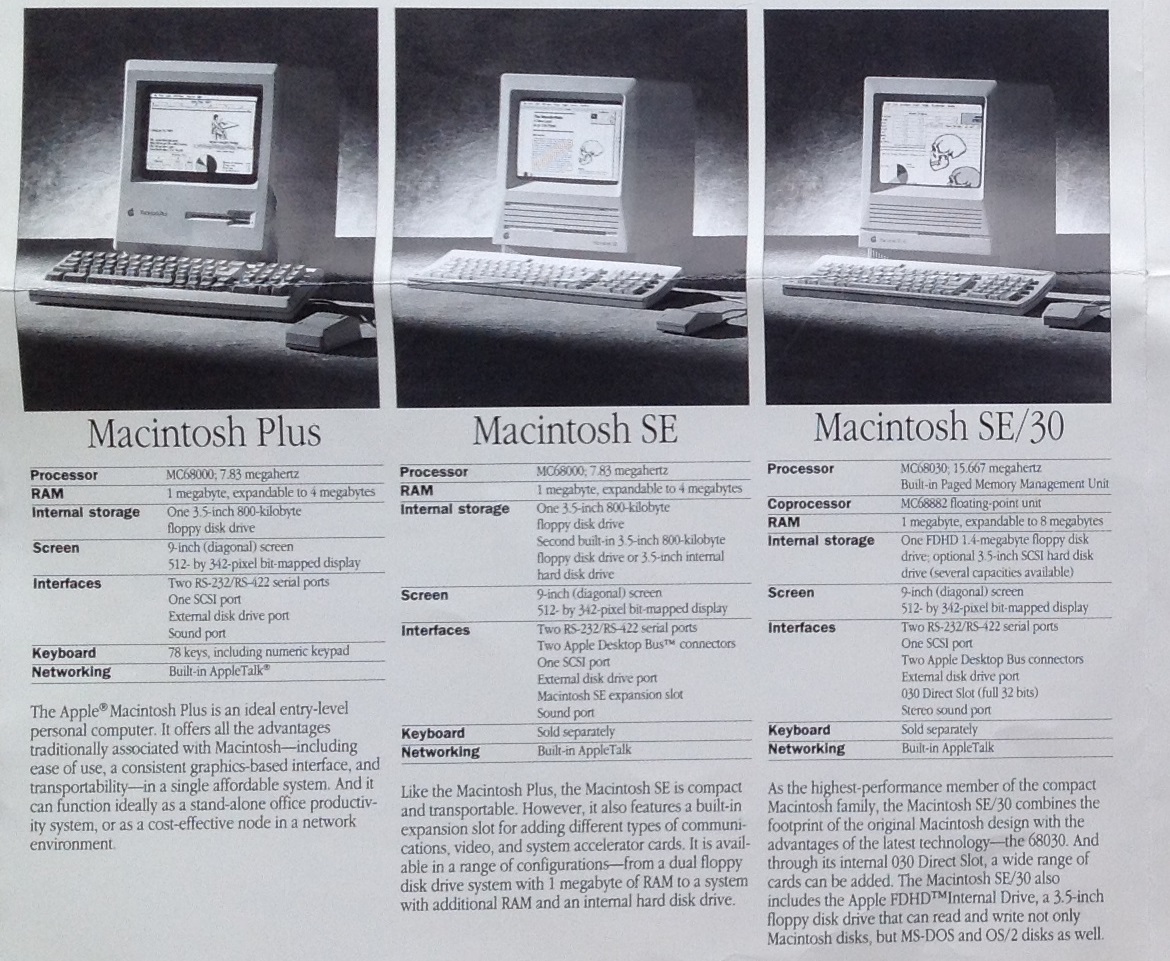
The Macintosh II was basically the Macintosh re-imagined as an open, expandable desktop personal computer in the vein of the IBM PC AT and was based on the more powerful Motorola MC68020 CPU.
The Macintosh II implicitly admitted the Mac platform was too expensive to be the “computer for everyone” and finally dispensed with the appliance pretenses of the compact Macs. Instead, Apple positioned the Macintosh II as a business workstation priced at a cool $5500 (before you bought a video card and monitor…Ouch). People were doing desktop publishing and graphics design on Macintoshes before the Macintosh II but I suspect that once you used a 13in 640×480 screen and enjoyed the benefits of what was then a fantastical amount of RAM and the 68020 CPU you were loathed to go back to a 68000-based compact Macintosh like my SE.
So there’s a certain disappointment to the historical fact that by the time Apple built a compact Macintosh that really paid off the original concept the future was pointing to expandable Macintoshes that resembled desktop PCs.
With that said, if you had purchased this machine at the time, I suspect that you were very happy with it.
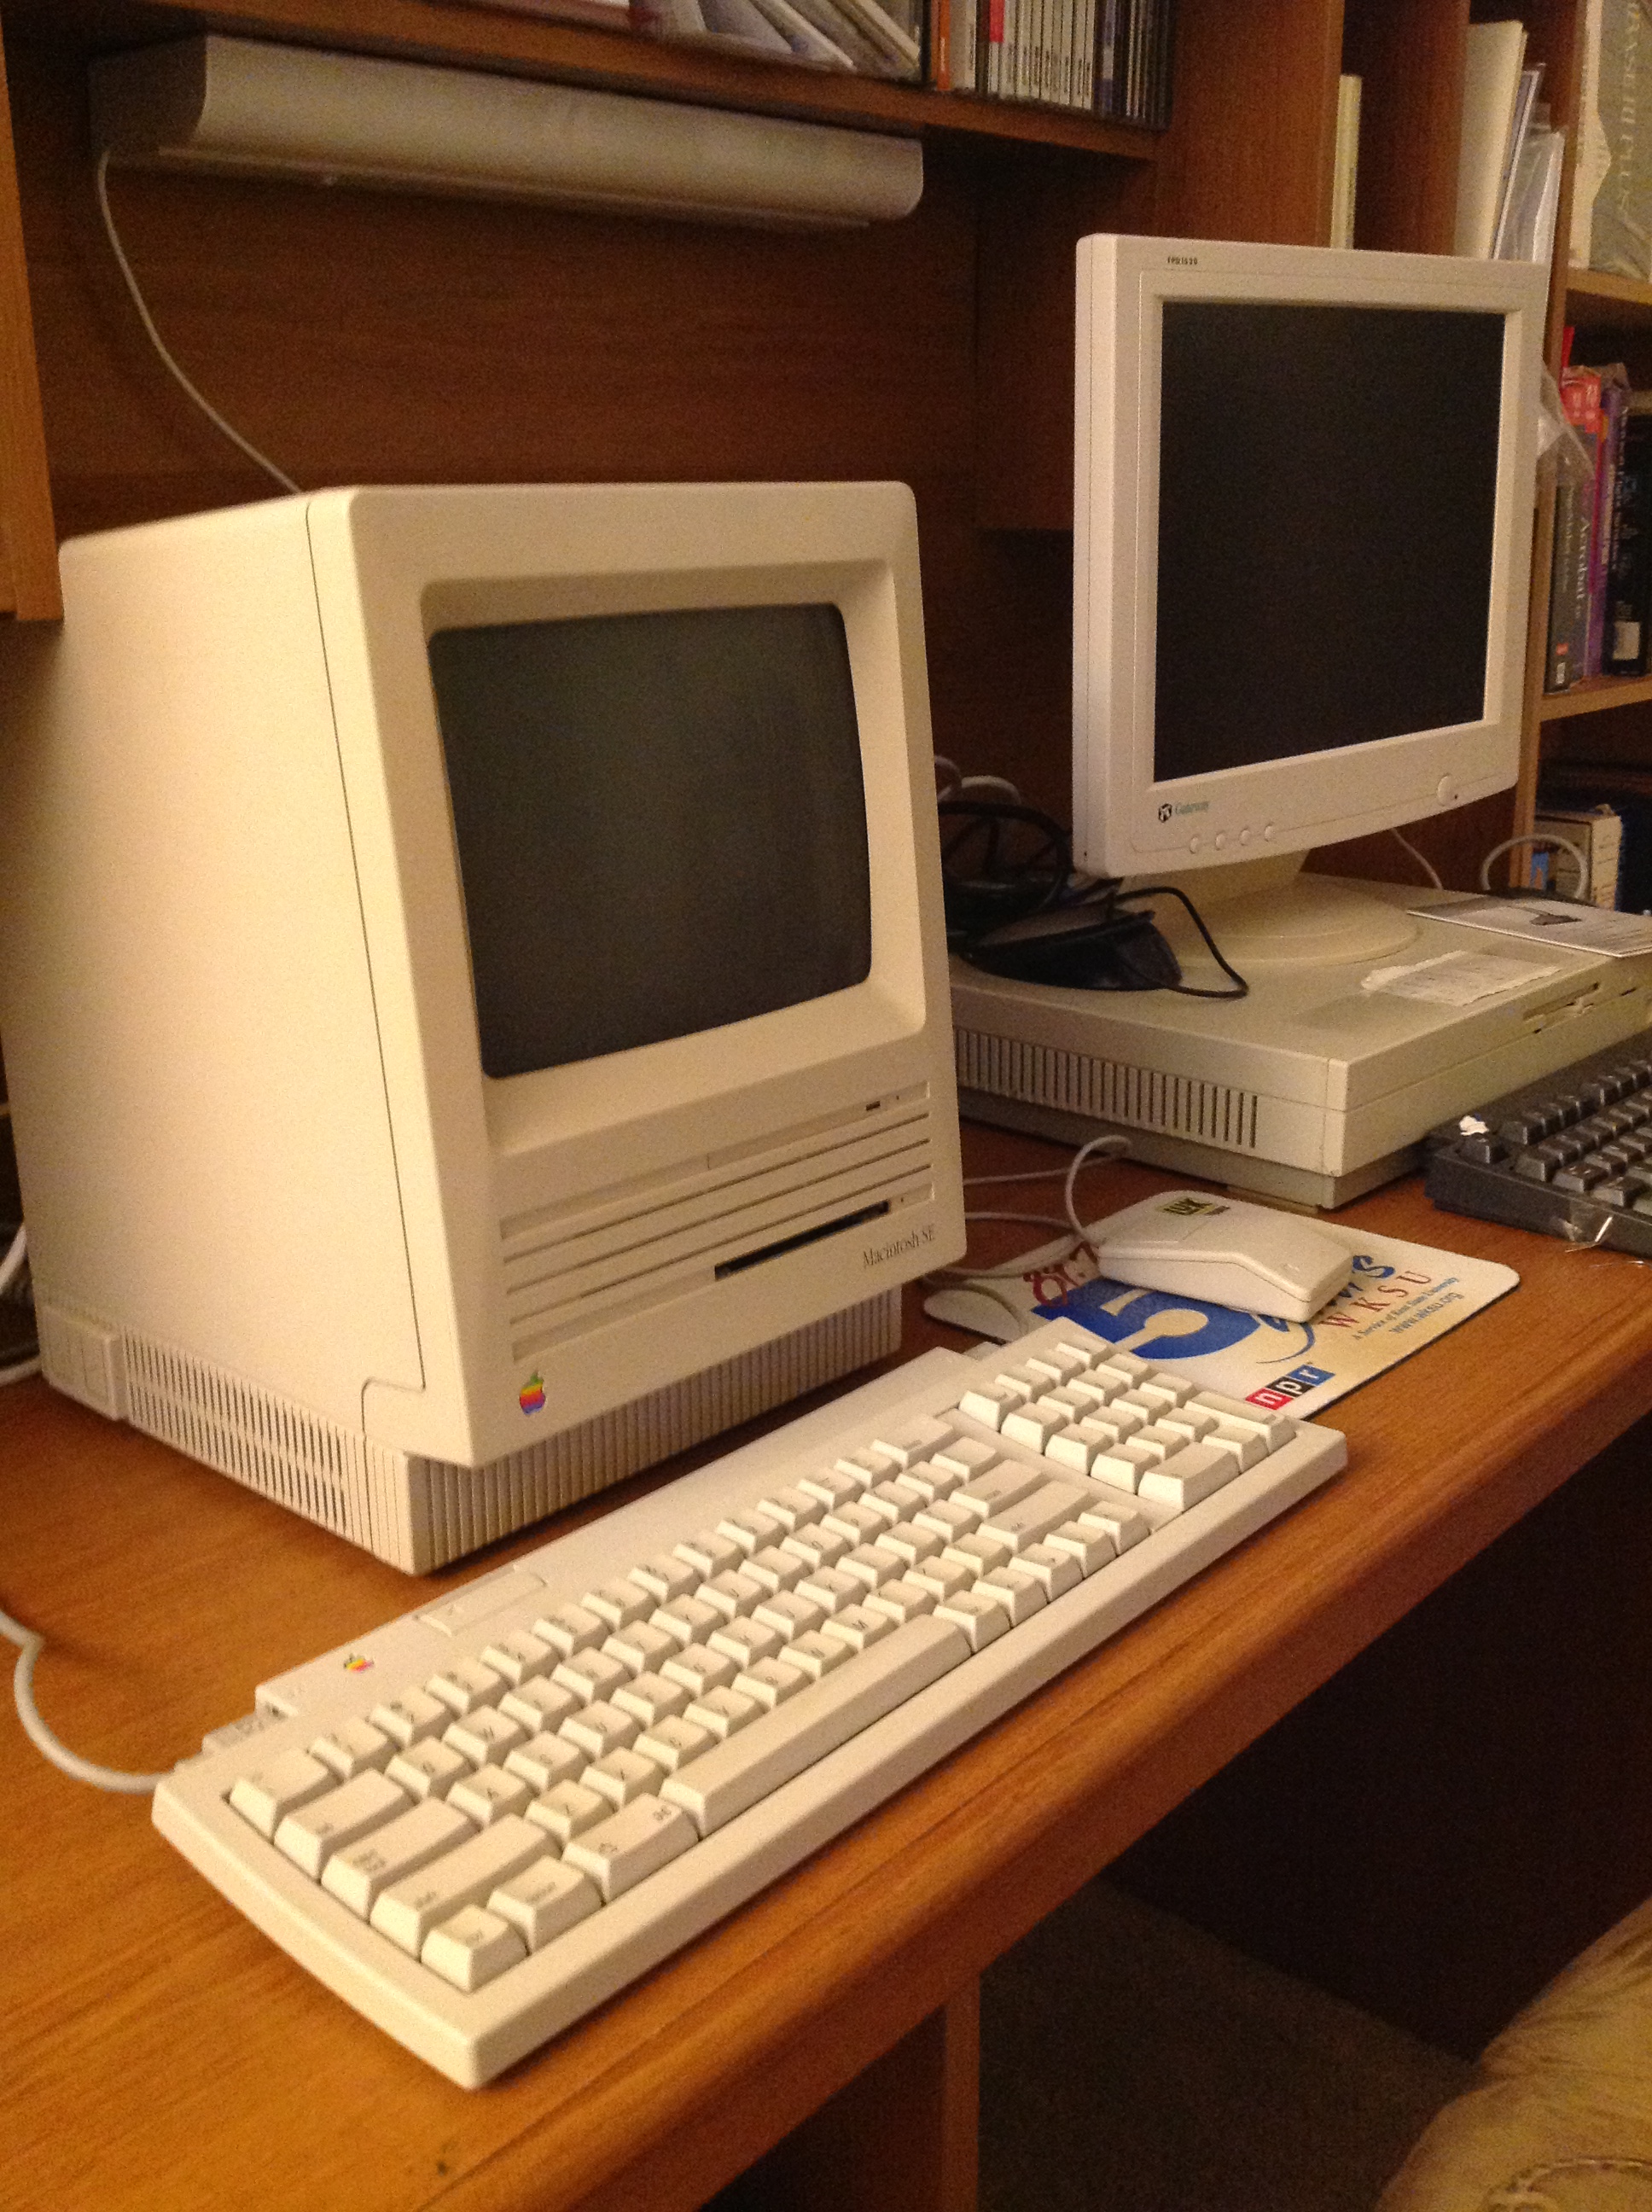
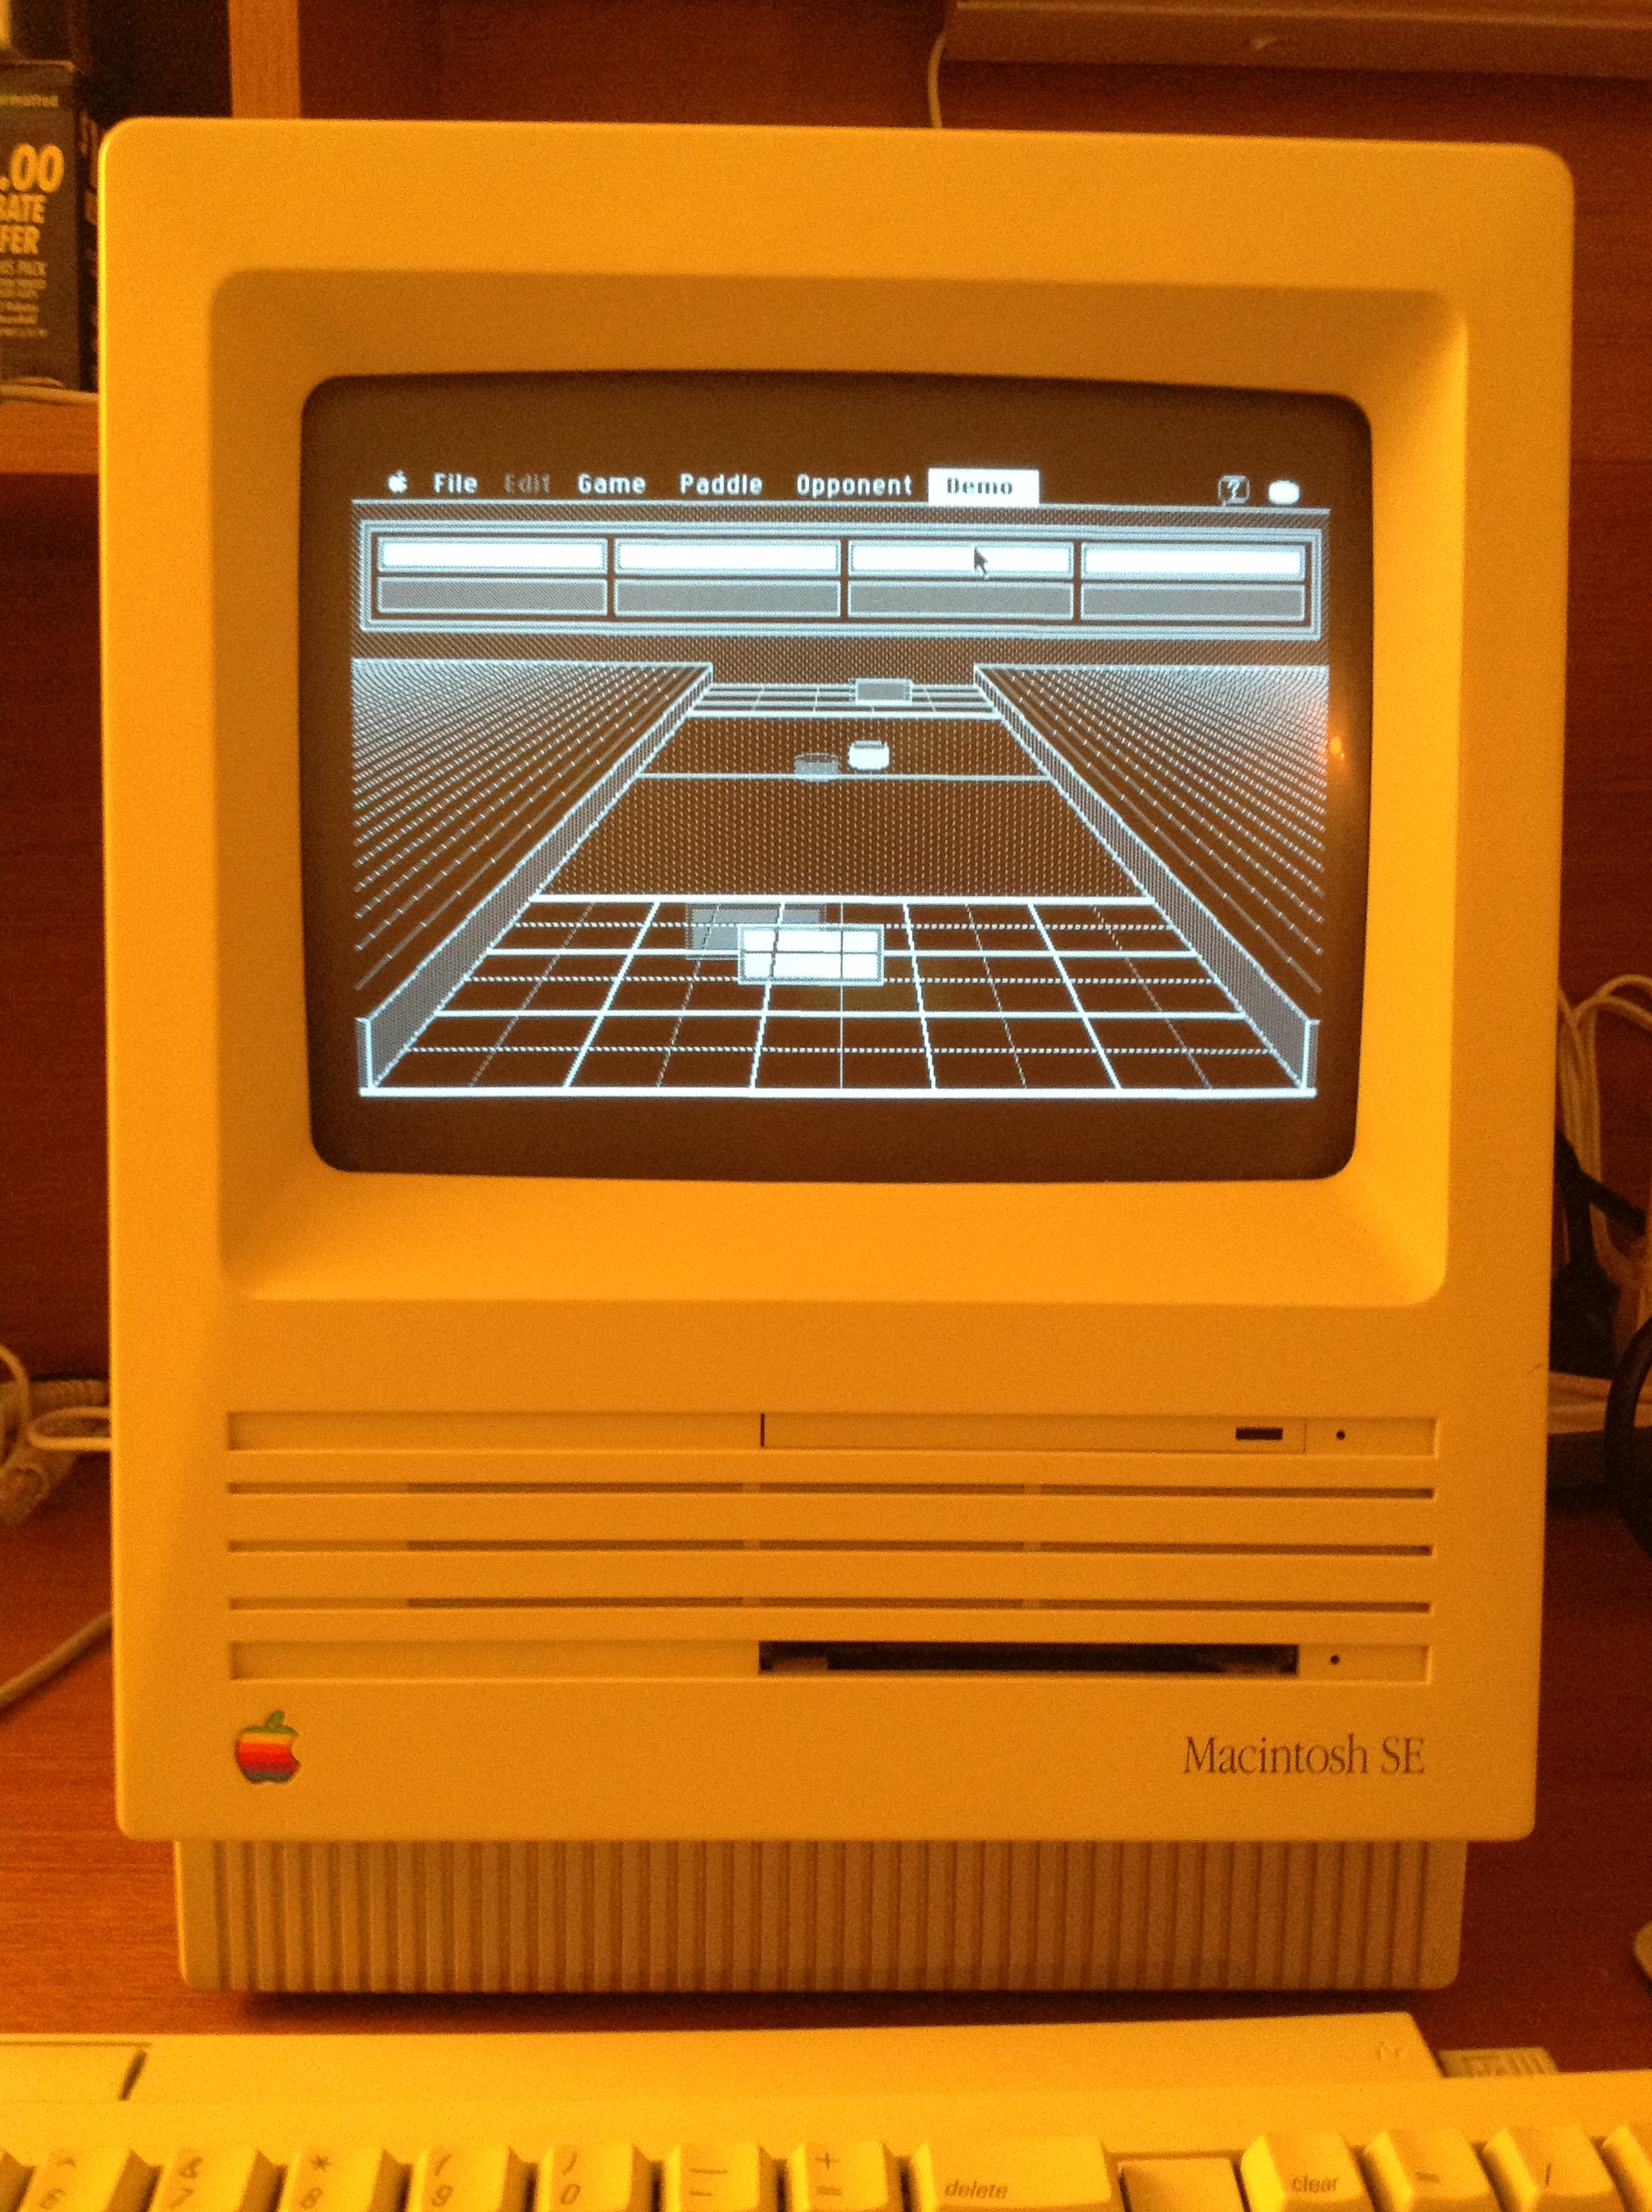
When you sit down with one of these machines at a desk you quickly understand how the subtle angle of the front of the machine puts the screen right in line with where you eyes want to look. The lovely glow the 9″ black and white CRT focuses your attention despite it’s small size. I think this would have been an enjoyable machine to own in 1987-1989, even considering that the price tag at the time for the model that included this 20MB hard drive would have been somewhere substantially north of $3000. Plus, you could play Shufflepuck.
The Macintosh SE is also the best example I own of Apple’s Snow White design language, which saw it’s heyday in the Macintosh line from 1987 to 1990. Previously I’ve talked about how I love the angular, metallic look of many pieces of 80s electronics. Snow White goes in the opposite direction by emphasizing ornamentation and subtle curves in injection molded off-white plastic. The overall effect is stunning. It’s somehow very 1980s but at the same time stands out among other designs.
You can learn more about the different components of Snow White from Ed Tracy’s excellent 1998 graduate school project about Apple’s industrial design. You may have also seen these wild prototypes that came out of the studies that designer Hartmut Esslinger from Frog Design created for Apple while developing the Snow White look. One of the first Snow White products was the memorable Apple IIc, which may be my favorite looking computer, period.
![]()
The idea behind Snow White was to take full advantage of the fact that Apple used injection-molded plastic cases rather than the sheet metal other computers used. If computers need air vents for cooling anyways, why not adorn plastic computer cases with horizontal and vertical lines that look like vents so they distract your attention from where the real vents are?
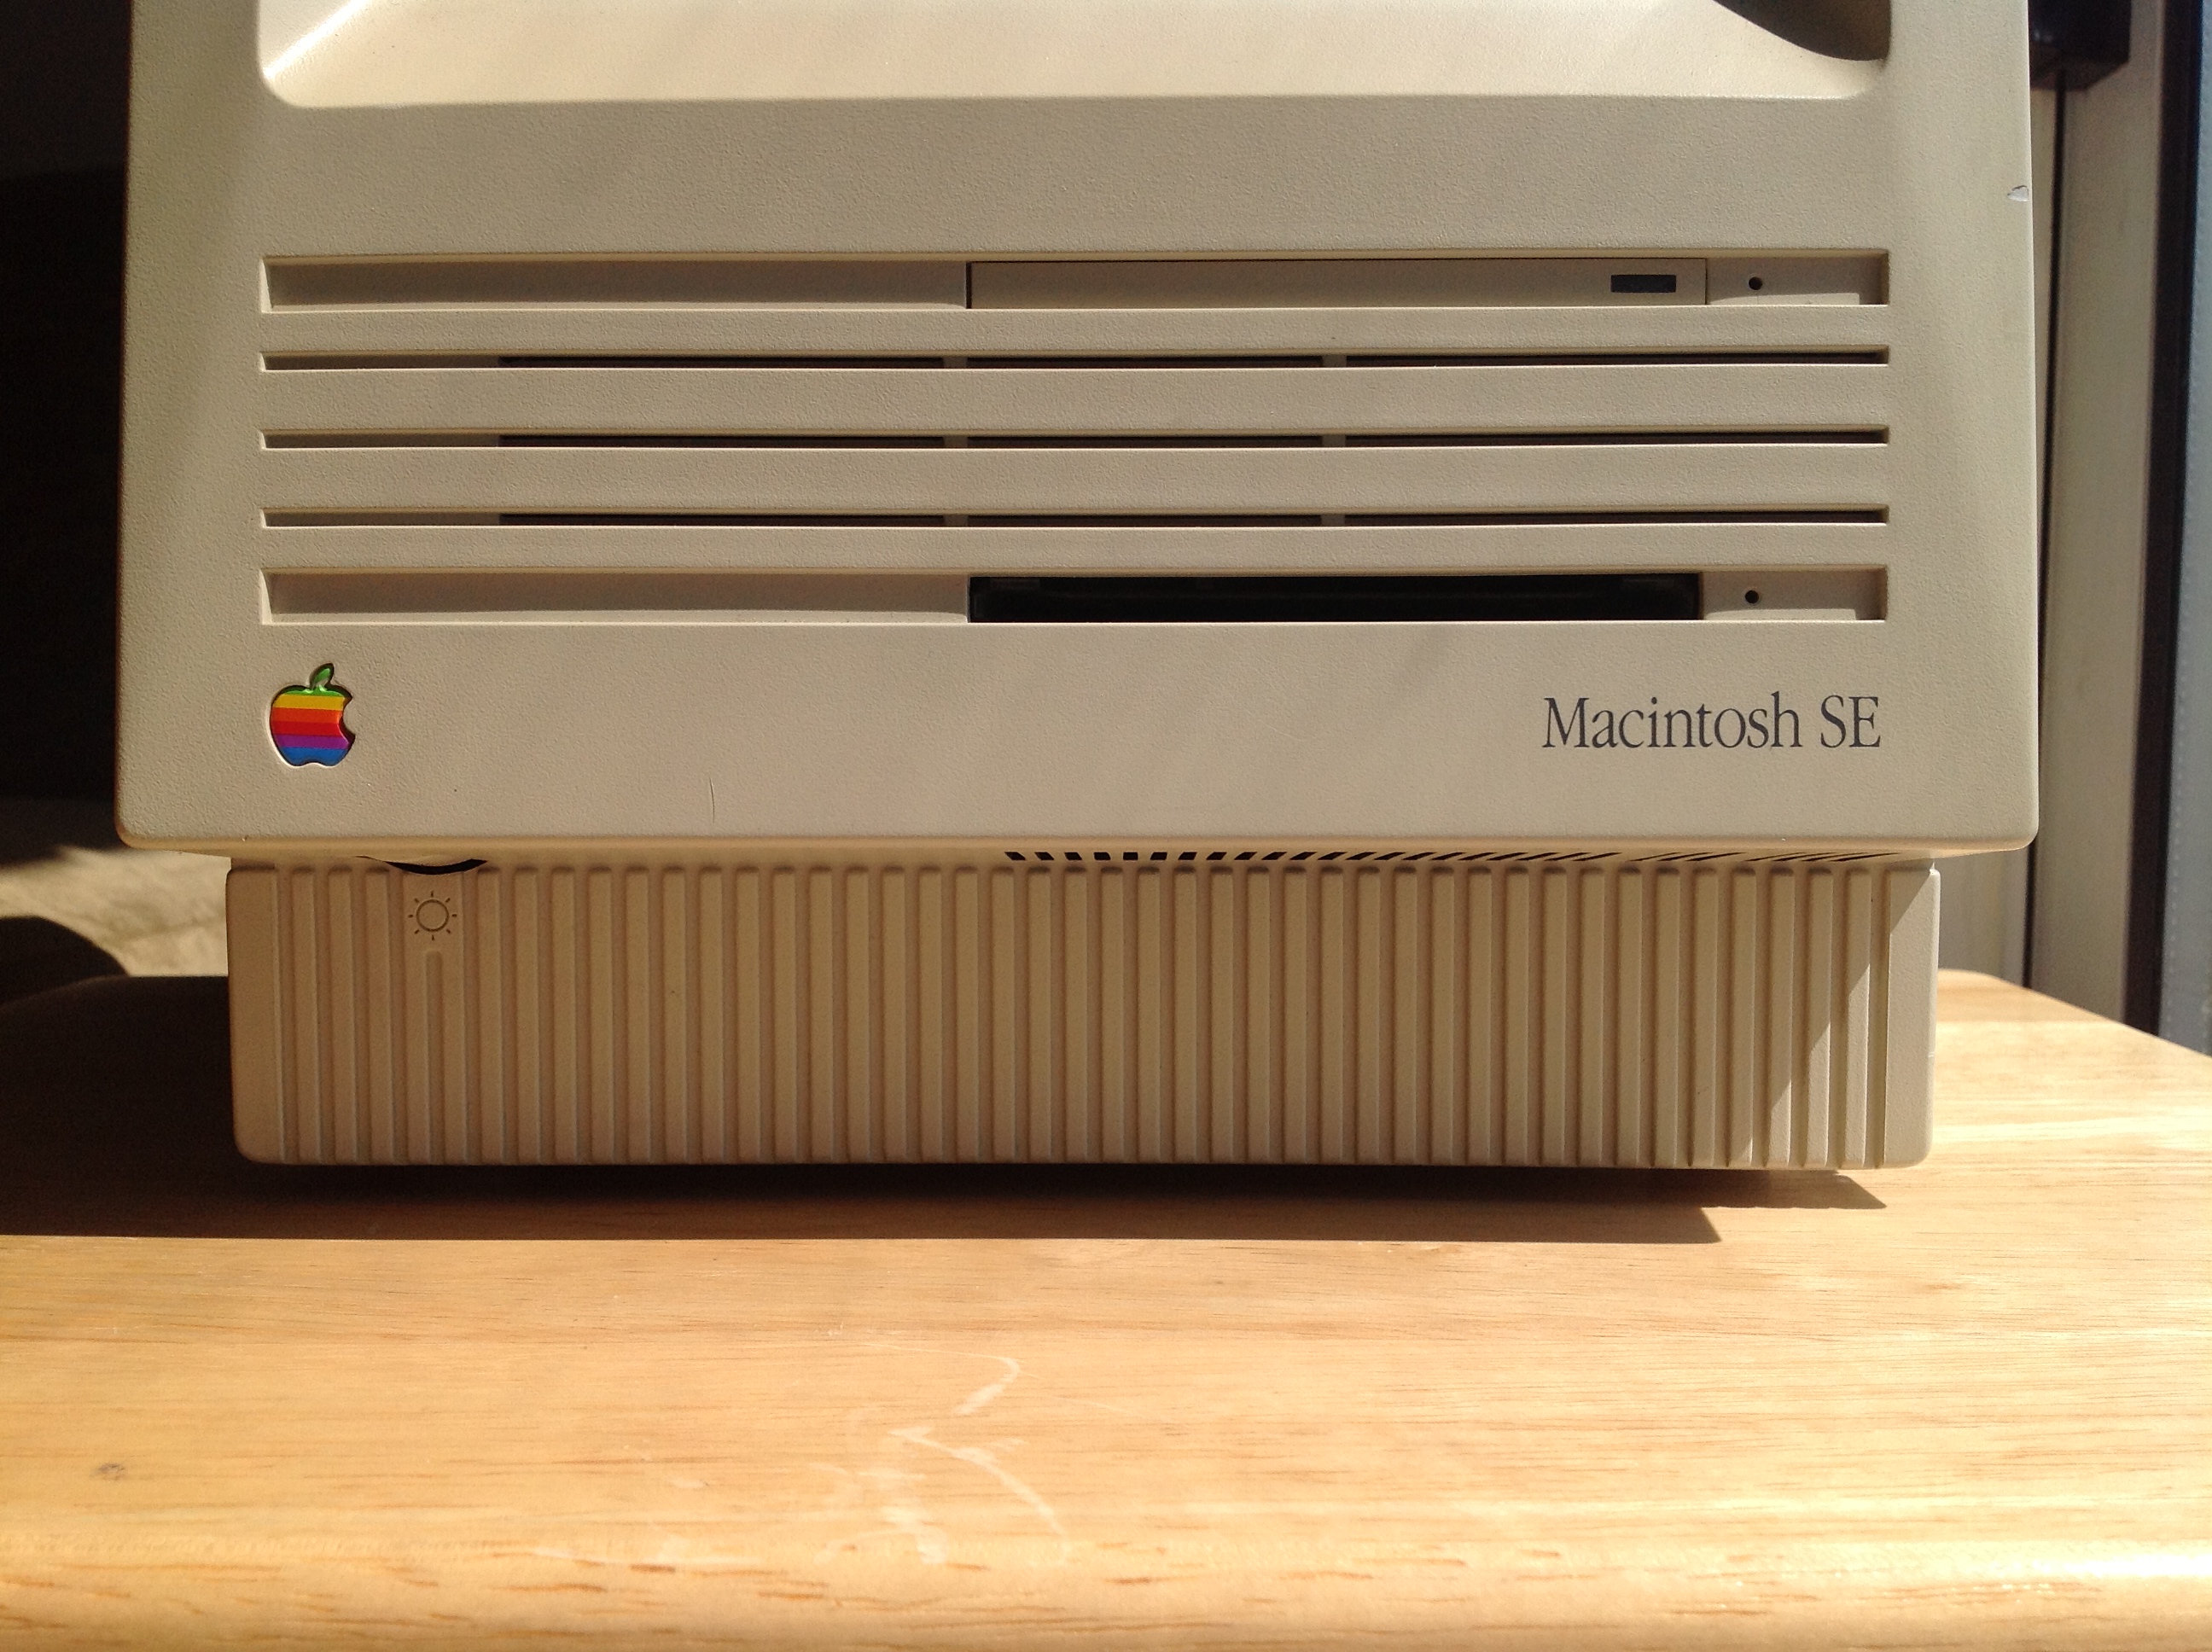
On the front of the Macintosh SE this results in a “grill” that contains the floppy drive, the hard drive indicator light and an air vent.
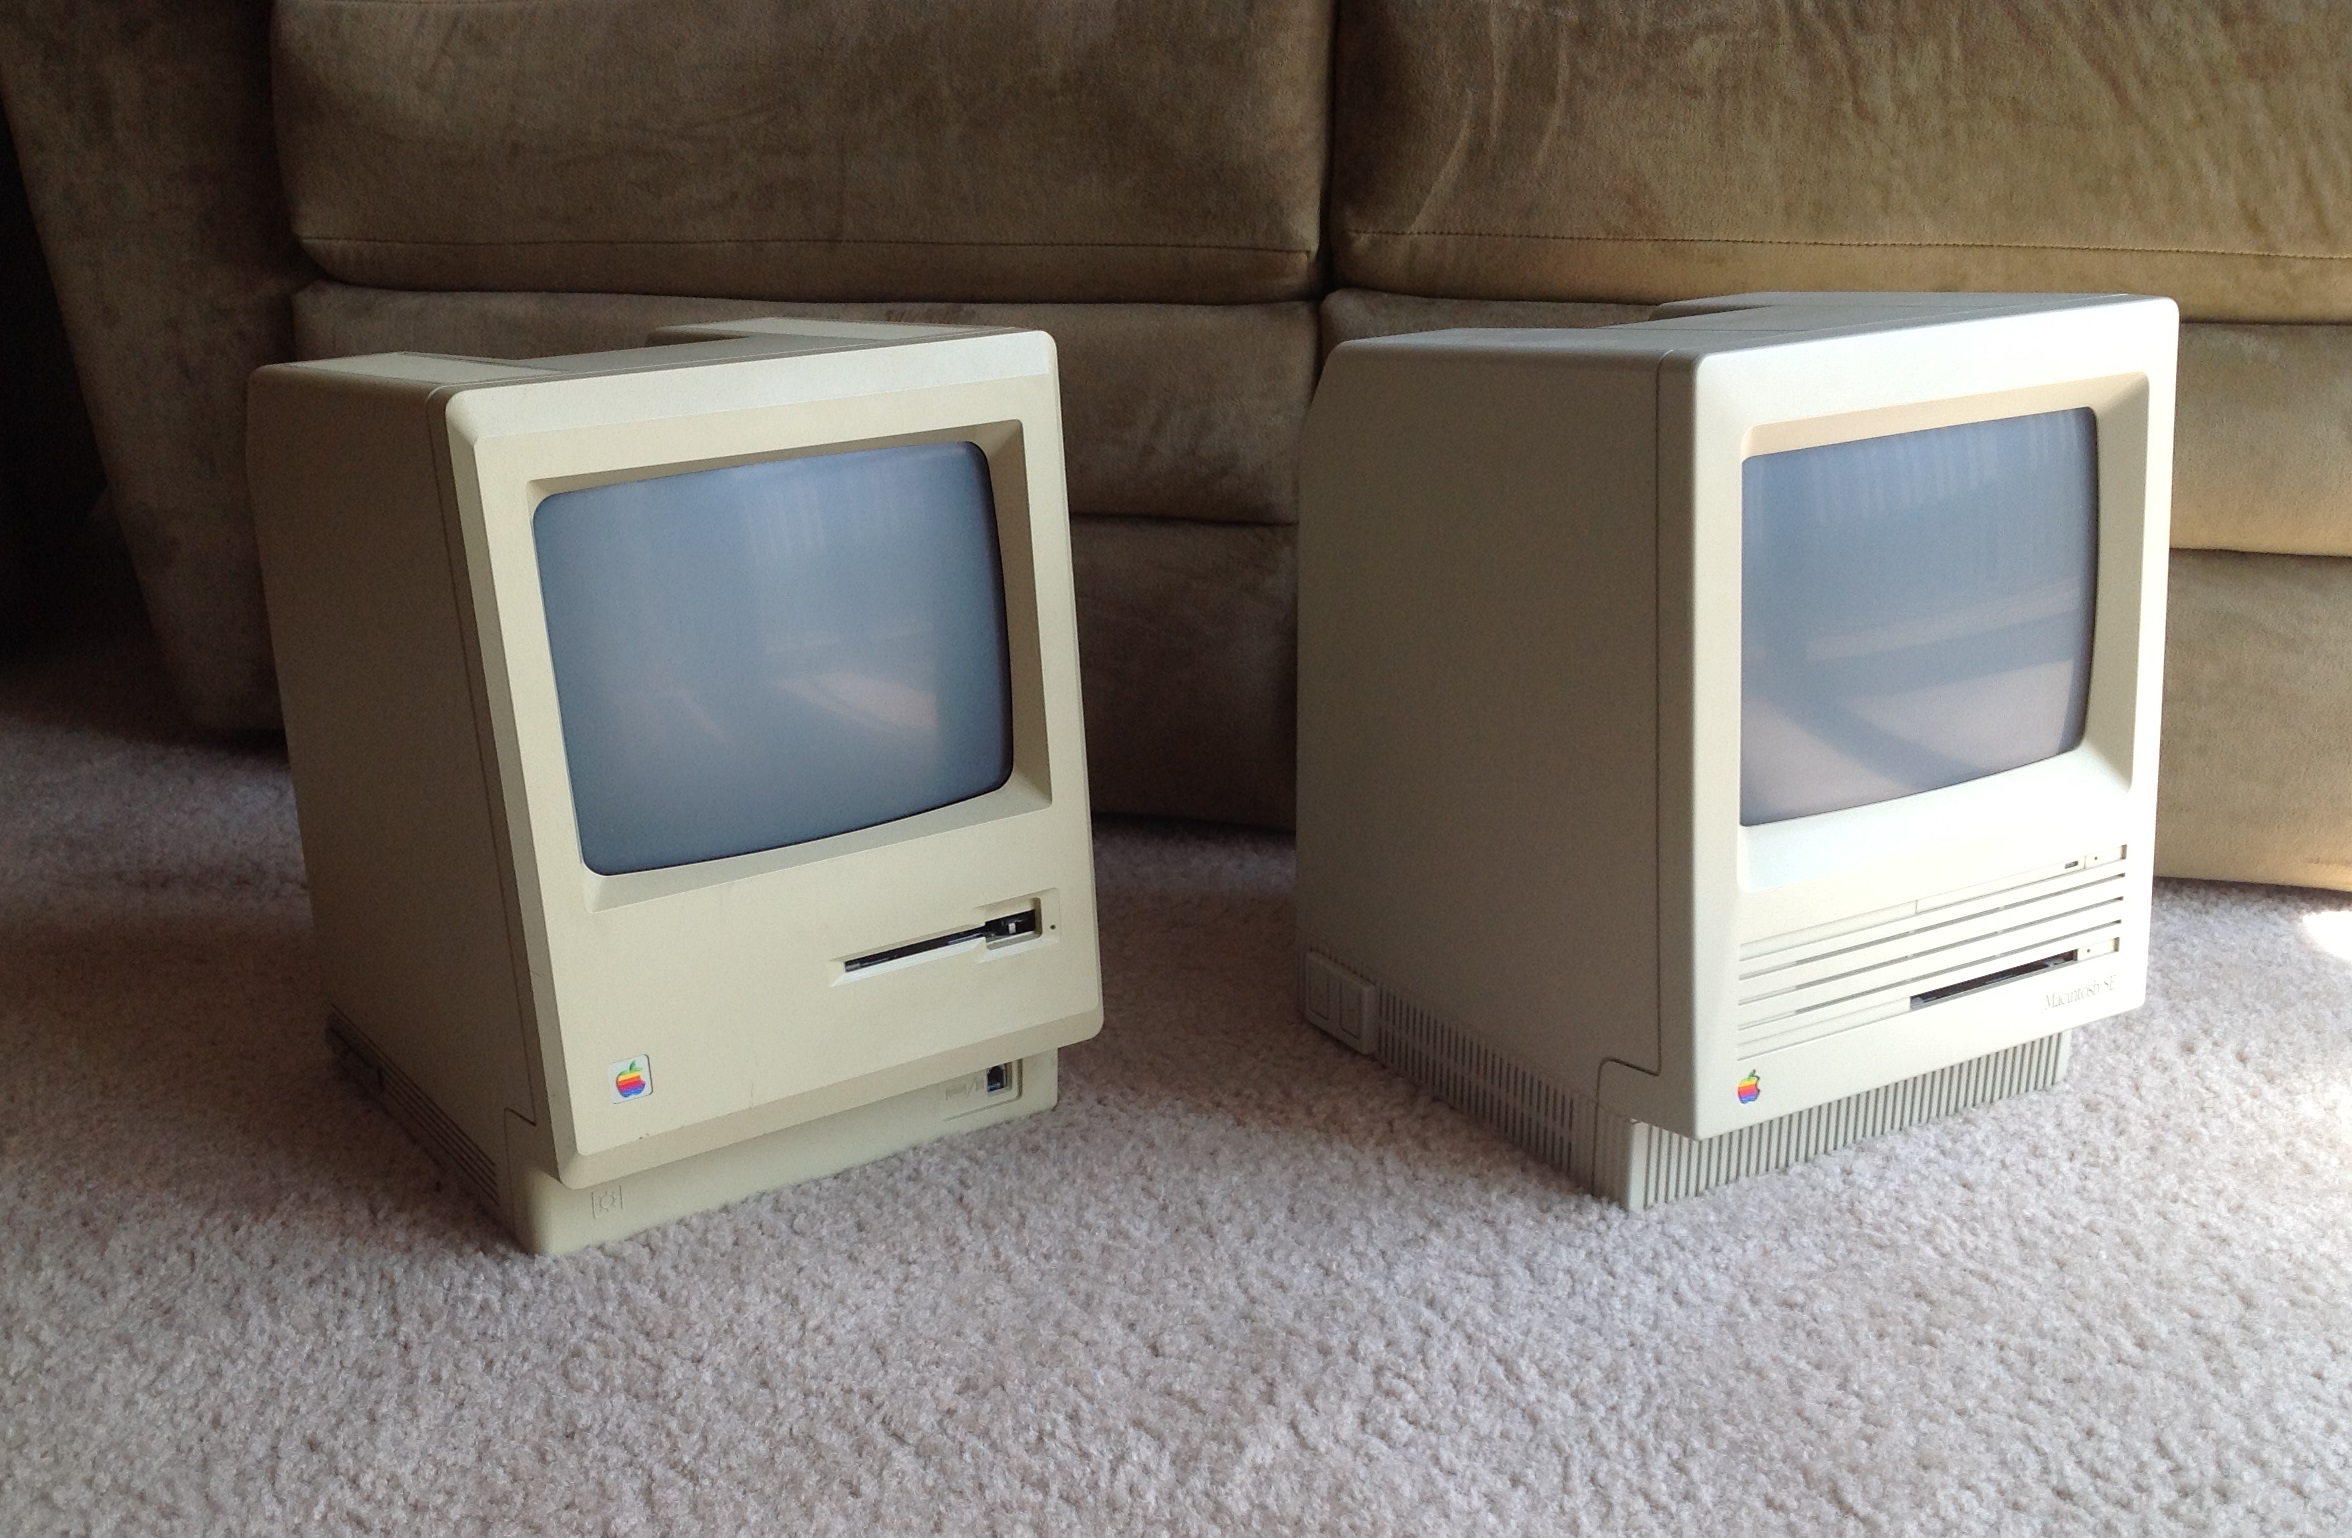
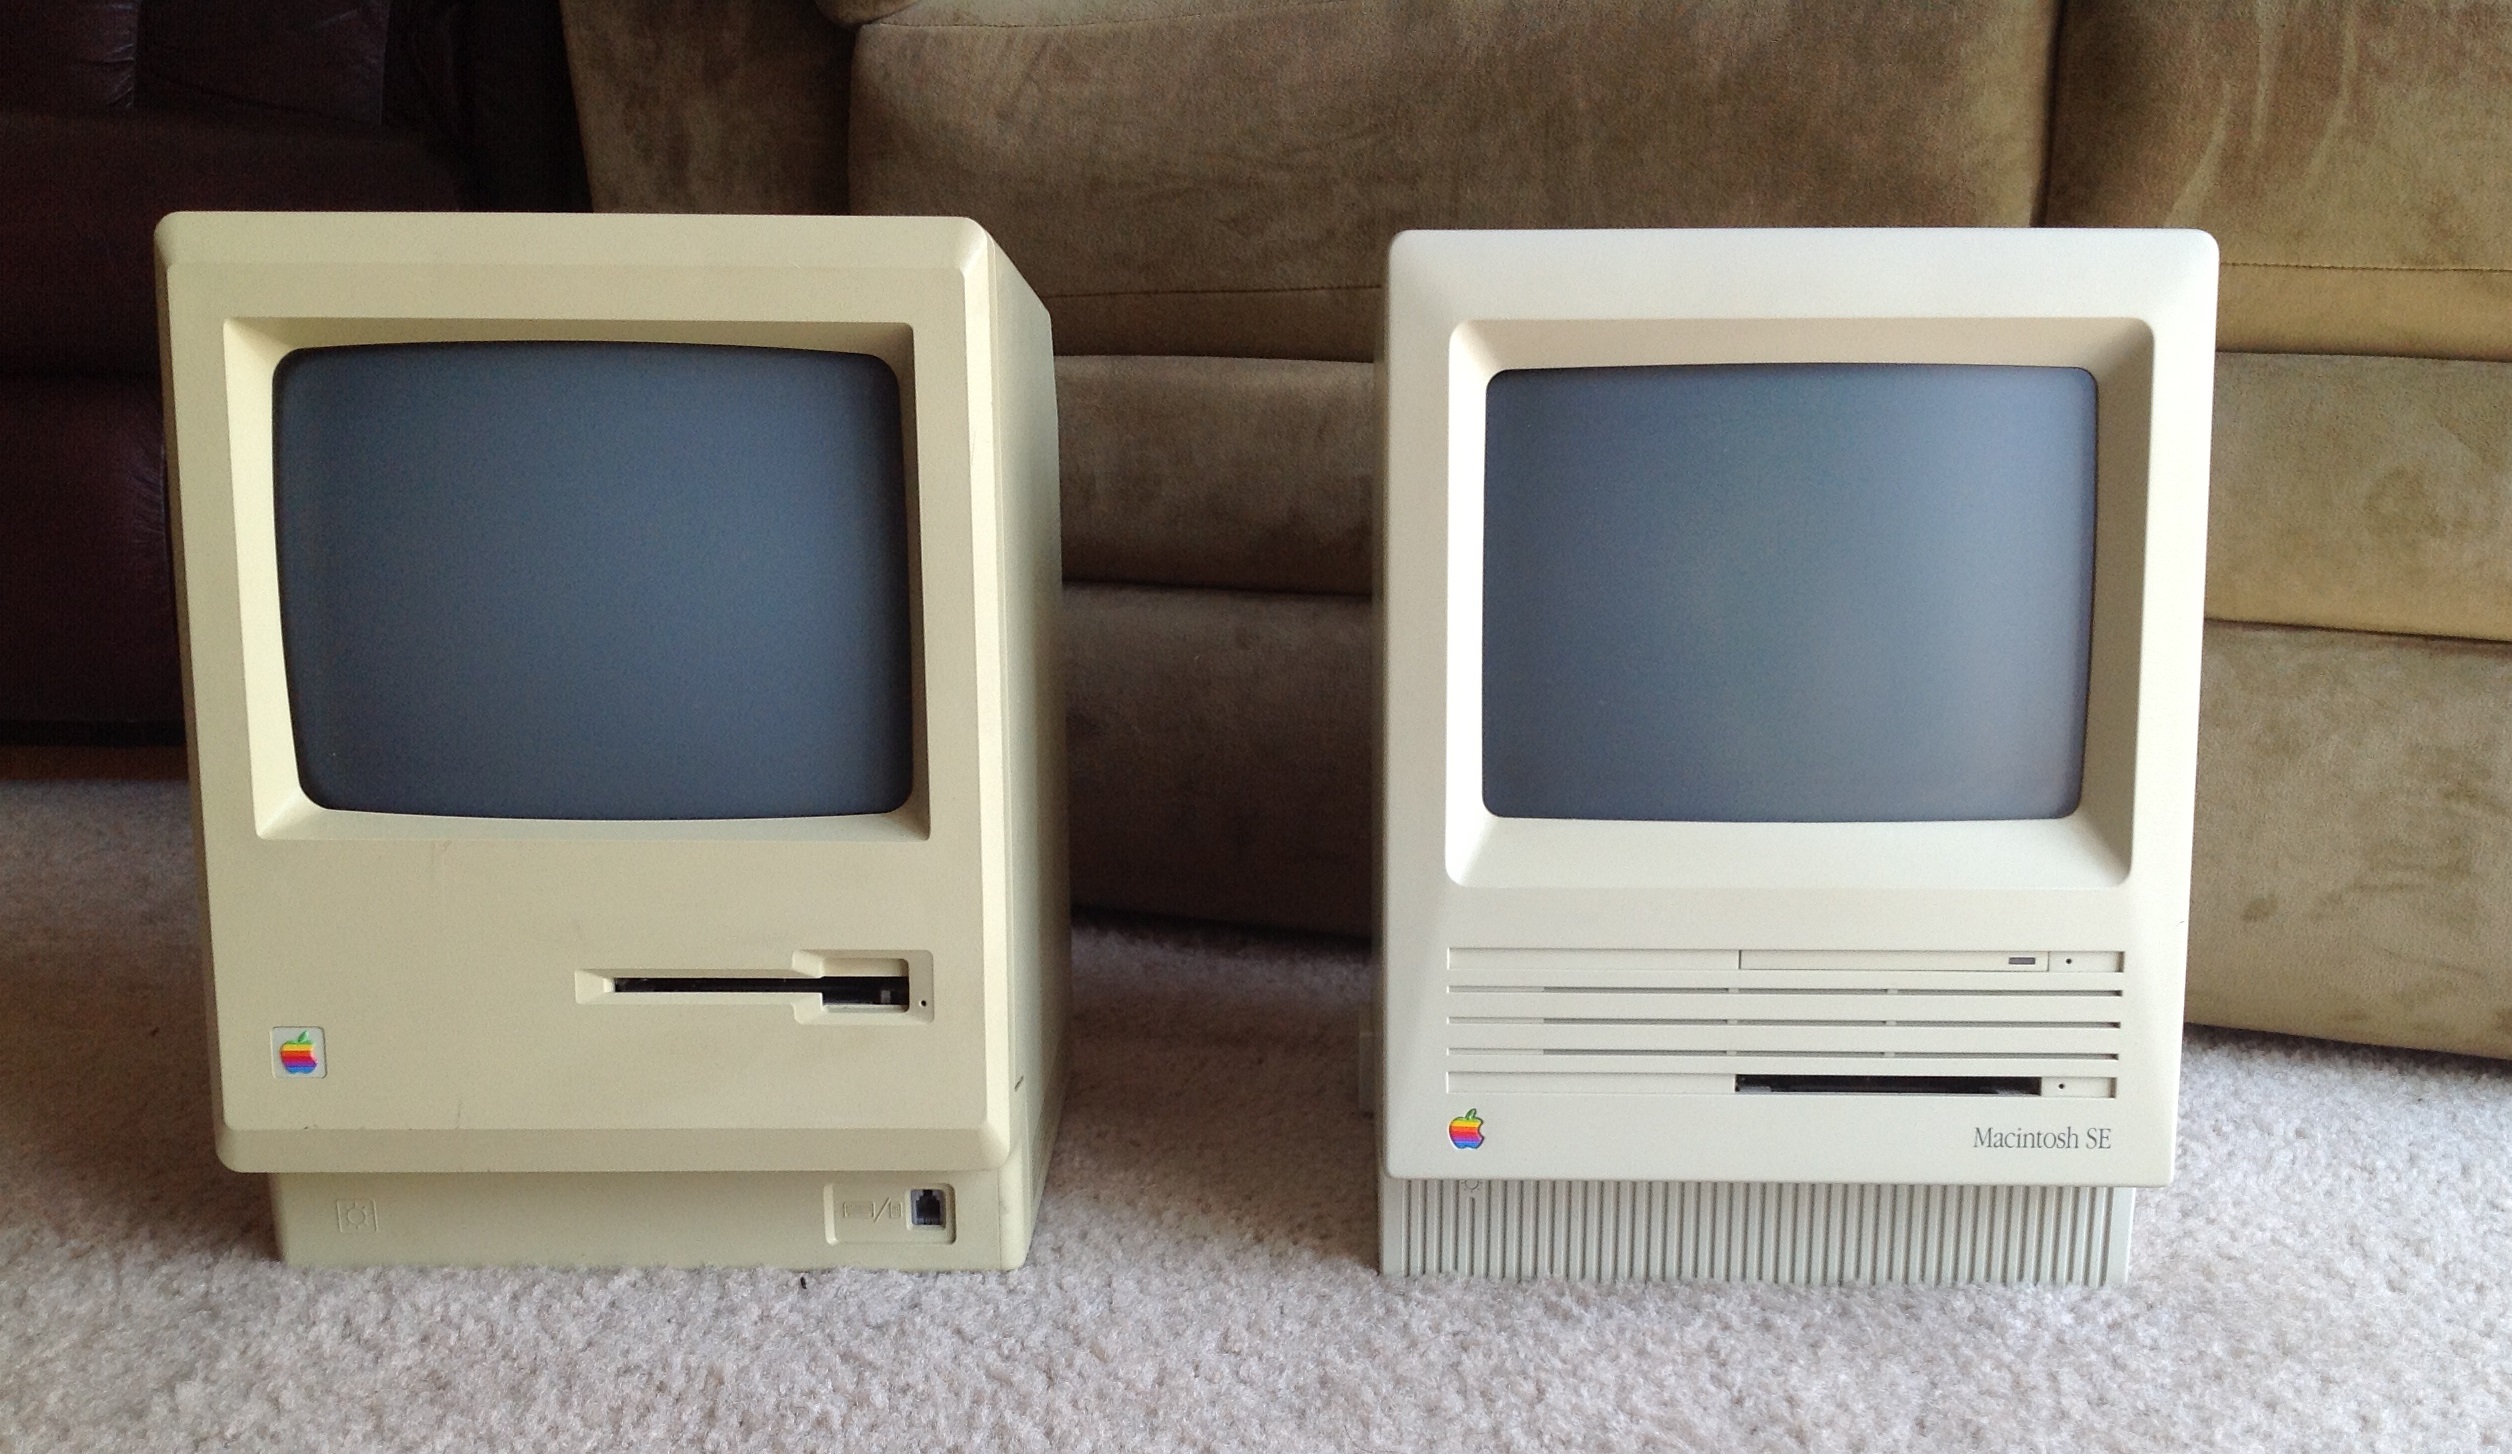
Adding the grill drastically changes the appearance of the front of the machine as compared to the original Macintosh case, even though both machines have basically the same dimensions. The front of the original Macintosh is dominated by the large bevels that surround the floppy disk drive where on the SE the floppy disk is de-emphasized as a thin line that matches the rest of the grill.
My favorite Snow White design element is the pedestal of vertical lines along the base of the Macintosh SE and the Macintosh II series cases.
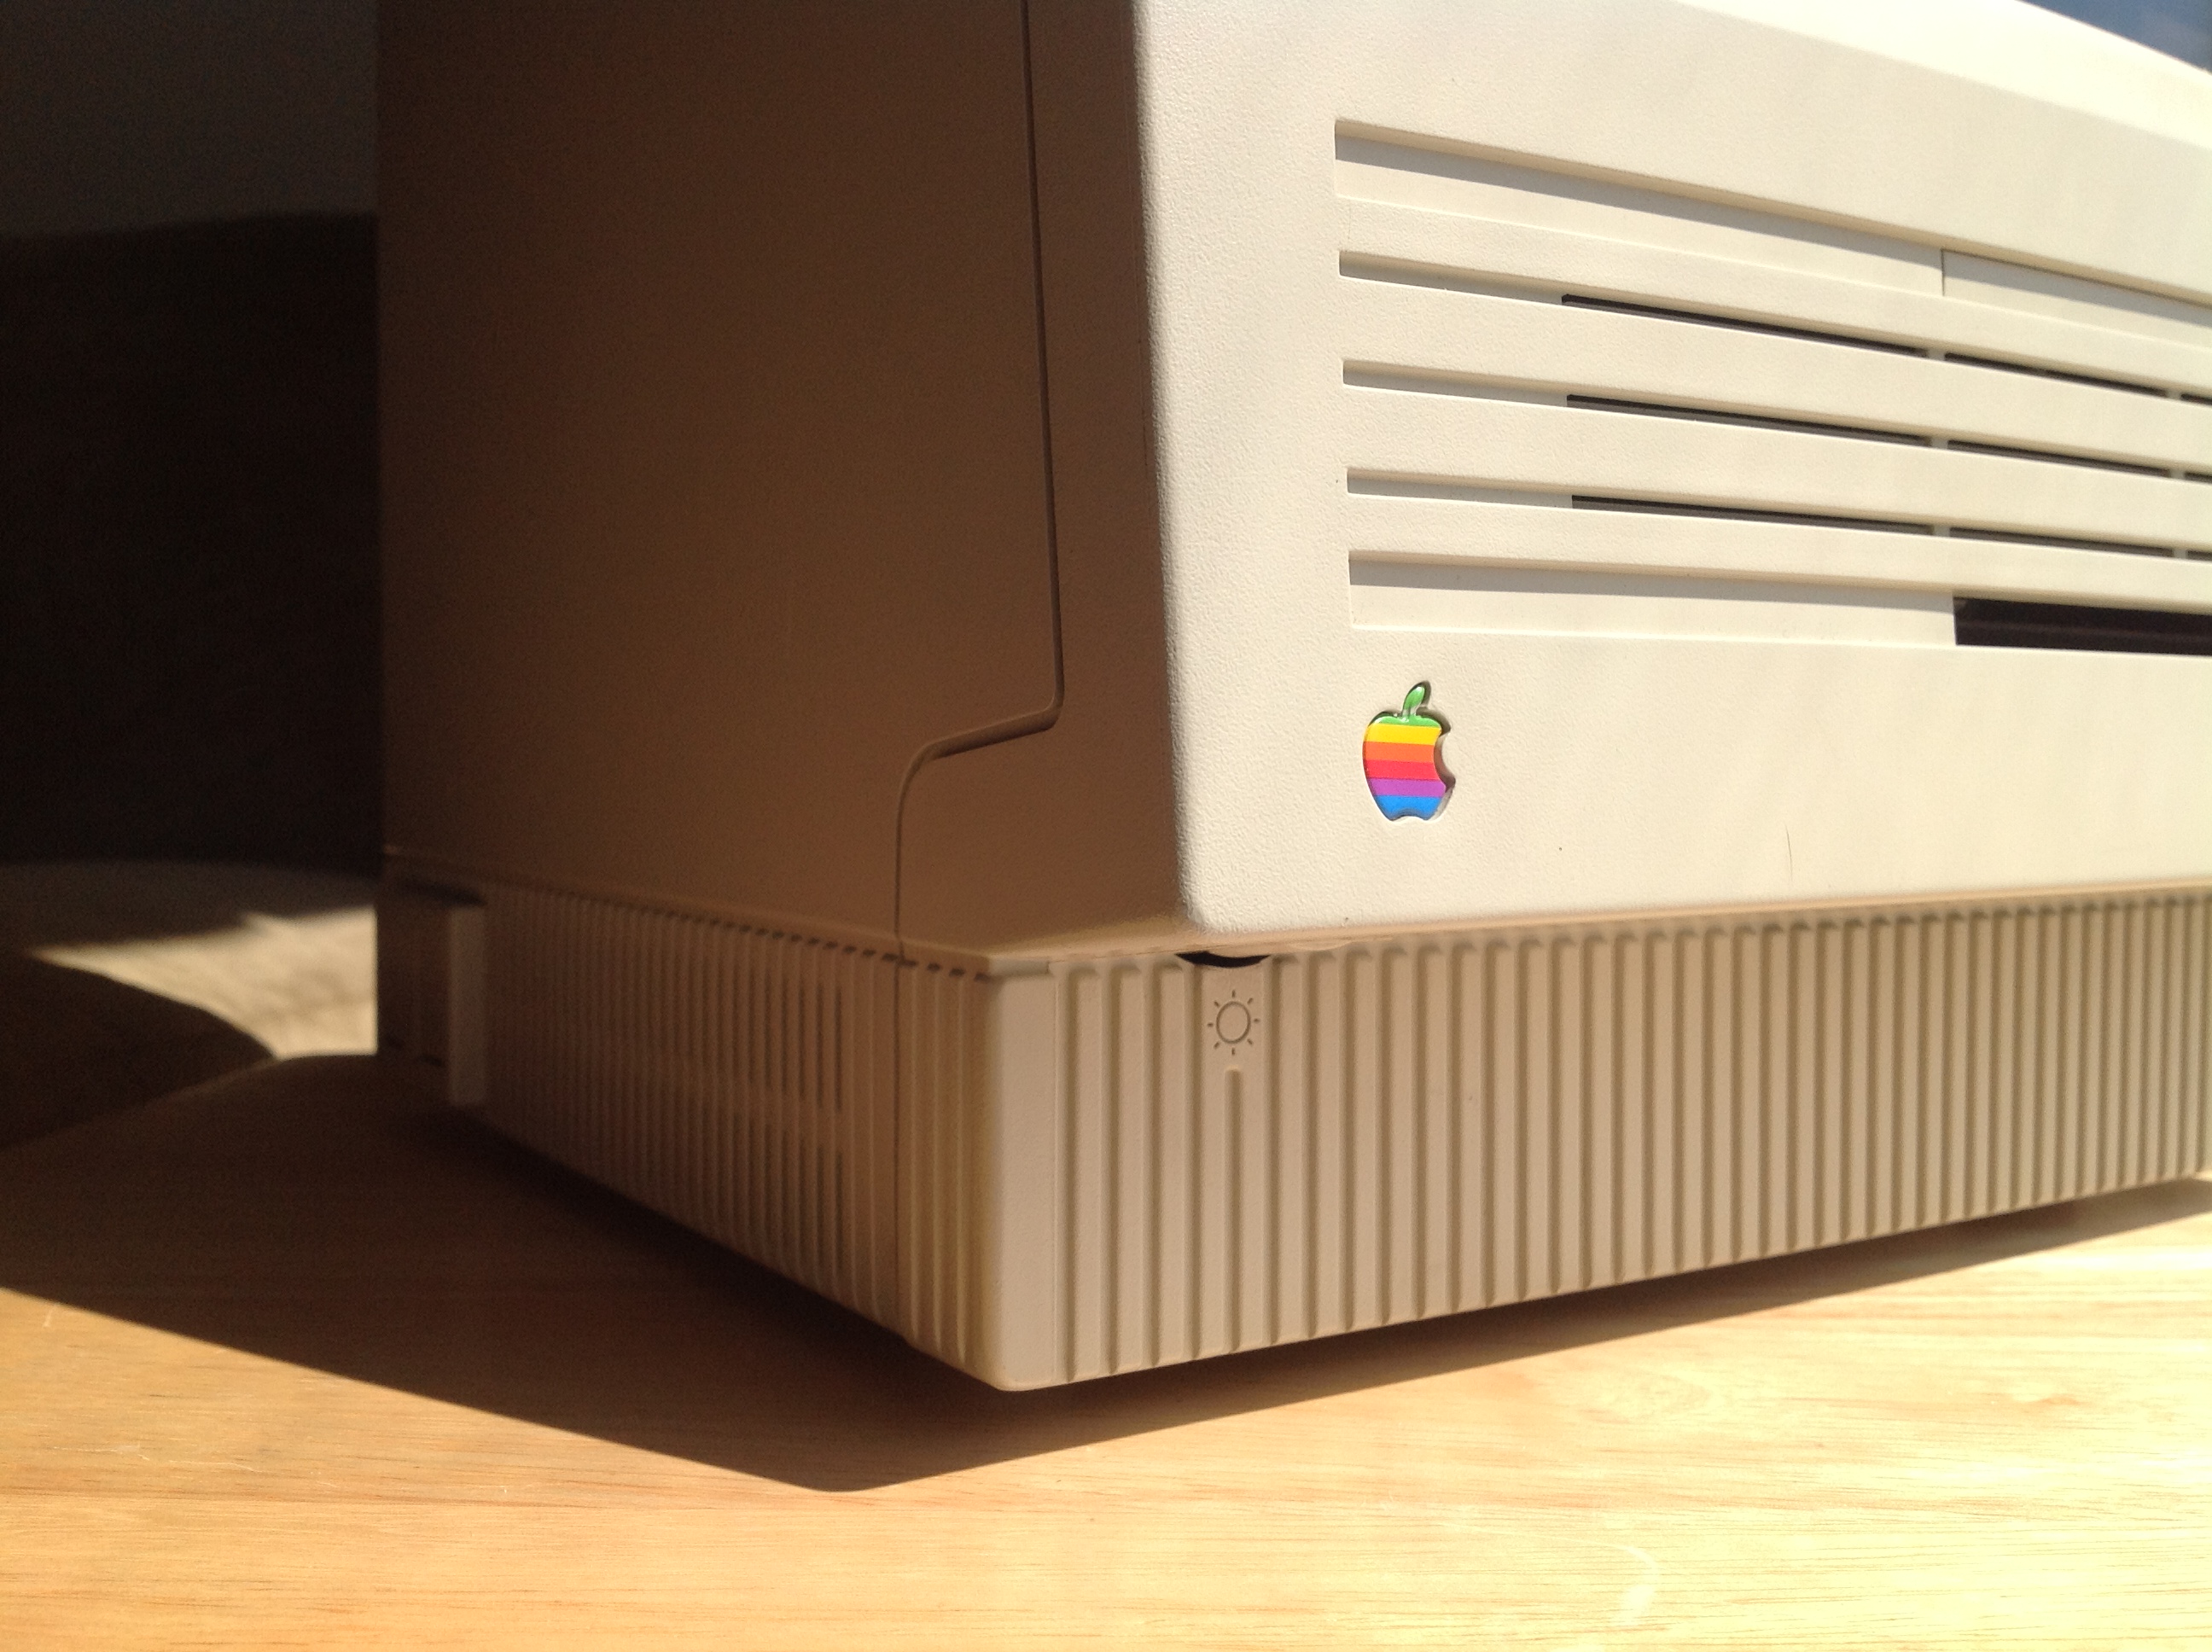
The lines on the pedestal help to conceal the air vents on the side of the machine that had been much more apparent on the previous compact Macintosh cases.
Sadly, the pedestal feature is often hidden behind the keyboard sitting in front of the computer.
Apple also produced monitors, CD drives, external hard drives, printers, scanners, and other accessories with Snow White designs from about 1986-1990. A fellow could fall down a deep rabbit hole collecting all of them.
I’m somewhat enamored with the various Snow White computers and accessories. In my opinion the Snow White designs have so much more personality than practically every other personal computer ever made, including Apple’s current product line. Plastic might be out of vogue today, but Snow White showed us that plastic can be just as profound as brushed metal.
Before I really dug into learning about the Snow White look, I thought the Macintosh SE looked a bit funky. The loss of the beveled edges the original Macintosh introduced gives the Macintosh SE a fat “chin” below the floppy drive. If you sit a big keyboard in front of it so that the main Snow White feature you’re looking at is the grill below the screen, the machine loses at lot of it’s appeal. However, as I have read more about Snow White I have come to appreciate the appearance of the Macintosh SE.
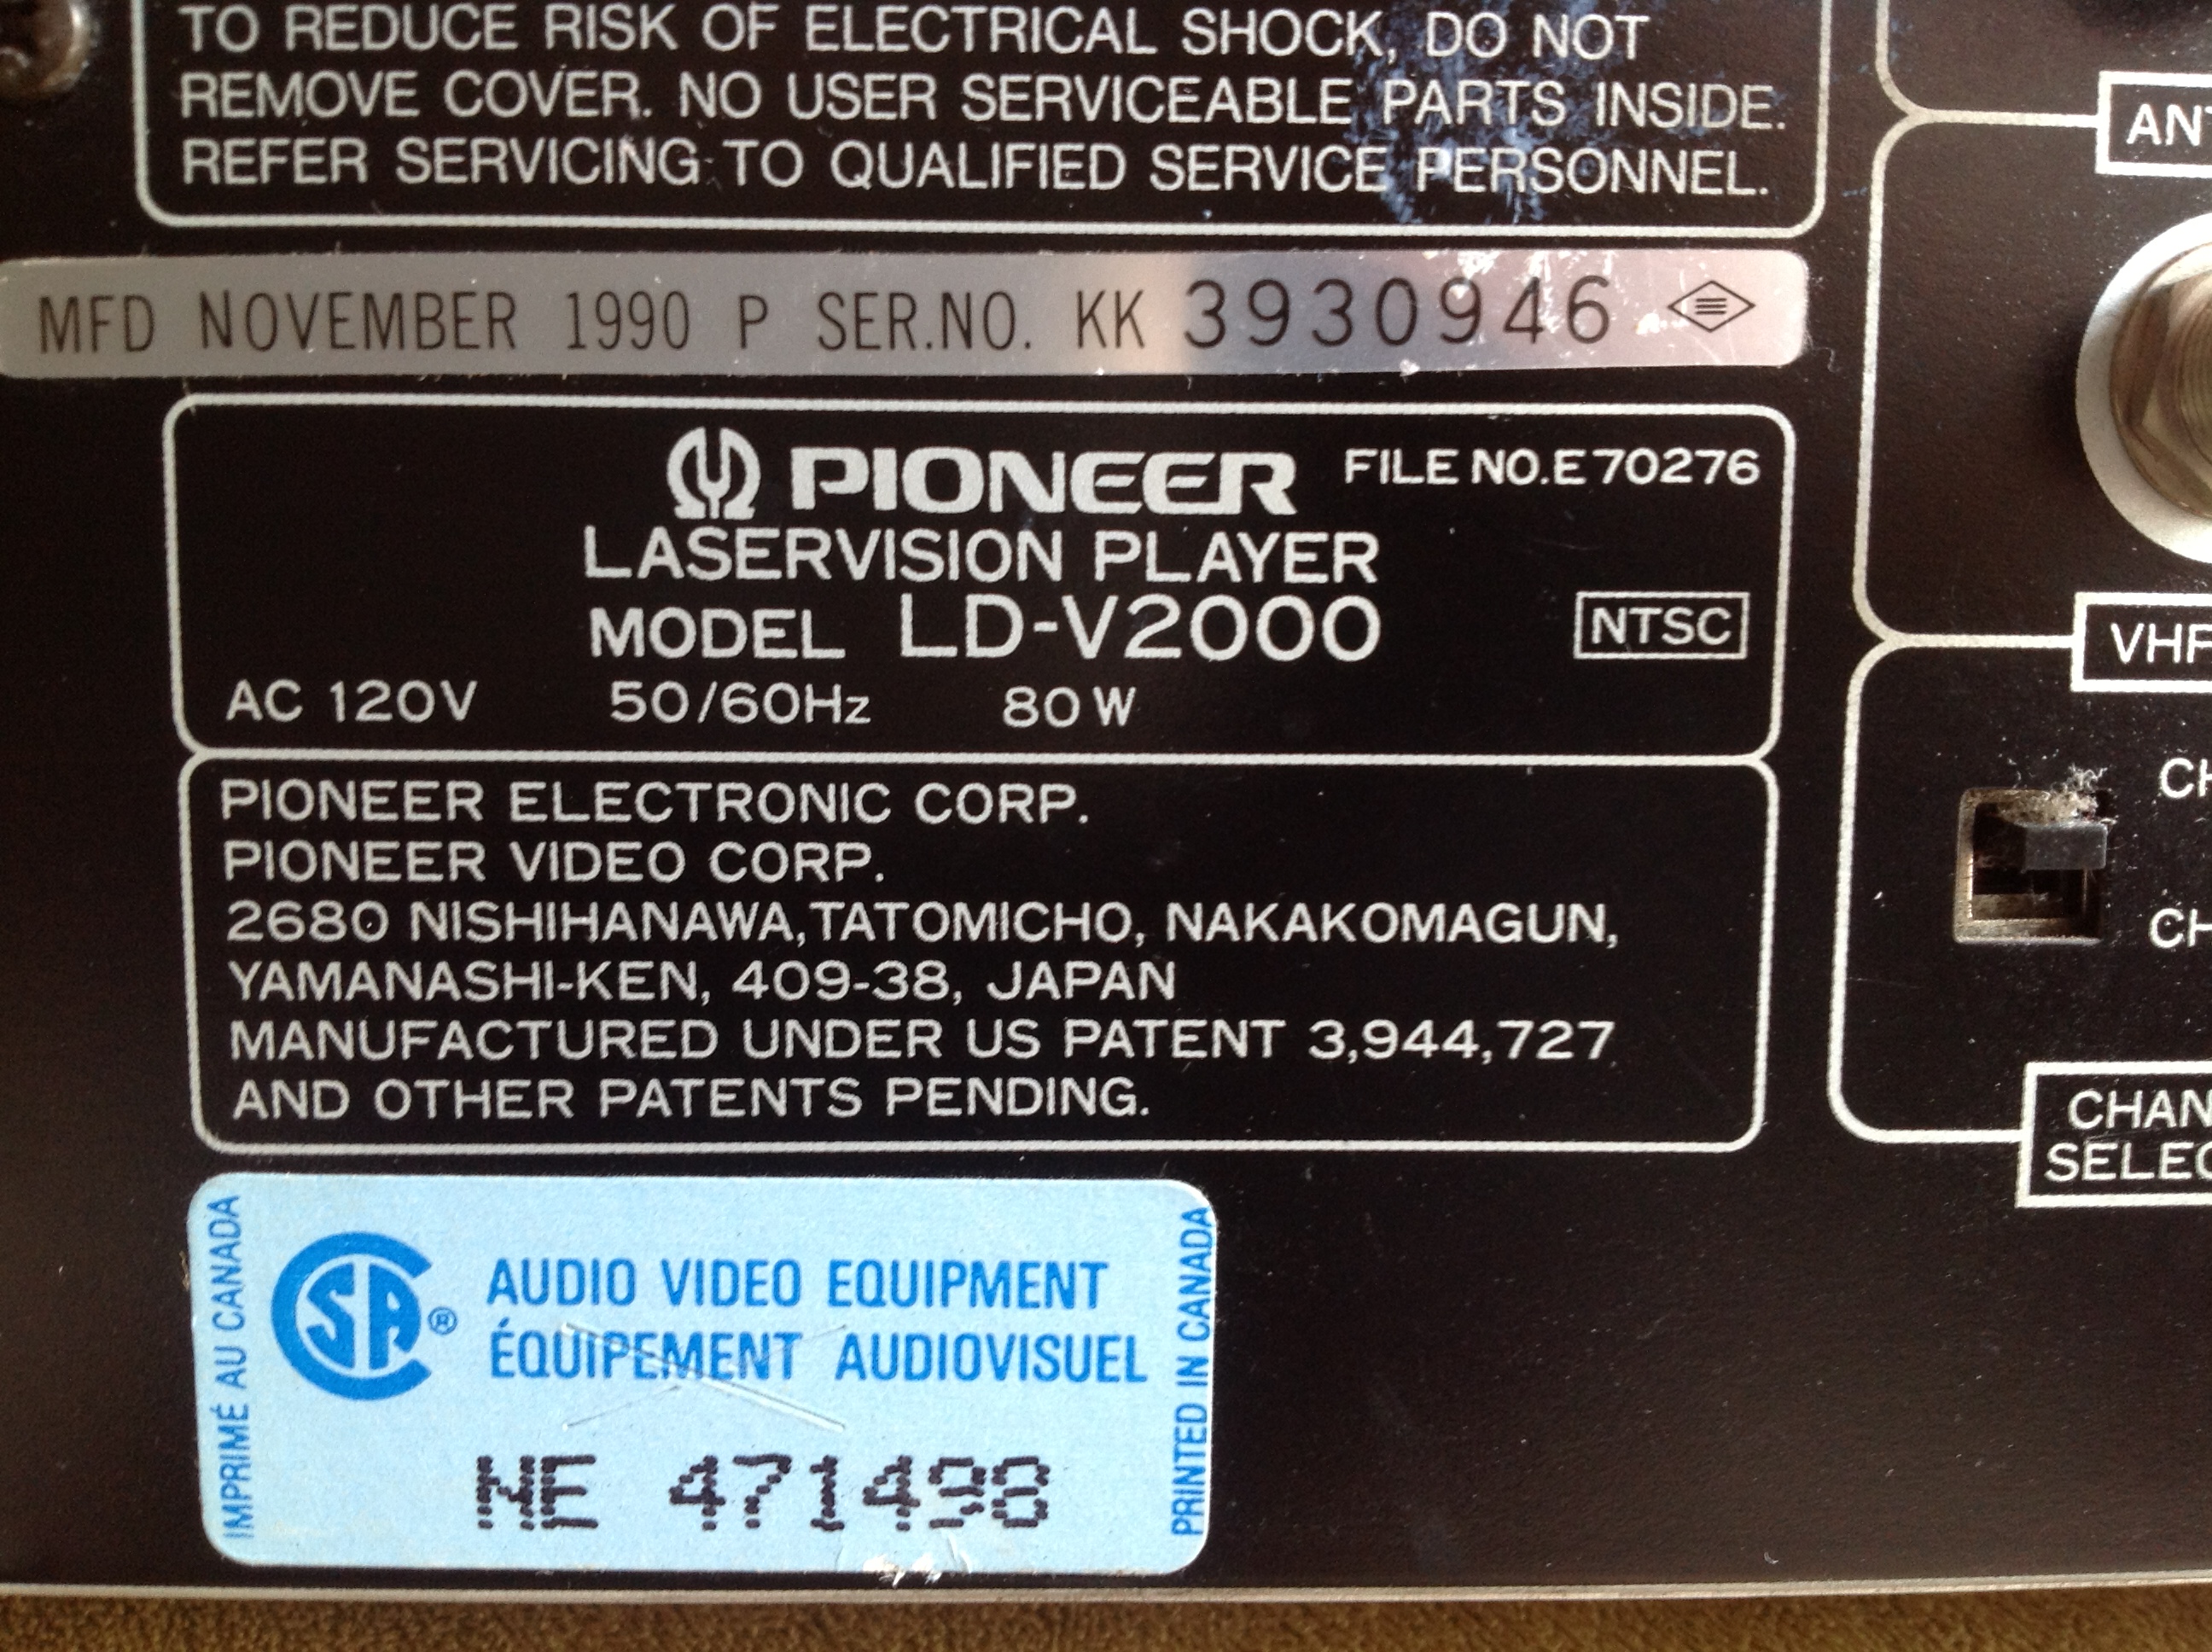
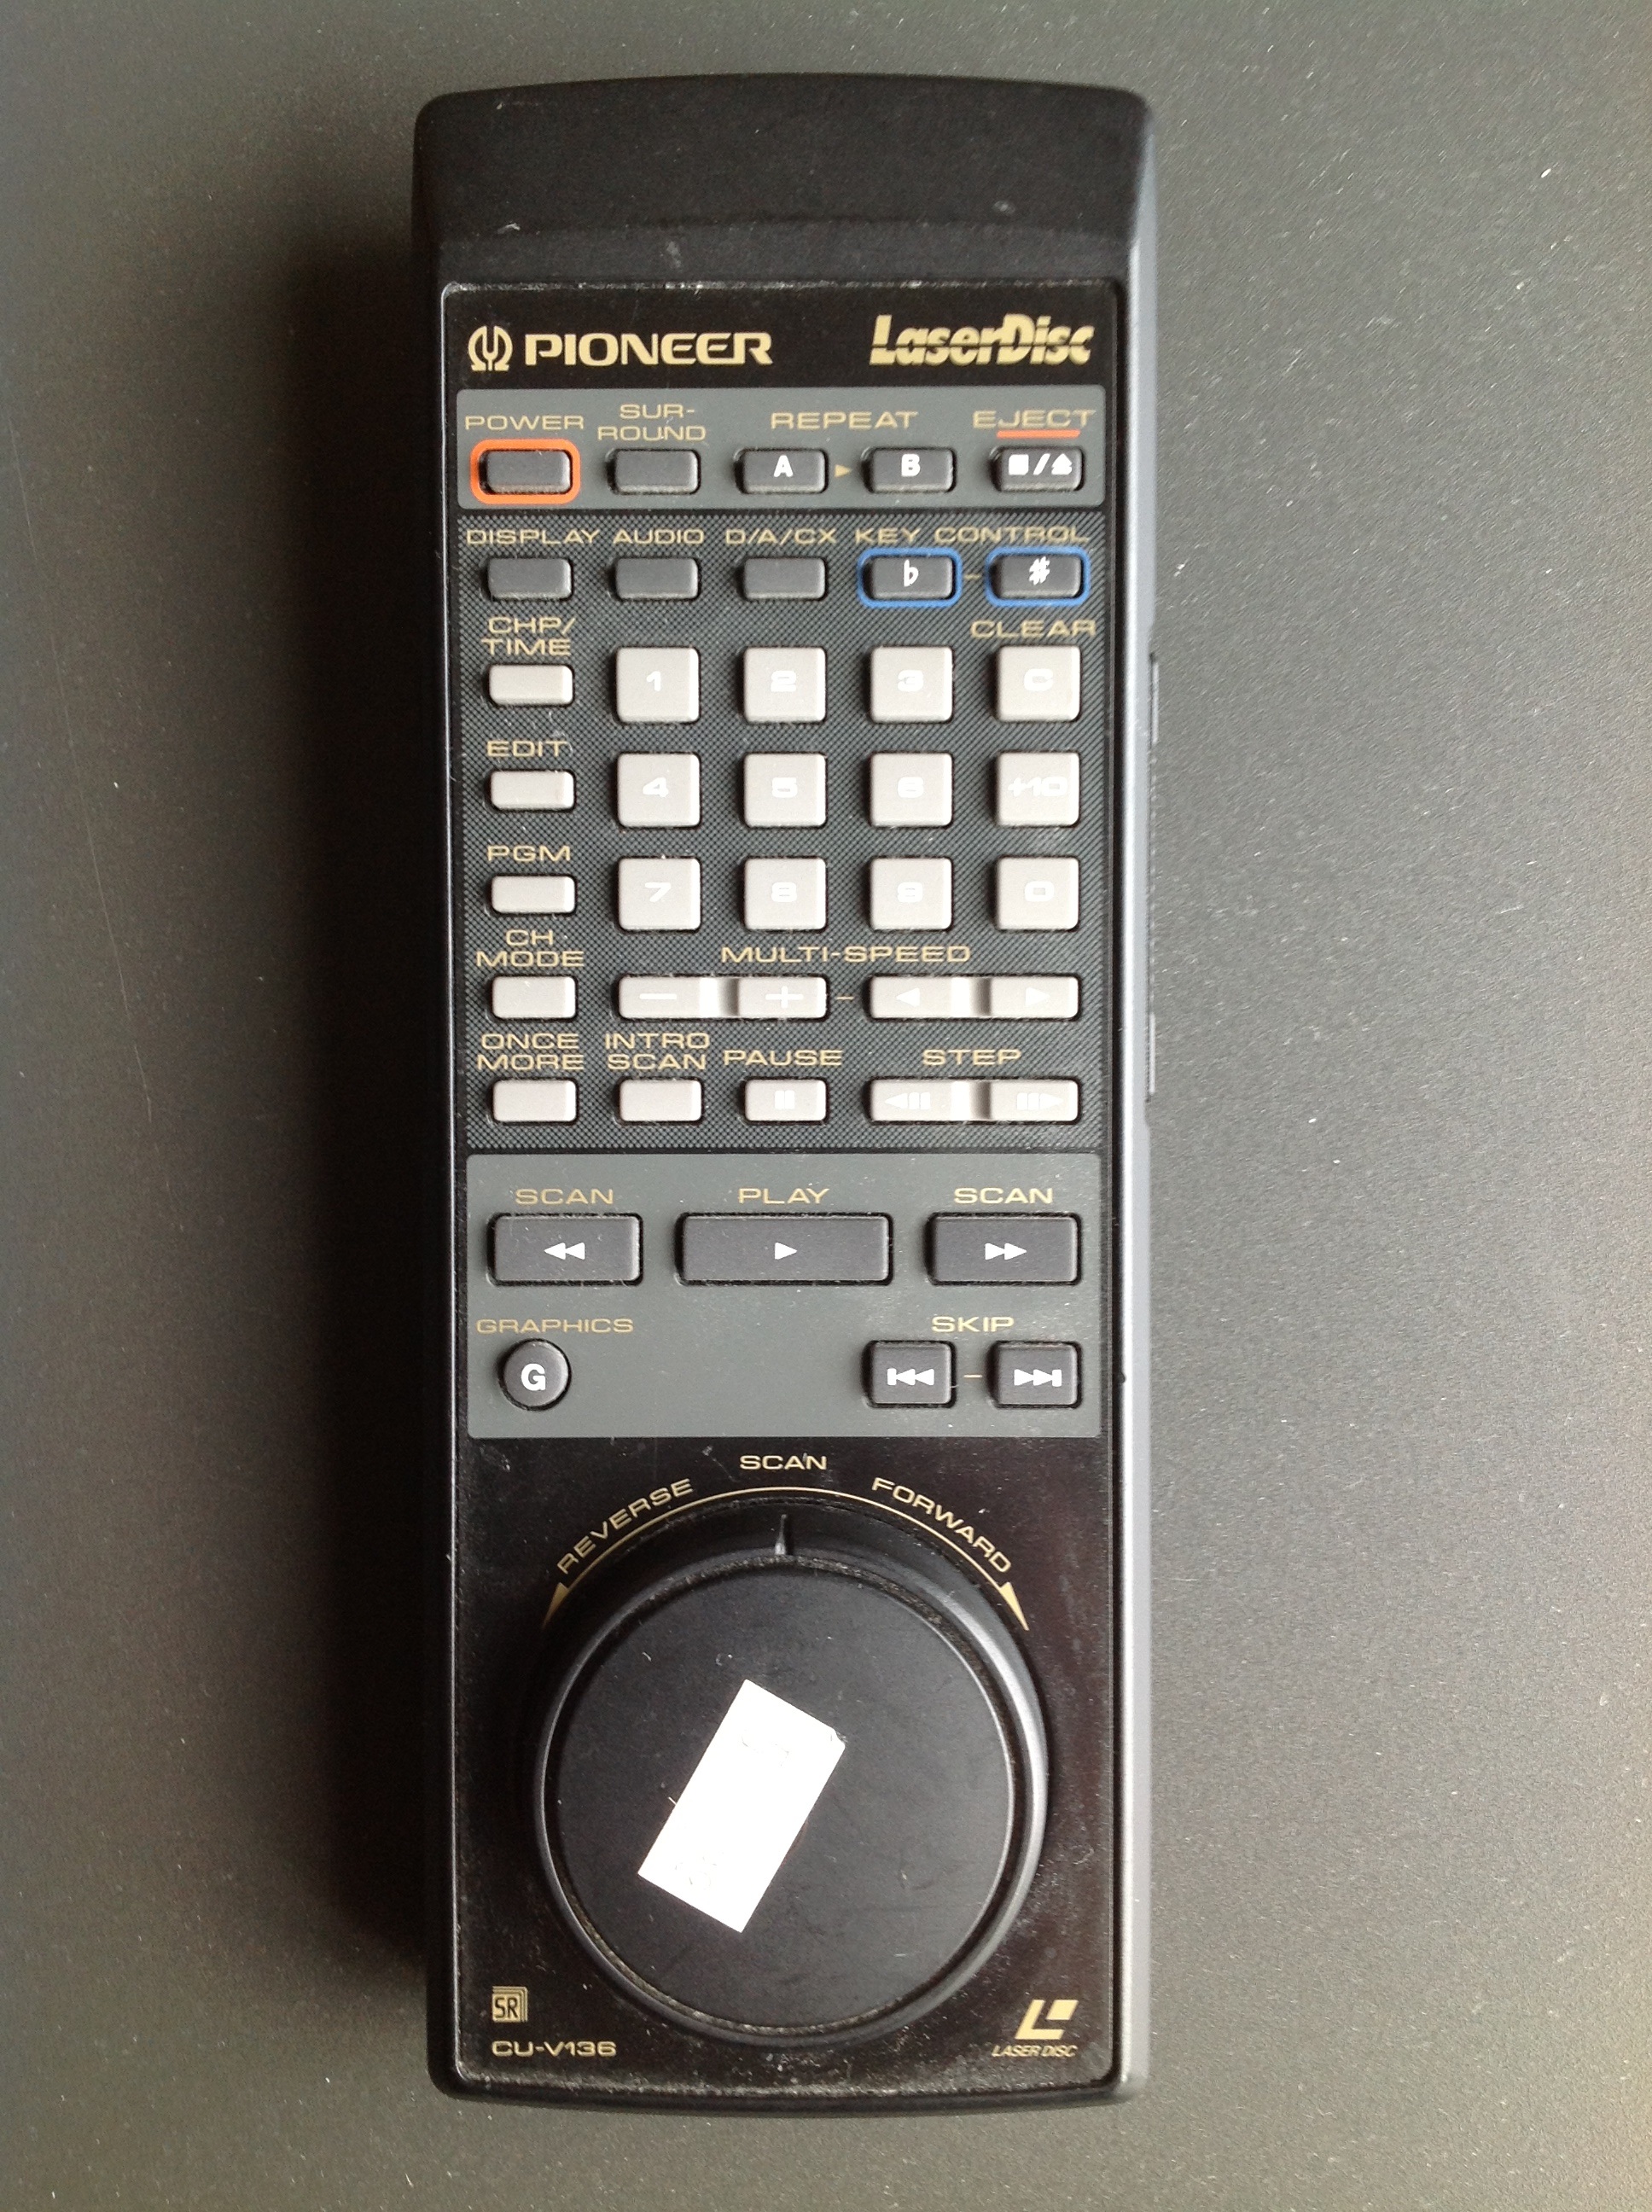
Pioneer LaserVision LD-V2000
This is my Pioneer LaserVision LD-V2000 LaserDisc player that I believe I found at the old State Road Goodwill some years ago.

A few weeks ago on Record Store Day I visited Time Traveler in Cuyahoga Falls and was pleased to find a nice little LaserDisc section among all of the other myriad things in that store. I think I spent about $20 on used LaserDiscs. That reminded me that I should write something about my LaserDisc player and my fascination with the LaserDisc format.

LaserDisc, if you’re not familiar with it, was a home video format active from about 1978 to 2000 that played high quality analog video from 30cm discs that resembled large CDs the size of a vinyl LP record.

LaserDisc is sometimes described as the forerunner to DVD, but that’s not a totally valid comparison. Unlike DVDs, LaserDiscs contain analog video. The way this page puts it, the video and audio signals are combined into a frequency modulated waveform and the length of the pits and lands represents the wave on the discs. So, while the discs are physically like CDs and DVDs in that pits and lands are read by a laser, the video itself is stored as composite analog video.
LaserDisc spent much of it’s life as a luxury format for film and home theater enthusiasts. It’s important to note that LaserDisc was not a failed format (like CED). Rather, it became a niche format that lasted for about 20 years while never achieving mainstream success. From 1978 to 1997 it was the home video format with the best video resolution, and after the introduction of digital audio in the late 1980s, the best audio as well.
At the time the main practical criticism of the format was that it was not recordable. If you bought a VCR you could both record from TV and watch prerecorded movies where if you owned a LaserDisc player you probably also wanted to own a VCR for recording TV. The other prominent downside to LaserDisc was that most films required at least one disc flip.
Early discs like this 1981 copy of Animal House were constant linear velocity (CLV) which meant that each side of the disc could hold 60 minutes of video and a two hour film could fit on two sides of a single disc and the film would require one disc flip. These discs are labeled Extended Play.

As the format became more of a high end item for film enthusiasts more films were sold as constant angular velocity (CAV) discs, which could only fit 30 minutes per side and generally required at least two discs for the whole film, meaning many more disc flips. However, they would have had better video quality. These discs were labeled Standard Play, like this Disc 1 of Blade Runner the Directors Cut.

The original Criterion release of the theatrical cut of Blade Runner was on two sides a single CLV Extended Play disc but the later Directors Cut was four sides of two CAV Standard Play discs.
There was also a 20cm LaserDisc size as well.

Today we associate features like random access and chapters with DVD but LaserDisc had already had them for years. One notable thing for me is that fast forwarding on LaserDisc is much more slick than on any other video format, DVD included. On VHS the image would waver and distort while fast forwarding. On DVD the fast forwarding is very jumpy as it quickly shows you still frames. On LaserDisc fast forwarding feels very stable, smooth, and responsive.
The most fascinating thing about LaserDisc was how the audio standards evolved over time. Originally LaserDiscs contained only analog audio. Some discs used the CX noise reduction system, like audio cassette tapes used Dolby-B noise reduction.
After the advent of the CD player started supporting PCM audio as well. Discs started coming with two PCM digital audio tracks in addition to the two analog tracks (to keep support for older players that only supported analog audio). These discs carried this digital SOUND logo.

About this time Philips tried to unite the LaserDisc and CD standards with what they called CD Video or CD-V. This meant they they wanted CD-V badged players to be able to play 30cm LaserDiscs, 20cm LaserDiscs, normal 12cm CDs, 8cm Mini CDs, and finally a new CD-Video format 12cm disc with 20 minutes of CD audio in an inner ring and 5 minutes of LaserDisc video on an outer ring, presumably for music videos.
Some LaserDiscs, like this 1993 AD Police anime disc, carry the CD Video logo.
![]()
In the mid-1990s some discs began to re-purpose one of the analog audio channels to carry RF modulated AC3 Dolby Digital 5.1 audio. These discs then carried three audio formats simultaneously: Mono analog audio, stereo PCM audio, and 5.1 Dolby Digital audio. It must have been a real thrill for home theater geeks to finally have a true discrete 6 channel surround sound format.
As LaserDisc players go my LD-V2000 is a very basic model and practically has none of the features you’d want to see in an ideal player. It does not automatically play both sides of the disc. It does not have a digital memory to show still frames. It does not have S-Video output. It does not play digital audio or have an AC3 Dolby Digital RF output. It does not have a fancy jog control. Basically, this player was manufactured in 1990 and the LaserDisc players that enthusiasts are really interested in were manufactured after this one in the early-to-mid 1990s.
I’ve seen references that call the LD-V2000 an industrial LaserDisc player model meaning that it was probably intended for the educational or business markets. LaserDisc is an ideal format for a business situation where you would want a TV playing a video on a loop all day.
I remember the ophthalmologist’s office I went to as a child had a LaserDisc player that would play Disney cartoons on a loop in the exam rooms. The idea was that kids would focus on the cartoons in the distance with one eye while he examined the other eye. I remember walking past the player in the hall outside of the exam rooms and being very impressed.

A VCR would have had to rewind the tape to play a loop where a LaserDisc player can seek to the beginning of the disc in a moment and loop the same video all day. That’s probably also why this player lacks the most basic controls on the front panel and totally depends on a remote control.

This particular LD-V2000 had a medical training disc in it when we bought it. It also did not come with a remote. However, I remembered seeing a Pioneer branded LaserDisc remote at the now-defunct Abbey Ann’s #2 in a basket of miscellaneous remotes. It still has the $5.99 price tag on it. I was correct in assuming that it would also work with other Pioneer models, though some of the controls don’t apply to the LD-V2000.
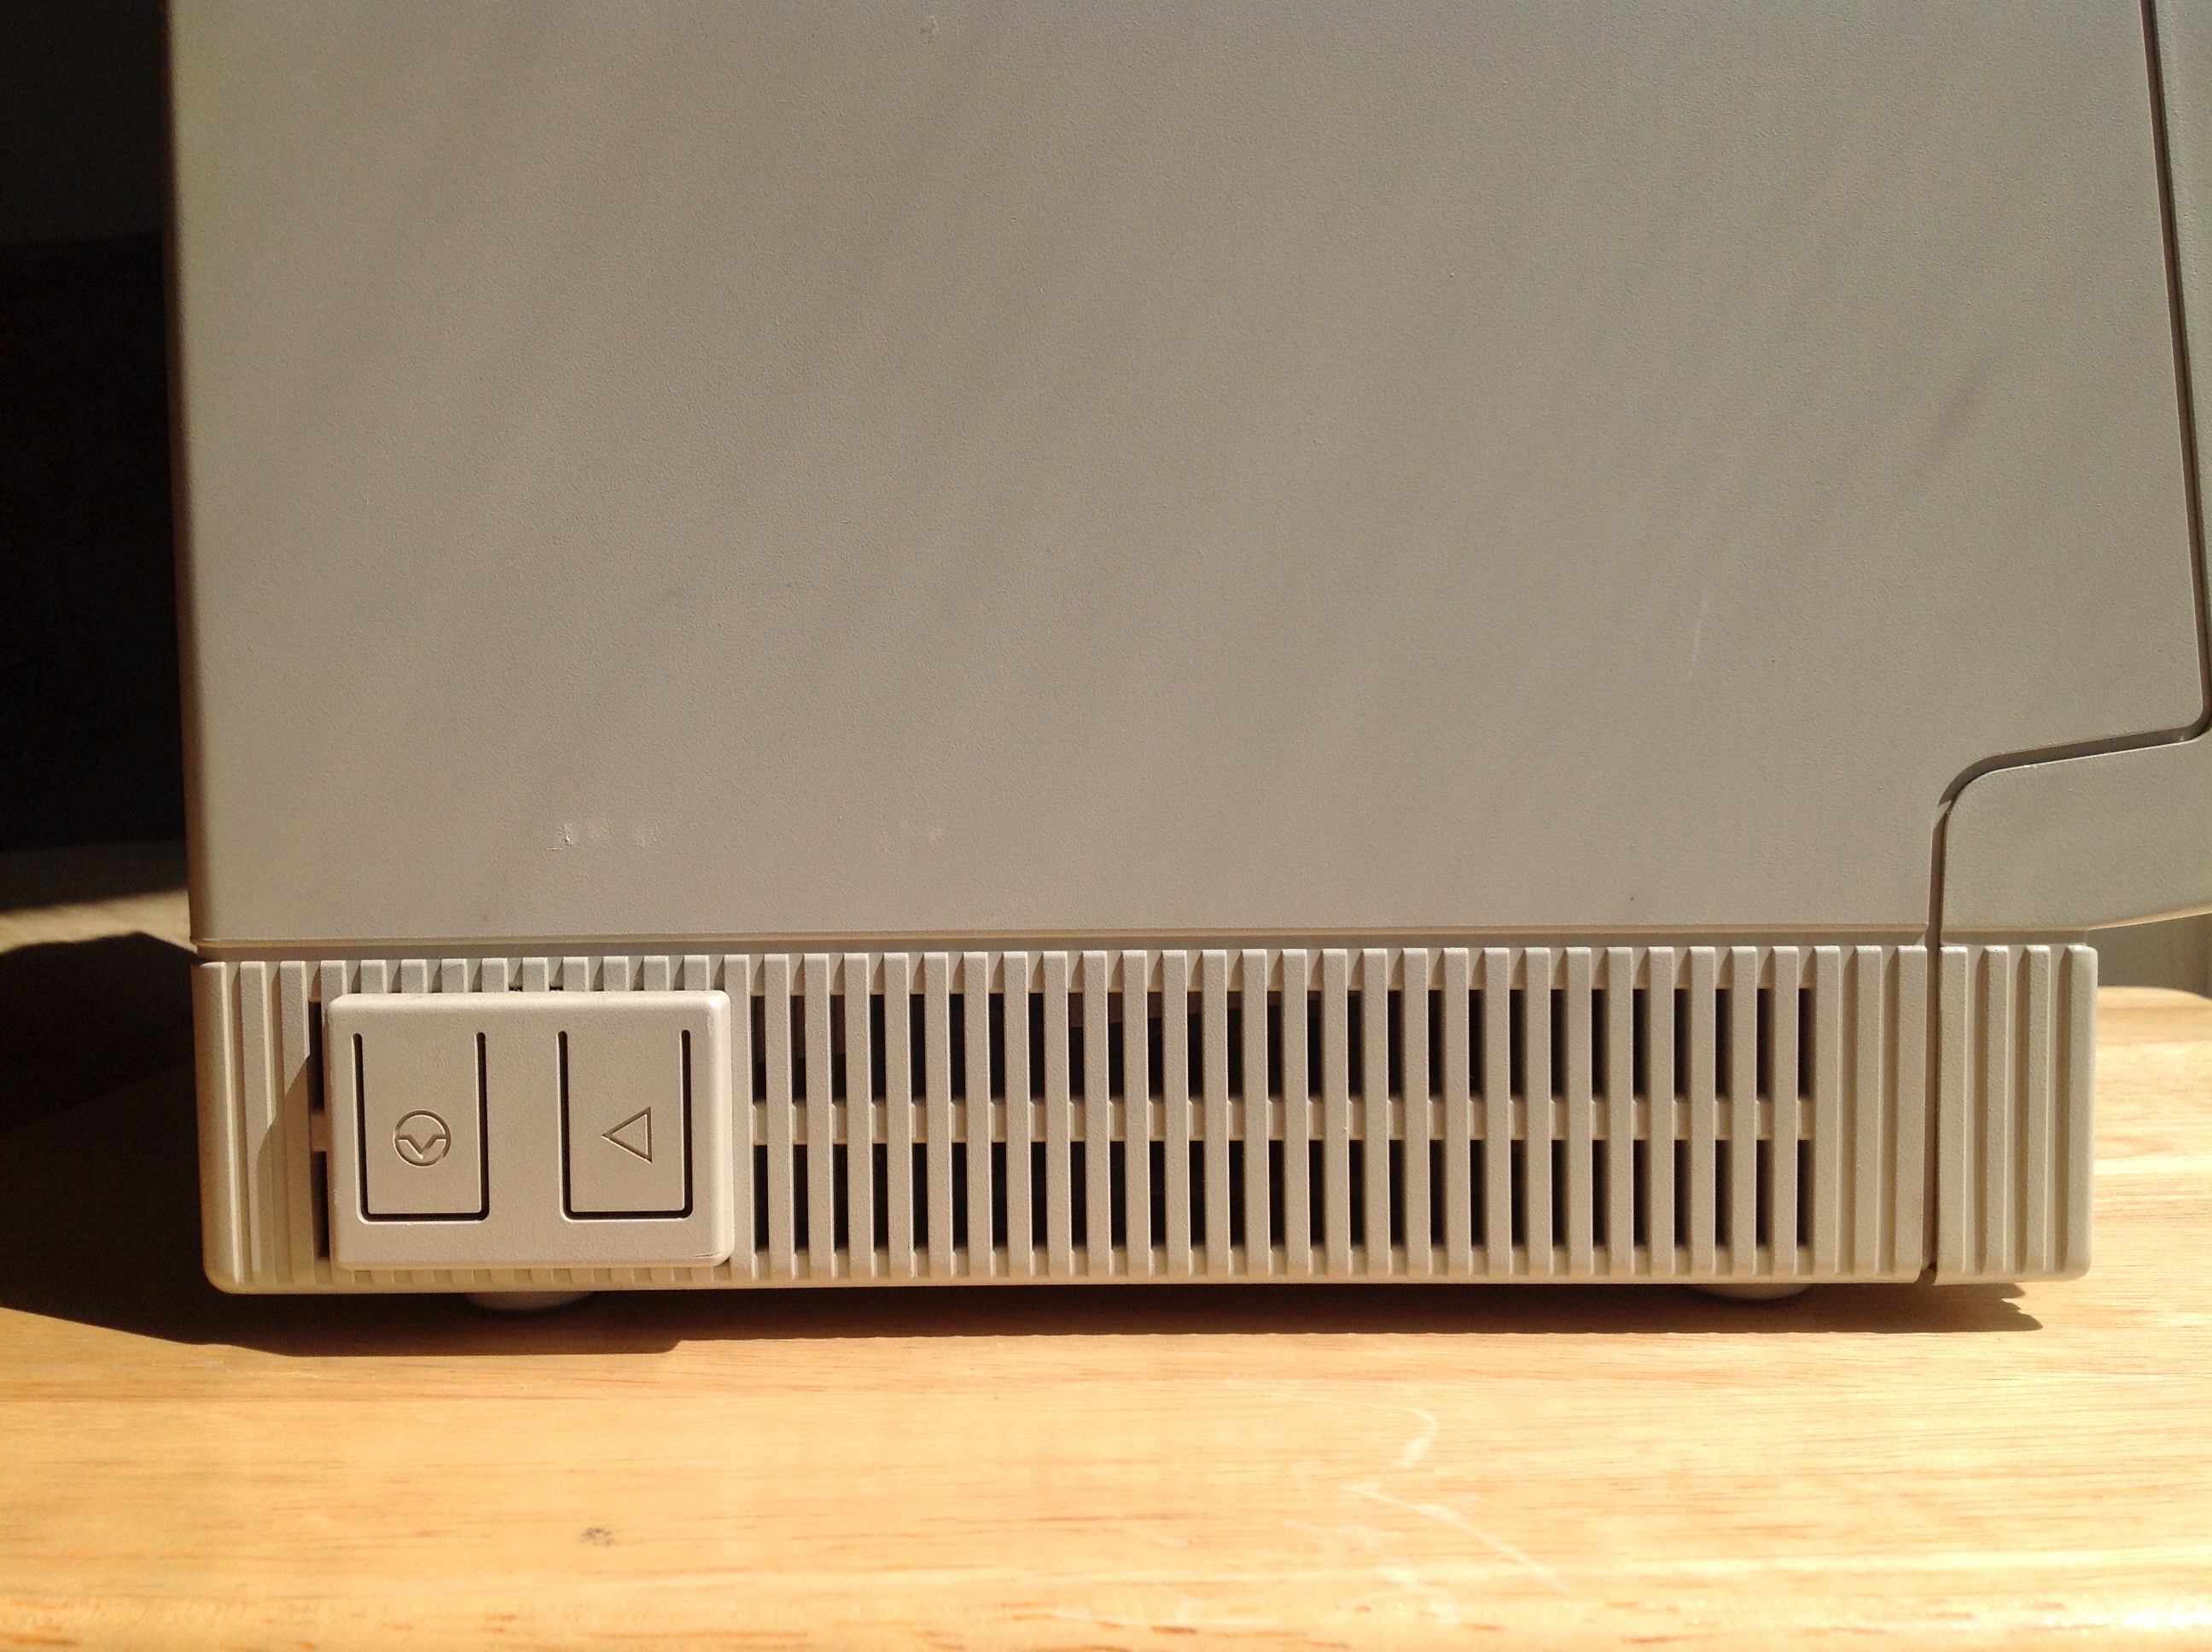
One interesting feature this player does have is an “I/O Port”, which I believe is a serial port.

I have never seen the manual for the LD-V2000, so I have to speculate a but about what this port is for. I’m fairly certain that it’s not some sort of port that reads data off of discs. I believe it’s a serial port that allows a computer or another accessory to control the player. Since all LaserDisc were time-coded it was very easy to tell a player to call up a particular frame from anywhere on the disc. For example, there were educational discs that used a bar code reader accessory to let a person scan a bar code in a book and call up a still image or a video from the LaserDisc. You can also easily imagine a museum display where pressing a specific button would call up a video on a monitor from a LaserDisc player.
So, what this player does have going for it it that it works and it’s built like a tank. I’ve been on the lookout for a player with more of the fun features people look for in LaserDisc players for some time now, but the problem is that usually someone wants $40 for it, and my sweet spot for something like this is $15. In the meantime, this simple player has been an excellent gateway into the world of beautiful analog video that is LaserDisc.

Microsoft Windows/386
This week I’m going to indulge myself with some extremely nerdy PC history. Find a comfortable chair because this is going to take awhile.
This is a sealed copy of Windows/386 which I purchased on eBay recently. Windows/386 was a version of Windows 2 released in late 1987 that was able to multitask DOS applications on a 386.

There’s a good chance you’ve never heard of Windows/386. It’s possible you may have seen this over-the-top 12 minute marketing film that Microsoft created for Windows/386 where a businesswoman uses the multitasking power of Windows/386 (and 80s fashions) to save the day.
I had really only heard of Windows 2 in the context of books written later like Windows for Dummies that basically said “don’t bother with Windows 2, buy Windows 3”.
If you’re wondering what Windows 2 looked like, here’s a close up of that screenshot on the front of the box:

I started collecting boxed software around the same time that I started buying the old Macintoshes in the late 1990s. One of the first copies of Windows I found at a thrift store was this sealed copy of Windows 3.1 I found amongst the toys and board games at the old State Road Goodwill 10-15 years ago. Apparently I paid $3.00 for it.

At the time I bought it because I loved the way the front of the Windows 3.1 box looks. It’s still my favorite OS box.
Now, Windows 3.1 in a box is not hard to find. In fact, I also have an open box copy of Windows 3.1. But, Windows 3.0 is much harder to find in a thrift store. I recently found a copy of Windows 3.0’s disks and manuals without the box at the 2013 Cuyahoga Falls Hamfest and shortly after that I bought a sealed copy on eBay. I’ve never seen any Microsoft OSes older than Windows 3.1 “in the wild” just hanging around in a thrift store.
Windows 2.0 is even harder to find than Windows 3.0. Up until I bought this copy on eBay I had never seen it in person.
I was inspired to buy this copy of Windows/386 (which as you can imagine is a bit pricey) because I’ve been reading Andrew Schulman’s really fascinating (and some say controversial) book Unauthorized Windows 95, which I found for a few bucks on ABEBooks.com.

So what does a book about Windows 95 have to do with Windows/386 which came out years before? This is the point where this post is going to get extensively nerdy.
Let me begin by showing you the back of the Windows/386 box:
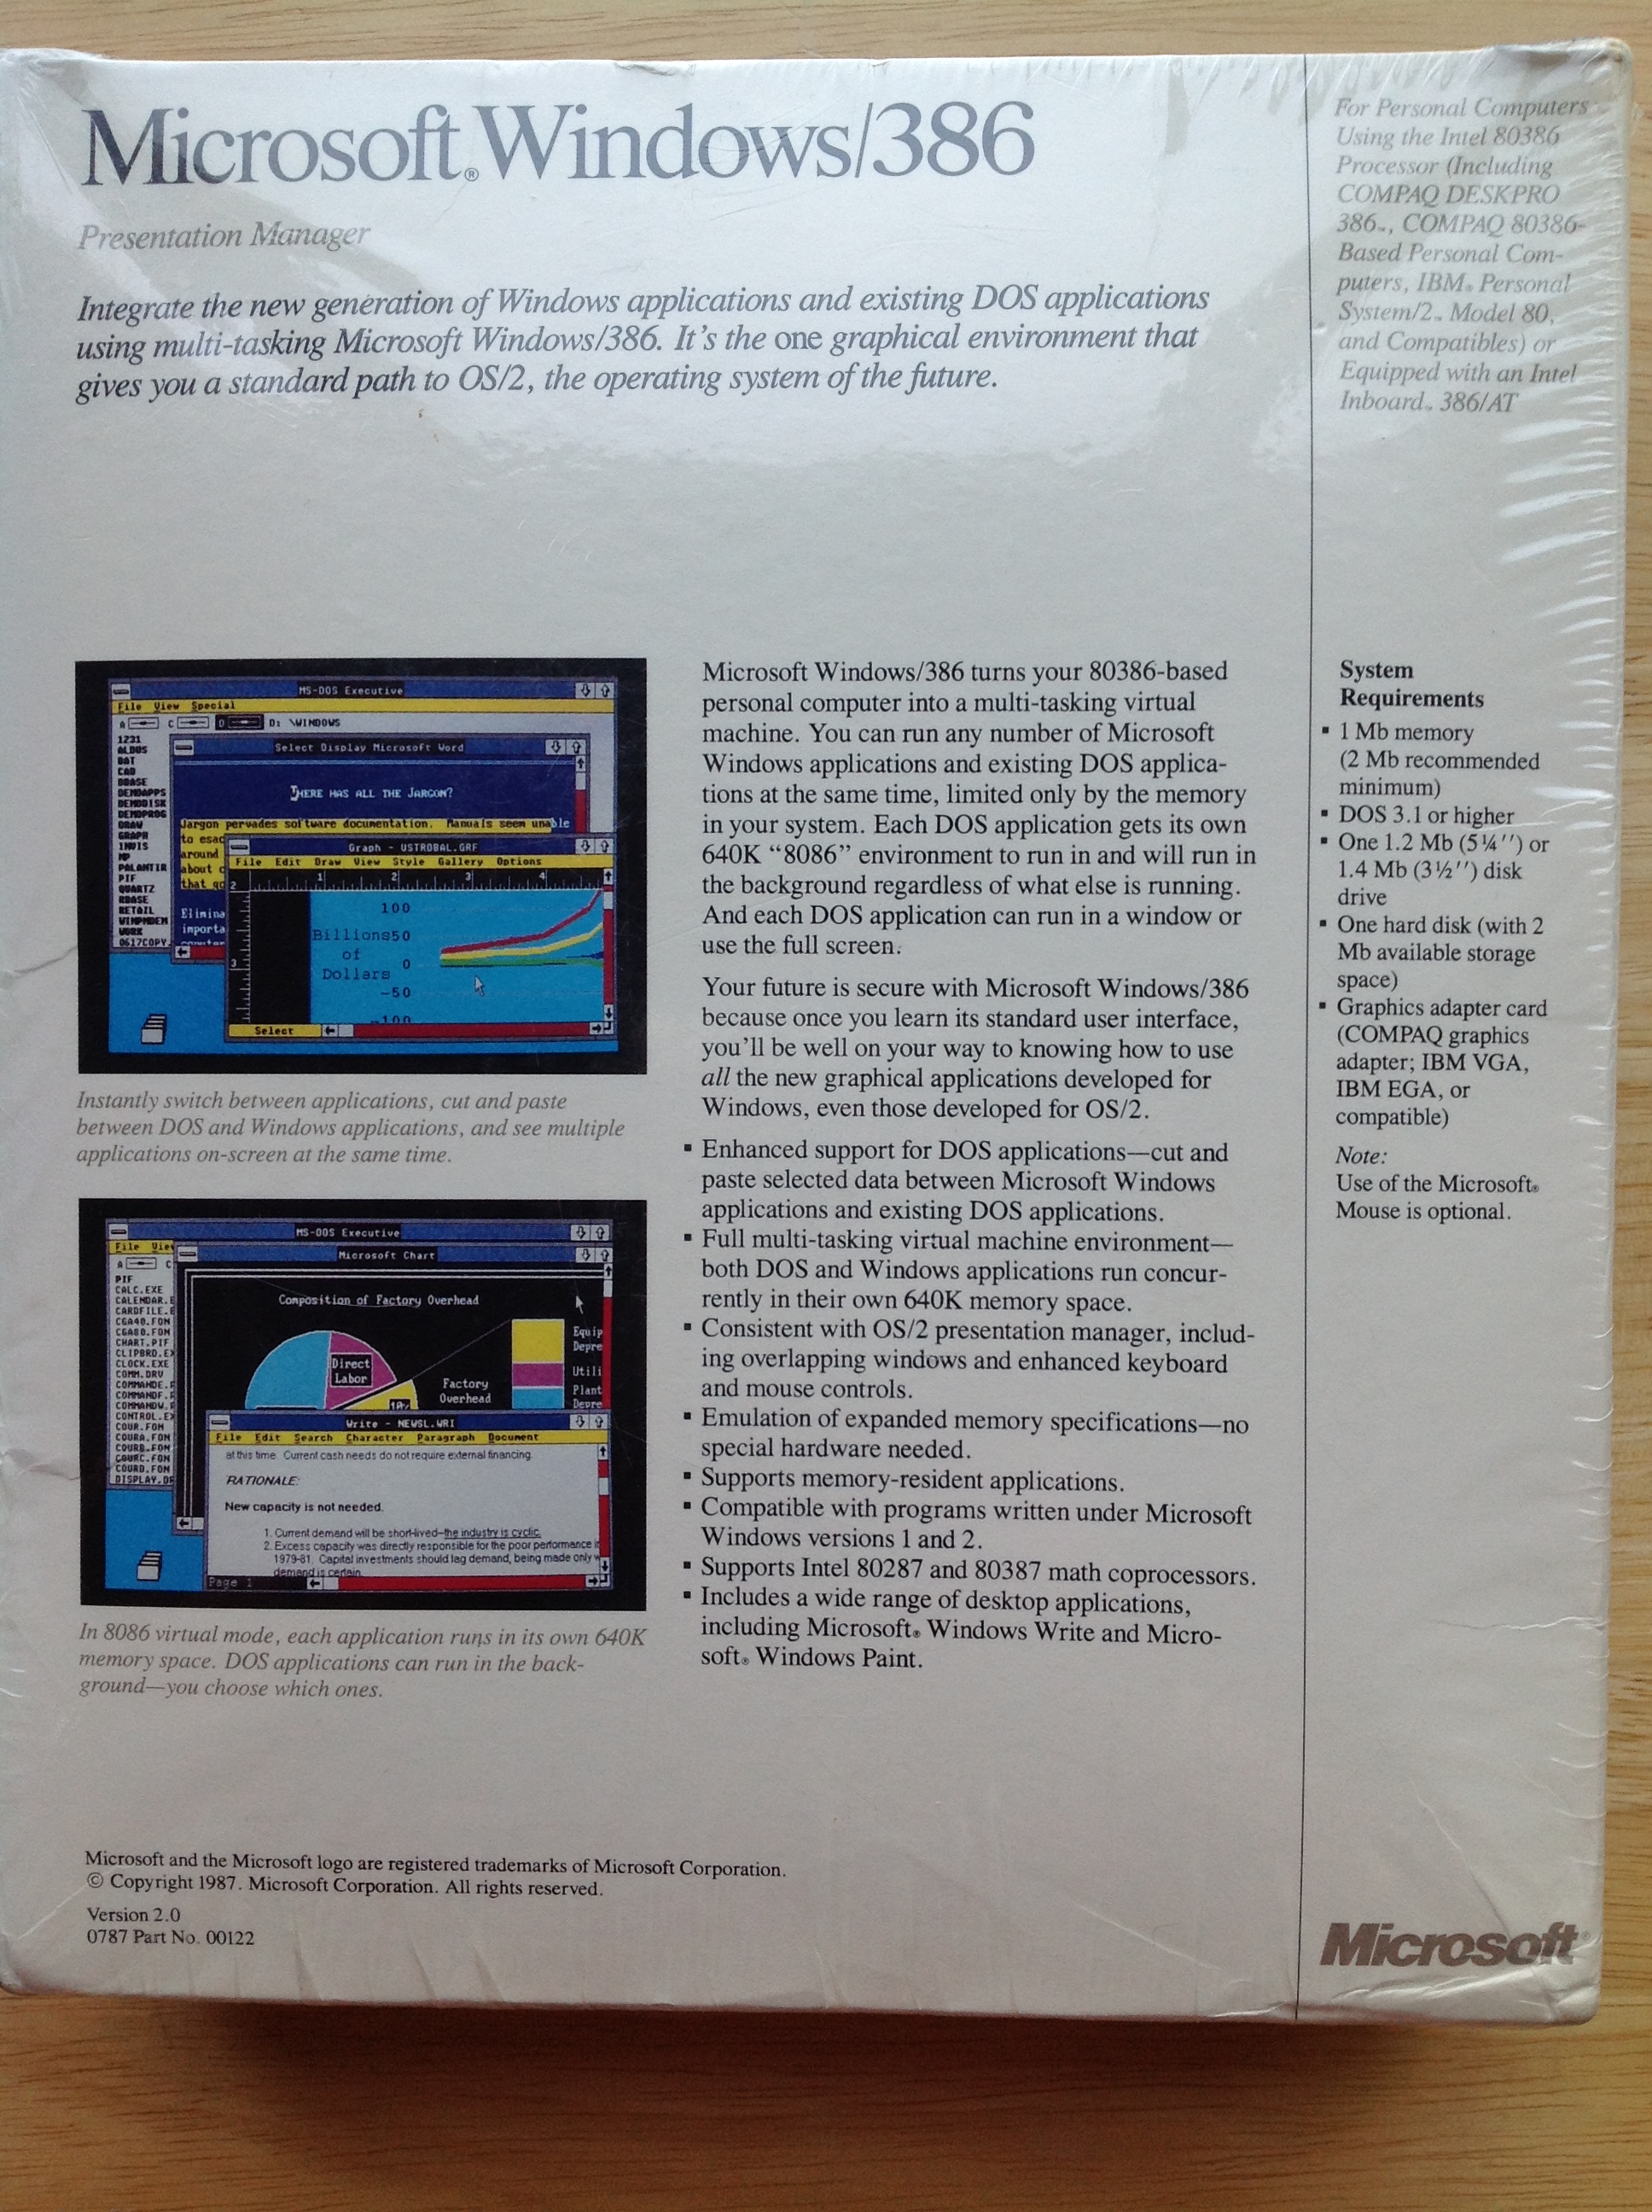
The description on the back of this box is glorious. This is one of the most horribly tortured chimeras of Microsoft marketing and technical jargon I’ve ever seen. But, by decoding this mess you can learn an enormous amount about what was going on with the PC in 1987-1989.
Here it is typed out so that it’s easier to read:
Microsoft Windows/386
Presentation Manager
Integrate the next generation of Windows applications and existing DOS applications using multi-tasking Microsoft Windows/386. it’s the one graphical environment that gives you a standard path to OS/2, the operating system of the future.
Microsoft Windows/386 turns your 80386-based personal computer into a multi-tasking virtual machine. You can run any number of Microsoft Windows applications and existing DOS applications at the same time, limited only by the memory in your system. Each DOS application gets it’s own 640K “8086” environment to run in and will run in the background regardless of what else is running. And each DOS application can run in a window or use the full screen.
Your future is secure with Microsoft Windows/386 because once you learn its standard user interface, you’ll be well on your way to knowing how to use all the new graphical applications developed for Windows, even those developed for OS/2.
- Enhanced support for DOS applications–cut and paste selected data between Microsoft Windows applications and existing DOS applications.
- Full multi-tasking virtual machine environment–both DOS and Windows applications run concurrently in their own 640K memory space.
- Consistent with OS/2 presentation manager including overlapping windows and enhanced keyboard and mouse controls.
- Emulation of expanded memory specifications–no special hardware needed.
- Supports memory-resident applications.
- Compatible with programs written under Microsoft Windows versions 1 and 2.
- Supports Intel 80287 and 80387 math coprocessors.
- Includes a wide range of desktop applications, including Microsoft Windows Write and Microsoft Windows Paint.
You can probably make out a few important themes here.
The first is that in 1987 it’s very exciting to be able to multitask DOS applications (today we seem to have lost the hyphen in multi-task).
Second, is that for some reason, even though you just bought Windows/386, Microsoft would really rather you buy OS/2. Usually the back of an expensive thing’s box is trying to stroke your ego and make you feel real smart for buying this expensive thing. Here, oddly, they’re saying you’re smart for buying this thing because then you’ll be ready to buy the next thing.
Third, they’re really eager to tell you that they are able to multitask DOS applications through the magic of virtual machines.
All of these things are really about memory and the nightmare that was the 640K “barrier” created by the 8086/8088 and DOS and what had to happen to get around the barrier.
The 8086 was a 16-bit processor (along with it’s cheaper version the 8088). Processor “bit-ness” is a complicated subject but in general it means that the 8086 operated on numbers that were 16-bits long. The 8086 was designed to address (i.e. talk to) up to 1MB of RAM. 1 MB of RAM has 20-bit memory addresses so Intel came up with a technique where they added together two 16-bit numbers in a way that came up with a 20-bit memory address.
Here’s a diagram from page 25 of Peter Norton’s 1985 book Programmer’s Guide to the IBM PC that shows how they did it:

This method of dealing with memory addresses was a central part of how every DOS program worked. This became known as Real Mode.
DOS was an operating system for the 8086 microprocessor, so it too operated in Real Mode.
IBM decided to use some of the memory addresses to talk to ROM chips, graphics card memory, and other things so that the memory addresses that could actually be connected to real RAM were limited to 640K. That’s where the so-called “barrier” came from.
Windows 1.0 was an attempt to create an “Operating Environment” that still ran in Real Mode where programmers could create graphical applications. As you can imagine, Windows 1 was held back by the limited amount of memory available in Real Mode and the lack of built in multitasking features in the 8086.
In general, when you’re building a multitasking processor you want several things. One thing you want is a timer that the operating system can set inside the CPU. That way a program gets a set block of time in which to do some processing before the timer goes off and the CPU wakes up the OS and the OS checks if the program needs more time or if another program should get it instead.
These are the basic building blocks of task switching. If the CPU switches fast enough it can appear to a human being that their CPU that can only do one thing at a time is actually running multiple programs at once. In reality the programs are all getting bits of time given to them by the operating system in which to execute.
Another thing you want is a sort of built in security system in the CPU that separates the programs from the OS so that the OS is in charge if the computer and can juggle these programs. Ideally you want it to be so that when the program needs to do something important (like say, putting a pixel on the screen or writing a file to the disk) it has to ask the OS to do that thing for the program.
That way multiple programs asking for important things at once don’t interfere with each other. The OS becomes like a traffic light at major intersection that prevents cars from running into each other. If a program tries to get the CPU to do something only the OS should do, the CPU should stop it.
Those are both things that Intel built into the 80286, their followup CPU to the 8086. The 286 was built for multitasking and it was built to talk to up to 16MB of RAM. These multitasking features were called Protected Mode.
This would have been great except Protected Mode was incompatible with Real Mode. That method by which Real Mode came up with memory addresses in that diagram above did not exist in Protected Mode. It used a different method. You could not simply load up a Real Mode program (like all DOS programs at the time) into Protected Mode.
Fortunately, the 286 could also pretend to be a fast 8086 operating in Real Mode. But you also couldn’t switch between the two in an elegant way.
So when people brought home their expensive new IBM PC AT’s with 286 CPUs in late 1984 they were mostly running them in Real Mode, running DOS applications.
What was needed was a new Protected Mode operating system and new Protected Mode programs to really use the multitasking Protected Mode on the 286.
This is why in 1985 IBM and Microsoft decided to create OS/2 (aka Operating System/2) with was a protected mode operating system for the 80286. They also came up with a way where OS/2 could run a single DOS application at a time by fooling the 286 into switching between Protected Mode and Real Mode in a way Intel had not really intended. Running DOS applications on OS/2 version 1 got a reputation for being slow and terrible.
OS/2 was a large undertaking and while it was announced in April 1987 and version 1.0 was released in December 1987, it wasn’t really complete. OS/2 1.0 did not come with a graphical interface at all. That would not come until OS/2 1.1 in October 1988.
By the way, OS/2 1.1 called it’s graphical interface the Presentation Manager, which is why Windows/386 is also calling itself a presentation manager.

So, now we have two messes. The first mess is the “640K barrier” that limited the PC platform. The second mess was the fact that the 286 could not multitask DOS applications.
So, let’s say it’s 1987 and you have a pile of very expensive, serious DOS applications.
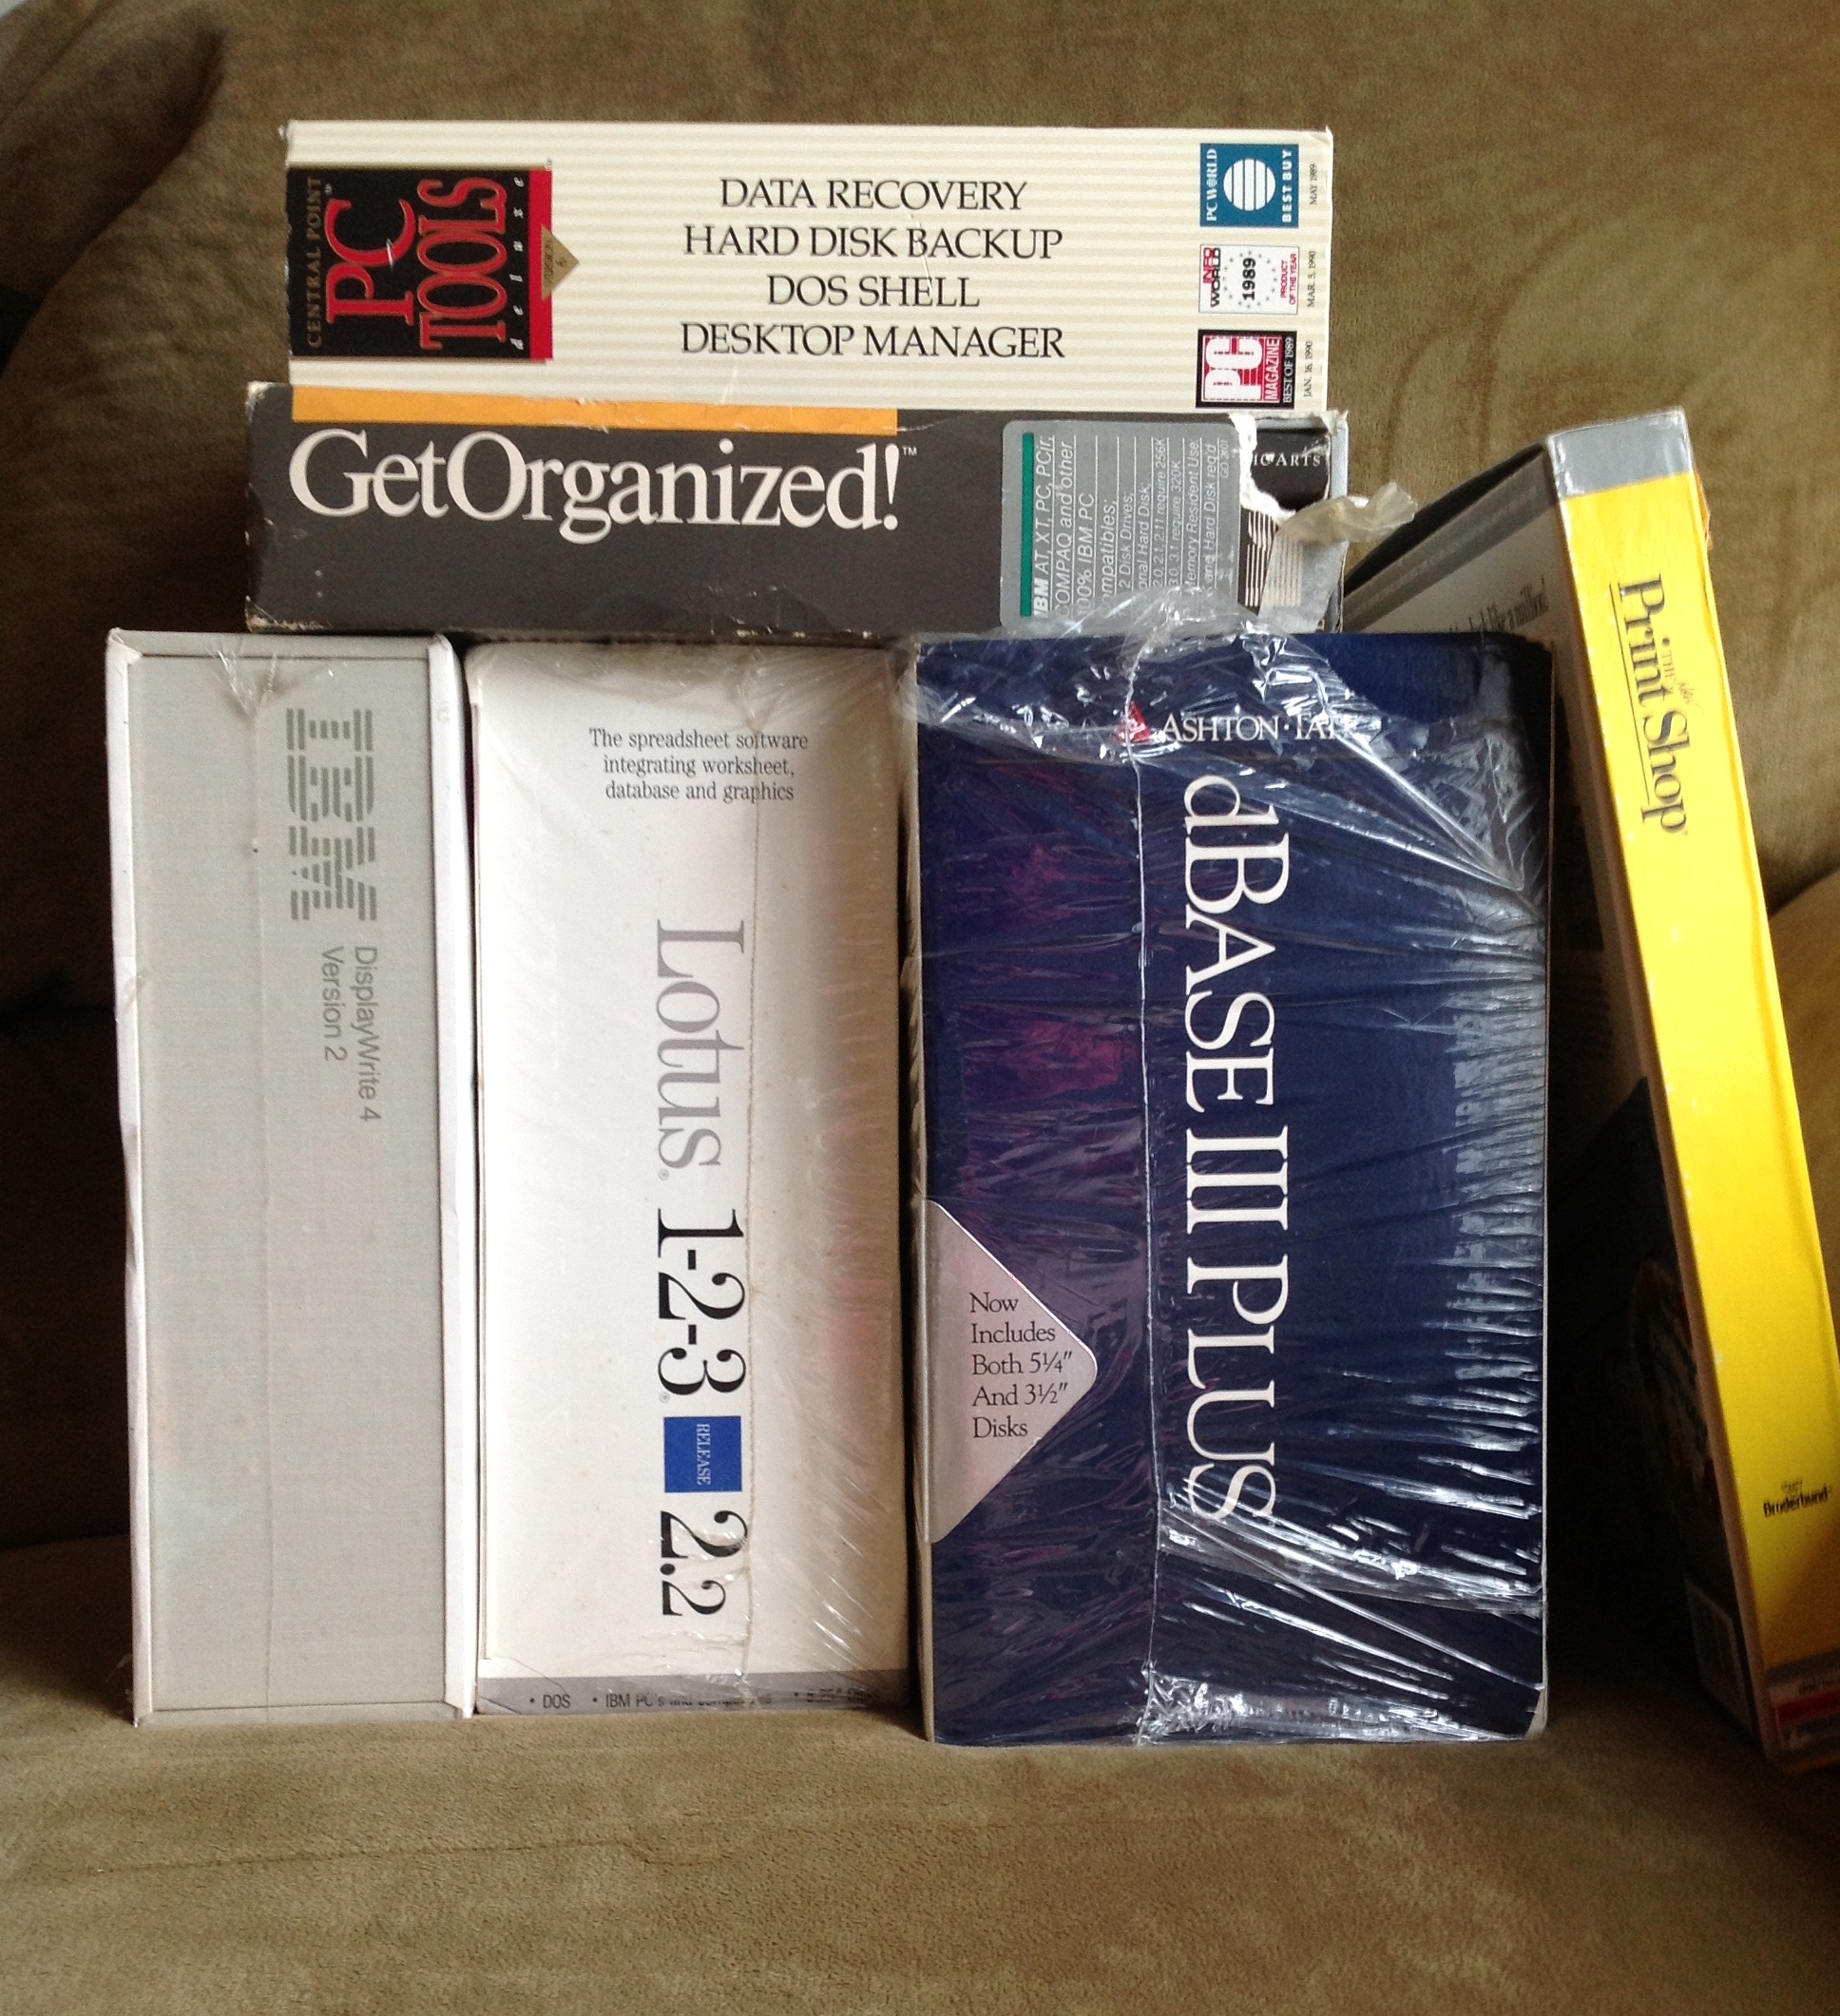
A pile of very expensive, serious DOS applications.
Are you happy with OS/2? Do you really want to have to replace all of your applications with new Protected Mode versions? Or, would you rather have something that could just multitask the pile of applications you have now?
Meanwhile, Intel released the successor to the 286, the 80386 in late 1985 and by late 1986 you could buy one in outrageously expensive PCs like the Compaq Deskpro 386 . Here Intel finally set the groundwork to clean up both messes.
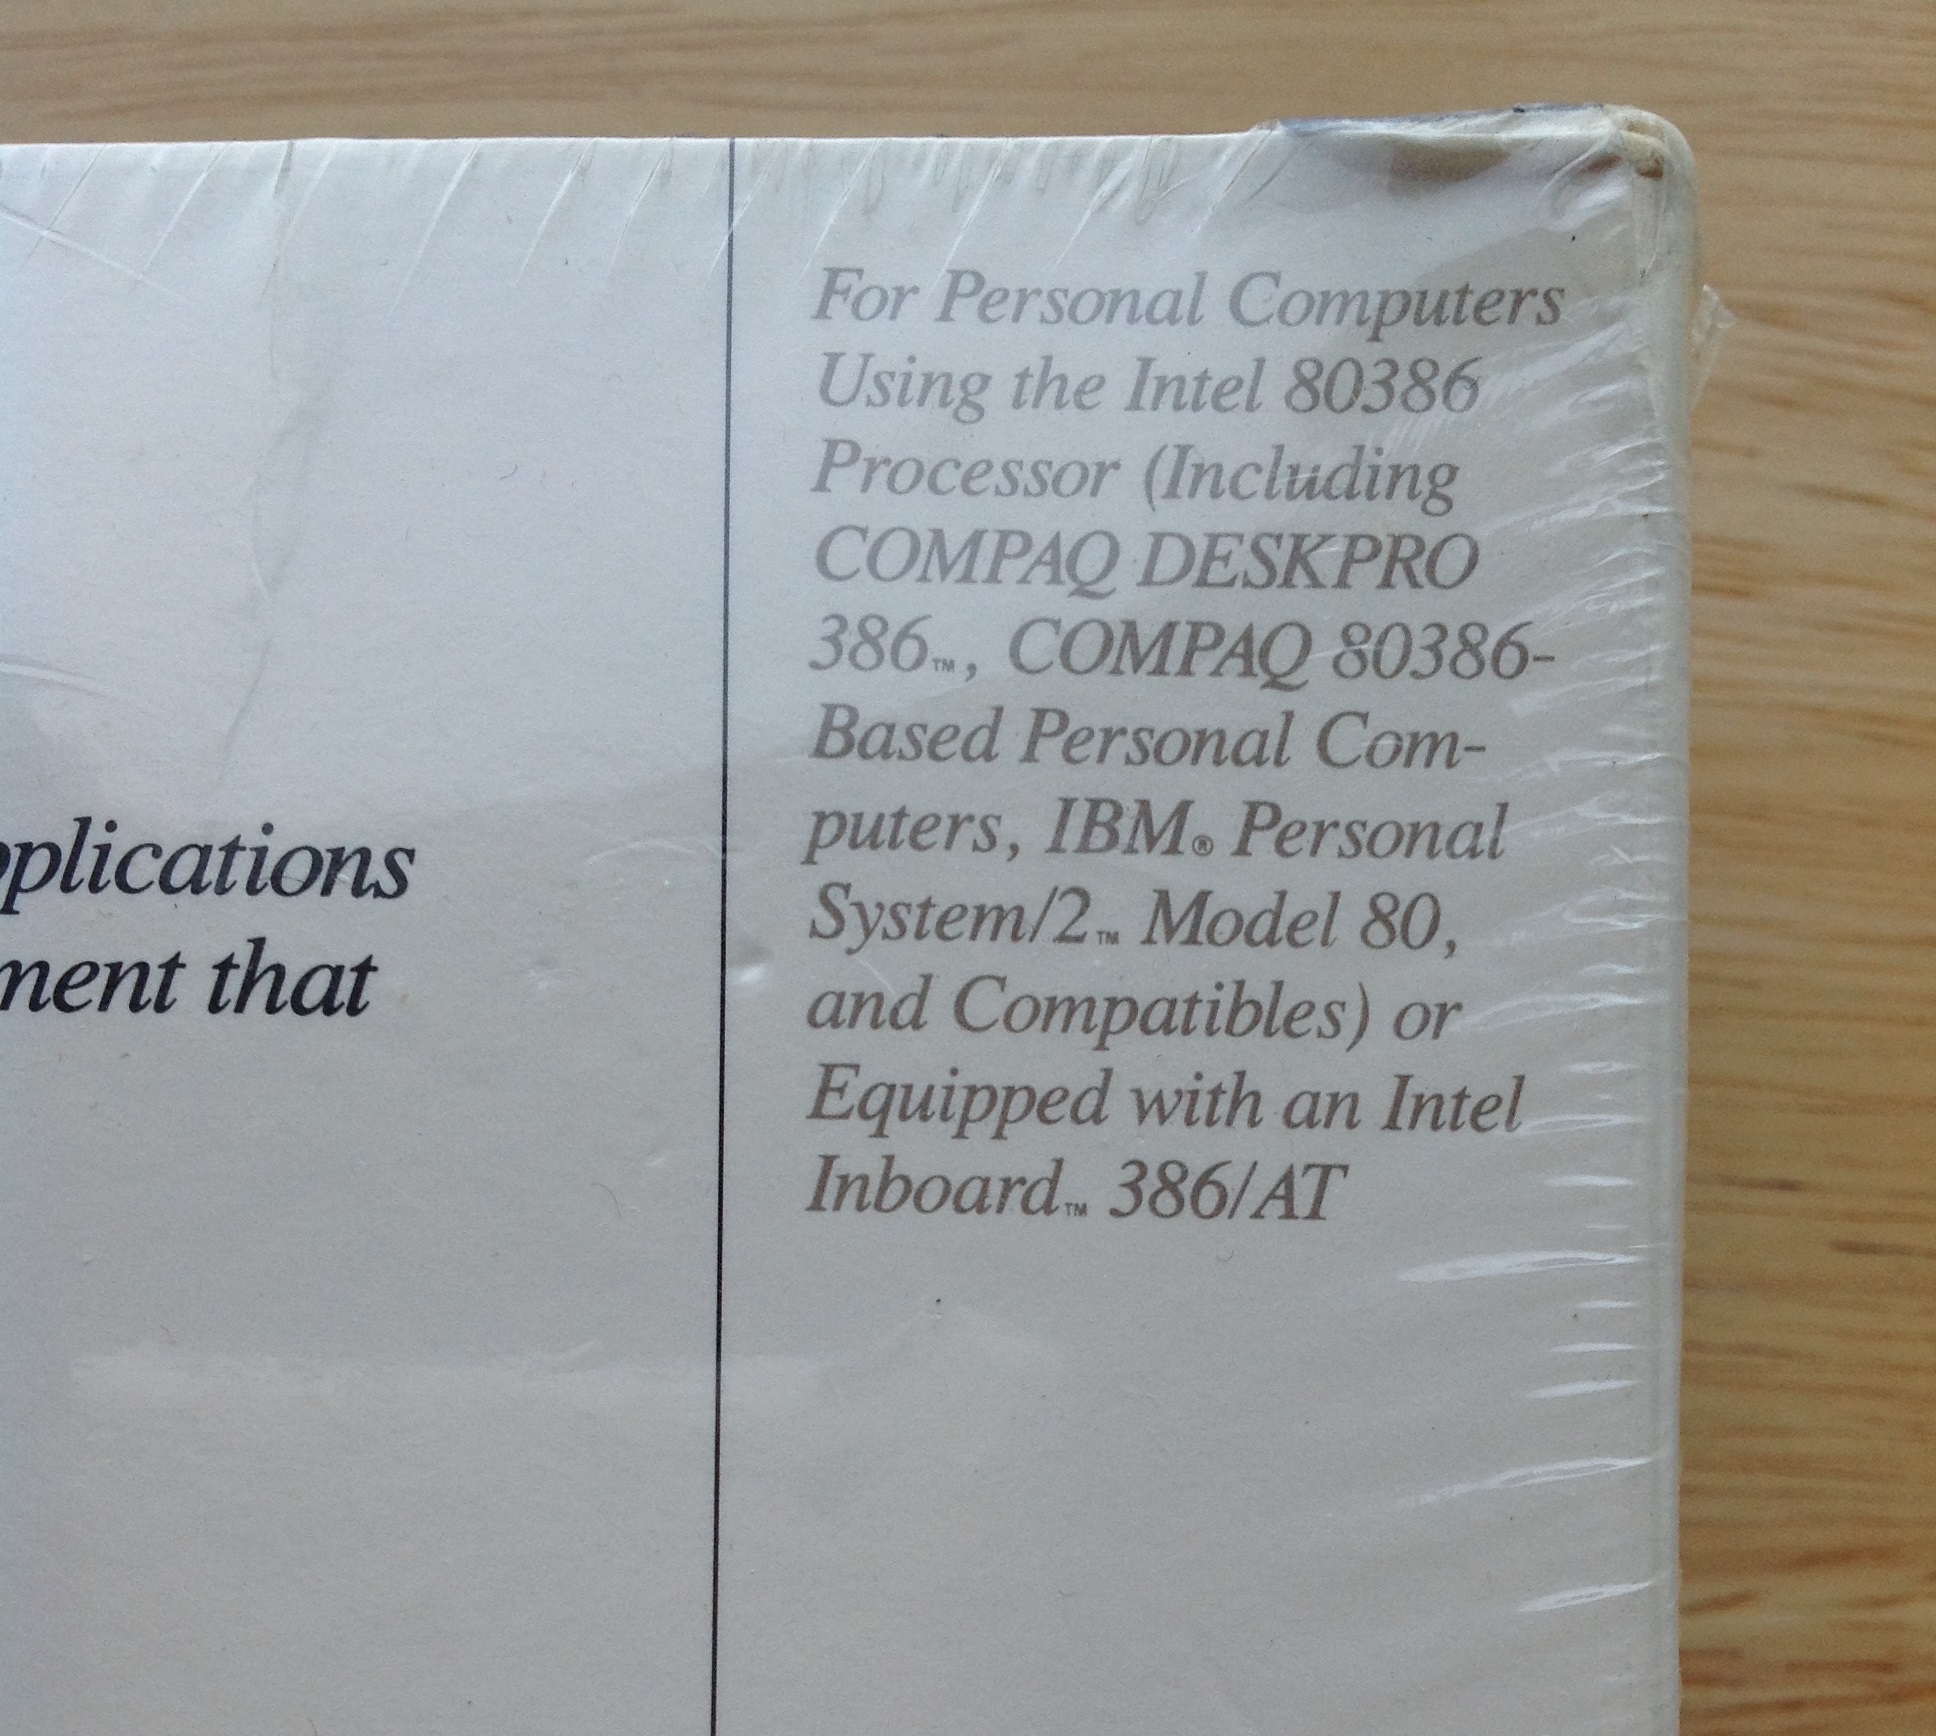
The 386 was now a 32-bit processor and could address up to 4GB of RAM. The 286’s protected mode was enhanced to become 32-bit Protected Mode in the 386. It also contained a Memory Management Unit, which breaks memory up into pages that can be swapped out to disk if necessary. This is the technique called virtual memory. As you can imagine this is very useful for multitasking programs.

With the 386 a PC contained most of the hardware features that allowed expensive mainframe and mini-computers the ability to multitask large programs but it would need a new operating system to take advantage of them.
There were ways for new programs that ran on DOS to use the new features in the 386. If you ever ran Doom on DOS you saw a bunch of text gobbledegook fly past before the game loaded. Part of what it was doing was loading a program called a DOS Extender that was basically a sort of mini-OS that let Doom’s 32-bit Protected Mode code talk to Real Mode DOS.
But, running old DOS programs needed something else. In order to finally solve the 8086 and DOS’s memory mess, Intel borrowed a trick from the mainframe world: virtual machines.
In order to explain what a virtual machine is here is a modern example:
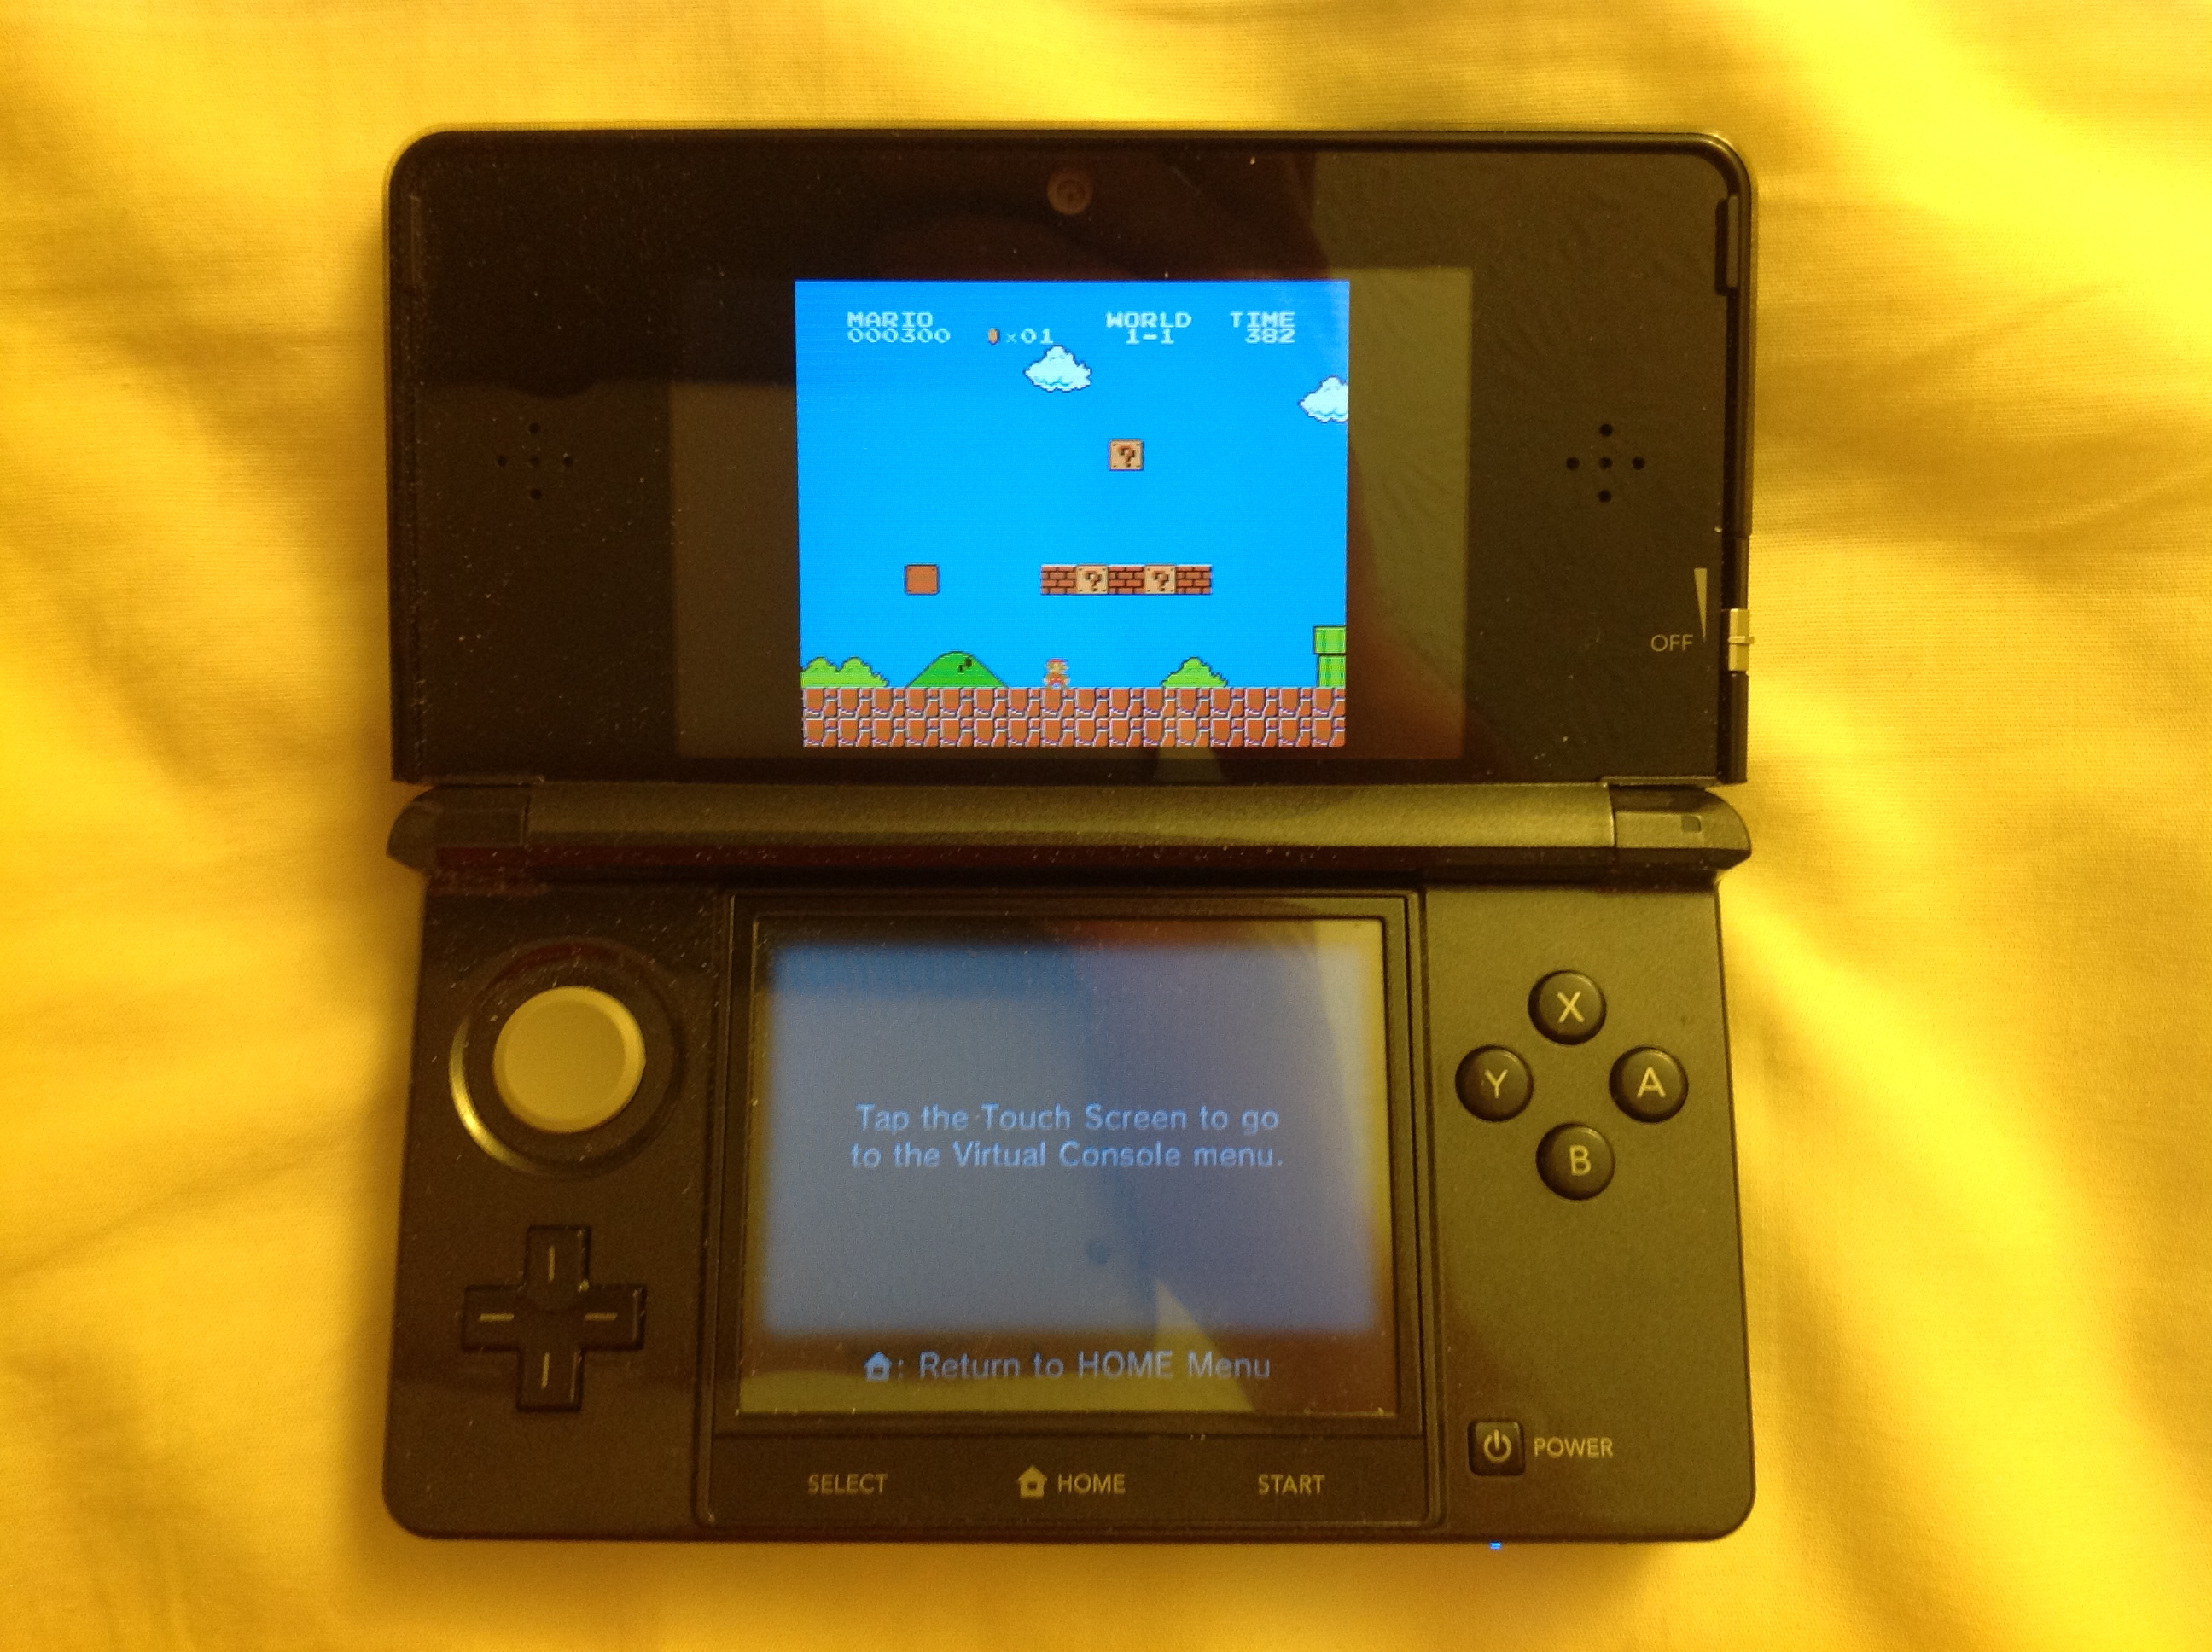
That’s Super Mario Bros., which was an NES game from 1985. But it’s running on a Nintendo 3DS from 2011 rather than an NES from 1985. The game thinks it’s running on an NES, but in reality it’s running on a piece of software called a virtual machine that just looks like an NES to the game but is really a different machine entirely.
What Intel did with the 386 was to build in a new mode called Virtual 8086 Mode (aka V86 Mode) that created 8086 virtual machines. V86 mode was really a version of Protected Mode modified so that the Memory Management Unit would take care of handling the different methods of dealing with memory addresses.

A 386 could create multiple virtual machines running in V86 Mode. In order to do this Intel said a software vendor would have to supply a program called a Virtual Machine Monitor, or VMM, which was actually a small 32-bit Protected Mode operating system that would manage the virtual machines. The VMM was really in charge of the computer. A program running in a V86 virtual machine thought it was talking to DOS but in reality the VMM was deciding to let it talk to a copy of DOS. The VMM is like the 3DS’s Virtual Console is my example above.
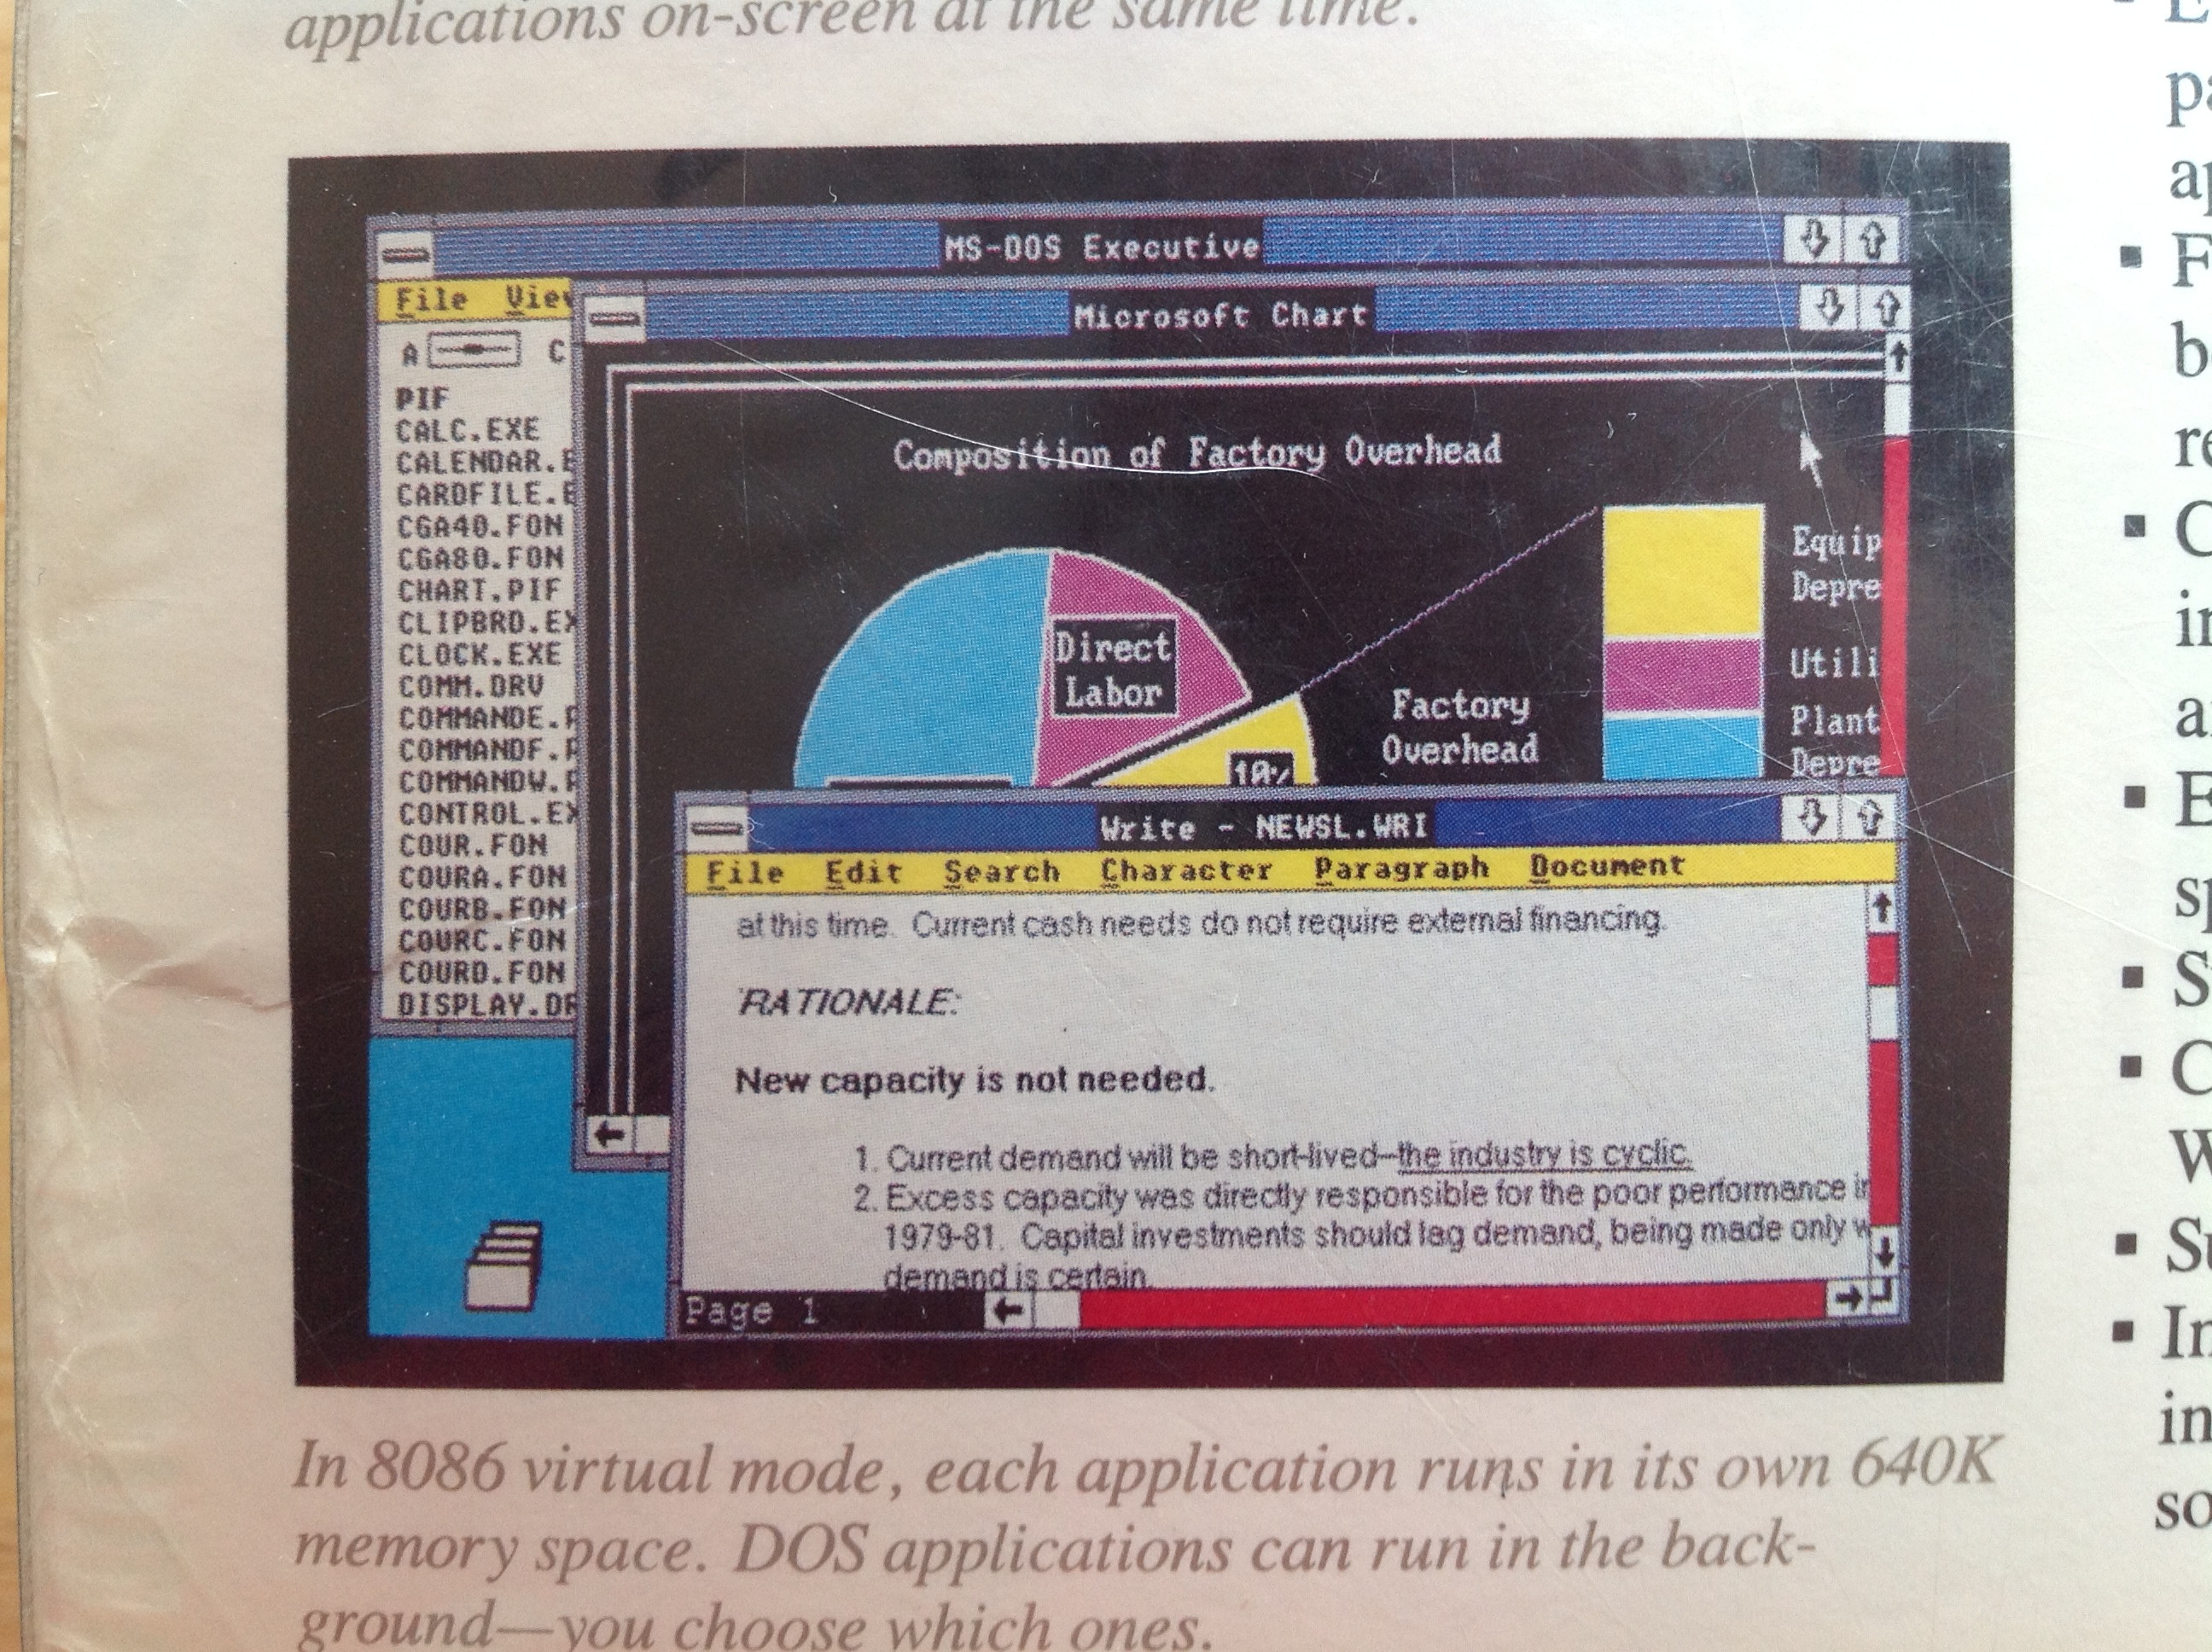
This is where Windows/386 comes in. Windows/386 was the first Microsoft operating system to contain Microsoft’s VMM. In fact, the whole thing ran inside of virtual machines that were really controlled by the VMM. So, there was one virtual machine that contained a copy of Windows 2 that ran Windows programs and then as many other virtual machines as DOS programs you needed to run.
There was other software that contained VMMs that let you run multiple DOS applications. You can read about some of them in this February 1989 Infoworld article. But the raison d’être for Windows/386 was that it ran graphical Windows applications too.
In these screenshots from the Windows/386 box notice how some applications have the garish yellow bar with drop down menus and others do not. The windows with the menus are Windows applications and the ones without are DOS applications and they’re all shown living in harmony together.

Where has all the jargon gone? How about this box! LOL.
You can see how this came dangerously close to dooming OS/2 already in 1987. Why buy a new OS that couldn’t run the applications you own now very well when there’s an alternative?
At the time however, in 1987, Microsoft and IBM were spending oodles on developing OS/2, and this is why you see such tortured marketing language on the Windows/386 box. They still really wanted to get you into a real Protected Mode OS.
The big problem for Windows/386 was that at the time very few people had 386s. When Windows/386 came out the Deskpro 386/20 (the 20MHz update to the original Deskpro 386) listed at $7,499 and went for a lot more when you added a larger hard disk and a better graphics card. Most people and businesses were still buying 286s, which is why IBM and Microsoft continued to bet on OS/2.
The other problem for Windows/386 was that people were not enthused about Windows 2 applications. Back in 1987-1989 Microsoft was not yet dominant.

Windows/386 and two Microsoft applications that ran on Windows 2.
The most notable Windows 2 application was Excel, but for the most part people were sticking with DOS applications they knew and loved like WordPerfect and Lotus 1-2-3.
But, Windows/386 was just the first VMM-based OS from Microsoft. This is where we come to that Unauthorized Windows 95 book.
Unauthorized Windows 95 is all about what the VMM did in Windows 3.0 through Windows 95. Windows 3.0, Windows 3.1, Windows 95, Windows 98, and Windows ME all were based on the VMM I described above. You may not have heard of Windows/386 but you most certainly have heard of Windows 95.

Windows/386, Windows 3.0, Windows 3.1, and Windows 95 were all based on the VMM.
Windows 3.0 changed everything in 1990. It moved Windows into the 286’s Protected Mode and if you ran it on a 386 it also run under the VMM which allowed you to multitask DOS applications. Suddenly peopled wanted to use Windows applications and sales took off. Suddenly there was no need for OS/2.
Windows 3.0 basically killed OS/2 as the successor to DOS and led to the breakup of the joint development deal Microsoft had with IBM. Windows 3.0 is what made Microsoft the dominant beast that people remember today.
The ultimate expression of Microsoft’s power over the PC market was Windows 95. When Microsoft said “jump” everyone jumped to Windows 95.

When Windows 95 came out a lot of people wondered what exactly it was. Was it a real Protected Mode operating system? Was DOS still in there somewhere? Microsoft said it was 32-bit…Was it really?
The answers to these questions are contained within the 500+ pages of Unauthorized Windows 95. Basically, DOS existed in Windows 95 as a servant controlled by the VMM used for compatibility with DOS applications and drivers. By Windows 95 the VMM became modular and whole pieces of DOS could be replaced with newer Protected Mode code. It was true that the whole OS was not 32-bit, but the most important part, the VMM was definitely 32-bit.
In a real way, the seeds of Windows 95 started in 1987 with Windows/386.
If you’ve read this far, I thank you. I collect this stuff because I love tying together the strings of history attached to these old objects. Normal service with continue next week.

Sega Genesis Nomad
This is my Sega Nomad, the portable version of the venerable Sega Genesis videogame console, introduced in 1995. I don’t remember which thrift store I found it at, but it’s likely to have been the old State Road Goodwill, sometime in the early 2000s.

The Genesis is better known as “the Sega” (as in, “remember when were were kids and played Sega at your house?”) than by it’s real name. It was Sega’s one and only true hardware success.

By the end of the 1980s through a combination of quality first party games and tight control of third party publishers Nintendo had come to dominate the home videogame console market. The Genesis broke Nintendo’s near monopoly and setup the first great “console war” of the 1990s. Powered by the venerable Motorola 68000 CPU (which also powered the Apple Macintosh and is one of the great CPUs of all time) the Genesis was home to Sonic the Hedgehog, edgy fighting games, and popular sports games.

While they were riding high on the success of the Genesis in the early to mid 1990s Sega made some bizarre decisions about videogame hardware that damaged their relationship with consumers in the years to follow.
There are a lot of companies that you come to find out 20 years later had design concepts or prototypes for ideas that seemed really cool but in retrospect were probably best left on the drawing board. These drawings for Atari computers that never were and these Apple prototype designs come to mind. There are probably sound reasons why these things were never produced for sale. In Sega’s case, they actually produced some of their bizarre ideas and basically every one of them was either an embarrassing failure or was received with apathy by the public.
When you consider the numbers of consoles and hardware add-ons for consoles that Sega either produced or licensed to other companies it’s staggering to think how much hardware they produced in such short a time between 1991 and 1995:
- There were two versions of the Sega CD that added better graphics and a CD-ROM to the Genesis.
- The Sega CDX that combined the Genesis and the Sega CD into one semi-portable console.
- The Sega 32X add-on for the Genesis that added somewhat pathetic 32-bit CPUs to extend the Genesis’s lifespan.
- An attachment for the Pioneer LaserActive that combined Genesis and Sega CD hardware with a LaserDisc player.
- The JVC X’Eye that was a combination Genesis and Sega CD console licensed to JVC.
- The Sega TeraDrive that somewhat unbelievably combined an 286-based PC and a Genesis.
The Nomad is another one of these bizarre hardware ideas. The technology of 1995 could not provide the Nomad with a crisp screen, a manageable size, or anything that could be considered better than horrendous battery life.
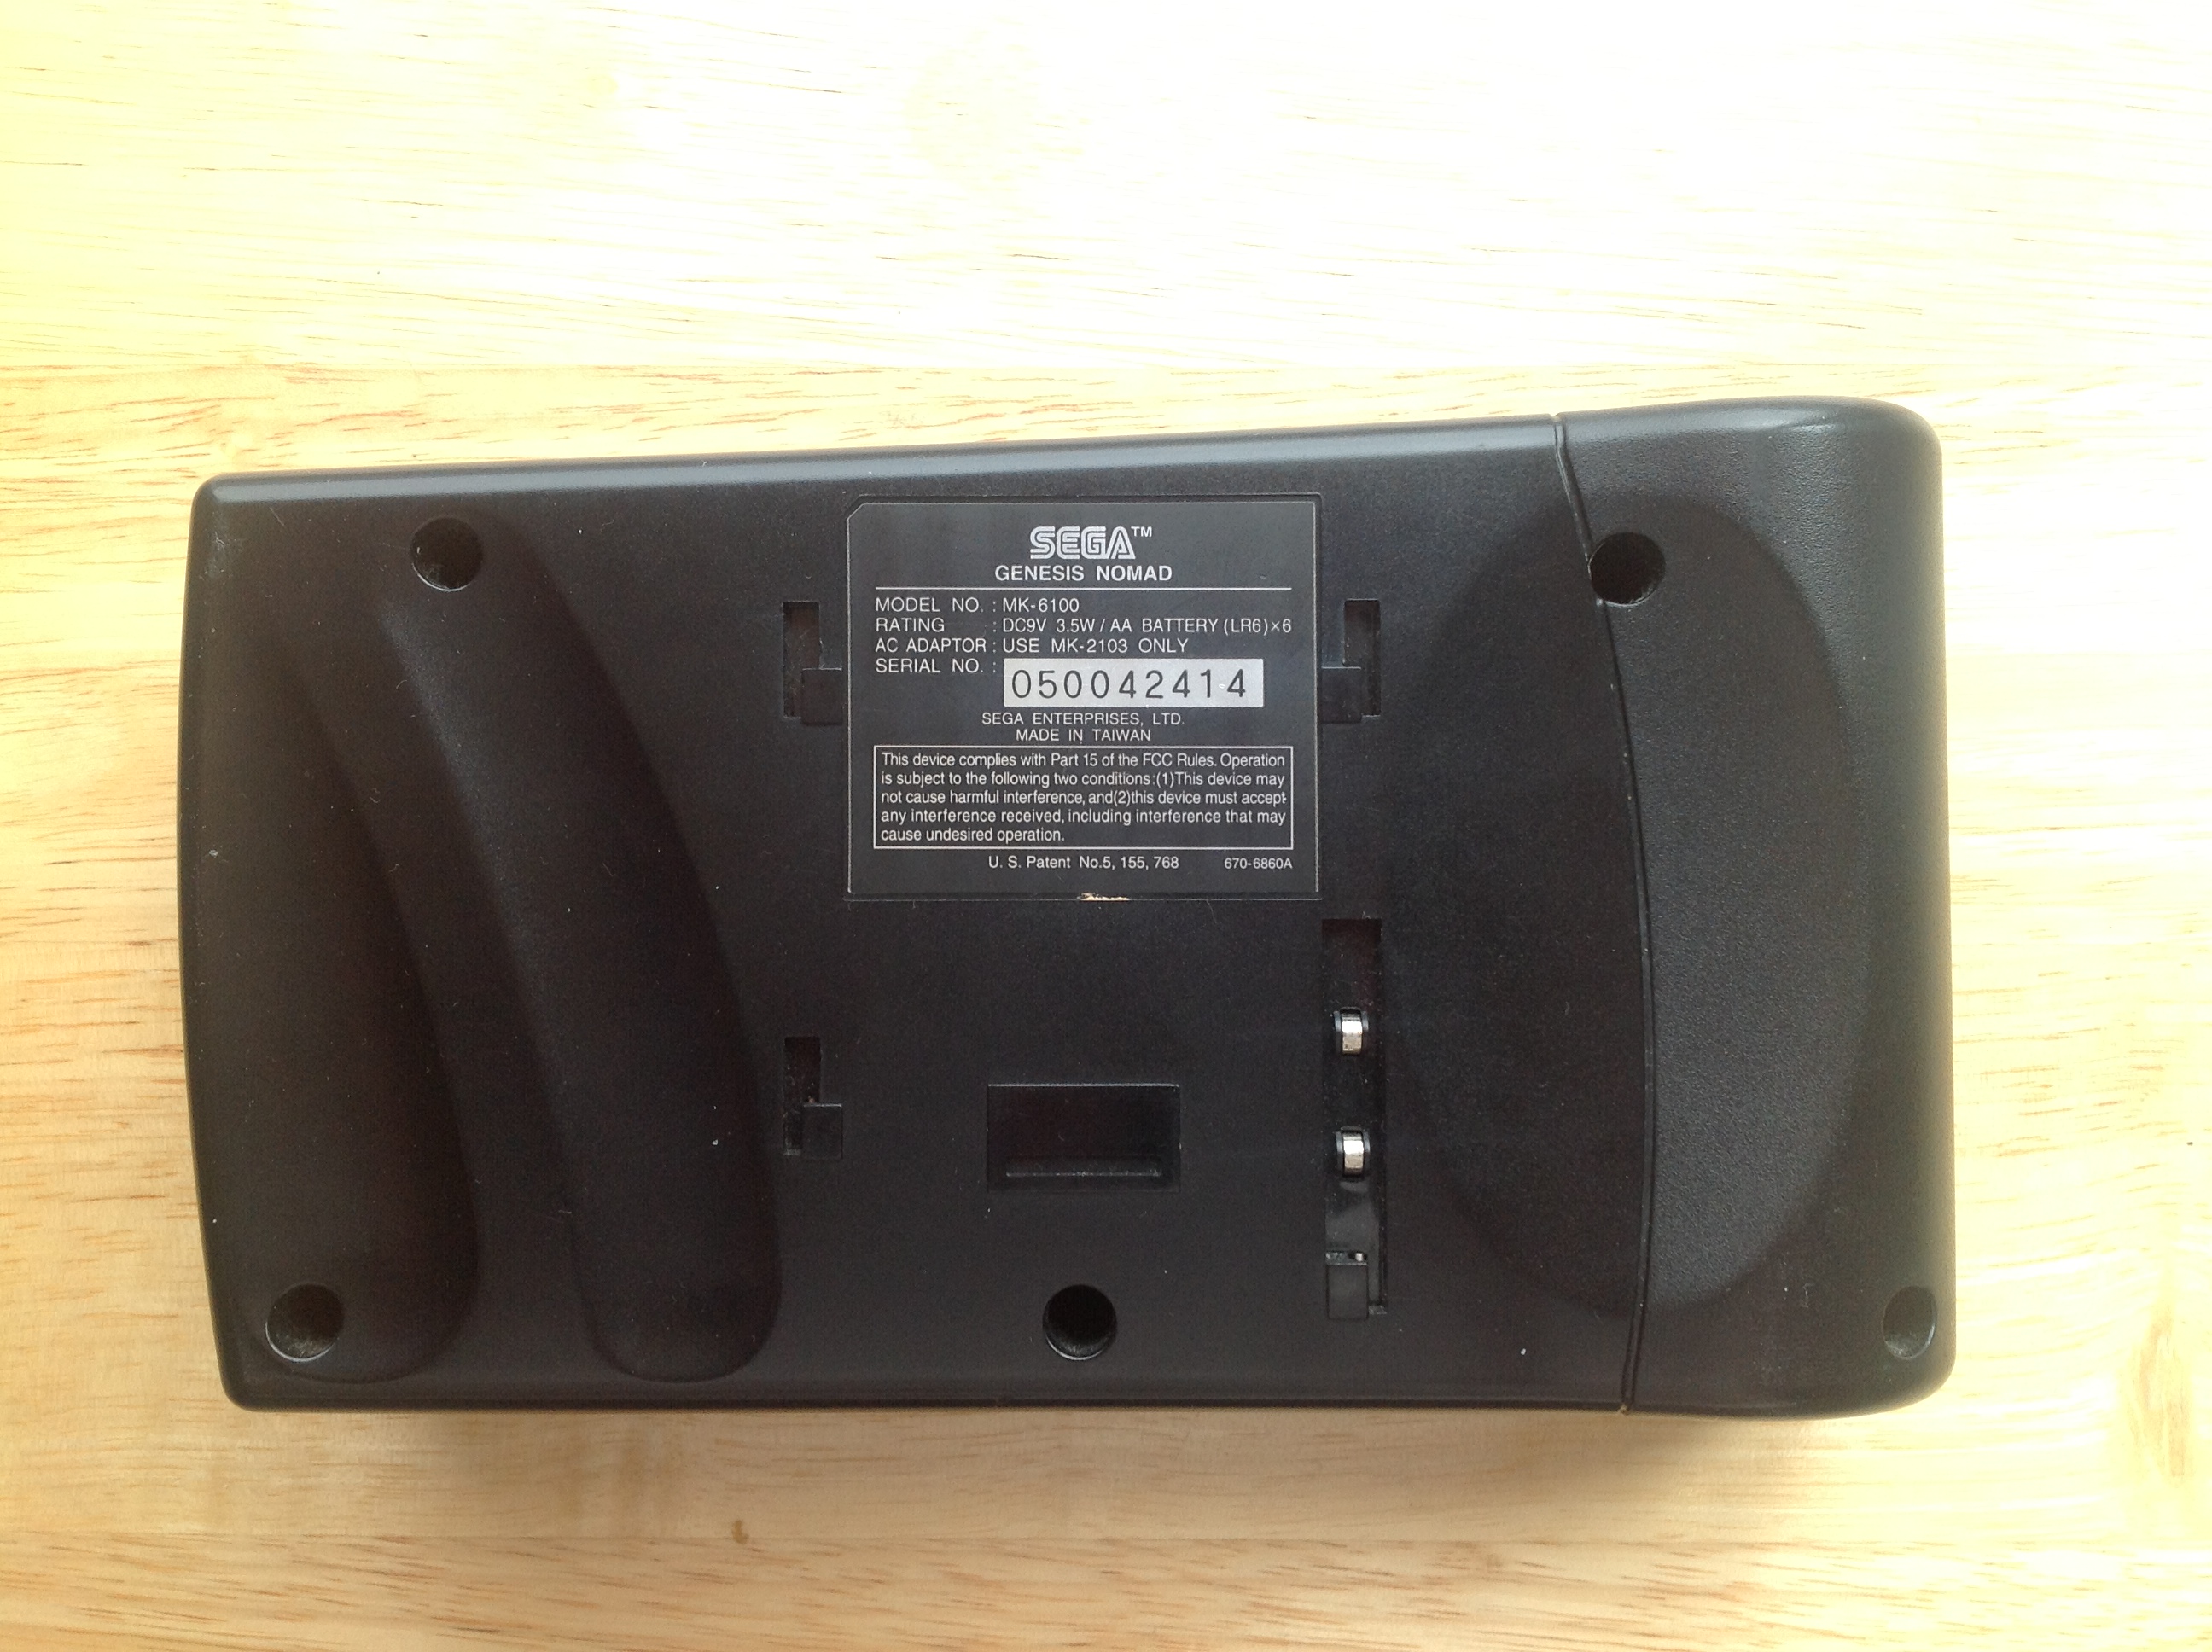
Here’s the back of the Nomad. Notice there is no battery compartment but there are contacts for a battery accessory. You were expected to attach an external battery pack to the back of the Nomad to actually use it as a portable game system. Without the pack, the Nomad is already over 1.5 inches thick on it’s “thin” edge. I don’t have a battery pack so I can’t speak directly to what the weight and battery life are like with the pack installed, but you read phrases like “the low battery light told you when the Nomad was on” and “horrendous” to describe the battery life.
The Nomad’s screen, while much better at producing color at the Casio TV-1000 I blogged about in February, has some serious issues with ghosting. As you can imagine, this is an issue with games like Sonic the Hedgehog that have fast movement.


Oddly, the blurring actually does a good job at hiding the awful color dithering in Virtua Racing.

Apparently part of the cause of the Nomad’s notoriously poor battery life is the high voltage florescent backlight which also lights the screen in an uneven way.
If you had paid $180 for a Nomad in 1995 expecting a portable Genesis as advertised, you would have cause to be unhappy. In that respect, the Nomad was a failure.
The thing is though, is that if you just consider the Nomad to be a miniature, self-contained Genesis model, it’s pretty fantastic. The saving grace of the Nomad is that it has everything a Genesis has: An AV output, a second controller port, and a six button controller. I have several Genesis controllers and I dislike all of them. The buttons feel clunky and the D-pads feel mushy. The Nomad’s controls seem much sharper. I like the smooth, convex buttons on the Nomad much better than the rough, concave buttons on most Genesis controllers.


Now, you can’t use the Nomad with the 32X (because the AV output that’s necessary to connect to the 32X is covered up by the bulk of the 32X) or the Sega CD (because the Nomad lacks the necessary expansion port) but in all other respects it IS a Genesis. It uses the same AV cables and the same power brick as the Genesis Mark 2 model. If you want to collect Genesis cartridges and play them on a real Genesis but you lack space for a real Genesis in your residence, the Nomad is for you. You would do yourself a favor though, by plugging it into a TV (especially a late-model CRT TV).
One problem the Nomad shares with the Genesis Mark 2 is that the connection between the power input and the PCB board can become weakened causing the Nomad to randomly shut off or not turn on at all. My Nomad had this problem until my father opened up the unit and re-solderer the power input’s connection to the PCB. One of the five screws on the back of the unit is a security screw, so safely cut that screw post, which does not affect the structure of the case at all.
If you really, really want to use the Nomad as a portable Genesis there are mods available to help. One mod replaces the florescent backlight with an LED for significantly improved battery life but otherwise stock appearance. Another mod replaces the mid-90s vintage LCD with a modern LCD for improved screen clarity.
![]()

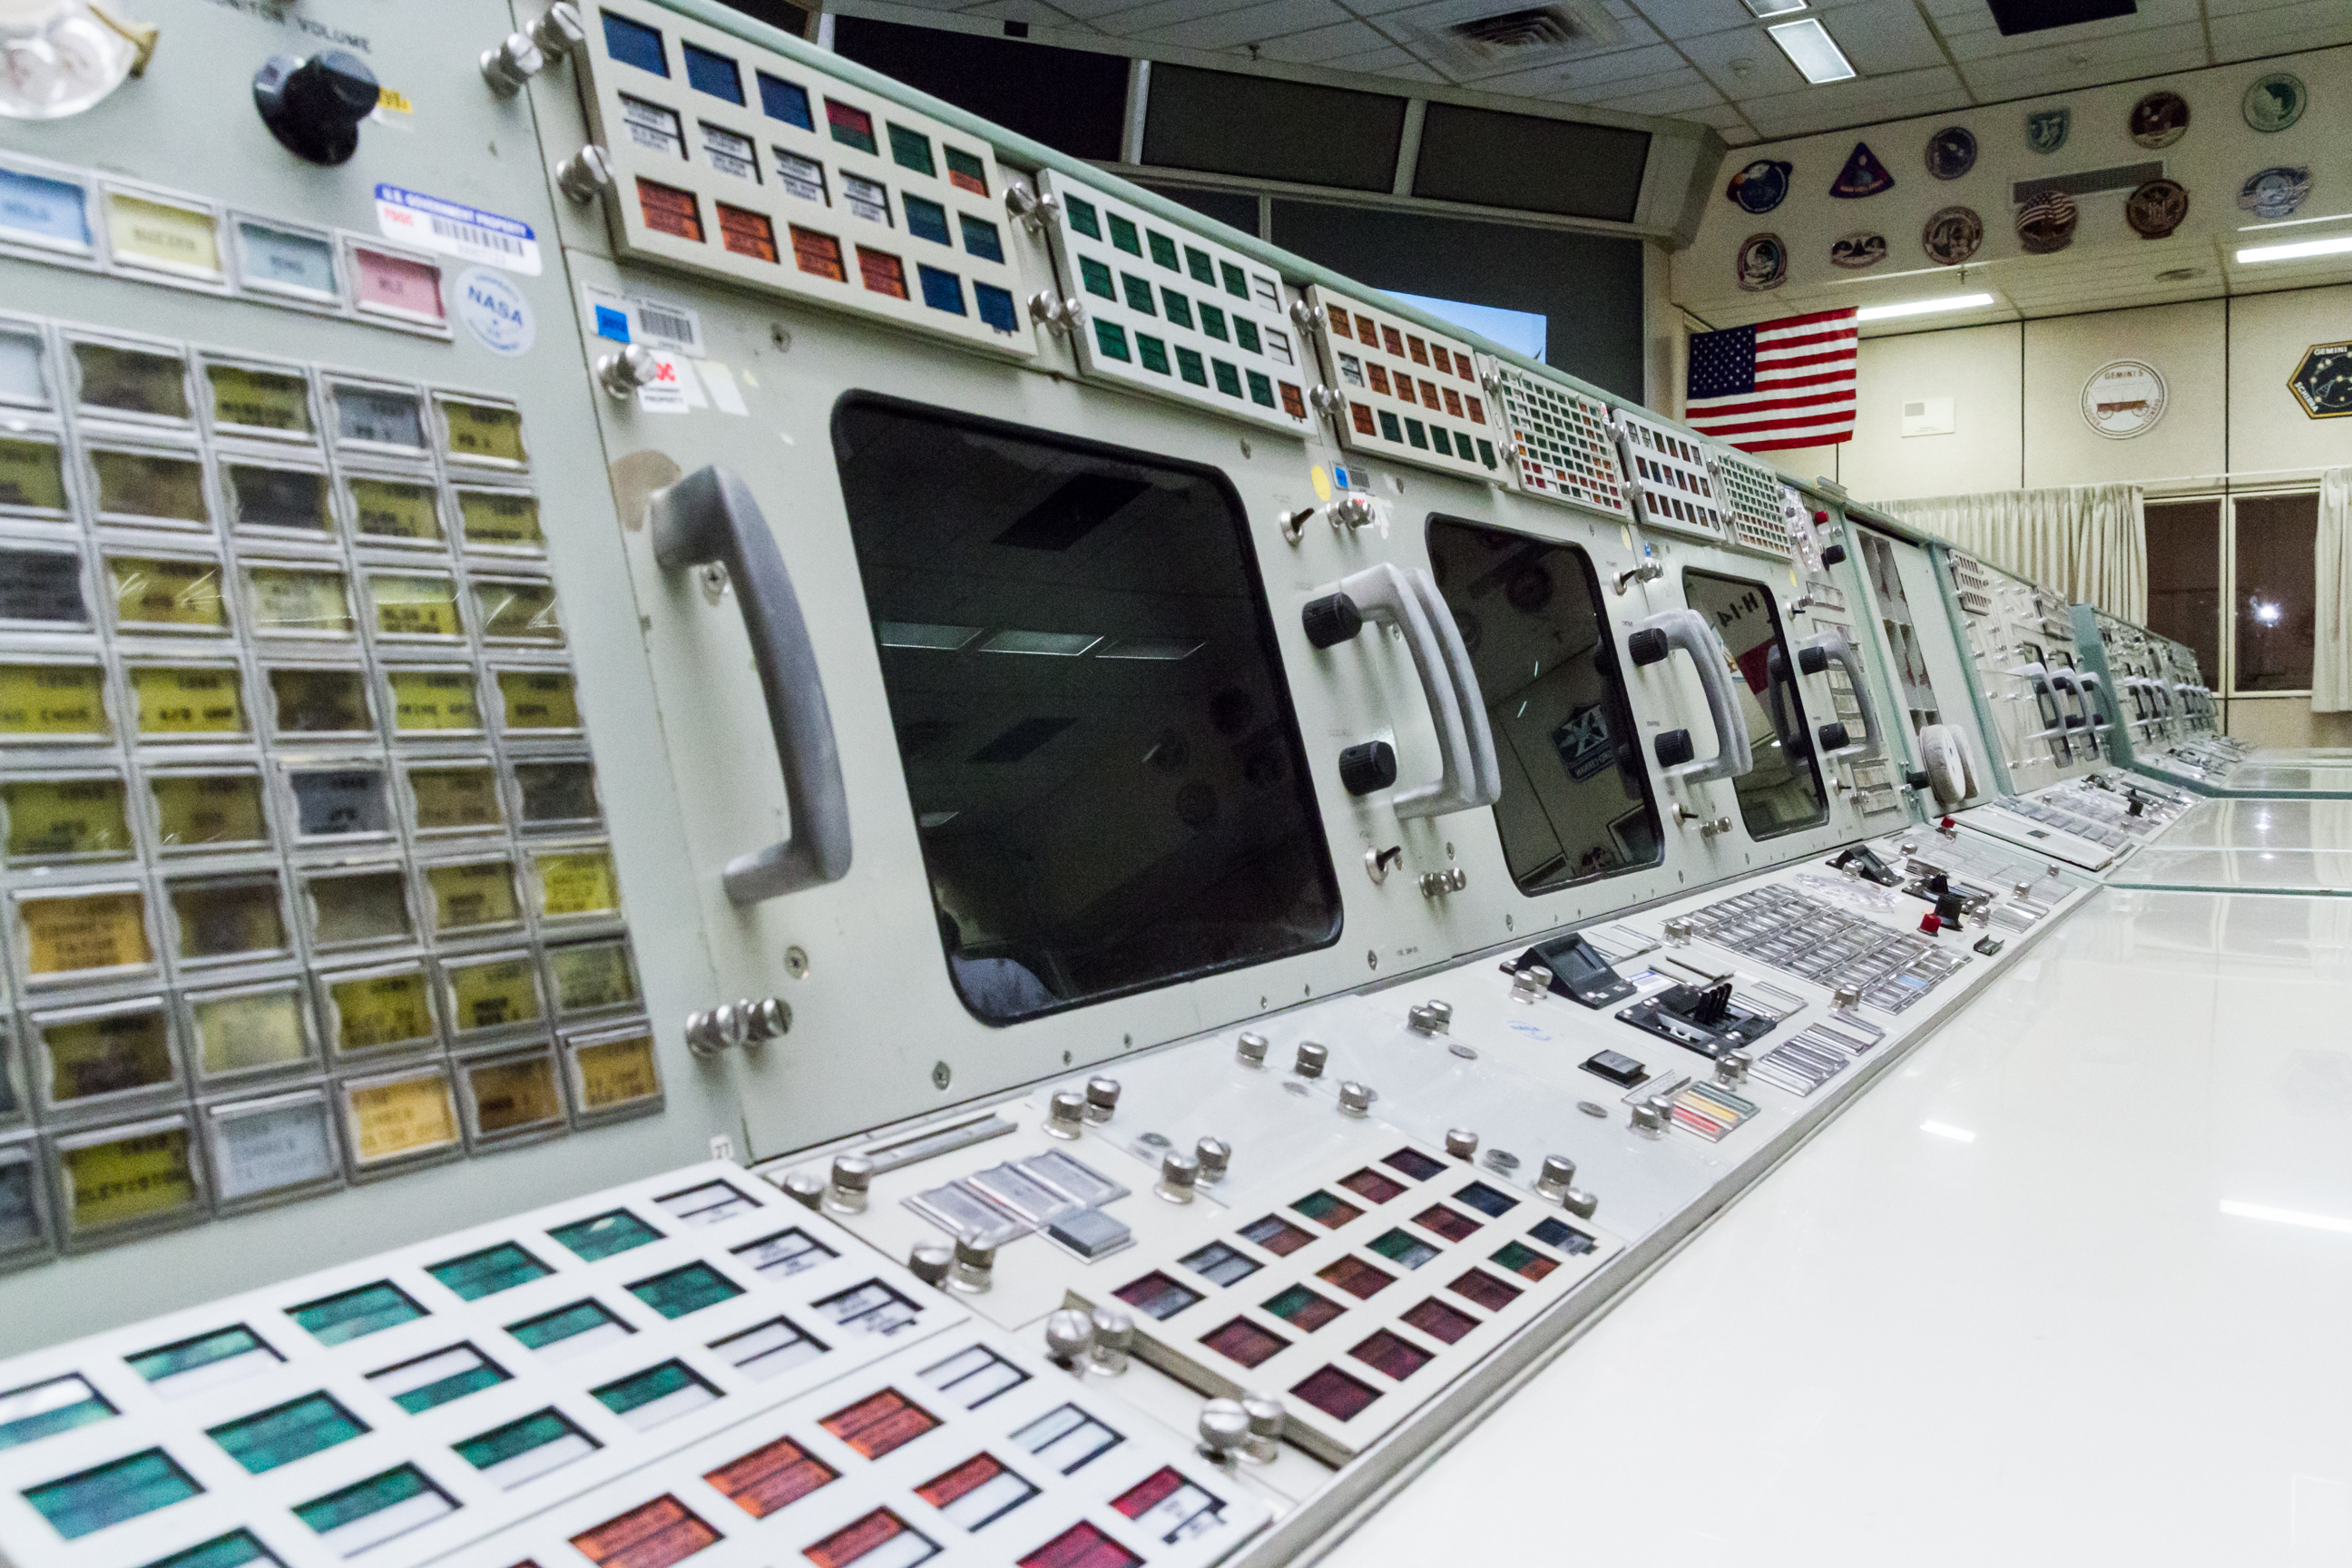